Showing posts with label captured words. Show all posts

Wednesday, July 16, 2014

sumertie canvas

Hi all Blue Fern Studios fans!

Its me olga! I'm coming today with canvas in summer colors with my favorite chipboards and some spraypainting.
 I use Tangier Page Panel to prepare background and magestic frame and captured words in my composition. To se step by stem how i did this watch my video :


Tuesday, June 24, 2014

Ombre Dreams 3 Times

Hello  all Blue fern studios fans !

Today i have for You 3 Layouts on Ombre Dreams. The Latest paper collection from BFS.  I love them since first look . They are soft , pastel universal, thick and beautiful.

My first work is with Ginger's Dream and Susan's Dream . At first i prepared background with
City Map Panel and my mist sprays. I simply sprayed through the chipboard on regular white cardstock. I received interesting background - negative of my chipboard panel. Chiboard is still perfect to use.   I could use in the same work and get pattern and color match but i left it for another work ;)   Techno Rings fitted me perfectly in industrial background composition    At the end I used Captured Words as title of my work.


Second work is based on Susan's Dream. I made it with photo of my friend. Again I used chipboard to make some effects in background. They are lights and soft because the paper is so beautifull , soft and fitted amazingly to my work so i decided to not cover it too much.

I started with adding little bit of gesso through Circle Groups around my composition. I
used also Broken Rings, Seasonal Wildflowers,  and Picture Perfect,  as elements around the photo


This one is in violets and blues. little bit of messy with lot of stamping. Instead of photo I used here beautiful postcard . I use Charlotte's Dream as base of my project and as paper elements in composition I used Broken Rings and Dot Grid Panel as elements under my photo. And Dream Big as title to my work and ligtest element in the same time


Thursday, May 22, 2014

'Capture the Moment' by Lisa Griffith

Hello Blue Fern Studio fans! 

I was looking at my projects to share this month and I realized something funny.... I think when 
it comes to scrapping I have a split personality! On the one hand I love a light, pretty shabby page
with lots of white, but I also love a really grungy messy page with lots of torn papers
and splashes of ink. I was thinking that Blue Fern Studio chipboard is not only beautiful, 
but it is also versatile, and can be altered and used in very different styles. 
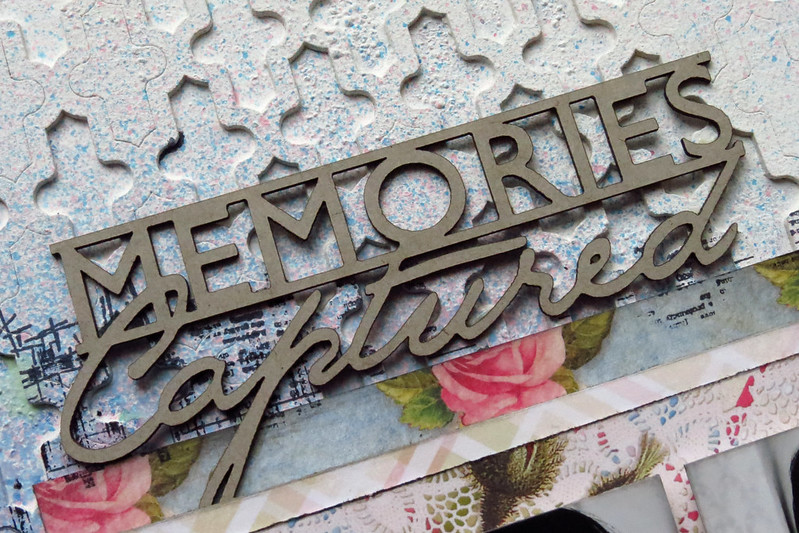
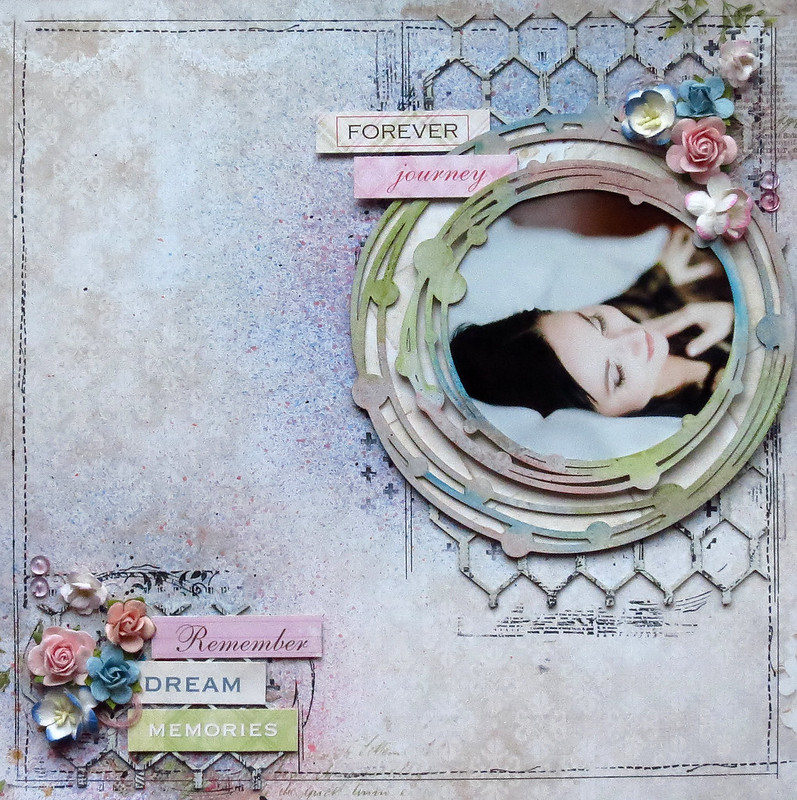
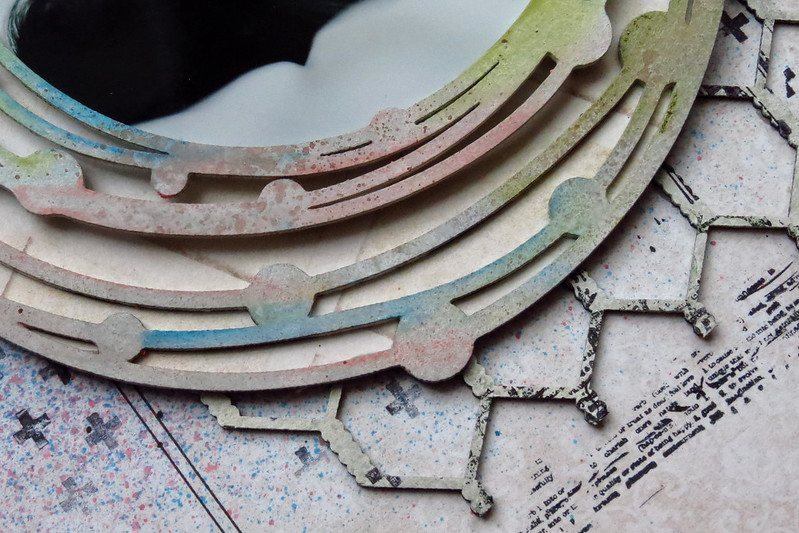
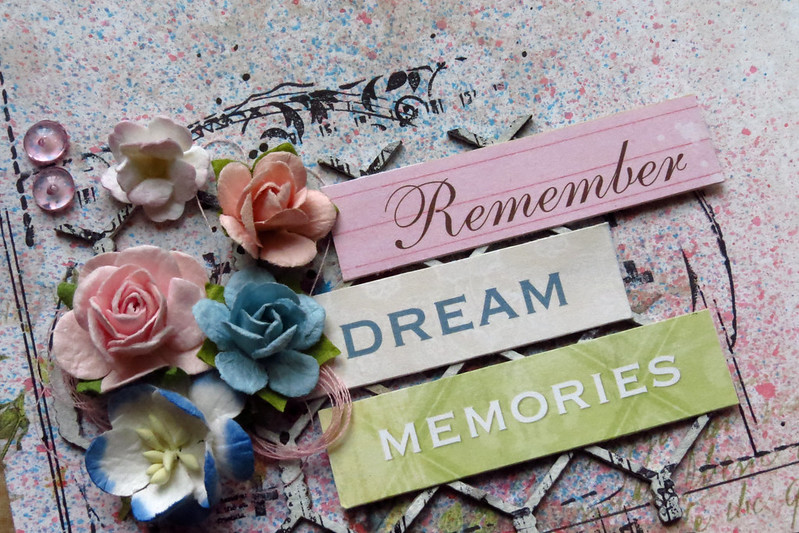
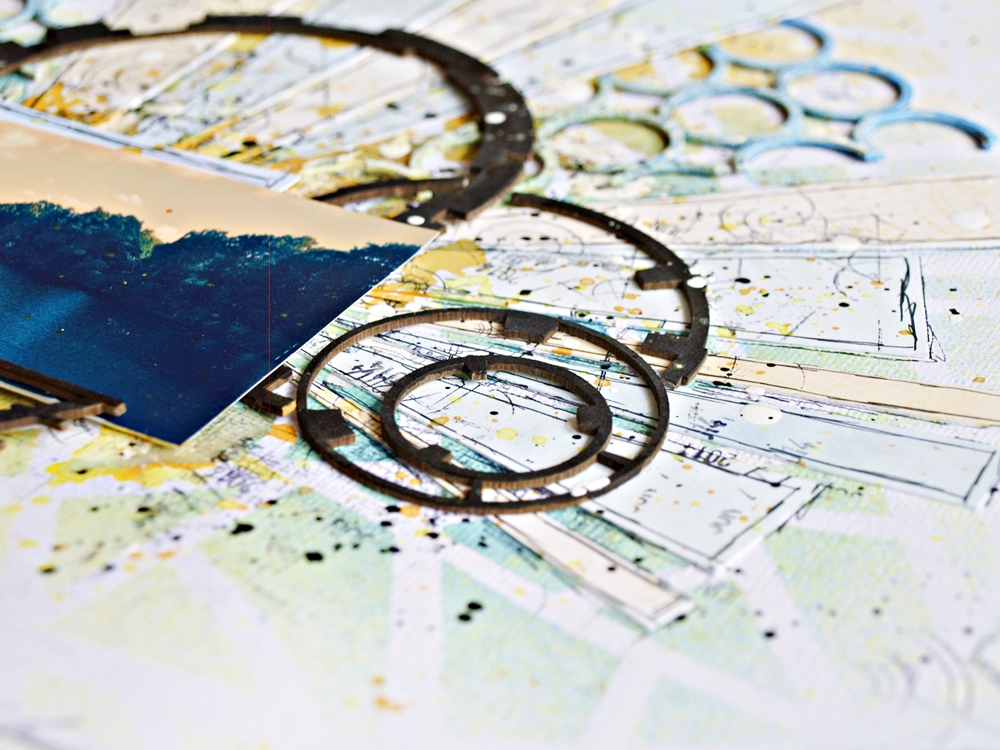
My first layout is very grungy with a vintage style.


I am not very good with titles, so I LOVE the word chipboards.
Here I have used 'Captured Words' and pieces of the 'Chickenwire Panel'
that I painted black and then covered with Glossy Accents.
I knew this was going to be a grungy look, so I altered the chipboards in a messy way.....


My next project is a tag that I made with a piece of the new Blue Fern Studios paper collection 
called 'Charlotte's Dream'. The new papers are so beautiful in real life! I got my set just in time
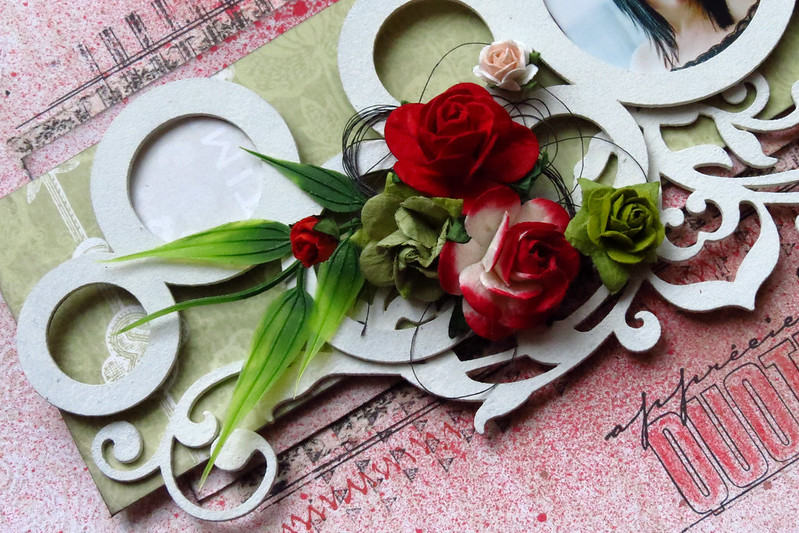
to make a shabby/grungy tag that I made for my mother's birthday present.


Here I used a piece from a chipboard called 'Organic Vine Corner' and also 
a piece from the 'Bohemian Butterfly' set that I embossed in white.


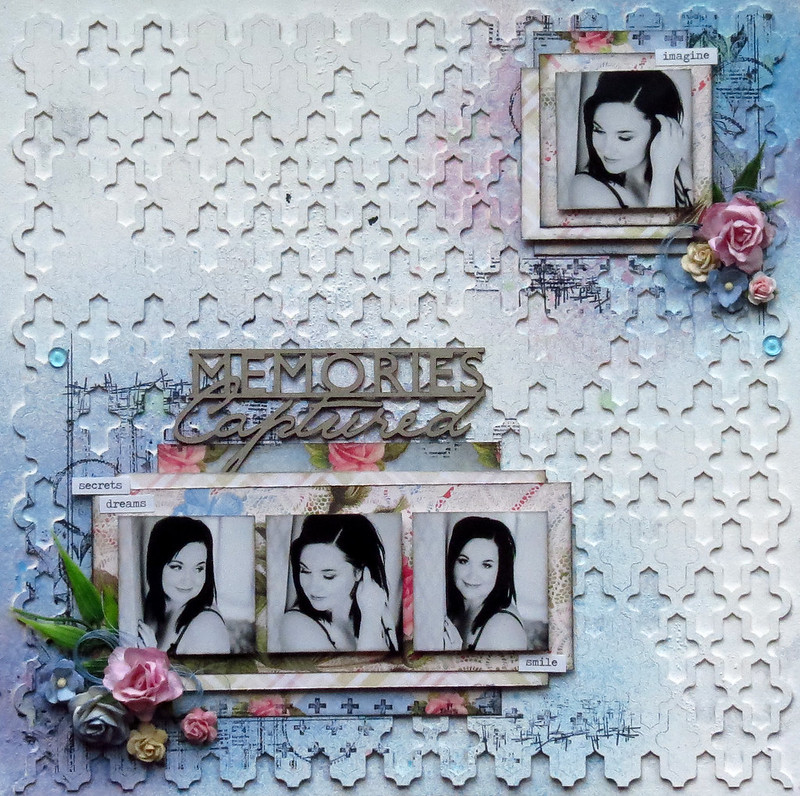
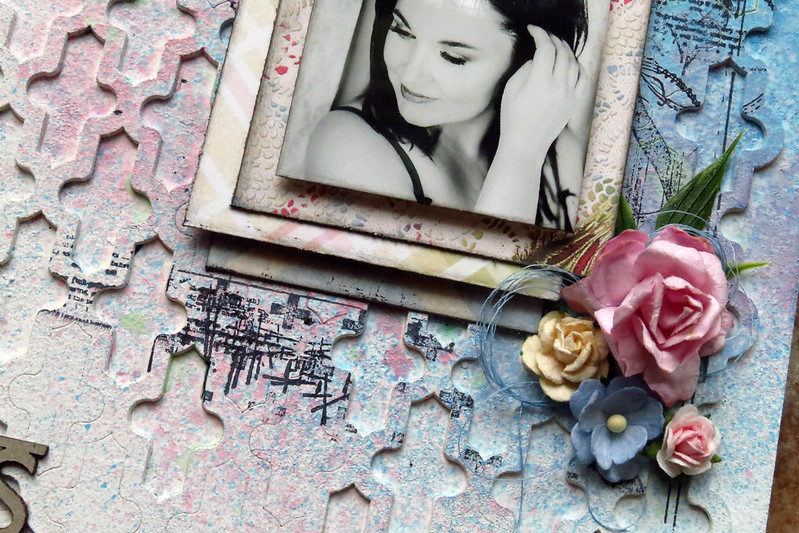
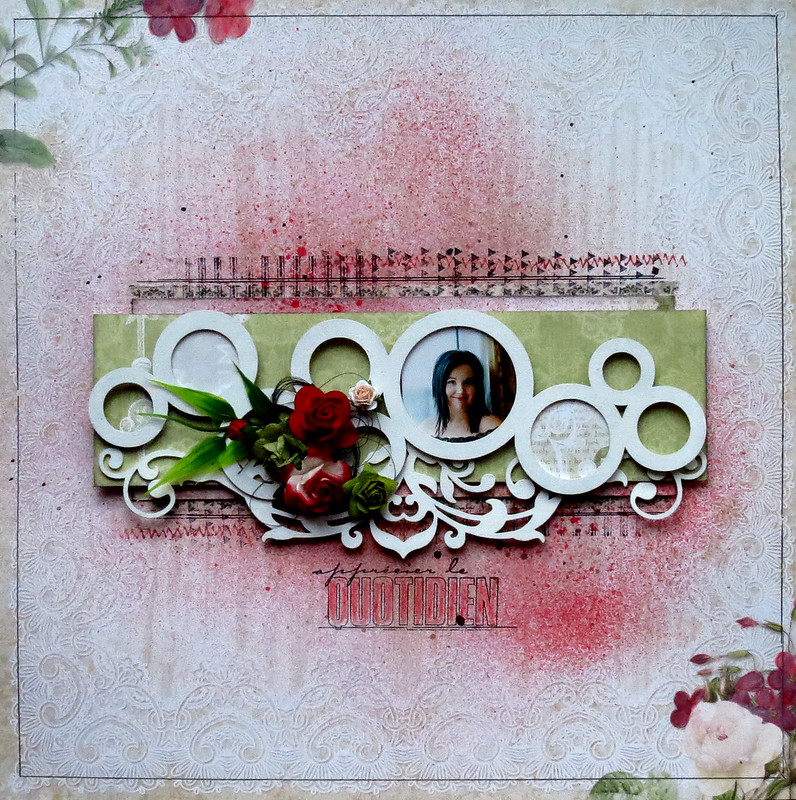
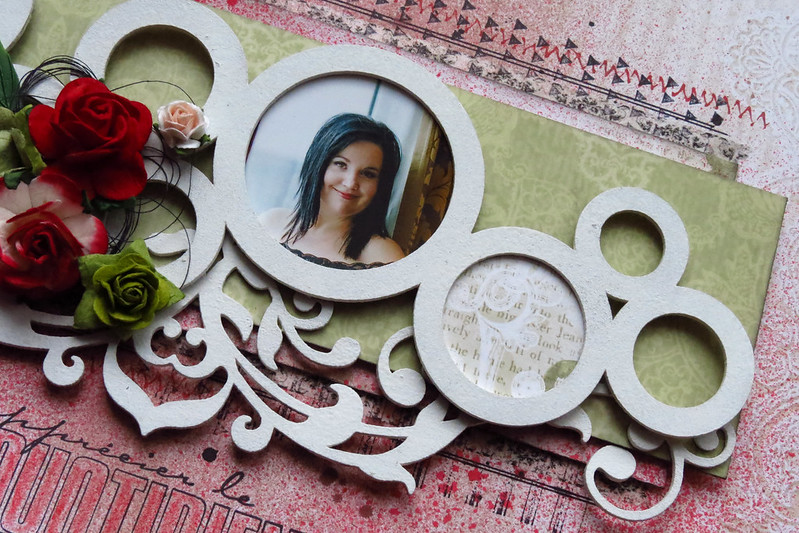
And my last project is a layout I created using the May Blue Fern Studios
sketch in a very romantic and shabby style.


I wanted a soft romantic look so I did a lot of masking with gesso and kept the colors very light. 
I used a Blue Fern Studios chipboard called 'Film Strips' and a piece from the 'Bohemian 
Flower' set which I kept simple with just a coat of white acrylic paint. 
The BFS paper 'In Bloom' was perfect for the base of this layout.
I also used pieces of the paper 'Calling Cards' to create my background.


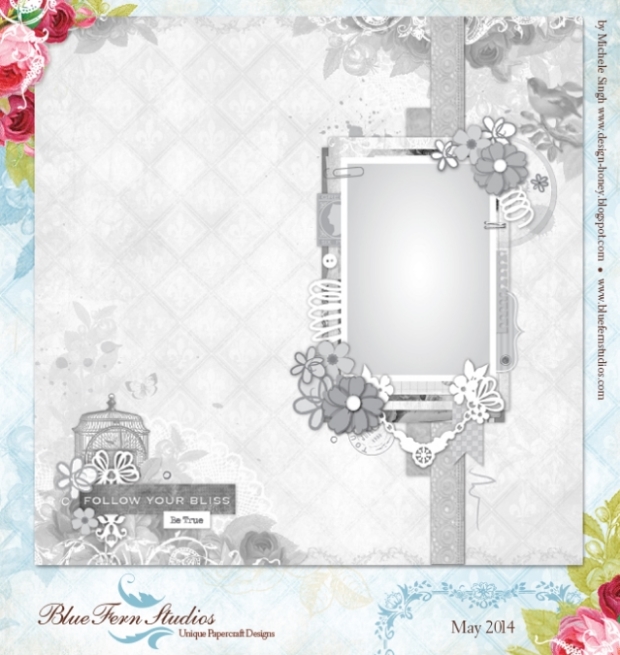
There is still time to enter the Blue Fern Studio May sketch challenge!
Here is the beautiful sketch....


I hope you have enjoyed my projects today! I wanted to show that by trying out 
different techniques and colors, you can use BFS pieces to perfectly fit your style......
(Even if you have more than one!)

Until next time....
Hugs, Lisa 


Saturday, March 22, 2014

"(love these) Memories" by Lisa Griffith

Hello everyone! I hope this post find you all well. It's my turn to share my projects today. The first layout I created was an experiment just to get some interesting looks using the new line of paper from Blue Fern Studios.

"(love these) Memories"


Here I started with the Blue Fern Studios paper called "Signature", and created some texture using heavy gesso and a stencil, and then sprayed with Ranger Vintage Photo ink and water. These papers really are amazing how well they hold up to whatever mediums you want to use. (There was a little bit of warping, but a small price to pay.) I love how the paper, inks and gesso mixed to create a watercolor effect. The chip board pieces I used is one of Captured Words piece that I cut in half and pieces of the Chainlink Panel. For the chipboards I coated them with gesso and then painted them with brown ink and then a coat of clear crackle paint. I was trying to get them to look like wood to match my photo. I also used a small strip cut off from the bottom of the paper, and a piece of the blue packaging that comes with the chipboard that I punched with a lacy punch and layered under my photo. I also cut out some butterflies Blue Fern Studios paper "In Bloom".


Next up I have a layout that I created using a vintage photo of my mum.......

"Pauline"


Here I used three different pieces of chip board called Circle Motifs, Petite Windows and Iron Work Accents. For all of the pieces I painted with Silks paint in Emperor's Gold (my new all-time favorite) and then stamped over the pieces with black ink. I added some bits of a vintage magazine, some Prima flowers and pink paint.


And my last project is a mixed media card I made for St. Patrick's Day.


I created my card using a piece of the paper "Signature" as my base, lots of stamping, misting, and the gorgeous Blue Fern Studios chip board called Blooming Foliage. I covered the chipboard with a light coat of gesso, and then painted it with green mist and gold paint and then a coat of Glossy Accents.


I hope you have enjoyed my projects and feel a little inspired?
Thanks for looking,
Hugs, Lisa xo


Thursday, March 13, 2014

Three layouts with Blue Fern Garden by Marie-Josée

Hello all,

I hope you are doing fine! Today, I have three projects to show you, all using the Blue Fern Garden paper collection. Here they are.

"Memories Captured" layout:


To create the background of this layout, I used the Turkish panel. Panels sent to DT members sometimes have smaller pieces still stuck to it. I decided not to get rid of those and to use the panel as is. I glued it to a piece of 12 x 12 chipboard, applied gesso and then white acrylic paint. I altered the background with mists, stamps and ink.


I used two different Blue Fern Garden papers on this layout, Love Letters and Picnic (both sides). I used pop dots to add dimension.


I also used a phrase from the Captured Words set as a title. I decided to leave it bare to make it stand out.


"Forever" layout


For this layout, I used a Blue Fern paper as a background (In Bloom). I altered two pieces of the Chickenwire panel with gesso and glued it to my background.


I also used two pieces of the Beaded Strings set. I used one as a frame for my photo and the other one as a second frame around it. I applied gesso and three different colors of Gelatos. I used a bit of water and the tip of my finger to blend the colors. I also sprayed a touch of brown mist.


Then, I cut some words out of the Calling Cards paper and used them in the corners of my layout.


"Apprécier le quotidien" layout


For this clean and simple layout, I chose to use a color not found in the Blue Fern Garden papers, that is, red! :) Here's what I did. I chose a rather plain paper for my background (Parlour, B side). As you can see below, originally, the color blue was found on the paper:


Since I wanted it to match the rest of my layout, I used a watercolor pencil and added a touch of red to the blue flowers! :)


You also noticed that I only used a tiny picture. That is because I wanted to use a piece of chipboard from the Circle Groups set as a frame. I painted this piece of chipboard with white acrylic paint.


I used the Royal Border - Large, also painted with white acrylic paint, under the "frame" to add interest and texture to my layout.