Hi everyone! It's time for my next projects for the Blue Fern Studios blog! Today I will show you 3 ( 4 exactly) totally different projects. Hope you will like them and you will feel inspired! :)
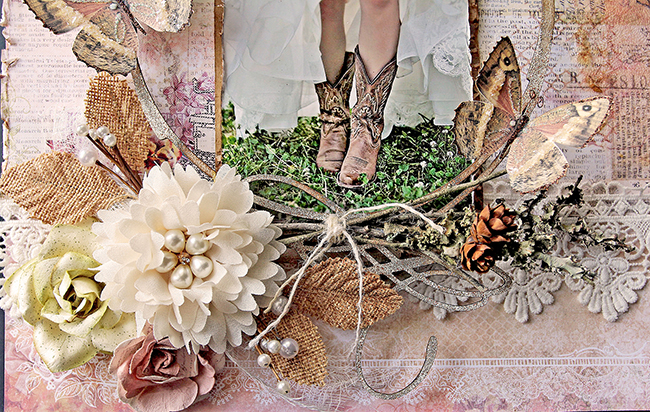
Memories
So let's start! My first project is a canvas.
Memories
So let's start! My first project is a canvas.

I used papers from Autumn Anthology and Deja Vu collection and few chipboard pieces. First I cut papers into small pieces and I created a texture on the background, then I built a 3D composition with these same papers, photos and chipboards. Finally I added some flowers and embellishments and media of course. I used pastels and watercolors.

I covered chipboards with using two different colors of embossing powders - lilac and breeze and a chalk finish acrylic paint (background pieces).


I added also some stamps with using black ink to make some contrasting accents.

Blue Fern Studios Products Used:
Papers: Autumn Anthology collection - Le Ballon, Mercantile, Deja Vu Collection - Lustre
Chipboard: Leafy Page Accents, Memory Frames
Embossing Powders: Lilac, Breeze
Stamps: Forever, Essential Textures
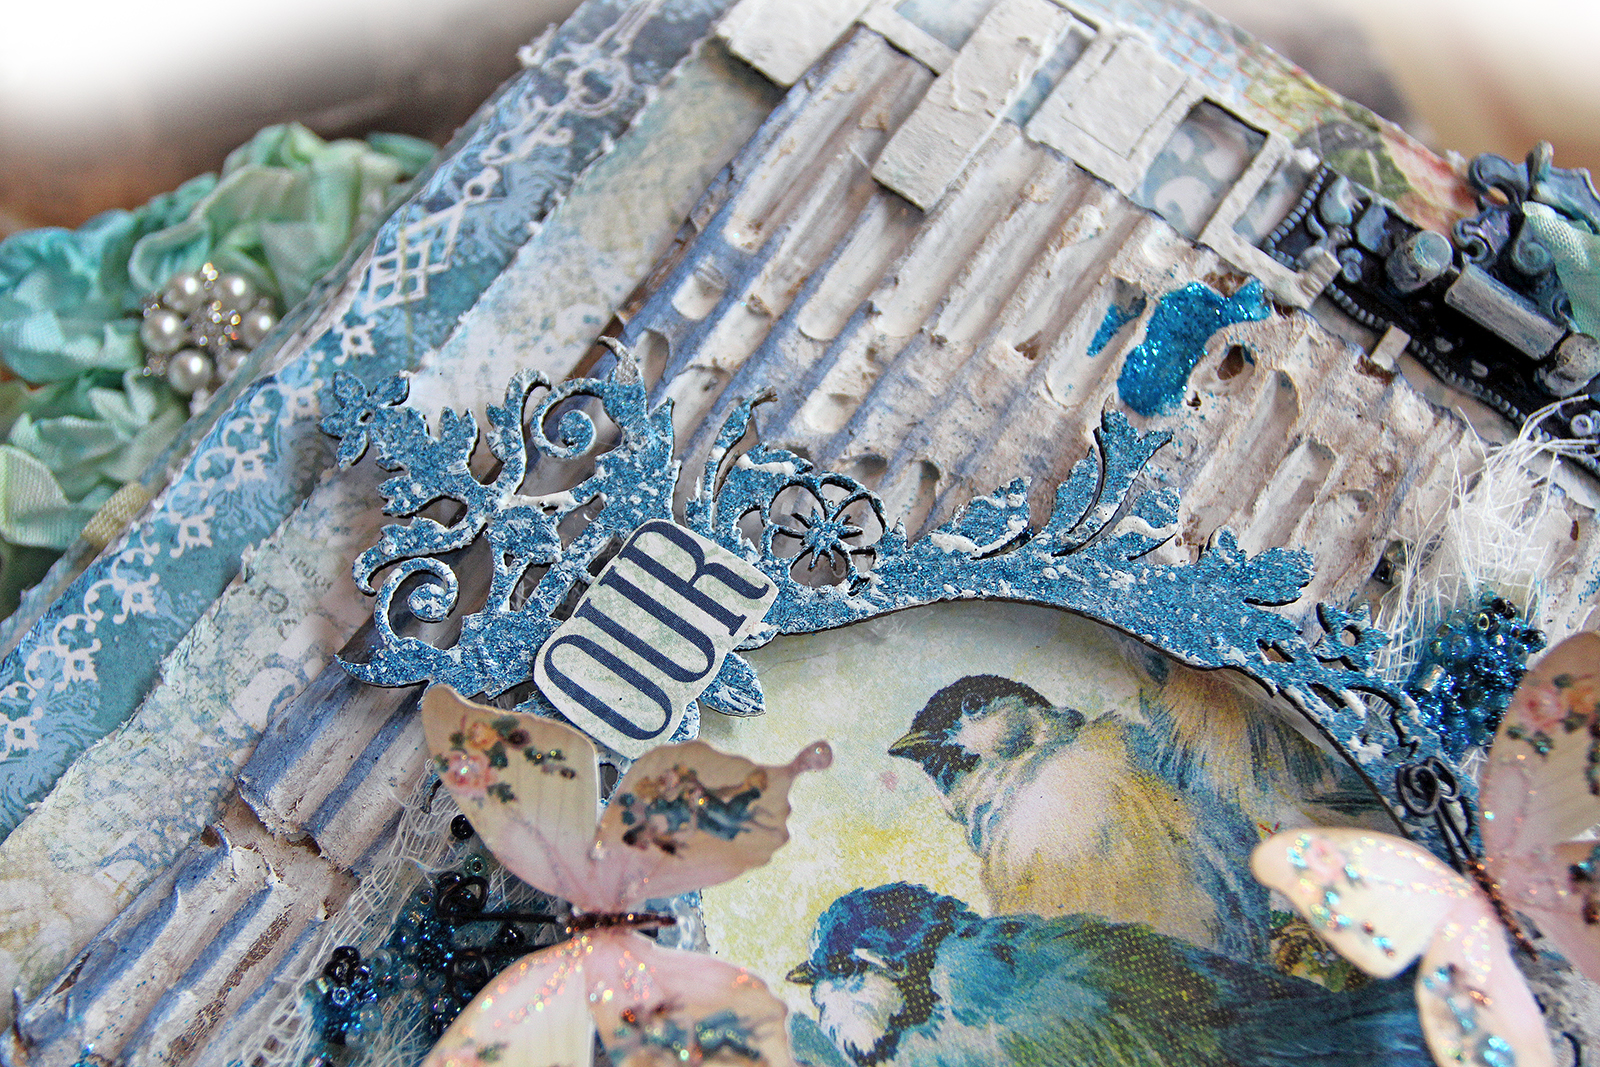
Inspiration
My second project is a layout with cute photo of me and my grandpa. I used papers from a Timeless collection. I really love a vintage look of these papers.
My second project is a layout with cute photo of me and my grandpa. I used papers from a Timeless collection. I really love a vintage look of these papers.

I built a composition based on 2 circles using papers, embellishments and flowers. I also used 2 chipboards - Inspiration and a frame.

I used a acrylic nk and black gesso to add some color to my chipboard pieces.


Blue Fern Studios Products Used:
Papers: Timeless collection: Calling Cards, Couture, Freedom
Chipboard: Petite Boutique Frames, Contemplation
Stamps: Forever, Essential Textures
Cards
And finally last but not least I will show you my two cards which I created with very romantic Blush collection. If you love make cards you can successfully use smaller pieces but also a background chipboards. Of course you must cut them :)
Cards
And finally last but not least I will show you my two cards which I created with very romantic Blush collection. If you love make cards you can successfully use smaller pieces but also a background chipboards. Of course you must cut them :)

On the first card I used very cute little balloon from the set "Love is in the air" and "Bits of honey".


On the second card I used a beautiful openwork tag. I used chalk ink to make it blue.


Blue Fern Studios Products Used:
Papers: Blush collection: Celebration, Key to my heart
Chipboard: Love is in the air, Bits Of honey, Stencil tag 1
And that's all! See you next month!
And that's all! See you next month!