Showing posts with label Ginger. Show all posts

Monday, December 26, 2016

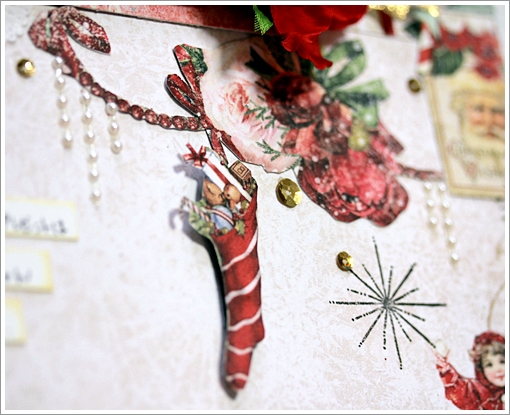
3 Chrstmas layouts with Yuko


Have you all had a wonderful Christmas?
I spent my time at home with my family.

Today I would like to introduce three Christmas layouts!


【joy】
I love paper of this red stripe!
However, anything becomes much the same when based on this.
So I made half daringly this time and used it.


Corner chip board was processed with ANTIQUEGOLD embossed powder.


The letter of the title posted red glitter FIRE ENGINE.
A layout of Christmas may become a lot gorgeous.

I also pressed the clear stamp.


<Blue Fern Studiso>
Paper   Vintage Christmas 2 - Holiday Treats/Holiday Cards/Let it Snow
Vintage Christmas - Greeting Cards
Chipboard  Dangled Flake/Chunky Words/Formal Corners
Glitter  FIRE ENGINE
Embossing Powder ANTIQUEGOLD
Flower  Christmas Blooms
Stamp  Christmas Collage


【wish】
Very pale light blue color friendly atmosphere paper.
But since the ornament of the colorful tree was reflected in the photograph
I dared to make a monochrome photograph.


This neighborhood attached various textures.
The light blue lame is very beautiful with light blue and silver mixed!

I applied a brick texture with Modape.
I was able to meet before drying so that 
the surface can be traced like a toothbrush 
so that irregularities can be made.


Because I wanted the snow here to feel a bit frozen
I used GLOSS GEL and dyr glitter.

I also used a stamp here.
It will be tightened if a little black comes in.


<Blue Fern Studiso>
Paper  Vintage Christmas - Auld Lang Syne/ Wonderland
Chipboard  Winter Cabin/Wish, Wonder, Dream
Glitter SILVER PRISM
Embossing Powder  PEAL/FROZEN
Flower  Soft Blossoms/Christmas Blooms
Stamp  Christmas Collage


【Cool Christmas】
The end is a little classical feeling.
The picture is Christmas 
in Harry Potter area of Universal Studios Japan!

I went to the other day, 
but it is different from colorful tree etc. in USJ
Very chic and cool image tree and cityscape.
So I tried making it a little cool.
I'm really happy to use this picture !


I also did this coloring method in my class
It is a process to make two color embossed powder overlap.
This method is favorite because it can be used anything at all .


The fluffy snow is piled up!


I also made snow on the flowers.


<Blue Fern Studiso>
Paper  Vintage Christmas - Noel/Deck the Halls
Vintage Christmas 2 - Holiday Cards
Chipboard  Star of David Set/Ironwork Edges/
Glitter PYRITE
Embossing Powder  EBONY/GINGER
Flower  Christmas Blooms


Blue Fern Studios' DT that I had for three years
is also the last in this month.
At first there is only a chip board,
Although shops handled in Japan 
were also few manufacturers
It has become a very famous manufacturer
 in the past few years since paper has been released!

I was really happy to be involved with Blue Fern Studios ❤
I never thought I could do it for three years
I was really happy!

I also appreciate Valerie who always reply me gently
 in my poor English! 

DT is over, but  I love Blue Fern Studios ❤
I'm going to use a lot to continue making works!


Thank you very much!

Tuesday, December 20, 2016

Christmas inspiration by Karolina

I defenitely prefer to say "hello" than "goodbye", but it's time to move on. It's my last post on BFS blog, but I'm sure it's not my last projects with BFS products!  I'm really thankful for the opportunity to be a part of this amazing DT. Thank you girls for everything! You are totally unique!

Today I would like to show you my 2 projects (one of them with mini tutorial) with gorgeous Vintage Christmas collections.

Calm

Let's start from the layout. What I love most in these collections is their versatility. You can prepare very traditional project with these papers as also more delicate and sweet, like my layout. When I look at this page I thinking about peppermint candies and candy canes, but also about something warm and cozy. I really like a combo of colours. 


Papers: Vintage Christmas 2 - Holiday Treats, Let it snow, Jolly, 'Twas the night;  Vintage Christmas - Greeting Cards, 
Embossing powder: Snow
Glitter: vintage gold
Chipboard: Serenity, Calm, Hushed, Seeing Stars

Magic and Wonder

My second project it's a Christmas canvas.  I prepared a little photo-tutorial for you.

I started from cover my canvas using old book pages. I'm pretty sure I said it few times, but I really love this effect. 


Next I cut some holly leaves and branches to make a wreath. I also cut a hoop from the common cardboard with scissors to have a shape of my wreath. It doesn't have to be perfect. it's only the skeleton of our construction and it will be unvisible. Then we can start to build our wreath.


We also need  two stripes of paper. We can make it look older using blending tool and the paper knife. We can also use stencil and modeling paste to make our background more interesting.


Next we need to prepare our chipboards. I have used copper and ginger embossing powders to colour them and I put gold glitter on a frame. Then I used a cardboard to make a distance between layers. 


And that's all! Now we need put everything together and add some extra embellishments. I made a snow paste with modeling paste, powder and gel medium.

And here is a result:


Papers: Vintage Christmas 2 - Greeting Cards, 'Twas the night;  Vintage Christmas - Magical, Deck the Halls
Embossing powder: Copper, Ginger
Glitter: vintage gold
Chipboard: Framed Winter Words, Winter Deer, Seaside Lanterns

So that's all. I wish you a Merry Christmas and Happy New Year! :)


Monday, September 19, 2016

September inspiration by Karolina

Hi guys! Karolina here. Welcome on the Blue Fern Studios blog ;) Today it's time for my September inspiration. Can you believe it? Time is running out so quickly!

This time I would like to show you 3 projects - layout and two canvases. 

DREAM BIG

I had so much fun when I was creating this little canvas! I really like the background and turquoise accent in my composition. I used some dark vintage papers to create my composition and the chipboard piece - a little Dream big. I covered the chipboards with ginger embossing powder as well as a leaves.


CAGES

This layout only looks very cheerful. It's full of colors and embellishments, but I created this page to express my feelings. Not exactly good feelings. But I really like when my life, my thought can be an inspiration for my projects. Even though it's clear only for me ;)

Here I also used papers from few different collections. I do love panels chipboard from BFS! You can use it in so many projects and in so many different ways. This time I decided to use two panels.


BEAUTiFUL

And the last but not least my third canvas with funny photos of one of my best friend Weronika. Weronika is 3 years younger then me and she will be always like my little sister, especially I've known her since she was 3! It's a lot of time! 

Here I also used a part of chipboard panel but this time I didn't cover it. 


Ok, so that's all! I hope your monday morning was a little bit more colorful ;) Have a good week and see you in October!


Wednesday, July 6, 2016

July Projects by Cathi

Hello my scrappy friends, Cathi here to share my July projects with you using 3 different and gorgeous Blue Fern Studios paper collections.


This collection, Ombre Dreams, is an oldie but goody, one of my favorites, I just love the gorgeous pastel shades, it screams summer to me! I decided to do some beach themed layouts and chose this beautiful Ginger's Dreams page to be my base for this layout.


My girls are now 12 and 13, they look so so young and adorable here making sand castles on Venice Beach in California! I used the gorgeous Seaside Frame to frame my photo, coloring it with Sea Mist Imagine Ink Embossing Powder. I added the fun title Hello Summer on top, using the Buttercup Imagine Ink Embossing Powder.


Here you see a cluster of gorgeous Tranquil Blooms and Courtship Blooms. I tucked in a starfish from the Seaside Seashells set  which I had embossed with the Imagine Ink Ginger Embossing Powder and some of my stash of real shells!!


I used a circle mask and molding paste and sprinkled the Imagine Ink Sunshine Glitter into the paste, I love the sandy look it gives!  You can see here the background stamping using my netting stamp from Essential Textures set and the circles from the Halftone set.

Blue Fern Studios Supplies:

Paper:
Blue Fern Studios Ombre Dreams Collection~Ginger's Dream

Chipboard:
Hello Summer
Seaside Frame
Seaside Seashells

Imagine Ink Embossing Powder:
Sea Mist
Buttercup
Ginger

Imagine Ink Glitter:
Sunshine

Stamps:
Essential Textures
Halftone

Flowers:
Courtship Blooms
Tranquil Blooms


Here is my second beachy themed layout, this one is more atmospheric...it is a photo of the girls beach toys left behind while they ran off to dip their feet in the ocean...just a calm serene scene using the Peaceful paper from the Tranquility collection.


I absolutely love this Seaside Charms chipboard which I layered on top of my photo. I embossed it with Petal Imagine Ink Embossing Powder. I did some masking and used molding paste for my background and used one of my favorite patterned background stamps from the Forever stamp set. The butterflies in pink are from the Bourbon Street set.  I tucked in a few layers from the Calling Card paper to add dimension to my layout under the photo.


In my cluster I used another of my starfish chipboards, this time from the Seaside Treasure chipboard set.  I embossed the starfish in  Lime Imagine Ink Embossing Powder. I made a flower cluster with the gorgeous Tranquil Roses and Attic Charm Daisies. I also tucked in more of my stash of seashells!  I used the Inspiration chipboard, embossed with  Petal Imagine Ink Embossing Powder for my title.


Here you can see the Tranquil Blooms flower and more shells and a bit of the coral from the Seaside Treasure chipboard set. I tucked in a kraft tag for journaling.


Blue Fern Studios Supplies:

Paper:
Blue Fern Studios Tranquility Collection~Peaceful
Blue Fern Studios Tranquility Collection~Calling Cards

Chipboard:
Seaside Treasures
Inspiration
Seaside Charms

Imagine Ink Embossing Powder:
Ginger
Petal
Lime

Stamps:
Bourbon Street
Forever

Flowers:
Tranquil Roses
Attic Charm Daisies
Tranquil Blooms


For my final layout this month I used a vintage image I found of an adorable sleeping child. There was a bird on the photo so I added some bird resins to the layout!  For my base paper I used The Grand Ball sheet from the Love Story collection.


I used lots of layers from the Love Story Calling Cards sheet.  Here you can see lots of the stamping I did using the Texture Circles, Forever set, and the Essential Textures set.  I did some masking and modeling past here as well. My flower cluster is from the gorgeous Tranquil Roses and Lilies set and you can see a little piece from the Tattered Diamond Bits set which I embossed with Cotton Candy Imagine Ink Embossing Powder.


Here you can see the gorgeous Organic Vine chipboard piece embossed in Sea Mist Imagine Ink Embossing Powder. I also tucked in some more of the Tattered Diamond Bits under the photo. I added a resin birdbath and birds to fit the design of the layout!


I finished off the layout with the title Stillness which I embossed with the Sea Mist Imagine Ink Embossing Powder, tucking a cute little bird on top of the title!

I really enjoyed picking out some of my favorite papers and collections this month and I thank you so much for taking the time to stop by and visit!!

Blue Fern Studios Supplies:

Paper:
Blue Fern Studios Love Story Collection~The Grand Ball
Blue Fern Studios Love Story Collection~Calling Cards

Chipboard:
Stillness
Organic Vine
Tattered Diamond Bits

Imagine Ink Embossing Powder:
Cotton Candy
Sea Mist

Stamps:
Essential Textures
Forever
Circle Textures