Thursday, July 16, 2015

Layouts Featuring Paisely & Vine By Debbie

Hi everyone, Debbie here with you today to share some layouts I created using the Paisley & Vine Collection which was introduced a few weeks ago.  I love the warm tones of the papers.

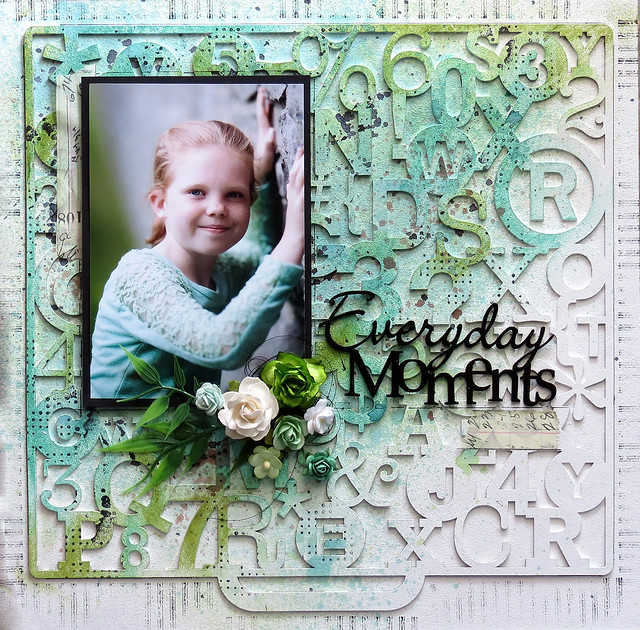
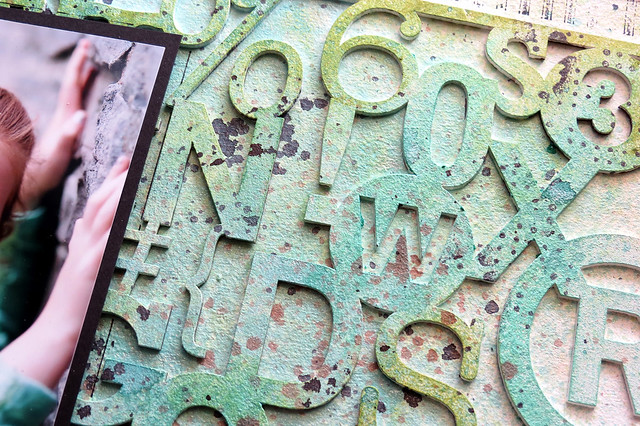
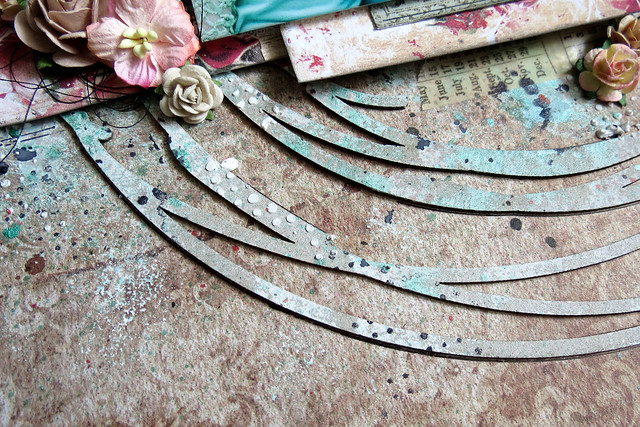
On  my first layout I used Bohemian, Nature, Vineland and Playing Card papers and added some masking, misting, paints and microbeads.

The Circle Flourish Chipboard surrounds my photo.  I first applied some gesso to the chipboard and then added some misting, water colors, gelatos and microbreads.

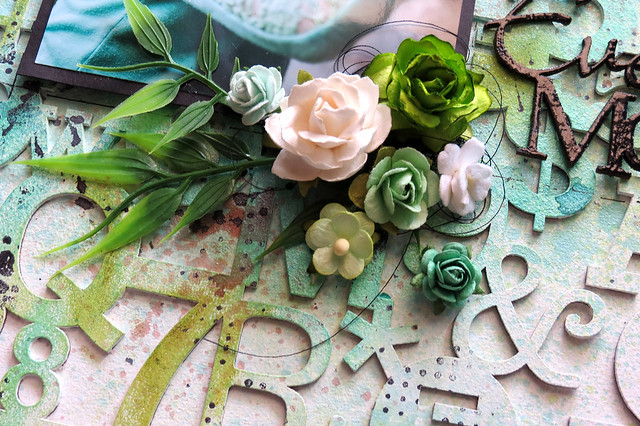
I painted a piece of the Quartre Foil chipboard with some yellow and blue paints and added more microbeads and tucked the chipboard behind the flowers.

Here I've used a piece from the Layering Stems chipboard, which I painted with watercolors and gelatos and added more of the blue microbeads.

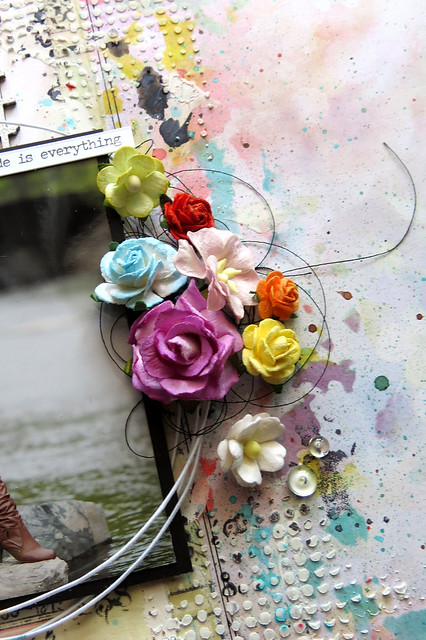
My next layout was based on the July sketch.
I used the Nature, Pathway, Splendor, Passion and Playing Card papers along with some masking and inking.

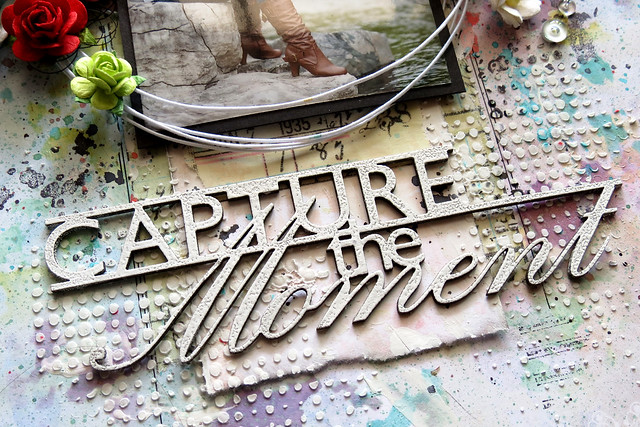
 I incorporated 2 chipboard pieces as a base for my picture, Frills Panel and Vintage Labels.  Both pieces were embossed using a number of products to achieve the aged look.

Tuked beneath the flowers is a Leafy Page Accent and Mini Rings chipboard.  Both of which I embossed and inked.

More pieces of the Mini Ring Things chipboard with some gold microbeads.

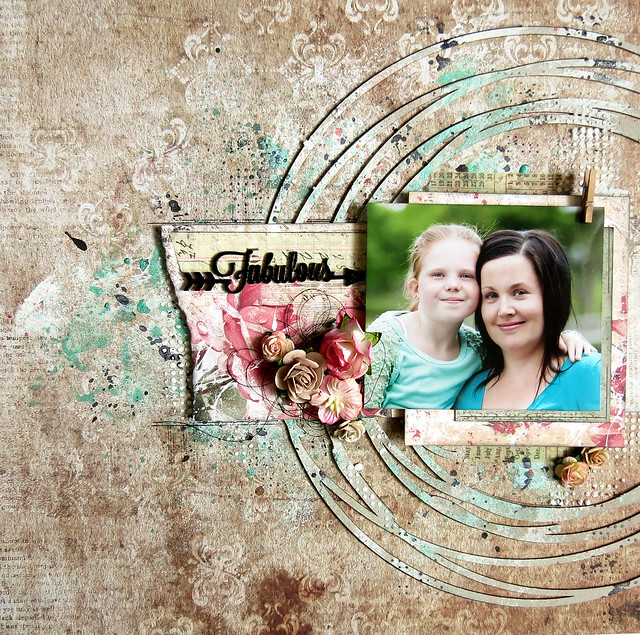
My final layout you saw earlier in the month on the blog, again using papers from the Paisley and Vine Collection.
I used the Whimsy paper as my background, which I lightly
applied light pink ink around the outside of the paper.  I also used Playing Card and Passion papers from the collection.


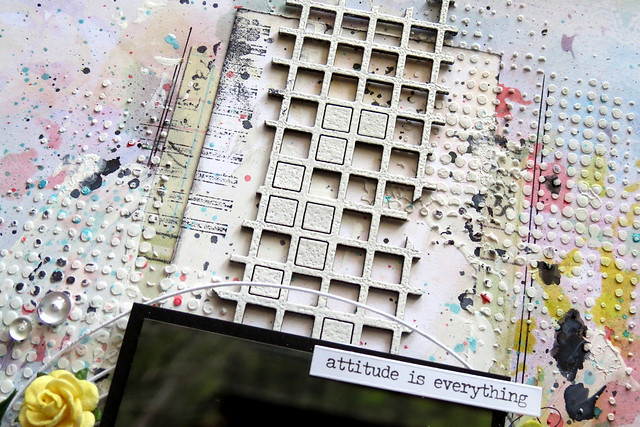
I inked the chipboard Perfect with some dark red ink and placed pieces of the Framington Medley chipboard, which I embossed with white powder and added some blue ink around my picture.

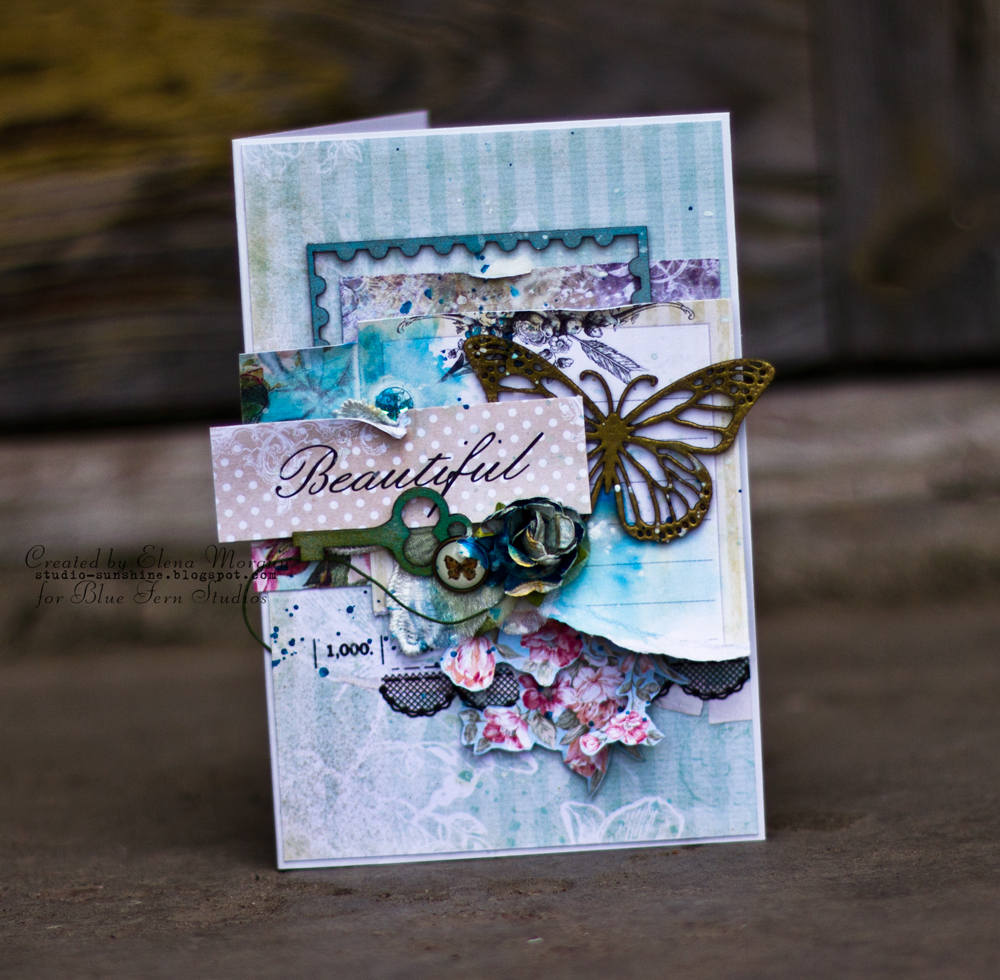
A gorgeous Royal Monarch chipboard butterfly embossed white and placed within a flower cluster is the perfect touch!

I hope you enjoy my layouts!

Thanks for stopping by!
. . . Debbie

Tuesday, July 14, 2015

My first blogpost for Blue Fern Studios. Mixed media layout and a pocketletter .


                Hello, my name is Wilma Voermans and I am a new team member at Blue fern Studios.
                                I live in the beautiful Bernese Oberland , Switzerland.
                     Talking English is not that difficult, but in my writing can be mistakes.
                                            I hope you will forgive me this.

                                  My first love is abstract mixed media on big canvas.
                     It is a side of my creativity I never show, because it is something for myself.

                        A few years ago I discovered scrapbooking and I was addicted right away.
                    Scrapbooking is so versatil , so many styles , techniques and materials can be used .
                                       Getting the mood of the picture,  be creative ,
                                       and make a keepsake for the next generation.
                                                         What more can we ask for?

                        Next to this I do Project life and my new addiction: pocketletters!

           Lets start with my first project for this post.......a vintage mixed media scrapbook page.
                                    Vintage and flowers is not my first to go to style,
                                     but I have a daughter that loves to dress vintage...
                                           Those pictures have to be scrapped too :)


                               My inspiration to start was the Love Story collection paper Concerto:

I used the black and white side to start.
But than I sort of lost myself with paints and medium.
But that doesn't matter, I had the feeling of the paper in mind.
For my layers behind the picture I also took leftovers from the Cottilion paper.


I knew I was going to use the tattered diamonds bits, so I took a stencil with the same shape.
The pink diamonds you see in the background is a mix of ink and translucent embossing paste.


For the chipboard I first painted it with black writersink.
It is deep black and you dont need to cover the chipboard first.
After it dryed I painted roughly over it with distress paint in Tarnished brass.


Lets go to my Blue Fern inspired pocketletter.
If you start with them, look out......it is highly addictive.
Not only is it great to receive real mail, it is fun to make somebody, somewhere something nice.

Pocketletters can have themes and  any kind of style.
Vintage, modern , colorfull, funny , cute etc etc
It are 9 cards and you add them in those baseball sleeves.
The card size is ATC , 2,5 x 3,5.

There should be a short (or long ) letter in one of the sleeves.
And you add some treats in the sleeves.
Little embellishments, a teabag, little tags, emphemera, well....anything goes.
There are groups on facebook for pocketletters swaps and it is a real hype at the moment.

For me it is not about the things that come with my letters.
 I love it when I see my swappartner made something with love and fun. 
Untill now I (almost) always got lovely letters and I like to save them as they are.
 I leave everything in it. 

The most fun letters for me are the ones with the themes: 
about yourself , your surrounding, country  , what do you like and so on. 

But I keep writing about them......lets have a look.
I decided to keep this letter calm, offcourse to see the beautiful background paper.

I used only one sheet of paper:

Cut it up to 7,5 by 10,5 

On the backside I mark the paper in 9 pieces..

At this point you can make your background or first cut them up.
I just did something with a stencil and distress ink before cutting

I have leftovers pieces from the 12x12 sheet.   I fussycut flowers and borderpieces from it.
I also used my Blue Fern stamps in the background and made embellishments with them.


Here the finished frontside:

On the backside I did not do to much, I love the print from the paper, and it is filled with little treatments anyway.
As you see, I added vintage poststamps, lace, flowers, a (real) dryed edelweiss, little shoes, a bookmark , mini incense, some BFS chipboard and offcourse the letter.
There is one pocket empty, I want to add a minipicture from her granddaughter in it.
I took it from her profile , so I dont show it here.... for her privacy.

I hope you like my first blogpost, have a great day!


Sunday, July 12, 2015

Three layouts by Marie-Josée

Hello all,

It's July already, school's out and summer is finally here! I am now having some well-deserved time off and I am really happy to have more time to devote to scrapbooking. Here are my latest layouts with Blue Fern Studios products!

"Everyday Moment" layout

For this layout, I used a panel, Printer's Drawer. I glued it to a 12" x 12" piece of chipboard and I applied white gesso all over.


Then, I altered it with various mists and Gelatos.


I used the Everyday Moments chipboard as my title. I altered it with black embossing powder.


I also used various stamps and black ink to add different pattern.


"Fabulous" layout

For this layout, I used a paper from the Sanctuary collection as my background.


I used the word "Fabulous" from the Arrow Words set as my title. I altered it with black embossing powder.


I cut two different pieces of the Graduated Circles set. I cut them to be able to use only a part of each piece on the right side of my layout. I altered the chipboard with gesso, mists and Gelatos.


"Capture the Moment" layout

For this layout, I used a paper from the Ombre Dreams collection as my background.


I also used two pieces of chipboard from two different sets, Grid Pieces and Captured Words.


I altered both pieces with white embossing powder.


Saturday, July 11, 2015

Mixed media canvas+video tutorial and cards from Elena Morgun

Hello, friends, it's Elena Morgun here today. 

I have three new projects to share with you today using lots of gorgeous Blue Fern Studios products. Today I'll be inspiring you with the mixed media canvas and step-by-step video tutorial, and cards.

Mixed media canvas 'Fabulous'

All the details of creation process you can watch in step-by-step video tutorial.
Enjoy! 
A few details:
Blue Fern Studios product used

Paper
- Montage
- Déjà Vu

Chipboard
- Arrow Words
- Chelsea Frame
- Bohemian Flowers
- Chelsea Vines

Also I have made two more cards)
Blue Fern Studios product used

Paper
- Montage
LOVE STORY

Chipboard
Checker Bits
Postage Frames


Blue Fern Studios product used

Paper
- Montage
- Déjà Vu

Chipboard
Royal monarchs
Vintage Keys
Postage Frames

Hugs
Elena Morgun

Friday, July 10, 2015

It's All About YOU!

Today we have a special feature for you......we are featuring layouts from those of you who love our products.  That's right, we see your beautiful creations on your blogs, in online galleries, on Facebook, and in our own Blue Fern Gallery.  We are in awe of the projects we see using our products!

First up is this artsy layout that we found on Lisa Novogrodski's blog using paper from the Blue Fern Ombre Dreams collection.  This paper is perfect with this awesome photo!


This ultra-sweet layout was created by Isabelle Gauthier using the Blue Fern chipboard title "The Best Day Ever".  What a wonderful design, and the details are perfect!  We found this layout on Isabelle's blog where she has LOTS of layouts using BFS chipboard!


Former design team member Tiffany Solorio shows how she used various round chipboard pieces to create this "happy" layout.  We love how she tied all the chipboard pieces together with the flowers.


This layout by Steph D was found in an online gallery.  Steph has used paper from our Sanctuary collection with this photo from the 1950's.  Such a lovely way to feature this sweet photo. 


Ginny Hickmott created this very dramatic layout with our Love Story collection.  Love how her paper layering stands out against the black/white background!


New design team member Marilyn Rivera hasn't had a chance to post on our blog yet, so we thought we would feature one of her layouts using Blue Fern products, before she became a member of our team.  Marilyn has used paper from the Sanctuary collection for this stunning layout.  You're going to love seeing her projects (and video tutorial) later this month!


Maiko Kosugi has taken this paper from the Montage collection, and created this adorable layout.  She has also used one of our chipboard dangles.  So much to love about this one!


Well, that wraps up our post for today.  Thank you to these talented ladies for using Blue Fern products in such creative ways.  You make us look good!

Thursday, July 9, 2015

New Stamps!

Hello Blue Fern fams!  When we introduced our Frolic paper collection, we gave you a peek at the coordinating stamp sets.  In case you missed them, we thought we would give you another look:


We have also released 6 additional stamp sets.   You'll find all our stamp designs to be very detailed, 
with beautiful images that are perfect for any project!


Thanks for stopping by today!  
We would love to hear from you.  Which stamps are your favorite?