Hi, I am so excited to be here today with my first projects for Blue Fern Studios!

I have always loved crafting since I was a little girl. My grandmother taught me to knit and crochet and I remember sewing Barbie doll clothes with her on her front porch! I am a knitter and quilter as well, but have recently in the last few years found cardmaking and scrapbooking, and an obsession was born!! Barely a day goes by when I haven't done something crafty!!
I would say my style is a mixture of vintage, shabby chic with a hint of mixed media, you will often see me using vintage images! I hope you will come visit me at my blog at http://celticknotted.blogspot.com.


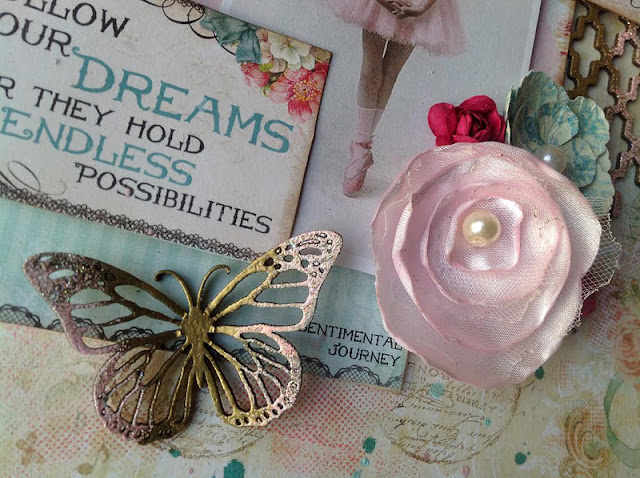
I have used the beautiful Royal Monarch butterfly chipboard and embossed it in Imagine Ink Honey and Cotton Candy. I have made a homemade satin and tulle flower and have used the Essential Textures and Texture Circle stamps for my background.

Here you can see lots of layers from the Montage Calling Cards paper and the Turkish Bits and Arrow Words chipboards.

I would say my style is a mixture of vintage, shabby chic with a hint of mixed media, you will often see me using vintage images! I hope you will come visit me at my blog at http://celticknotted.blogspot.com.

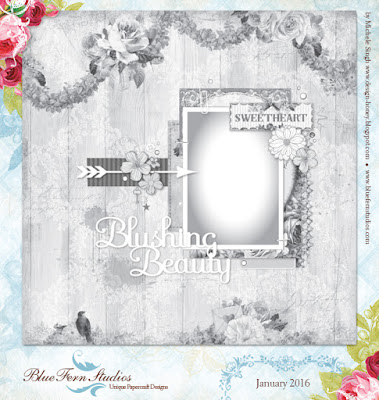
My first project uses the amazing new paper line, Blush. I have chosen a gorgeous vintage image that had just a tint of pink and blue in it...I used those to guide the layout's colors. I chose the beautiful Sweetheart paper for base of my layout.

I used many of the cut out cards and titles from the Blush Calling Card paper, layering them up! You can also see the Postal Textures stamps here in the background, I used Walnut Stain distress ink to make a weathered and distressed stamping background.

You can see two of the chipboard pieces I used, the gorgeous Floral Medley Frame and the Bits of Honey pieces. I used the Imagine Ink Sage and Bonny Blue on the frame leaving some sections plain for an overall distressed look. The Bits of Honey pieces were embossed with the Bonny Blue and I added some Walnut Stain distress ink to age them a little.

I used lots of yummy flowers from my stash in my floral cluster adding a ribbon for extra detail. I finished off the cluster with the heart lock from the Vintage Locks chipboard set.
Blue Fern Studio Supply List:
Paper:
Blush-Sweetheart and Calling Card
Chipboard:
Bits of Honey
Floral Medley Frame
Vintage Locks
Stamp:
PostalTextures
Imagine Ink Embossing Powder:
Sage, Honey, Bonny Blue

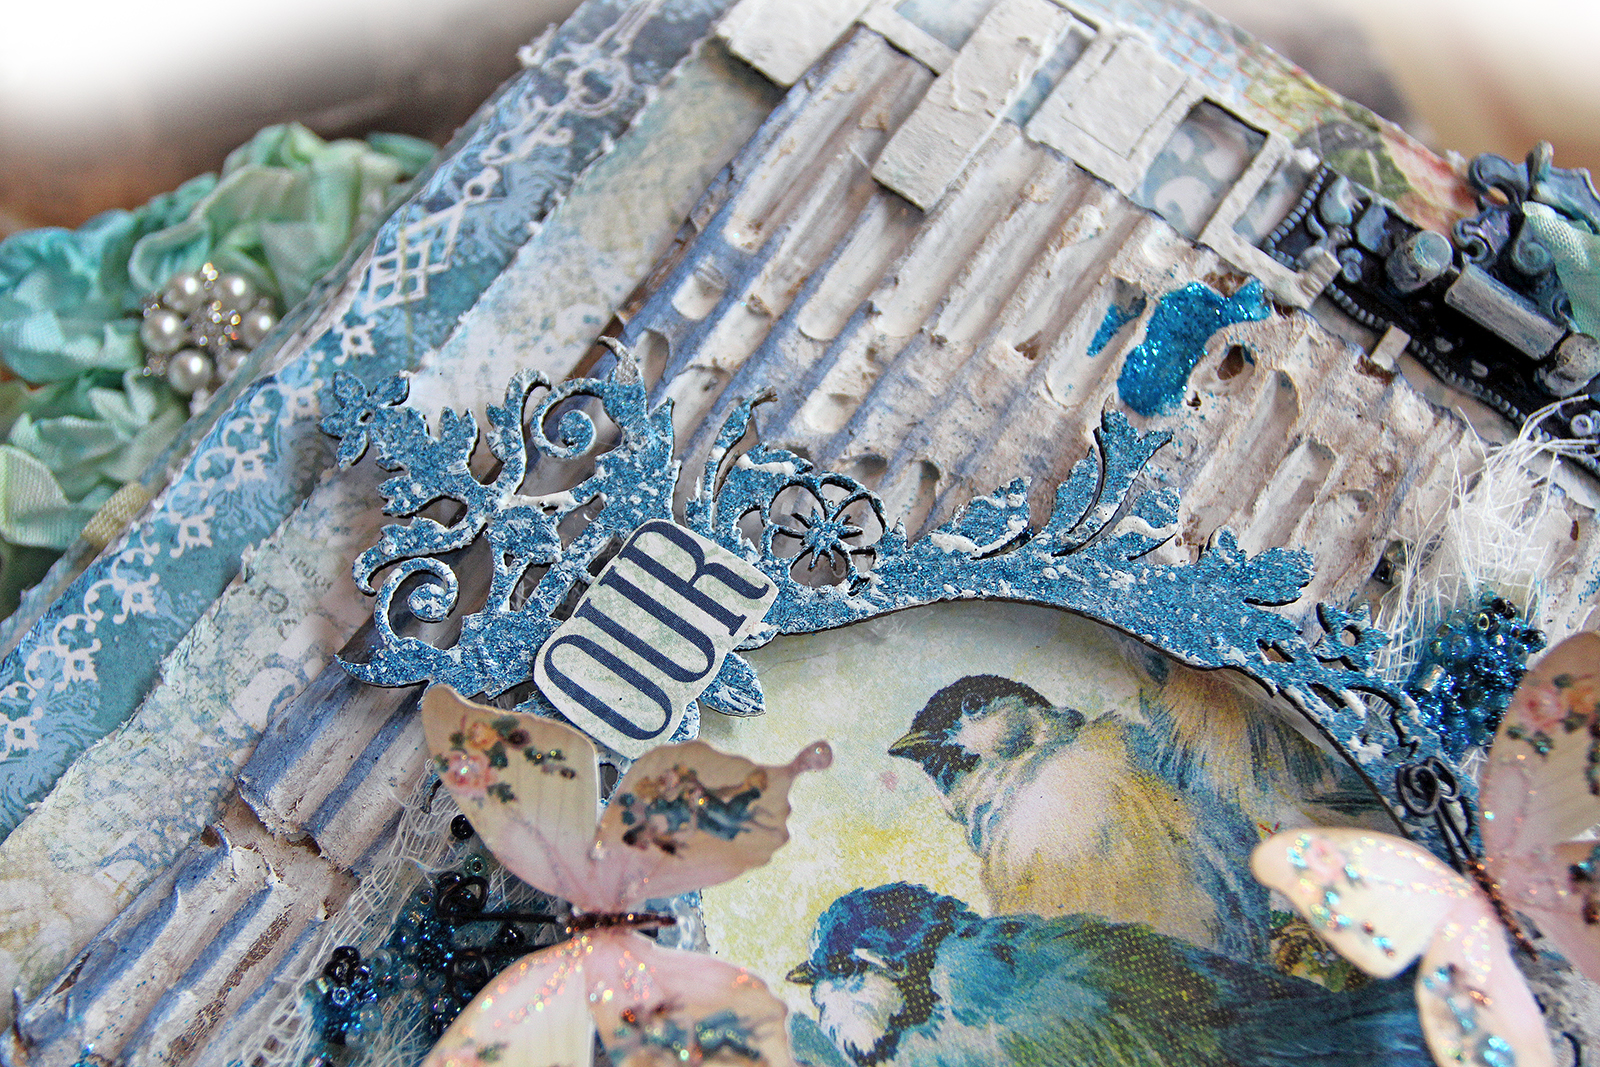
My next layout features the gorgeous new Timeless collection and a beautiful selfie my daughter took on my iPad. It is always fun to find new photos to use for my layouts taken for me on the iPad, a selfie addicted girl is great for a scrapper! I have used the Timeless Maçonnerie page for the layout base.

You can see some more layers in this page using the Timeless Calling Cards paper cut outs. Under the photo I have used the middle clock from the Roman Clock Set - Large. I used the Imagine Ink Mystic Plum embossing powder to color up the chipboard, adding some gesso for distressing.

I love the retro font used for the Timeless chipboard! This layout is called Timeless Beauty, which I happen to think my daughter is! I have used Imagine Ink Mystic Plum embossing powder and gesso again to color and distress the title.

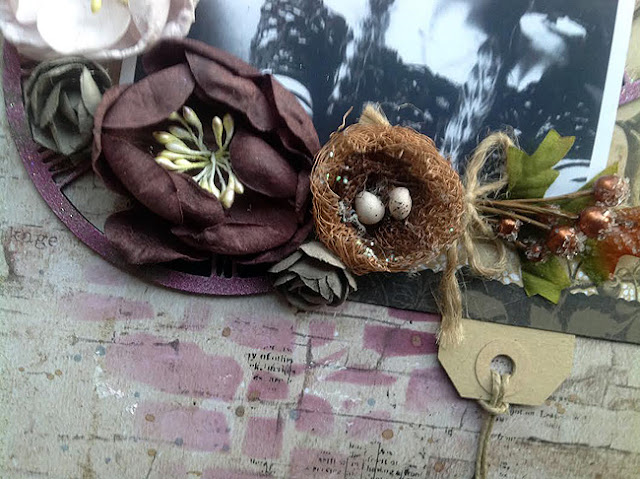
I have added some gorgeous flowers and a nest which I think works well with the bird imagery in one of the calling cards. I have also tucked in some tags under the photo cluster. I also used Seedless Preserves distress ink and a stone wall mask to tone in with the papers. I added a bit of blue and brown splashes too.

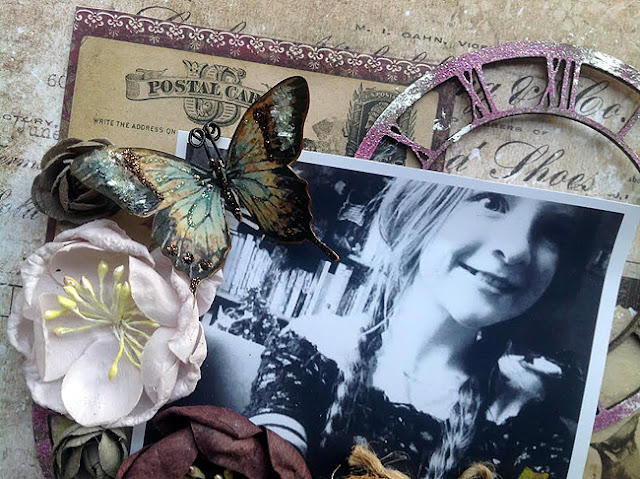
I finished off my layout with a beautiful handcrafted butterfly by Renea.
Blue Fern Studio Supply List:
Paper:
Timeless -Maçonnerie and Calling Card
Chipboard:
Roman Clocks - Large
Timeless
Imagine Ink Embossing Powder:
Mystic Plum

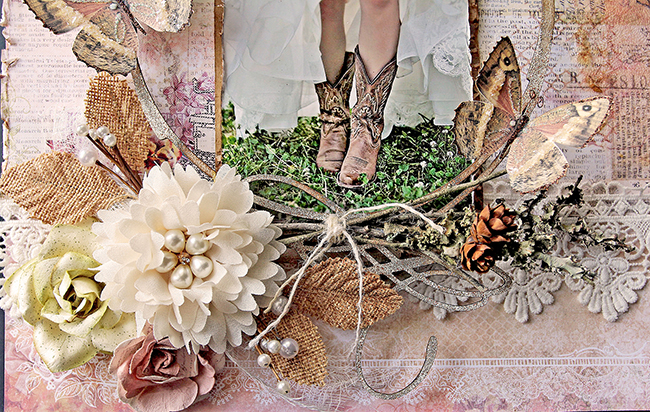
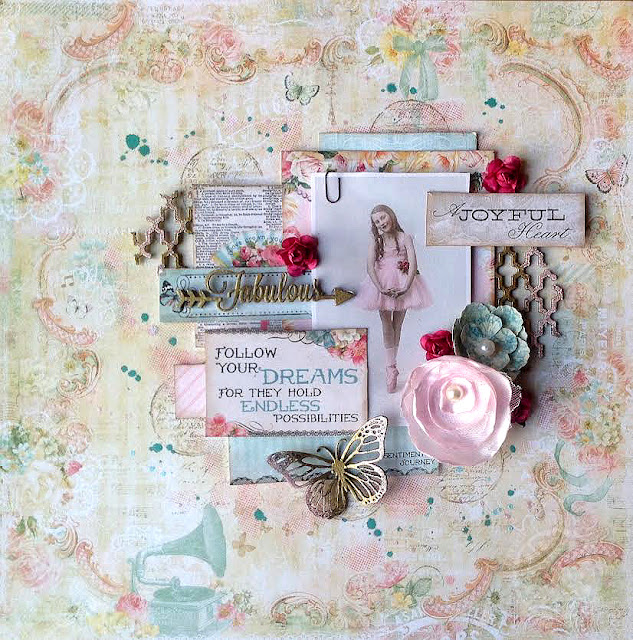
You might have seen this layout in the challenge post earlier, this is my take on the January sketch challenge. I have used the Frolic Allegro paper for my base. Here is the sketch you can use to play along this month:


I have used the beautiful Royal Monarch butterfly chipboard and embossed it in Imagine Ink Honey and Cotton Candy. I have made a homemade satin and tulle flower and have used the Essential Textures and Texture Circle stamps for my background.

Here you can see lots of layers from the Montage Calling Cards paper and the Turkish Bits and Arrow Words chipboards.

Imagine Ink Honey and Cotton Candy are used here again to color the chipboard. To finish off the layout with my gorgeous vintage ballerina I simply added a little clip to the corner of the photo.
Blue Fern Studio Supply List:
Paper:
Frolic - Allegro
Montage - Calling Cards
Chipboard:
Turkish Bits
Arrow Words
Royal Monarchs
Stamps:
Essential Textures
Texture Circles
Stamps:
Essential Textures
Texture Circles
Imagine Ink Embossing Powder:
Honey
Cotton Candy
Thank you so much for having a look at my projects for this month. I am so excited to be here!