Showing posts with label Texture Circles. Show all posts

Wednesday, November 23, 2016

Vintage Christmas by Pascale

Hello Sweeties,

Today I'm up on Blue Fern Studio with three new projects featuring the Vintage Christmas 1 & 2 collections. The first project is a mini album entirely realized with the first Vintage Christmas collection. The size of the mini album is 13 x18 cm (5" 1/4 x 7"1/4).


 I embossed the pages with different stamps as well as the edges. 


I die-cut a few doilies to add inside. I added the page titles too.


I added the first design to the cover with the Brocade Texture stamp and the Ginger powder. Then I continue with the Christmas Collage stamp set and a permanent ink.


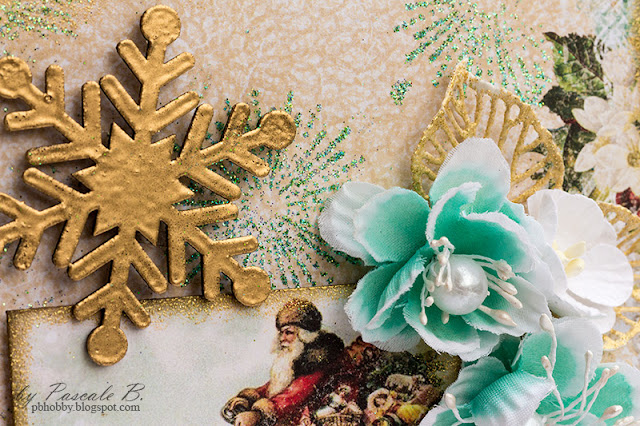
I embossed the Dangled Flake with two layers of Black Sand embossing powder and the Winter Flakes with two layers of Ginger While the embossing powder was still hot, I stamped the Winter Flakes to add some texture.


Blue Fern Studios products:

Papers - Vintage Christmas (Wonderland, Greeting Cards, Magical, Deck the Halls,
Auld Lang Syne, Noel)
Chipboards - Dangled Flake, Winter Flakes
Stamps - Christmas Collage, Brocade Texture, Postal Texture, Texture Circle, Grungy Grid
Embossing Powder - Antique Gold, Ginger, Black Sand, Silver Bells

------------------------------------

My second project is a layout featuring the new Vintage Christmas collection. I chose an old photo of my daughter.


I cut a large strip in the Twas the Night paper and glued it on the Joly paper. Then I primed the background with clear gesso.


I added a thin layer of white gesso where I want to put my embellishments and photo. When dry, I added a design with 3D Gloss Gel and a stencil. While the gel was still wet I sprinkled some Pyrite glitter.


While the background was drying, I painted the chipboard with a metallic paint and the Soft Blossoms in red. 


I splattered some red and copper paint; Then I added a new design to the background with the Christmas Collage stamp embossed with the Ginger powder. I colored the area with different colors of watercolor.


I glued all the embellishments with a 3D gel (flowers, chipboard, lace...), and to finish, I added some star brads embossed with the Ginger powder. 


Blue Fern Studios products:

Papers - Vintage Christmas 2 (Jolly, Twas the Night, Holidays Treats)
Vintage Christmas 1 (Wonderland, Greeting Cards)
Chipboard - Tree Treats
Flowers - Christmas Blooms, Soft Blossoms
Stamp - Christmas Collage
Embossing Powder - Ginger
Glitter - Pyrite

------------------------------------

Here is my third November's project: a set of card.


I chose the Jolly paper as the base of both cards. I stamped them with one of the stamps from the Christmas Collage set. Then I embossed the image with a sticky powder in order to add Carribean glitters.


Then I embossed also the edges of both cards with the 14 Karats powder to add some extra shine.


I embossed some Winter Flakes with the Honey powder, other with the Ginger and the Antique Gold powders. 


I embossed some die-cut leaves with the 14 Karats powder too. While the embossing powder was still hot I sprinkled them with  the Carribean glitter and heat set them. 


Blue Fern Studios products:

Paper - Vintage Christmas 2 (Jolly)
Chipboards - Winter Flakes
Flowers - Christmas Blooms, Soft Blossoms
Stamp - Christmas Collage
Embossing Powders - 14 Karats, Antique Gold, Ginger, Honey
Glitter - Caribbean


Thursday, June 23, 2016

Attic Charm inspiration by Pascale

Hello Sweeties,

Today I'm up on Blue Fern Studios blog with 3 new projects featuring the new paper collection: Attic Charm. The first project  is a canvas I made for a friend whose son get married last month.


I started to glued a tissue paper to the canvas and covered it with a thin layer of gesso. Then I layered together some paper strips (Haberdashery, Sachet, Generation), lace, drywall tape, ...  and covered them with a thin layer of gesso too. 


I added a design with the Serendipity Medley stamp that I embossed with Honey Imagine Ink. I colored the background with different colors of watercolor, Bister and Primary Element. 


I primed the chipboard with white gesso. I colored the French Word "Bonheur" with a Primary Element. as well as the Jeweled Frame


I stamped and embossed also the "Jeweled Frame" with the Serendity Medley stamp and the Honey embossing powder.


I die-cut some leaves in the Generation paper. I sprinkled them lightly with the Verdant embossing powder that I heat set.


Blue Fern Studios products:

Attic Charm papers - Haberdashery, Sachet, Generation
Flowers  - Attic Charm Daisies
Chipboards  - French Words, Jeweled Frame
Stamp - Serendipity Medley
Imagine Ink - Embossing Powder - Verdant, Honey

-----------------------------------------------

My second project showcase a photo of the Castle of Brézé (Brézé, Loire Valley, France). You can't see it on the photo, but there is an underground castle under this one that is quite impressive. 

I cut the Sachet paper in the middle and glued the edges together so they were in the middle. Then I added a layer of clear gesso. When dry, I added a design with a stencil and a white crackle paste.


I primed the French Ironwork with white gesso and the Spring Branch with a clear gesso. 


Then I colored the chipboards with some Twinkling H2O. While the watercolor were still wet, I sprinkled the Spring Branch with Sage, Lime and Nutmeg embossing powders. I added also some Icicle emboosing powder to the French Ironwork.


When the crackle paste was dry, I colored the backgroung, before gluing all the embellishments.


Blue Fern Studios products:

Attic Charm collection: Sachet, Haberdashery
Flowers - Attic Charm Glitter Roses
Chipboards - French Ironwork, Spring Branch
Imagine Ink - Embossing Powders - Sage, Lime, Nutmeg, Icicle

----------------------------------

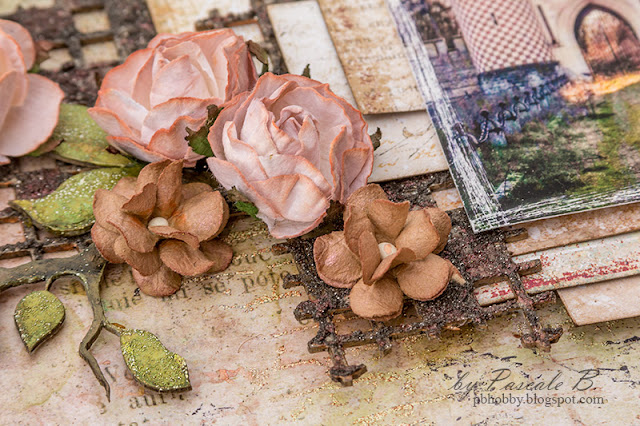
The third project showcase a photo that was also taken at the Castle of Brézé. I was trying to find the right angle to take my photo, when I was startled by these bee: I haven't notice that she was in the flower, but I was lucky enough to have time to take these photo; it was only when I print the photo that I discover there was more than one inhabitant in this rose...


As usual I started to primed the background (Generation) with a clear gesso. While it was drying, I mixed some Mica Powder with a soft gel and texture powder: I used this paste to add a design with a stencil.  


When dry, I added some white crackle paste. I let dry again before adding some color. 


I stamped randomly the background with one of the Circle Textures stamp (music notes) and a metallic paint.


I colored the Floral Lattice Bits and the Tranquil Foliage with a metallic paint and a pink watercolor to the latter. Then I dried brush the flowers with a white gesso to add some light.


Blue Fern Studios products:

Attic Charm collection - Generation, Mercantile, Calling Cards
Chipboards - Tranquil Foliage, Floral Lattice Bits
Stamp - Texture Circles

Saturday, April 23, 2016

April inspiration by Pascale

Hello Sweeties

I followed the April sketch for these first layout. I chose to work with papers of the Serendipity collection. Their vintage feel is a perfect match with the photo of Notre-Dame-la-Grande of Poitiers (France).


I started to add a layer of clear gesso to the background and the chipboards. Then I added adding a design with a stencil and 3D gloss gel. 


While the design was drying, I colored the Whimsy Flourishes with a brown Distress inkand added a touch of gold wax. 


I colored the die-cut sprigs with the same ink, sprayed them with water to activate the ink and sprinkled sage embossing ink while wet. I colored the leaves with the same Distress ink and some Twinkling H2O and added ginger and garnet embossing powder. 


I colored the flowers with the H2Os too and I used them to added some color to the background too. 


To finish I added some splatter of merlot glitter: I mixed soft matte gel with water and the glitter so I was able to splatter the mixing. 

Blue Fern Studios products:

Serendipity collection - Calling Cards, Fascination
Chipboards - Whimsy Flourishes
Imagine Ink - Embossing Powders - Ginger, Garnet, Sage
Imagine Ink - Glitter - Merlot

-------------------------------------

The second layout showcase a photo of the entrance of the castle of the Temple (L'Ile-Bouchard - France).


I started to add a layer of clear gesso to protect the background and the chipboards. I added some texture the wall stamp and the oatmeal embossing powder.


I covered the Grid Pieces chipboards with a graphite paste. When dry, I splattered some color.


I  painted the Spring Branches with some Twinkling H2O  and sprinkled some embossing powders to add some texture.    


I colored the flowers with some Twinkling H2O too. 


When all the embellishments were glued, I added more wall prints: I used a twinkling H2O with a similar color as the background.


Blue Fern Studios products:

Timeless collection - Song
Serendipity collection - Calling Cards, Chronicle, Fascination
Chipboards - Spring Branche, Grid Pieces
Flowers - Courtship Blooms
Imagine Ink - Embossing powders - Verdant, Sage, Nutmeg
Stamp - Essentiel Textures

-------------------------------------

The third layout showcase another postcard from Rennes (France) where we can see the City Hall Belfry.


I started to add a layer of clear gesso to protect the background and all the chipboards. Then I added a design with a stencil and modeling paste. While the paste was still wet I sprinkled different colors of embossing powder and heat set them. 


I covered the Roman Clock with black gesso, then I added some texture with the Texture Circles stamp and the Ginger embossing powder. 


I covered the Leafy Page Accents with a white crackle paste. When dry I colored them with a light brown Twinkling H2O. 


I colored the roses and the leaves with different Twinkling H2O and I added some ebossing powders on the leaves to add some textures.


I added some colors to the background and some random stamping with the Arcadia Textures stamp. To finish I splattered some glitters mixed with matte gel and water.


Blue Fern Studios products:

Serendipity collection - Contemplation, Reminisce
Chipboards - Roman Clock Set - Small, Leafy Page Accents
Imagine Ink - Embossing powders - Breeze, Icicle, Pearl, Ginger, Verdant
Imagine Ink - Glitter - Blue Ice
Stamp: Texture Circles, Arcadia Textures

Sunday, February 7, 2016

My February projects by Marie-Eve Bernard

Hello ladies,

It's Marie-Eve Bernard.  I'm here to present you my projects for February. This month, I had fun with the beautiful and girly Blush Collection.

Smile


For my title, I use the Smile chipboard from the Laughter, Happy, Smile set. I paint it with white Gesso and I emboss it with the Imagine Ink Cotton Candy powder.


Under my picture, I use the Damask Flourish chipboard.  It come in set of two pieces.  I emboss it with the Imagine Ink  Fern embossing powder. I use the Vintage Edges Stamps in my background.


In my flowers cluster, I had the Layering Stems chipboards set.   I simply paint them with White Gesso. 

Blue Fern Studios Products used:

Papers
- Blush Enamored
 - Blush Celebration

Chipboards
- Laughter, Happy, Smile
- Layering Stems
- Damask Flourish

Imagine Ink Embossing Powder
- Cotton Candy
- Fern

Stamps set:
-  Vintage Edges


 Happy


For my title, I use the Happy chipboard from the Laughter, Happy, Smile set. I paint it with white Gesso and I stamp with the Texture Circles stamp set in pink ink.  


To create my background, I cut pieces in the Tangier Page Panel. I paint those pieces with white gesso and glue it to the background paper.  I use the Celebration paper from the Blush Collection.  Then I slash different pink ink on it.  When the ink where dry, I stamp it randomly with the Texture Circles stamp set.  


Blue Fern Studios Products used:

Papers
 - Blush Celebration

Chipboards
- Laughter, Happy, Smile
- Tangier Page Panel

Stamps set:
-  Texture Circles

My layout for the Sketch challenge: Cherish

In the beginning of the month, I present this layout for the February sketch challenge.  I use the Timeless Collection.  I invite you to participate in the sketch challenge.  


For my title, i use the Cherish chipboard from the Adore, Love, Cherish set.  I paint it with gesso and use spray ink to color it.


For my frame (from the Memory Frames set) and my chipboard flowers (for the Bohemian Flowers set), It all begins with a coat of White Gesso.  Then I use a pink gelato to give some color.  Finally, I distress the edges with a dark brown ink.


List of Blue Fern Studios supplies:

Papiers / Papers
-Timeless Papillons
-Timeless Freedom

Chipboards
- Bohemian Flowers
- Memory Frames
- Adore, Love, Cherish

 Stamps
-Postal Textures

I hope that you enjoy my creations.
Have a nice day.

Marie-Eve Bernard