Showing posts with label Tags. Show all posts

Friday, August 22, 2014

'Delight' by Lisa Griffith

Hello Blue Fern Studios friends! 

I hope you are all having a wonderful week so far....it's my turn to share my projects with you today.
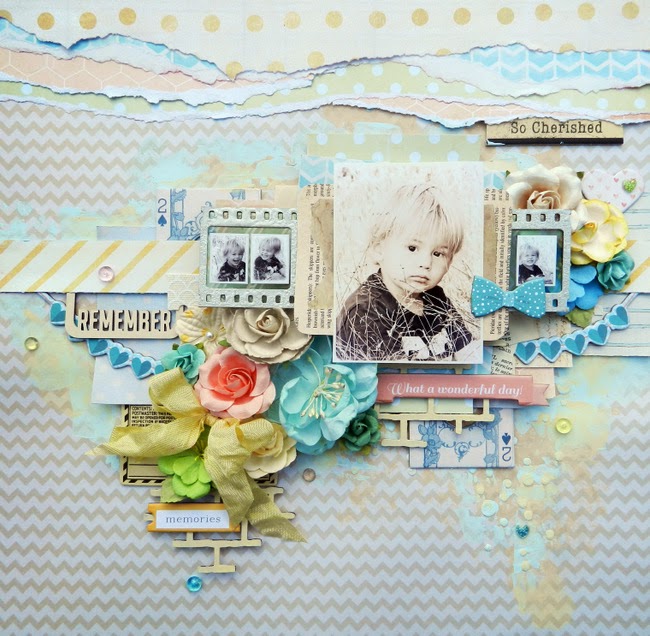
My first project is a layout called.....

'Delight'


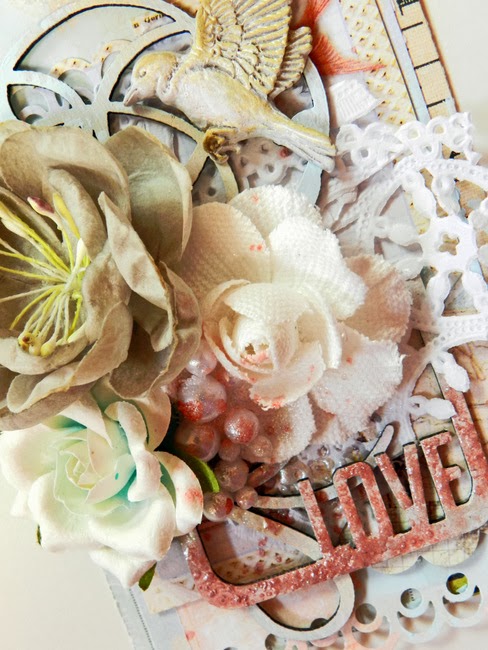
Some of my all-time favorite designs are the nature inspired sprigs and leaves like the 'Spring Branch' I used here. I also used a piece of the 'Tattered Butterflies' (another favorite!). I painted them white and then splashed them with some of the yellow and green watercolor paints that I used on my layout.

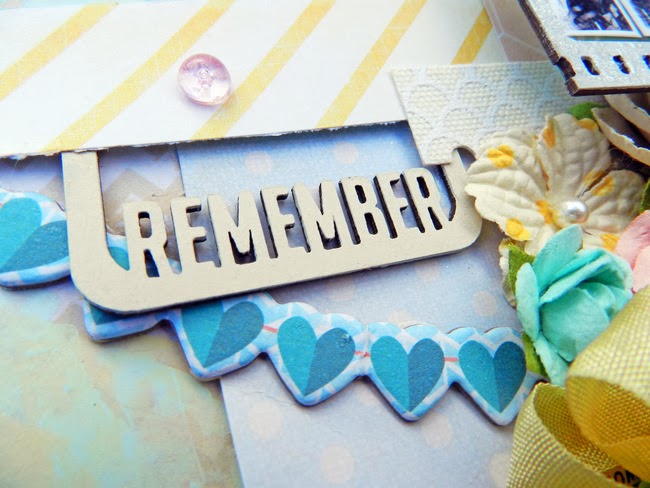
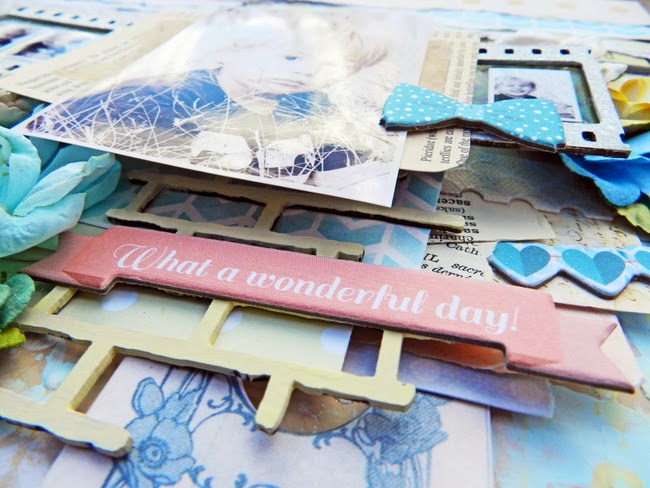
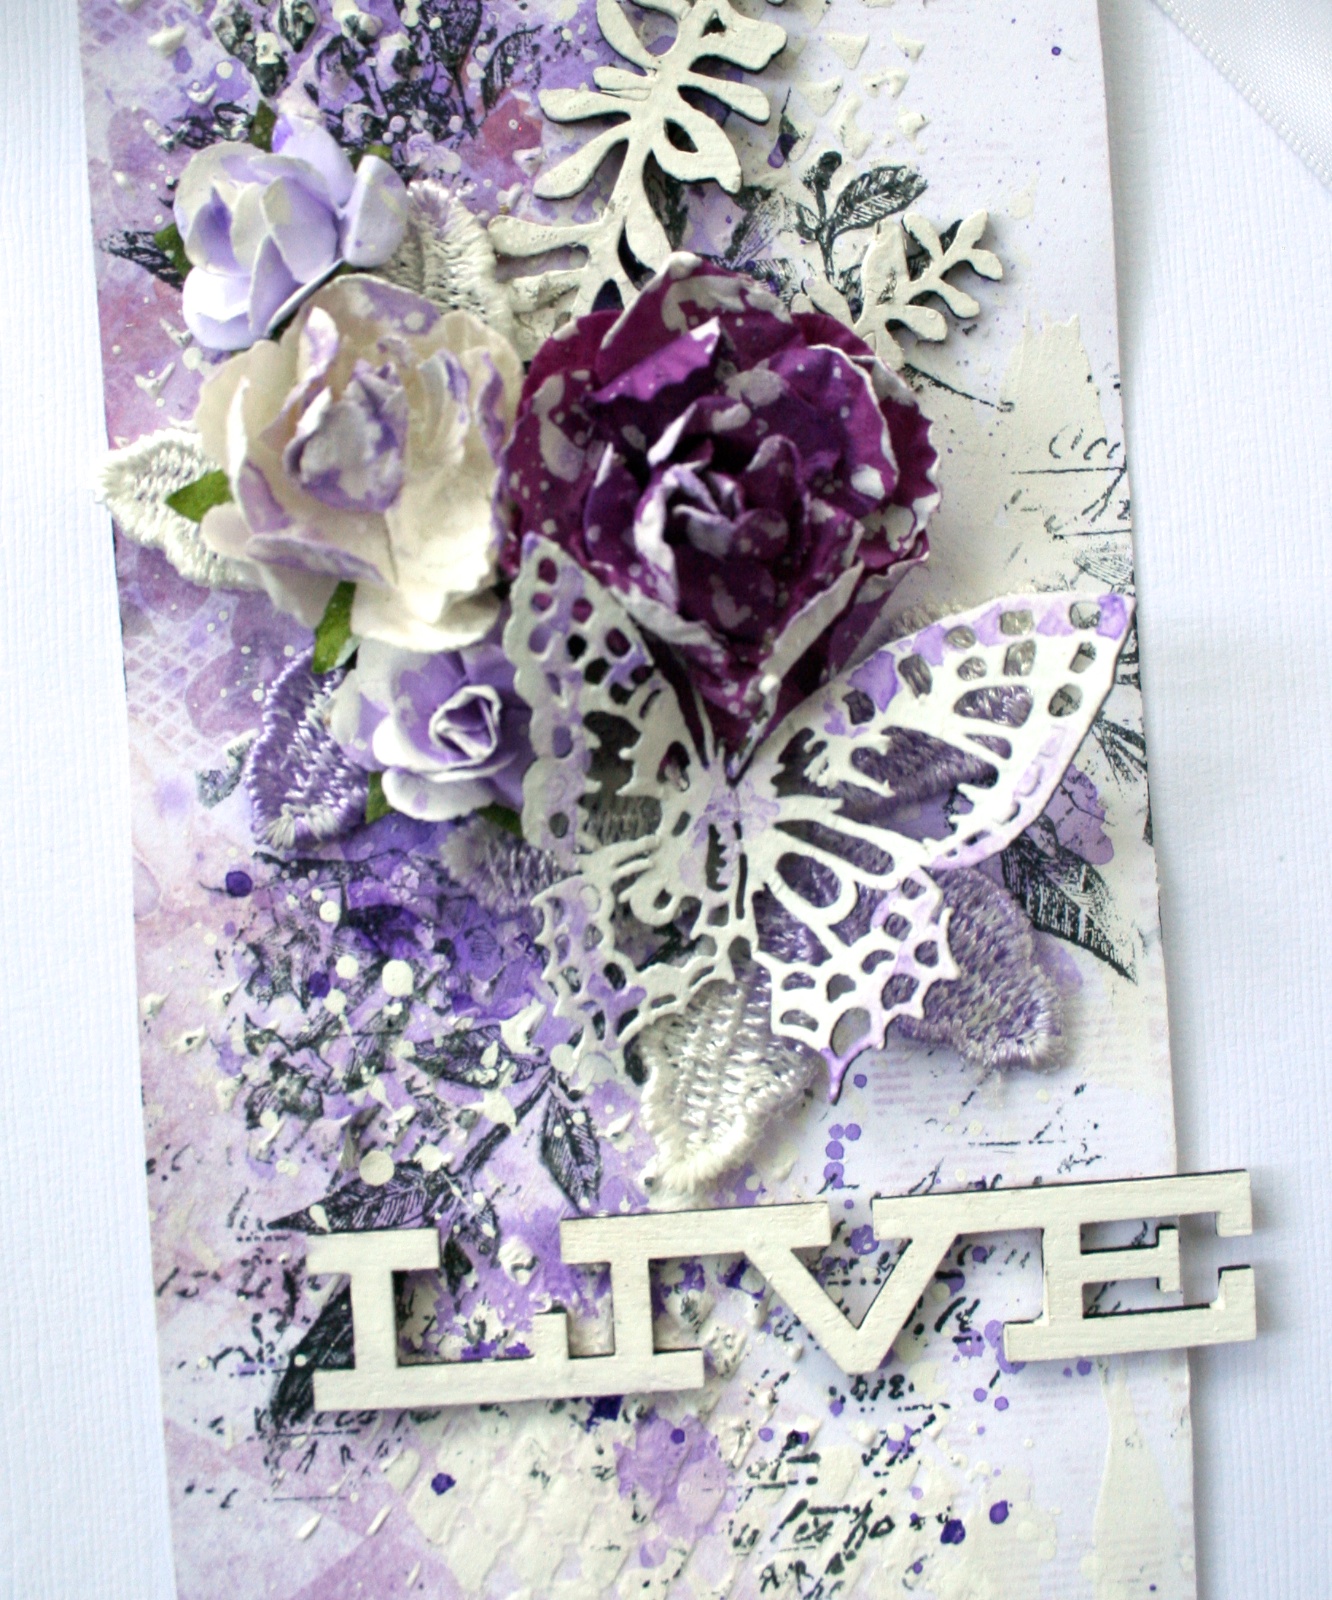
Here are a few close ups....


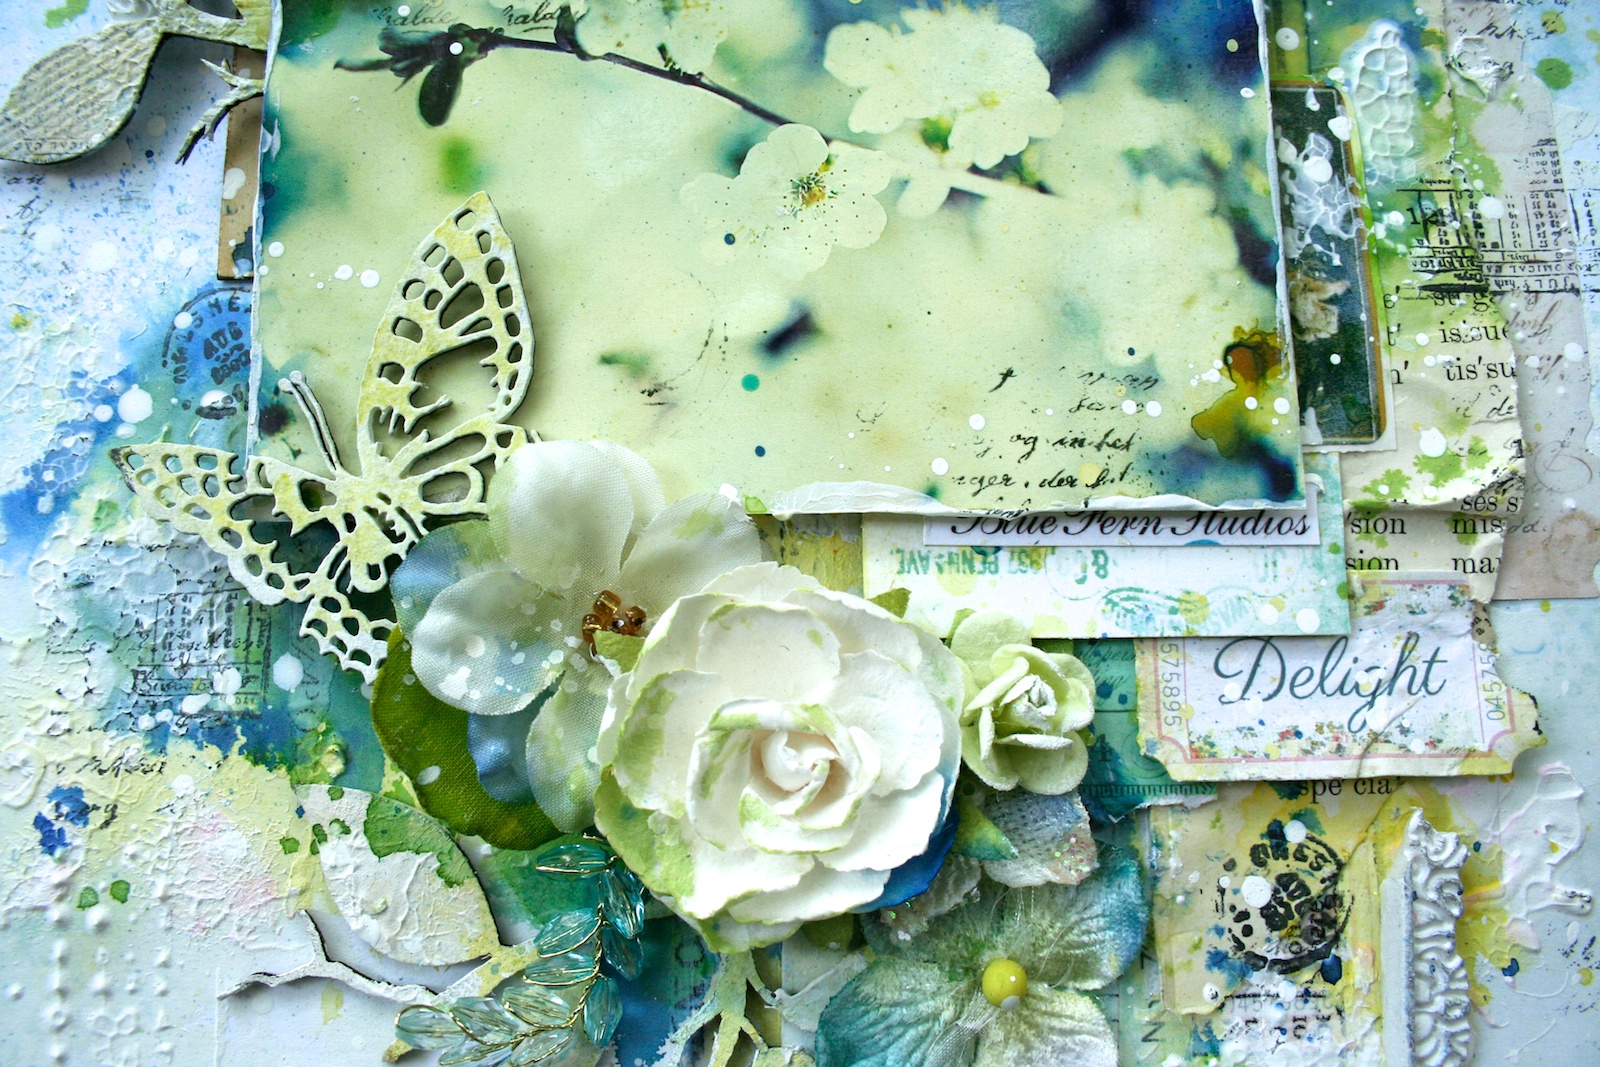
I used a piece of the beautiful paper called 'Susan's Dream' for my base paper with lots of 
layers and masking.


My second project is a tag I created using a piece of 'Shannon's Dream'.


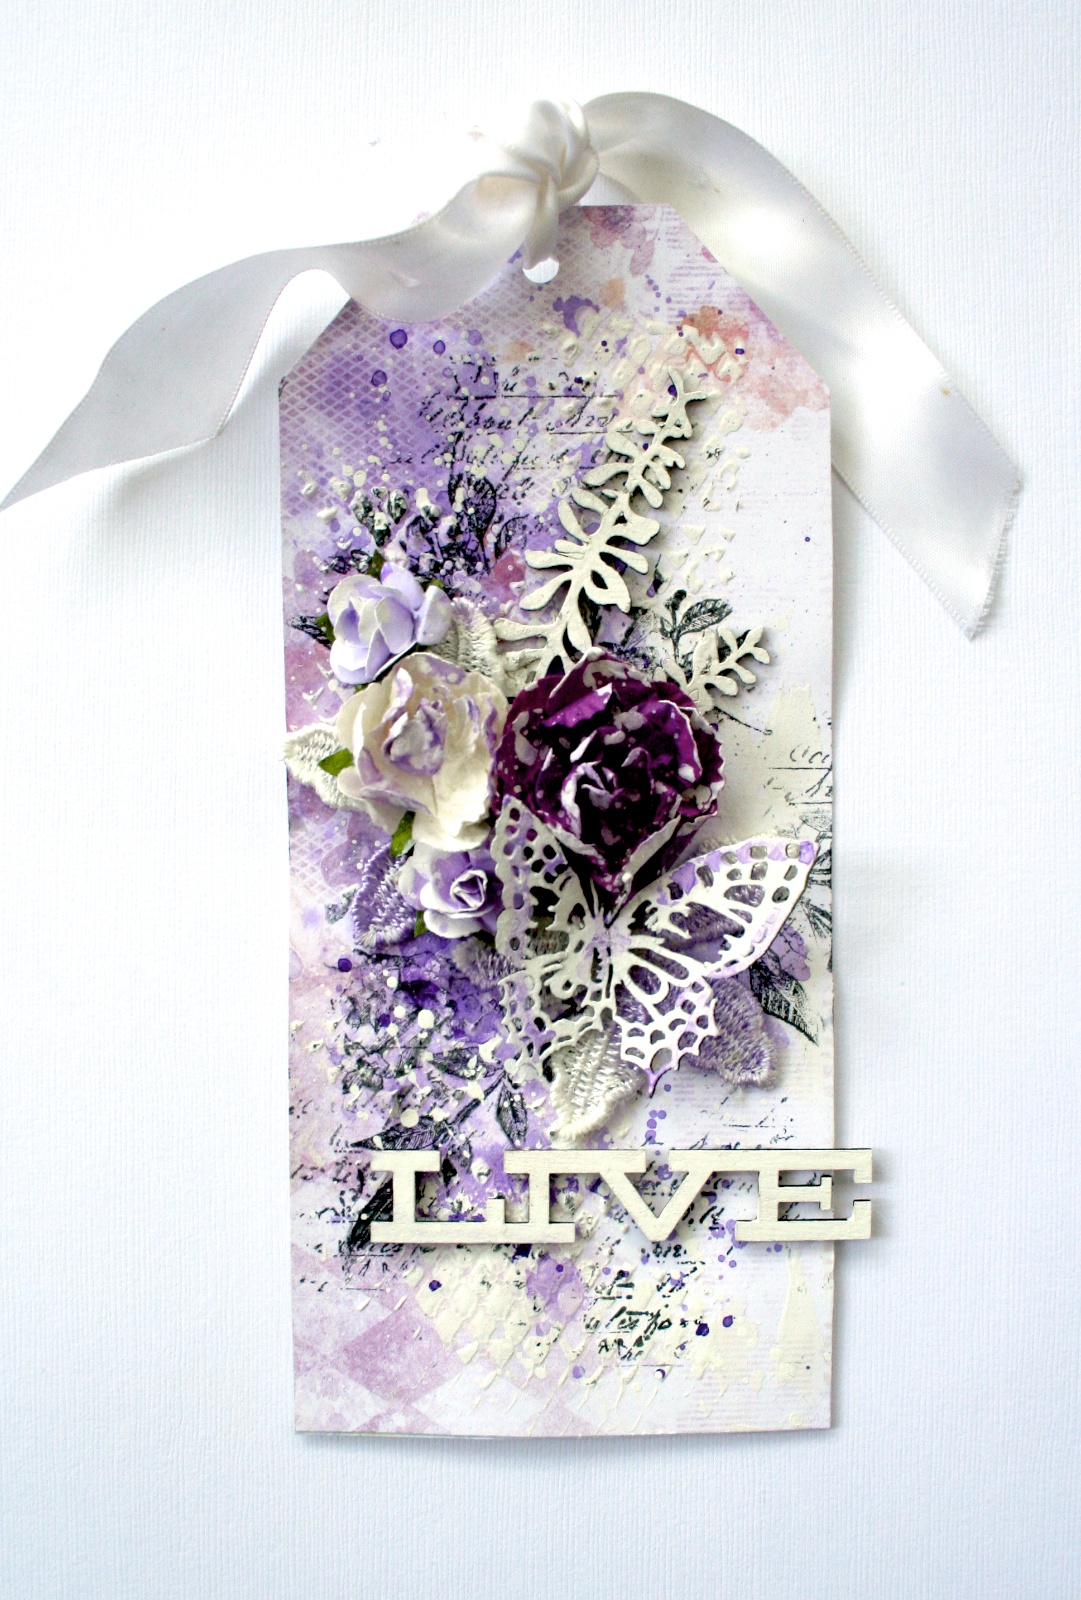
I started by using a mask with heavy gesso, added a piece of the 'Layering Stems', and then added some purple ink and some stamping in the background. Then I layered on some flowers and another piece of 'Tattered Butterflies'.


Thanks for looking!
Until next time,
Lisa xo

Tuesday, May 27, 2014

A Card & a Tag Featuring Ombré Dreams!

Hello everyone! 

Erin Blegen with you today to share a card and a tag that I created using the brand new "Ombré Dreams" paper collection, as well as some new chipboard pieces too!

"You Make Me Smile" 
This paper collection comes just in time for summer- with its fresh, light colors and dreamy patterns, I couldn't wait to start putting it to good use! Here I've created a card using the "Ginger's Dream" paper on top and "Leslie's Dream" for the base. There was just enough design in the upper right-hand corner of the "Ginger's Dream" paper to perfectly compliment the card design I had in mind.

I'm really loving circular pieces and frames at the moment, and this "Treasured Floral Frame" was just what I needed for my card. I took a white Prima Chalk Edger ink pad and used that to mostly cover the piece, leaving just a hint of the raw chipboard to show through. I then wrapped it with white wire cord.

Blue Fern Studios Products Used:
Ombré Dreams "Ginger's Dream" Paper
Ombré Dreams "Leslie's Dream" Paper
Treasured Floral Frame

Next, I have a pretty little gift tag for you :)

"Follow Your Dream"
Everyone loves butterflies {including me!}, so I was very excited to see the new "Royal Monarchs" that were recently released! Paired with a set of the {also new} "Layering Stems", I thought the combination suited nicely this particular sentiment.

The butterfly piece was covered with Ranger Glossy Accents and then sprinkled with microbeads. Allow the glossy accents to dry on their own rather than heating them with a heat gun as the glossy accents tend to bubble up and scorch otherwise. The stems were misted with Heidi Swapp Color Shine in "Blush" and, while wet, covered with clear embossing powder and set with a heat gun.

Blue Fern Studios Products Used:
Ombré Dreams "Dream Cards" Paper
Royal Monarchs
Layering Stems

Thank-you for visiting today and taking a look at my projects this month!

Don't forget to check out our sketch challenge while you're here- there's still some time to get your entry in!


Thursday, March 27, 2014

March Projects w/Erin Blegen

Hello :)

Erin Blegen here today to share my March projects with you. I always enjoy varying my projects each month, so today I have for you a layout, a card, and a tag...a little bit of something for everyone.

Let's get started :)

"Always"
The large panels available from Blue Fern Studios like this "Number Grid" one are so great for working with 12" x 12" layouts. I like to cut mine up and make them suit my design. 


I painted the panel white before randomly dabbing it with embossing ink, sprinkling with Stampendous "Shabby Pink Embossing Enamel", and setting with a heat gun. I love the pretty pink and textured bits splattered throughout the chipboard to mimic my background.

Blue Fern Studios Products Used:
Number Grid

"Different" Card

As like anyone who has ever used chipboard before, sometimes the raw look just suits the project best. Here I've used a few various pieces and have simply dabbed them randomly with a Prima white chalk edger pad before adding them to my project. Combined with some of the more subtle Blue Fern Studios papers, I created a neutral, monochromatic look which I love.


Blue Fern Studios Products Used:
Blue Fern Garden "Love Letters"
Blue Fern Garden "Calling Cards"
Checker Bits
Film Strips
Eclectic Hearts

"Love" Tag
 Sometimes downsizing a chipboard piece can give you exactly what you need for a particular project. Here I've taken the middle out of the "Helen's Doily" to beautifully accent this tag. Primed with gesso, covered with a Prima "Shabby Tote" chalk edger pad, and adorned with pearls :) The Blue Fern Garden "Picnic" paper was whitewashed with gesso to make it a little bit more subtle in order to achieve the look I was going for.


Blue Fern Studios Products Used:
Blue Fern Garden "Picnic"
Blue Fern Garden "Calling Cards"
Helen's Doily

That's it for me! I hope you enjoyed :)

Don't forget about our March Sketch Challenge- still plenty of time to play along!

Friday, December 27, 2013

Two Projects from Erin!

Good morning! I hope that your Christmas went well and that you're getting ready to welcome in a new year :). We're back to business as usual here at Blue Fern Studios, and I'm happy to share some classy Christmas cheer with you all, as well as a sweet and simple project too!

"Let it Snow"
Blue Fern Studios has released some beautiful holiday themed chipboard pieces over the past month or so, as well as some wintry ones as well- simply perfect for this time of year! The "Let it Snow" set includes the title piece and snowflake you see here, as well as a tree and some additional snowflakes. A must-have!

For the frame I first primed with gesso before applying embossing ink. I then sprinkled on some sparkly white and gold embossing powders as well as some glitter and then setting with a heat gun. The snowflake was treated with white embossing powder and set. Finally, the title piece was stamped with chalk ink and sealed with some glossy accents.

Blue Fern Studios Products Used:
Let it Snow
Ever After Frame Set

Next I have a sweet and simple card for you!

"A Very Good Life"
I love the "Winter Page Dangles", and I have been envisioning creating a tall, narrow card with one for a while now. I wanted to make sure the chipboard piece was the focus, so I kept the rest of my card fairly simple. 

I used a white chalk ink before adding embossing ink and glittery white embossing powder to my chipboard. It turned out sparkly and feminine which was perfect for my girly card!

Blue Fern Studios Products Used:
Winter Page Dangles

Thank-you for stopping by amidst the holiday happenings! 
I hope you've had a chance to play along with our sketch challenge this month too- there's still time left to enter!

Friday, December 13, 2013

3 projects from Frau_Muller and Goodbye

Hello everyone!
Here is Frau_Muller with you today and this is my last post for Blue Fern Studios
The time I spent with BFS was one of the most exciting experiments in my scrap-life. I'm so proud and happy to have been the part of the BFS team  I'd like to say big thanks to all team members.

And now I'ld like to represent you my 2 cards and tag, created for BFS:
The 1st one is vintage card
 I really love vintage style.That's why i love to use distress crackle paint and alcohol ink for chipboard pieces.
 I've used:
Symphony Border

My second card I also a little vintage amazing butterflies
I've covered all the chipboard pieces with gold acrylic paint.

And my vintage tag:
Some close-ups
I've covered all  chipboard  with gold glitter.

For card and tag I've used:
Leafy Page Accents
 Well, that's it.)))
Thanks again for all of you who gave me support and appreciated my work at BFS!
Have a lovely day!

Wednesday, November 27, 2013

Clean Up! w/Erin Blegen

Good morning! Erin Blegen here with you today to share a few projects using some of the newer Blue Fern Studios products. I started out with a layout and then decided to clean up my scrap space and create next a card and tag using paper and chipboard scraps. What a way to get organized and creative at the same time ;)!

"What a Wonderful Day!"
I was looking back on some older photos and found this precious set of my middle child from the summer of 2012. I remember clearly this day- and it truly was wonderful :). I wanted to create something happy, conveying that through my fun color scheme and accompanying chipboard elements. Using one of the Film Strips pieces, I was able to include a few extra little photos from that day :)

 I love these adorable, contemporary Memory Frames! I simply dabbed this one with a chalk edger pad.

A simple coat of yellow acrylic paint dressed up these Shabby Bricks Bits pieces, which added to my layering with fun texture and interest :)

Blue Fern Studios Products Used:
Memory Frames
Film Strips
Shabby Bricks Bits

Next up, I have my "scrap" projects:

"Love"
Since I had the Memory Frames out, I decided to create a sweet tag. After priming with gesso, I applied some clear embossing ink, mist, and white sparkly embossing powder and set it with a heat gun.


 Blue Fern Studios Products Used:
Memory Frames
Swirly Doodle

"Reach & Wander"
 For my final project, I took some of the Tattered Diamond Bits and a partial Film Strips piece to accent this simple scrap card using up some leftover papers from my layout. Sometimes all you need is a little gesso and maybe some stamping and you're set!

Blue Fern Studios Products Used:
Tattered Diamond Bits
Film Strips

Thank-you for stopping by the Blue Fern Studios blog today!
Have you had a chance to play along with this month's sketch challenge? Check it out- there's still some time :)!

Monday, November 11, 2013

Just a little something from Kristine


Hi Everyone!

Kristine here to share some projects with you today. 

AND.... I have made a mini-tutorial for you :) 
Enjoy! 


***


Cute stuff

I like to make my own backgrounds for my layouts, and this time I made a step by step mini-tutorial on how you can do it, and how to use and include chipboard on your background.

(Sorry for bad pictures, and some of the colors is wrong...)


1. Gather your supply. I used:
- Mod Podge
- Modeling paste
- Palette knife
- torn paper with different textures
- heat tool
- Canvas or cardstock
- Shabby brick panel
- Some chipboard leftovers


2. Use Mod podge to glue down the paper, in 3-4 layers.

3. When you are done gluing on paper, put on some chipboard. 

 4. I have cut out a piece of the 12x12" Shabby brick panel, and are using it as a stencil. 
 5. Put on modeling paste, a thick layer. 
 6. To create texture use the palette knife and tap it over det modeling paste before removing the chipboard. 
 7. Remove the brick chipboard, and use the heat tool to dry.
Place the brick chipboard over a new area of the layout, and repeat step 5-7. 

 8. After the modeling paste is dry, choose one or two colorsprays of choice and spray it over the modeling paste. After dyring, you can stamp over with a stamp, to create more texture.
Now the background is finish. 


Here is the end result, I hope you like it :)

I have used these Blue Fern Studios Chipboards: 

Good Vibes
 Shabby brick panel

Spring branch


In the end I just want to share a tag with you


Lovetag


I have used these Blue Fern Studios Chipboards:

Brigitte butterfly set

quatrefoil page panel

Good vibes

I hope you found some inspiration here today :)

Friday, September 27, 2013

Parts & Pieces w/Erin Blegen

Hello Blue Fern Studios friends! Erin Blegen here today with my last two projects for the month, showing you how to use up some of your bits and pieces for those who like to piece apart your chipboard to make the most of it. We all like our product to go a little further!

For both projects, I've used 7 Dots Studio products as we continue our month-long swap with them. What fun it has been combining them with Blue Fern chipboard!

First up, I have a canvas to share:

"Grown Up"
I had two pieces remaining from the Doily Bunting and Page Chains sets. I made them a part of my mixed media background by applying gesso, tape, and embossing powder over top of them.


Products Used:

Page Chains

Doily Bunting

(7 Dots Studio Products Used: "Messy Head" Collection paper and Elements, "All I Ever" Collection paper and Stickers, "9th Wave" Collection paper, and "Hopefully" Collection Stickers)

Next up, I have a very girly tag :)
"Love Happens!" Tag
For this tag, I took the top section of the Princess Window and one of the Heart Set pieces. 

I simply painted the heart piece with gesso to accent the title of my tag. The window piece was primed with gesso before being traced with glossy accents. While the glossy accents was still wet, I sprinkled on broken glass glitter, star sequins, and microbeads. 

Products Used:

Princess Window

Heart Set

(7 Dots Studio Products Used: "Messy Head" 6x6 Designer Pad and Elements)

Thank-you so very much for stopping by today! I hope you've had the chance to play along with our monthly sketch challenge- just a few more days left!

See you soon :)