Showing posts with label Graduated Squares. Show all posts

Monday, June 6, 2016

June Attic Charm Inspiration from Cathi

I have a big interest in genealogy and when I was younger my aunt gave me copies of many photos of our ancestors, I have some really great images and this month I decided to use family vintage photos for all of my layouts! I just love preserving our history a little bit this way.


For my first layout I feature a gorgeous photo of my grandfather Ernie Jones, circa 1910. I just love the way he is dressed and how they have him seated at a table. I used the Attic Charm Attic Key paper as my base and the gorgeous Mercantile paper featuring the chair image to reflect this in the layers I added to the layout. My title Treasure came form the Calling Cards page.


In this close up you can see the gorgeous Attic Trunk chipboard piece which has been embossed with Imagine Ink Embossing Powder in Ginger and "antiqued" with Sage Embossing Powder!  I have added some Attic Charm Daisies and Courtship Blooms.


In this close up you can see the Mini Flourish covered in gorgeous Imagine Ink Fool's Gold Glitter. I did a lot of background work and I have stamped the Halftone stamps, the postmark stamp from the Desk Set stamp set and a favorite of mine the cross texture stamp from Forever stamp set.  I added mist and masking using my texture paste.


There are lots of gorgeous Blue Fern Flowers on this layout, I have used the Attic Charm Glitter Roses, Courtship Blooms and Tranquil Lilies.  I have used the Imagine Ink Fool's Gold Glitter again to color the Vintage Lock chipboard.  I finished off the layout with lots of stitching around the edges.


Blue Fern Studios Supplies:

Paper:
Blue Fern Studios Attic Charm Collection~Attic Key
Blue Fern Studios Attic Charm Collection~Mercantile
Blue Fern Studios Tranquility Collection~Calling Cards

Chipboard:
Attic Trunk
Mini Flourishes
Vintage Locks

Imagine Ink Embossing Powder:
Ginger
Sage

Imagine Ink Glitter:
Fool's Gold

Stamps:
Desk Set
Forever
Halftone


This next layout features my great grandmother, Helen Tobin, when she was a young girl along with her sister. I just love the pose with the flower basket and chair...they don't look too happy here but I think they had to stand still for ages back in those days to take the photos!  The base of the layout is the gorgeous Haberdashery paper.


Here in this closeup you can see a cutout from the Calling Cards paper, "The Good Old Days". I have also used the Mercantile paper to build up my layers. Lots of Courtship Blooms here and Attic Charm Daisies.


I used the Graduated Squares and embossed them in Cotton Candy Imagine Ink Embossing Powder and added these to my layers. I tucked in another cut out from the Calling Cards paper and added some kraft tags for journaling.


In my final close up for this layout you can see my trio of chipboard (Film Strip, Vintage Locks, and Adorable) embossed in the gorgeous Ginger Imagine Ink Embossing Powder. I have added some stamping of the cross background stamp for the Forever stamp set. I also love the Making Plans stamp as it is a collage of some of my favorite texture backgrounds and depending on what part of the stamp I ink up I can get book page, script, rules, blue prints, or several other gorgeous patterns! The final stamp I added to the background is the needle book stamp from the Needlework stamp set, randomly around the edges. I added some misting and some masking with texture paste and a bit of splattering. To finish off this layout I added some stitching around the edges.

Blue Fern Studios Supplies:

Paper:
Blue Fern Studios Attic Charm Collection~Haberdashery
Blue Fern Studios Attic Charm Collection~Mercantile
Blue Fern Studios Attic Charm Collection~Calling Cards

Chipboard:
Graduated Squares
Vintage Locks
Adorable
Film Strips

Imagine Ink Embossing Powder:
Cotton Candy
Ginger

Stamps:
Forever
Making Plans
Needlework


My final layout is a layout I did for the sketch challenge. This photo is of my Great Aunt Marge who had it taken for my Great Uncle Les before he went off to war. He took it with him to remember her and I called this layout Patience because that is what they needed to make it through war time to see each other again and go on to have many years together and many many children!  For the base paper for this layout I chose the Attic Charm Curio paper. I took many cut outs from the Calling Cards paper to layer under my photo.  Here is the challenge sketch if you want to join in!


In this closeup you can see the gorgeous Attic Charm Glitter Roses and Daisies, as well as a Courtship Rose. I have layered the huge beautiful Roman Clock Set - Large, embossed with Imagine Ink Embossing Powder in Oatmeal underneath the photo.


I embossed the Patience chipboard piece with Imagine Ink Embossing Powder in Mushroom as well as flecks of Oatmeal.  I have added lace and pears to match her dress and necklace as part of my layout and I have tucked in some Bits of Honey chipboard pieces into the photo cluster as well.


To finish off the layout I added some background stamping using the gorgeous cross texture stamp yet again from the Forever set. I added the brick wall stamp from Essential Textures and also the clock stamp from the Bird Vignettes stamp set.  I tucked in a tag with some typed journaling about my great aunt's story and added some stitching again to finish off the layout.

Blue Fern Studios Supplies:

Paper:
Blue Fern Studios Attic Charm Collection~Curio
Blue Fern Studios Tranquility Collection~Calling Cards

Chipboard:
Bits of Honey
Roman Clock - Large
Patience

Imagine Ink Embossing Powder:
Oatmeal
Mushroom

Stamps:
Essential Textures
Forever
Bird Vignettes

I really enjoyed with Attic Charm set of layouts with a family history theme. I love that the photos are all my relations! I just love the care they took when making photos back then and am grateful for all the gorgeous memories! I hope you enjoyed these and am glad you took the time to visit! The Attic Charm collection is a gorgeous one!


Friday, March 18, 2016

Keren's Projects with Courtship Lane Collection


Hello Everyone!!
Its Keren here with two projects for Blue Fern Studios!
I usually create two layouts but this time I wanted to create something different with the Courtship Lane collection.

"Home Sweet Home Memories"


I really love the vintage house images on the Courtship Lane papers so I fussy cut them to fit into my three part shadow box frame.
I cut three different houses to fit each of the boxes as they measured 3,4 and 5 inches squared respectively. The houses were cut out of the West Plaza, East Plaza and Calling cards papers.


The middle box was framed with one of the graduated squares. The right box was framed with the Memory frame. Finally I placed the Iron Signage chipboard on the top corner of the left shadow box.
All three chipboard pieces were embossed in both Oatmeal and Sage embossing powders.
Then I added a "Home Sweet Home" phrase out of the Calling Cards paper to add to the sign.

I added some matching  Courtship flowers and other vines to embellish around the frames as well as the Evening Lamp Post  chipboard which was simply painted with acrylic paint.


<<<<<<>>>>>

"Sail Away"

For my second project, I used the Town Gossip paper from the Courtship Lane  for the background.


I framed the photo in one of the Beaded Strings chipboard which was embossed with Tangerine embossing powder. I also added the swirly doodle under the photo. I cut it in half so it would show under both ends of the photo. Both the light house chipboard piece from the "By the Sea" set, were embossed in Ginger embossing powder


The sail away title was sprayed in brown to match the Courtship Lane flowers.
I also used the Journey stamp to create some texture in the background with brown ink.


Thank you so much for visiting the Blue Fern Studios Blog

Have a wonderful day!!

Keren


Friday, December 11, 2015

Inspiration from Elena Morgun

Hello!
Today Elena Morgun is here. Glad to see you here, I hope you are having great sunny days! I am happy to share my newest creation using lots of gorgeous Blue Fern Studios products. I also made with a video tutorial.

Everything is quite easy, but the result is quite impressive!
New Blue Fern Embossing powder is just wonderful. Enjoy the video.

Blue Fern Studios product used
  • Autumn Anthology paper
  • Vintage Christmas paper
  • Stamp: Forever
  • Stamp: Journey
  • Chipboard: Graduated Squares
  • Chipboard: Flutter Medley
  • Chipboard: Sweet Dreams
  • Imagine Ink: Embossing powder - Fern
  • Imagine Ink: Embossing powder - Petal
Also I would like to share a tags today.
Blue Fern Studios product used
  • Autumn Anthology paper
  • Chipboard: Shabby Brick Panel
  • Chipboard: Roman Clock Set - Small
  • Imagine Ink: Embossing powder - Fern
  • Imagine Ink: Embossing powder - Petal
Hope to see you soon again!
Take care,
Elena Morgun

Monday, August 24, 2015

August projects & Video tutorial by Marilyn

Hi everyone!!  Marilyn  here with you today  to share two projects and a video tutorial using the beautiful Frolic collection.

DREAM

I recently traveled to Colombia to give workshops in a scrapbooking event in this country.  It was a wonderful experience and I want to make an album with all these lovely memories from the different places that I've been visited and here's my first page with a lovely memory with three new friends..I'm with the other two  teachers and the owner of the event.
I selected the Graduated Squares chipboards to create the design in my page.   You will see all the work process of this page in my video tutorial that I hope you  find some inspiration! :)

My title the word "Dream" that I applied stickels  but I can't captured the "frost"effect with the camera.

I love the Bird Ornaments and I applied stickles, too.


Blue Fern Studios Products Used:
Frolic collection: Amoroso paper
Chipboards:
Graduated Squares
Bird Ornaments
Dream- word


and the video tutorial...Enjoy it!!! :)


 LIFETIME
For my second project I worked a page  without lot of layers just more simple like I want my life lately, it is a photo that hubby took me a week ago while I was celebrating my birthday and although isn't a perfect photo I wanted to document. I'm celebrating and enjoying everything lately, a new day, the new opportunities, the little things in life...
I selected the calling cards papers...I just love it!!! and to complete my design I chose the beautiful Royal Monarch chipboards.
My title is from the Chunky words chipboard...the lifetime word that I gave a coat of gesso then I applied two colors of embossing powder in rose and white and I did the same technique to the butterflies, too.

I embossed  with the Journey stamp around my photo  .


Blue Fern Products Used:
Frolic collection: Calling Cards
Chipboards:
Royal Monarch
Chunky Words


Thanks for stopping by...Until next time!!
Have a great day!!xx

Marilyn Rivera


Tuesday, July 21, 2015

Bente's July inspiration.

Hi, I hope all of you in the northern hemisphere are enjoying a lovely Summer, 
and that the Winter is not too bad on the rest of you :-) 

Today I have some layouts to share with you that are absolutely 'fresh from the press' so to speak.
I was in the UK last week celebrating my eldest daughters graduation from university and 
when I got back I had to finish my projects rapidly!! 
-But with such awesome products to play with it's not a problem:-)


My first page is based upon a pink paper from the Montage collection. 
On top is a paper from the Deja Vu collection. As yo can see the collections mix very well.
-Especially when you add a litttle mixed media here and there. :-)
I 'framed' the whole page with the largest sized Graduated Squares, painted white then inked around.


 The gorgeous piece of chipboardbelow the picture is one of the recent shapes and called
  Rock Wall Bits. I painted it beige , stapmed on it and addedsome pink glitter. The part of the Grunge Frames chipboard piece above the photo was given the same treatment. I just love to add glitter to my pages at the moment :-)


The cute small dots scattered all over my page are the insides of then alpha stickers that I used.


I used the Montage collection for my second project. I love all the lovely yellow papers in that collection:-)


And here are some close ups of the details.

I used one of the Memory Frames as my title and hid it partially behind my photo.


The arrows are from the Directions set and simply painted black.


Making banner-pieces or mats behind the photos are such great ways to use up those left over pieces from your favourite patterned papers.


And finally here is my page for the current sketch challenge that you can find HERE.


The chipboards I used are:
Laughter, Happy, Smile and Floral Clock.

And a closer peek at some of the details:


That's all from me for today!! 
Have a good week! 


Wednesday, May 13, 2015

Two mixed media projects by Marie-Josée

 Hello all,

I hope you are doing fine today. In this blog post, I will show you two mixed media projects I created using some of my favorite pieces of Blue Fern Studios chipboard, which are perfect for mixed media projects.

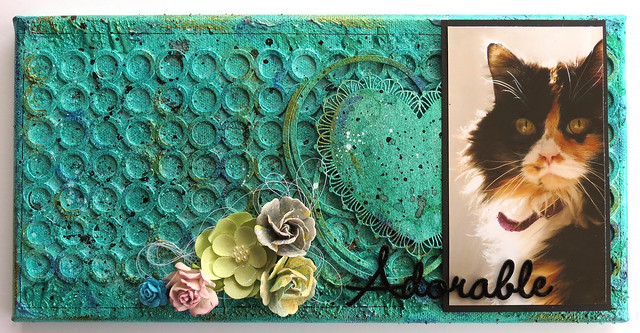
"Adorable" kitty canvas

This is my beautiful kitty, Pretzel. She passed away on April 20 at the age of 16. I wanted to create something in her memory and I thought a canvas would be perfect.


First, I chose a 6" x 12" canvas. I cut a piece of the Mini Rings Panel and glued it to my canvas. Then, I applied gesso all over my canvas. I also applied gesso to the heart (from the Frilly Hearts set) and the circles (from the Graduated Circles set).

The word Adorable (from the French Words set) was heat embossed with black embossing powder.

Then, I painted the whole thing using various ColourArte products : paints, gels and mists. I mainly used teal, but I also added touches of gold and purple here and there. I finished with black and white ink splatters.

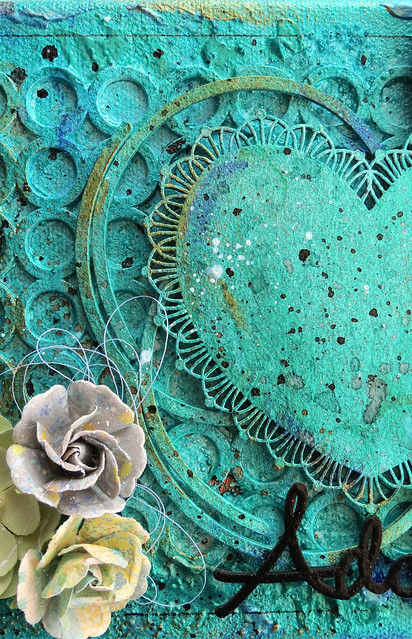
Here's a close-up view of the Frilly Heart and the Graduated Circles...


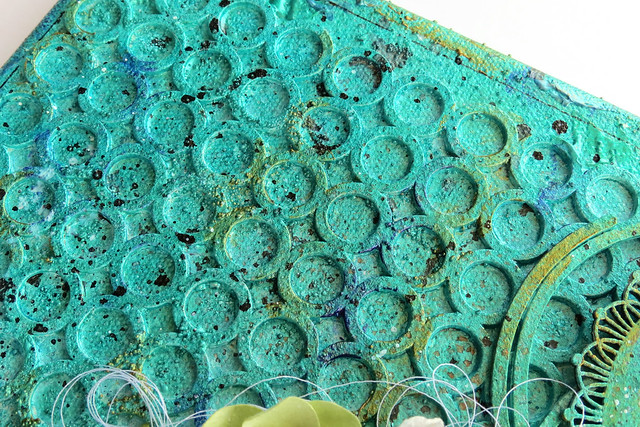
... and here's a closeup view of the background!


Blue Fern Studios products used:
Graduated Circles
Frilly Hearts
Mini Rings Panel
French Words

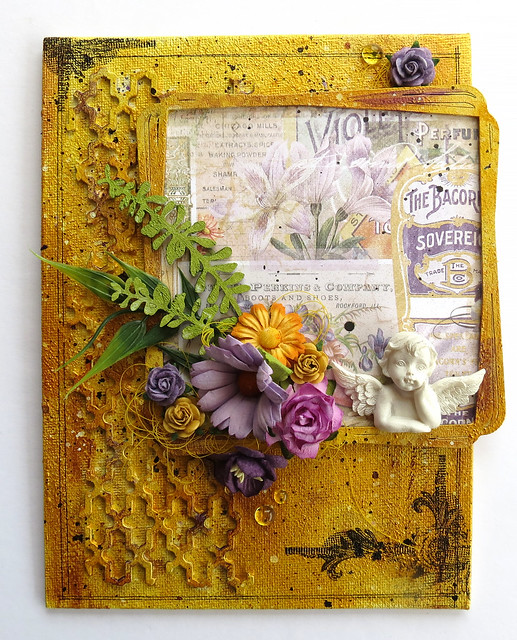
Angel canvas


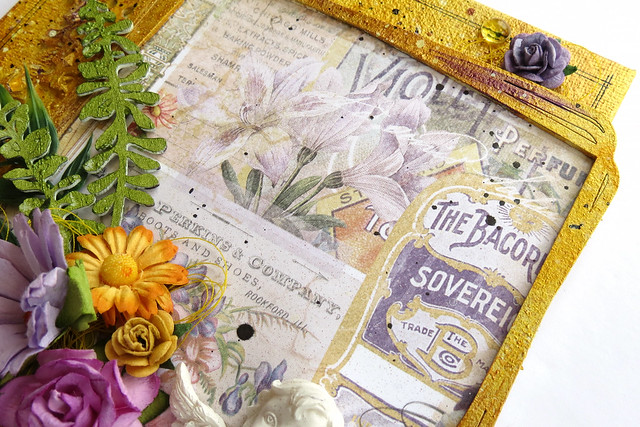
For this canvas, I used the colors of the Déjà Vu collection as my inspiration. I used of piece of the Friperies paper as my starting point. I cut it to fit a piece of the Graduated Squares set.

Here's a closeup view of the Déjà Vu paper and a piece of the Graduated squares set.


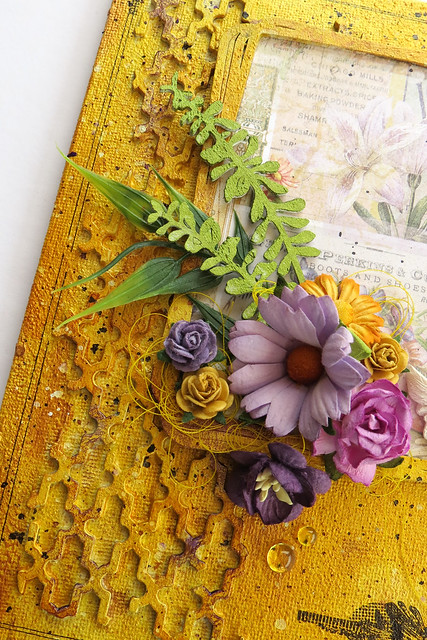
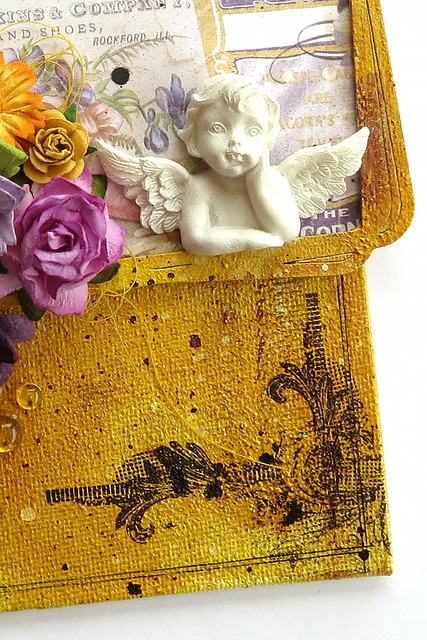
I worked exactly the same way I worked for the previous canvas, using similar products. I just used different colors and different chipboards. Here you see a close-up view of a piece of the Turkish Bits set as well as of a piece of the Layering Stems set.


Finally, I also used a stamp from the Halftone Stamps set, which matches the Déjà Vu collection, with black ink.


Blue Fern Studios products used:
Graduated Squares
Turkish Bits
Layering Stems
Déjà Vu collection (Friperies paper and Halftone stamps)