Wednesday, April 16, 2014

Chipboard alteration tutorial by Marie-Josée

Hello all!

Today, I have a quick and easy chipboard alteration tutorial for you.

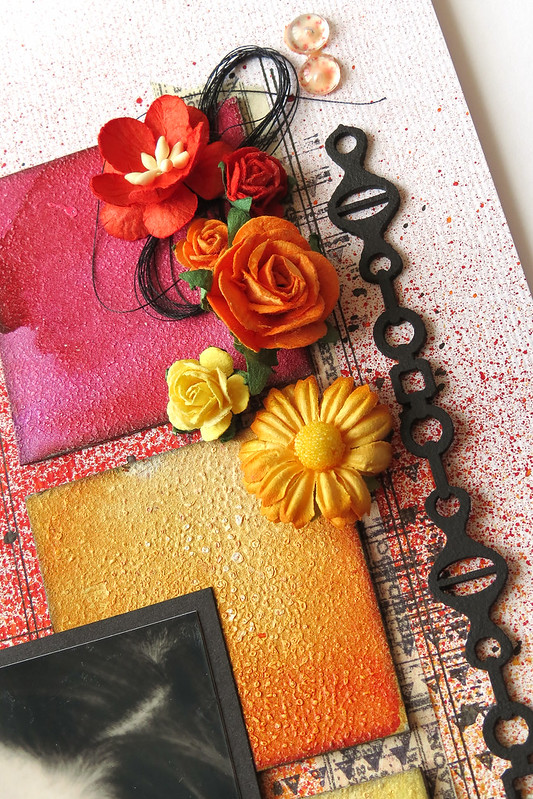
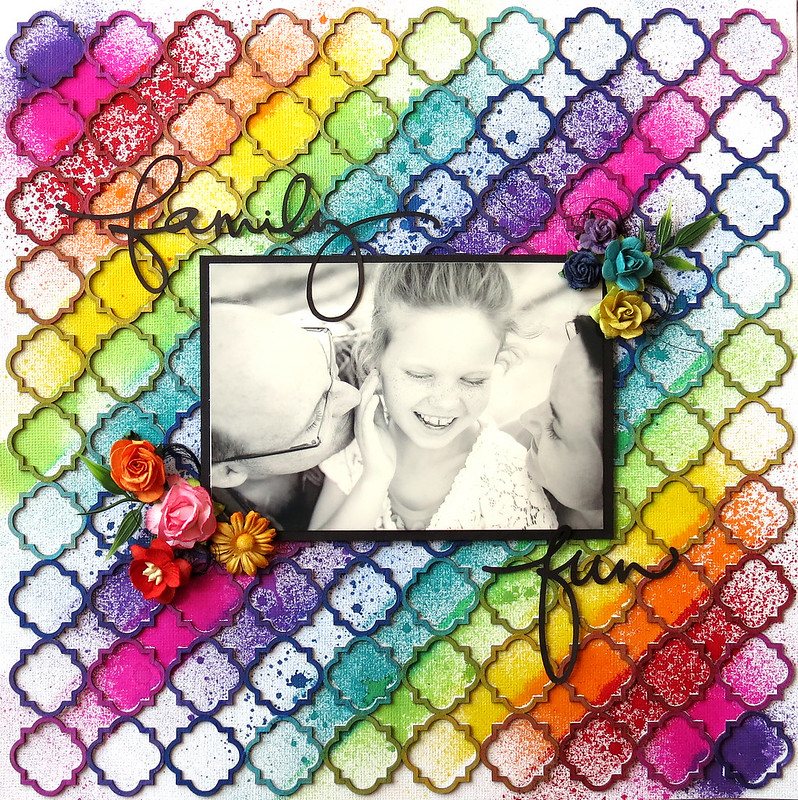
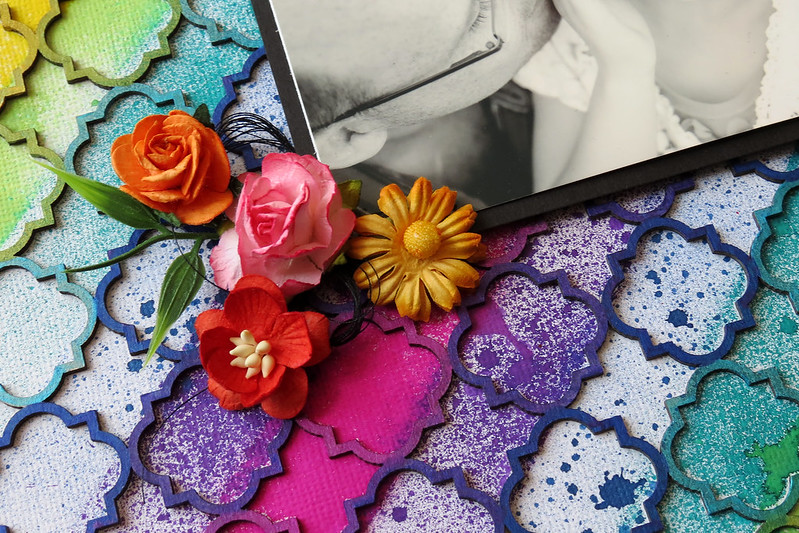
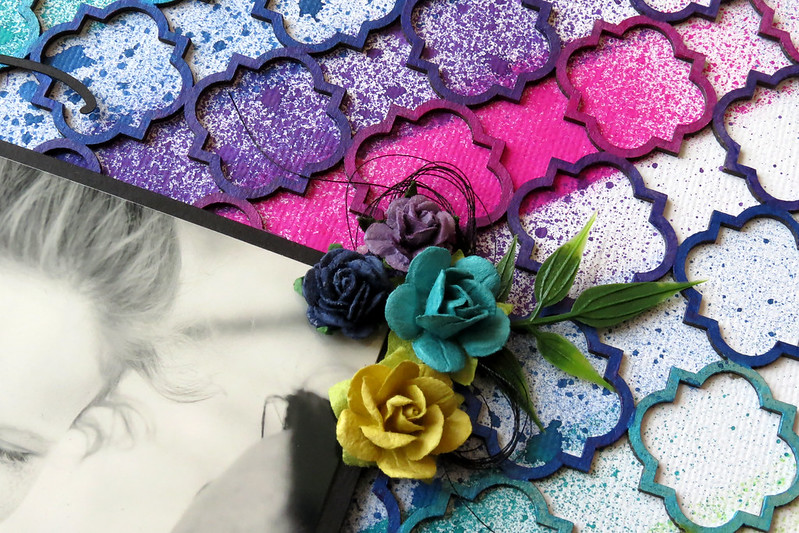
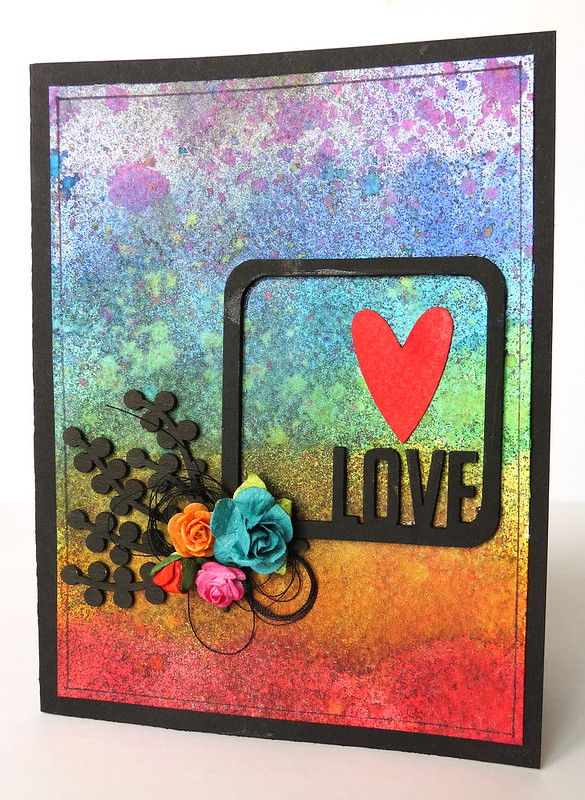
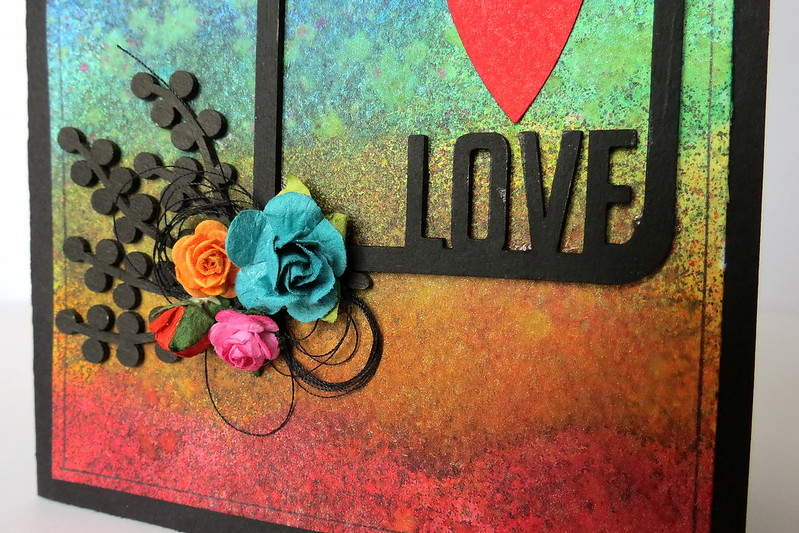
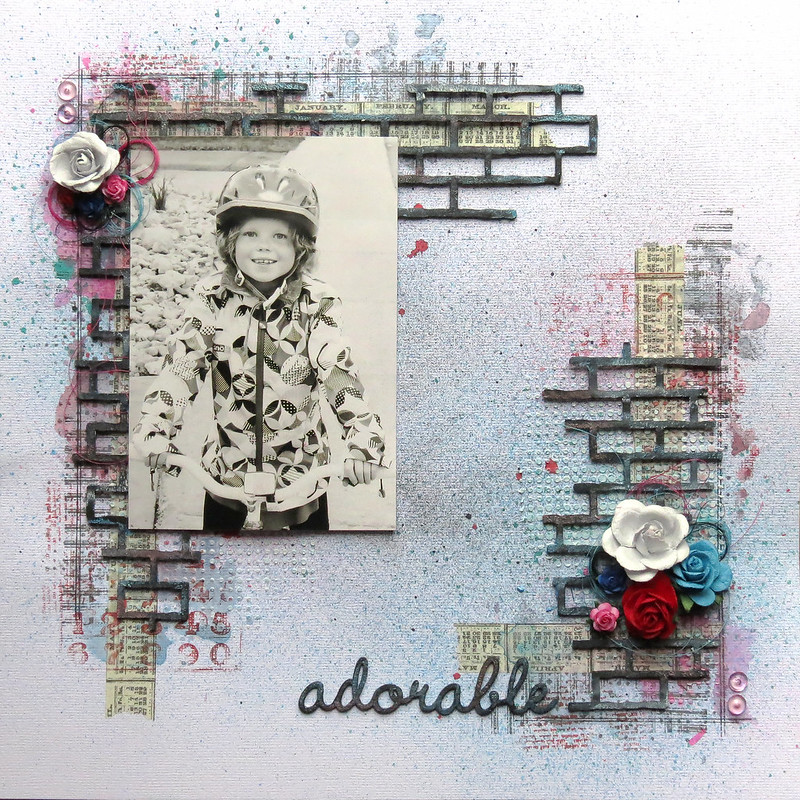
Here's the layout I created with the altered chipboards. I used chipboards from the Shabby Brick Bits set and the Good Vibes set.

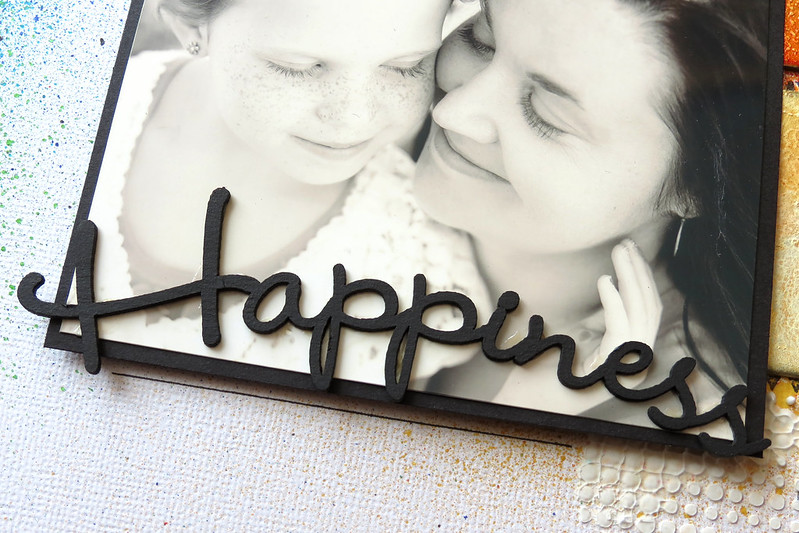
We usually prime our chipboards with white gesso, but for this layout, I used black gesso instead to create another effect.


To alter your chipboard, you will need:

- Black gesso
- A sponge
- Various colors of Faber-Castell Gelatos (choose them according to the colors of your project: here, I used white, metallic blue and metallic pink)
- Paintbrush
- Water

1) Alter your chipboard with black gesso. Apply it with the sponge, it's easier and less messy. Let dry or dry with a heat gun.


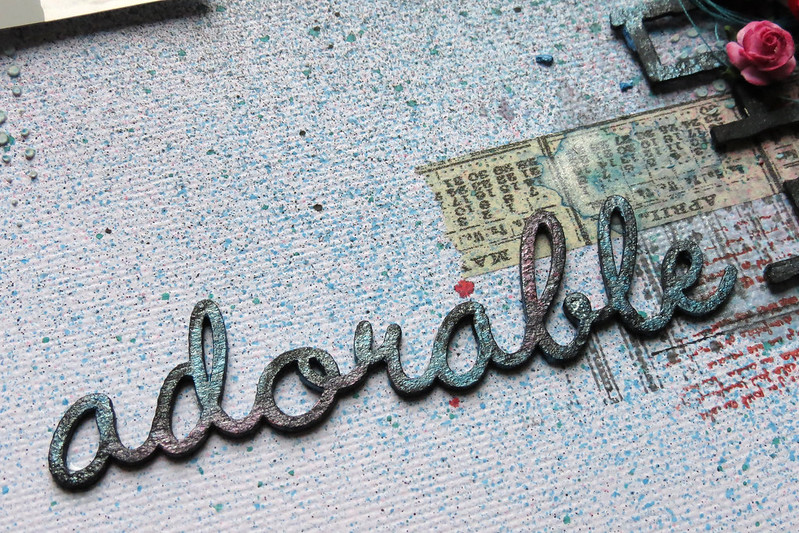
2) Apply various colors of Gelatos randomly on your chipboard.


3) Dip your paintbrush in the water and blend the colors. Don't use too much water. Let dry or dry with a heat gun. Once dry, if needed, add more color.


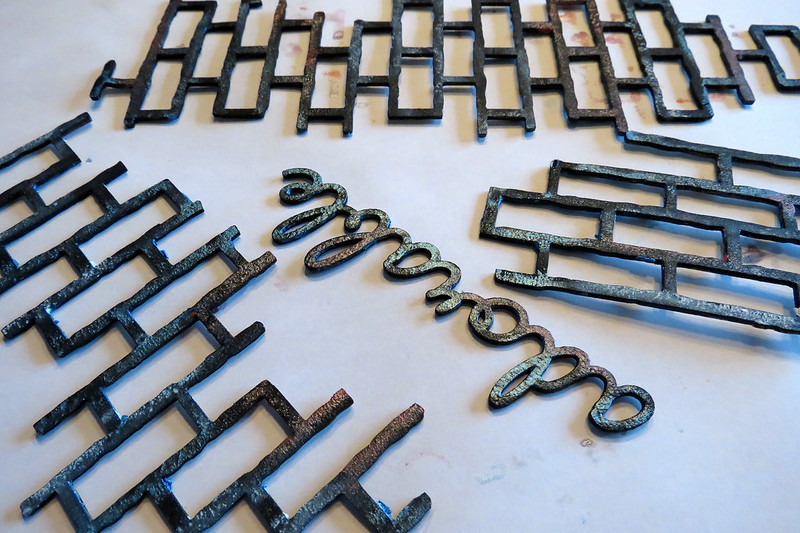
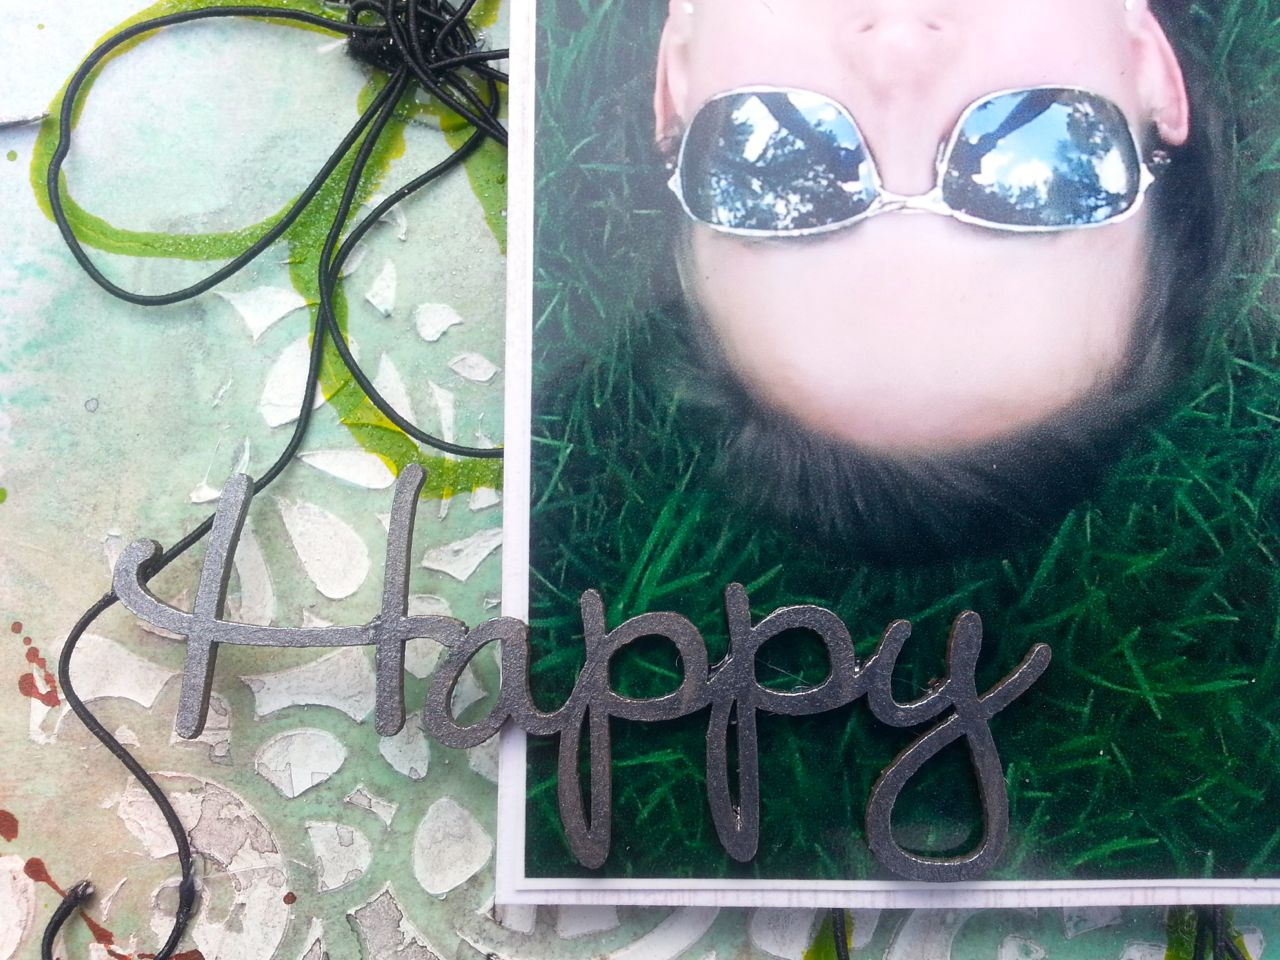
Here are some close-up views of the altered chipboard on my layout.


Monday, April 14, 2014

3 projects by Evgenia Petzer

Hello dear friends! Its Evgenia Petzer with you today. I have 2 cards to show you today, both of them are made uisng Blue Fern Garden papers and then a hanmade notebook/journal, that has a fabric cover.
So lets start with this one.

 BFS products used: Blue Fern Garden paper, Organic Vine Corner - Large

 I used acorns on this card and added fowersoft inside them...

my second card...

BFS products used: Blue Fern Garden paper, Lace Heart Border, doily bunting

 Absolutely love how you can split this lace heart border for so many pieces and use them separate. I sprinkled mine with silver microbeads.

and a handmade wedding book (for special wishes for a new couple)
I also incorporated the lace that the bride will have on her wedding dress so everything will match perfectly on this special occasion.
 BFS products used: Doily Bunting, Jeweled Page Baubles


 I guess the doily buntng is my most used piece out of all variety that BFS offers- just love it!!!

Have a great day everyone!


Sunday, April 13, 2014

Three rainbow projects by Marie-Josée

Hello, Blue Fern Studios fans!

I hope you are doing great. Today, I will show you three different projects featuring the colors of the rainbow. The weather has been bleak here recently, so I needed a bit of color.

"Happiness" layout


I will start by explaining to you how I created the squares, because it is a technique you can use on any Blue Fern Studios chipboard. For this layout, I used plain cardboard. I covered it with gesso using a sponge and used my heat gun to create texture (small bubbles). Then, I painted each square with three different colors of Twinkling H2O watercolors, starting with the lightest color in the middle of each square. You can also create a similar effect with any watercolor paint ou even with Gelatos.


Then, I used black gesso to alter my title, Happiness (from the Good Vibes set) as well as the two chipboards from the Mixed Chains set. I used a sponge to apply my gesso: it's quicker and less messy.

Here are some close-up views of my layout:


"Family" fun layout

 It took me a lot of time to create this layout, but since I like the end result, I am OK with it!

First, I colored each row (diagonally) of the Quatrefoil panel with various colors of Silks acrylic glazes. You have to be patient, because you will need two coats of paint for the lightest colors.


Then, I used some Dylusions mists to add color to my background. I protected my background with scrap paper and sprayed each row, one at a time. I had to use a lot of scrap paper because it would become wet and I did not want to have stains all over my layout.

Here are some close-up views of my layout:


"Love" card

For this card, I used chipboards from the Memory Frames and Berry Stems sets, that I also altered with black gesso. The background was made with watercolor paper, Twinkling H2Os and various mists.


Saturday, April 12, 2014

Spring inspiration from Maja

Hi, Maja here today. I´m here to show you two layouts and a card I  have made using both papers and chipboards from Blue Fern Studios.

For this first one I began with my stencils, Distress Inks and stamps on the background paper. I used the same colors on my Distress Inks that can be found in the background paper. I added some more small pieces of paper and some chipboard, Chikenwire panel, and  of course losts of flowers and a few more chipboard pieces from Natural Springs Set. 


Blue Fern Studio products used:
Papers: Love Letters, Calling Cards and Signature
Chipboard: Chickenwire Panel and Natural Springs Set

For my next layout I used some more of the gorgeous BFS papers and pieces of Shabby Brick Bits. The background paper has some brick patterns in it so I made some more bricks with my stencils and Distress Ink.


Blue Fern Studios products used are:
Papers: Picnic, Timeless and Boudoir
Chipboard: Shabby Brick Bits

My daughter just turned 20 so this is the card we gave her. I´m not really a cardmaker but if I know that I have a reciever it´s easier. 


Blue Fern Studios products used are:
Papers: Picnic and Calling Cards
Chipboards: All Natural Sets, Petite Boutique Frames and Veranda Cage Set

Thanks for stopping by =)

Thursday, April 10, 2014

Jackie's April Creations

I have two new projects to share today using the gorgeous Blue Fern Garden papers along with some stunning Blue Fern chipboard. Spring is in full swing here, and I couldn't resist playing along with some springy greens, flower motifs and outdoor photos. And for a change - no kid photos (gasp!).


Once again, I loaded my Blue Fern paper down with media. I know I've said this before, but I'm so impressed with how this paper holds up to media. Gesso, mists, paint, ink - I threw them all at the paper.


I love the new Eastern Lantern chippies, and used this one as an elaborate hummingbird feeder. I simply painted it with graphite paint and added some script stamping; the nice thing about such an intricate piece of chipboard is that it doesn't take much.


The birds from the Little Birds set are just too sweet. To add some texture, I dabbed on some Texturez Dazzlerz, then misted overtop.


One of my favourite things about Blue Fern chipboard is all the different titles and words available. I have to admit I am lazy about titles, so having such a large selection of words ready to go is fantastic.

Blue Fern Studios Products

Blue Fern Garden Paper:
- Timeless
- In Bloom

Blue Fern Chipboard:
- Little Birds Set
- Eastern Lanterns
- The Optimist Word Set

The background for my next layout is inspired by a great Irish restaurant we frequent, that has decorative holes in the plaster to reveal the brickwork underneath. The leftover bits from the Shabby Brick Panel have been sitting on my desk, waiting to be used, and they paired brilliantly with the stone viaduct in my picture (which happens to be the one from the Harry Potter movies).


I wanted to keep the bricks understated, but add some subtle texture, so I painted them with super heavy gesso, and once it dried I sponged some on for dimension.


The Manor Hinges were painted, then heat embossed in places with Distress Embossing Powder for an aged patina look.


I love the drama of these Pretty Weeds, and painted them with metallic green paint to make a simple statement in my cluster.


Blue Fern Studios Products:

Blue Fern Garden Papers: 
- In Bloom (x2)
- Timeless
- Calling Cards

Blue Fern Studios:
- Shabby Brick Panel
- All Natural Set
- Pretty Weeds
- Manor Hinges

We always love seeing what you create with Blue Fern Studios products, so please remember to share your projects with us in the Blue Fern Gallery!


Wednesday, April 9, 2014

A Little Bit of Spring

Hi, it's Valerie today, and I've got spring on my mind.  With Easter approaching, I pulled out the Blue Fern Garden paper collection, along with a few chipboard pieces, and created an Easter layout and card.

First up is a layout using the "Picnic"  and "Timeless" paper and a photo of my niece that was taken last Easter. 


I chose the Cosmos Basket as a backdrop for the photos, tucked in a Bohemian Flower with the cluster, and painted some Checker Bits green, as a page accent.  

Here are a couple of close ups of the chipboard pieces:


Next, I created a little Happy Easter card using the Timeless and Calling Cards papers from the Blue Fern Garden collection.  I painted the bunny in the Bunny Basket chipboard set, and used the smallest circle from the Beaded Strings set.  


Lastly, I've had this sweet photo of my nephew that I took when he an infant, that I wanted to use with the Parlour paper.  I first worked with the background to create a grunge look (the Blue Fern Garden paper is perfect for this, since it's good and heavy).  I primed the Lattice Gate with gesso, applied a coat of Inka Gold (Old Silver), and unevenly sponged on some gold Prima Metallic Chalk Edger, to give it a distressed look.  I also primed the Broken Rings, and inked them with black ink.


Here is a close-up of the chipboard pieces:


That's all from me this month.  I love trying to achieve different looks with this chipboard!  
Be sure to stop by tomorrow when Jackie will share a few of her projects with you!