Showing posts with label Brocade Texture Stamp. Show all posts

Monday, March 7, 2016

My march layouts by Marie-Eve Bernard

Hello,

I'm here today to present you my three march creations.  They showcase de new Courtship Lane Collection and the Serendipity collection too. I love those two collections. They are gorgeous. They totally fit my style and I had so much fun creating with such wonderful products. 
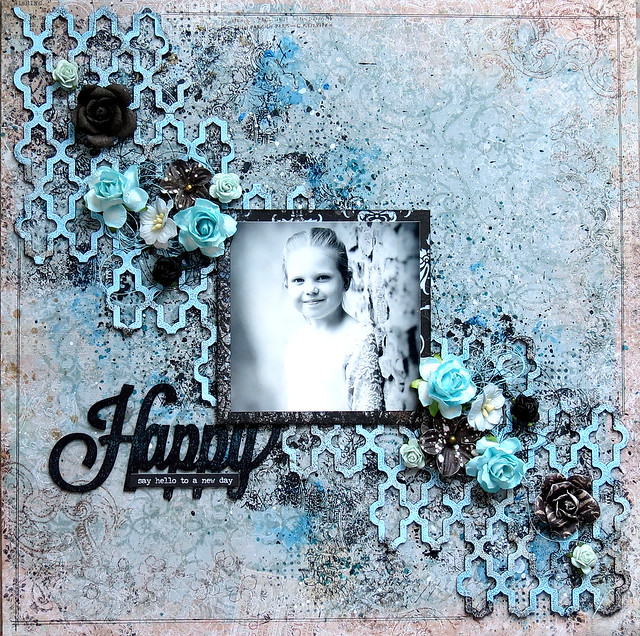
Sweet


I use the Courtship Lane West Plaza as the background for my layout.  


To had texture to my chipboard, I use modeling paste and I directly dab it with my finger.  On my background, I use the Blue Fern Studios Forever Stamp set.


Behind my photo, I use the Swan Gate Chipboard.  I begin with a coat of gesso. Then I add two colours of Imagine Ink Embossing Powder ( Iris and Lilac).  Finally, i add a few touches of the Imagine Ink Glitter in grape.

Blue Fern Studios Products used:

Papers
- Courtship Lane West Plaza
 -Courtship Lane Est Plaza

Chipboards
- Cute, Sweet, Sassy
- Swan Gate

Imagine Ink Embossing Powder
- Iris
- Lilac

Imagine Ink Glitter
-Grape

Stamps set:
-  Forever
Fascination


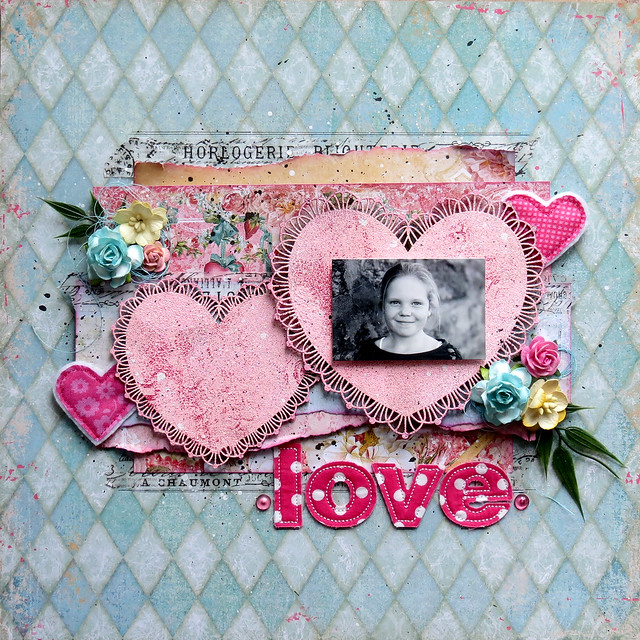
To create my background, I use the Glee paper from the Serendipity collection.


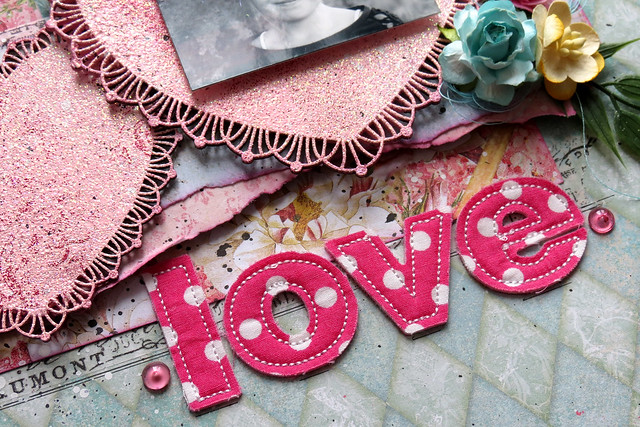
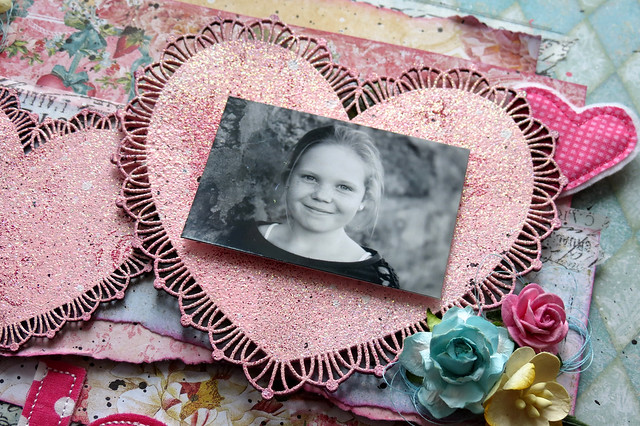
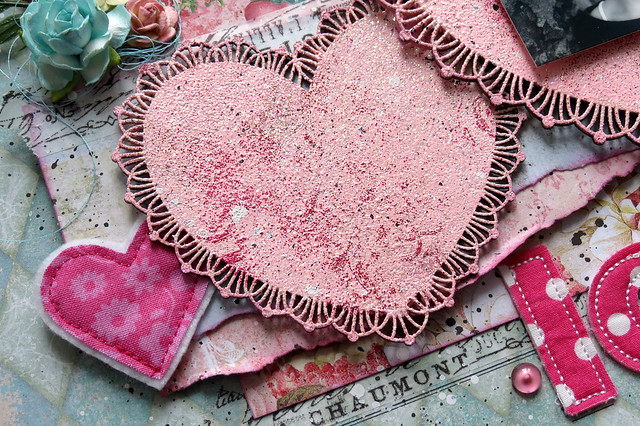
To alter the Fascination chipboard, i use modeling paste and apply it with my finger to give it texture.  Then, I paint it with watercolours in different shades of pink.  For the rose bouquet chipboard, i use a coat of gesso and paint it with watercolours, leaving some white space. 


Blue Fern Studios Products used:

Papers
- Serendipity glee 

Chipboards
- Serendipity Words 2
- Rose bouquet 

Stamps set:
-  Brocade Texture

I Think you're wonderful


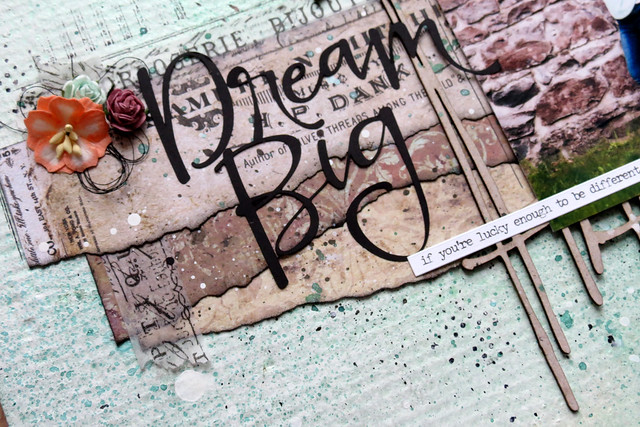
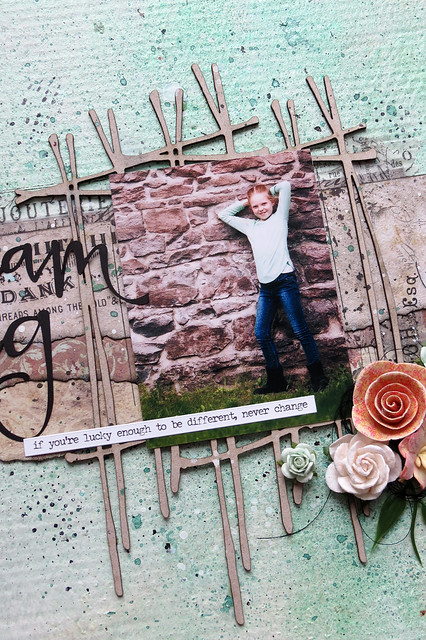
For the background of my layout, I use the Parkway paper from the Courtship Lane Collection. On my background, I use two stamp set :  Forever ans Arcadia Texture.


I emboss the Chelsea medallion chipboard with the Imagine Ink embossing powder Tangerine. Then I cut it in half to position it underneath my picture.


For the my title (I think you're wonderful chipboard), i apply a coat of gesso and I add modelling paste only on the wonderful with my finger.   I paint the wonderful with watercolours.

Blue Fern Studios Products used:

Papers
- Courtship Lane Parkway
 -Courtship Lane Calling Cards

Chipboards
- Chelsea Medallion
- I think you're wonderful

Imagine Ink Embossing Powder
- Tangerine

Stamps set:
-  Forever
-Arcadia Texture

Thank you and I hope that my creations inspires you! Have fun with those two new collection. See you next month!

Marie-Eve Bernard  

Sunday, February 21, 2016

Three layouts, three collections by Marie-Josee

Hello, Blue Fern Studios fans!

Today, I will show you three layouts I created with the latest Blue Fern Studios collections!

"Happy" layout with the Serendipity collection

Here's the layout I created with the latest collection, Serendipity. I used the Imagination paper as my background, with I altered with black ink and the Arcadia Textures stamps.


The chipboard I used in the background is the Turkish Panel. I used only a part of it.


I altered it first with a black ink pad. Then, I used the Sea Mist embossing powder on top. I did not cover it completely. I wanted to see some black.


For the title, I used a chipboard from the Happy, Heart, Love chipboard set. I altered with a black ink pad, and I also added teal spray ink.


"Love" layout with the Blush collection:

For the background of this layout, I used the Charmed paper from the Blush collection.

I used the Frilly Hearts chipboard set as the focal point of my layout. First, I altered them with light pink paint. Then, I embossed them with the Cotton Candy embossing powder. Using the Brocade Texture stamp, I added patterns here and there with embossing ink and color using the Fuchsia embossing powder.


"Dream Big" layout with the Timeless collection

The background of this layout is made of recycled cardboard, which I altered with various mediums.

I used scraps of paper of the Timeless collection that were left after I created other layouts. I love how their colors fit with the background of the picture I used.


I also used the Crossing the Lines chipboard behind my photo.


That's it for today. I hope you enjoyed seeing my projects!

Friday, February 12, 2016

February Inspiration with Sandi Clarkson!

"On the Road"

Hello, Blue Fern fans! Sandi here with you today sharing my February projects with 3 different collections. 
For this project, I've chosen the Serendipity range which works nicely with this particular photo of my daughter. As have several others, I've chosen Contemplation as my background layer. It seems to be quite popular! I really went to town on the mixed media with this one  .. it is hard to even see my stamping. 


The Swan Gate is a gorgeous piece of chipboard! I've used it here as a photo layer along with some random pieces of Calling Cards and Chronicle.  The gate was heat embossed with Ginger Embossing Powder with various intensity of heat so that some of the powder is not totally embossed. Then I went over the gate with Gold and Patina metallic rub medium.


Titles are hard for me, so I love that Blue Fern carries so many title pieces. This one was perfect! After I gessoed it to give it some tooth, I just did my favorite thing which is to ink them up! When I was completing my page, I added some copper glitter randomly over the page but made sure to give this title  some chunky love. 


Once again, I've merely gessoed and inked my chipboard piece, even making the little bird the same color as the branch. Then a fussy cut butterfly (Merriment) was added for more dimension and color. Right beneath this branch you can see some of my stamping. 


The B Side of the Chronicle paper is a beautiful damask look, while the A side provided fussy cut flowers. The little bird is from the Glee papers. A Calling Card makes a great title mat. 


A few more butterflies cut from the Merriment sheet finish things off. I've also tucked in an older flower from my stash that matched perfectly and provided some femininity to juxtaposition against the more grungy papers and textures. 


Just one more close-up of that gorgeous Swan Gate.
 A final splatter of white paint and this one was done! 

Blue Fern Studios Products used:
Paper:
Serendipity Glee,  Contemplation, Chronicle, Calling Cards and Merriment

Chipboard:
Swan Gate, Mystic Branch,  On the Road

Stamps:
Christmas Collage

Embossing Powder:
Ginger

***

"You are Unforgettable"

This project was a true labor of love. This 12x12 Butterfly Grid is a lot of chipboard! There are so many directions you could do with this one but I decided to add color. It didn't turn out quite like I imagined it but it was fun nonetheless. And I'm anxious to use this piece again. 
I've used the Timeless Main Street as my background and added Calling Cards for my photo layers. 


The Majestic Frame was embossed with a powder from my stash but the title piece was done with Blue Fern Ebony Embossing Powder. After that, I got to work on the butterflies using paints and then Mystic Plum and Iris Embossing Powders. 


Everything got a little white to paint to help with blending.


Gold and violet flowers were added, although the gold are looking a little orange-ish here,


You can see here that parts of the grid were cut away in the corners so that the paper floral design would show.  Also, some of the butterflies were cut to allow me to lift their wings.


A final side view.

Blue Fern Studios Products used:
Paper:
Timeless Main Street, Calling Cards

Chipboard:
Butterfly grid, You Are Unforgettable, Majestic frame

Embossing Powders:
Mystic Plum, Iris and Ebony

Mist:
Jingle Bells

***

"Dreams Come True"

You probably have already seen this project if you made it here for the February Sketch Challenge Post. This one was created with the Blush Collection which I have found so easy to scrap … my fave colors. The background was embossed with the Brocade Texture stamp and 14K Embossing Powder. I also did some other light stamping with the Forever stamp. Then lots and lots of layers from mostly torn paper but also plenty of fussy cut layers as well. 


I totally love the medley and ironworks type pieces. Here I've embossed the  Ironworks Medley piece with Copper Embossing Powder and then randomly smudged it with an antique gold and a patina wax metallic finish. I adore the look of patina on my chipboard pieces! You can also see the fussy cut florals I've tucked in as a layer. 


The Dreams come True title piece was embossed with the Fern color Embossing Powder and then I rubbed more of the antique gold metallic finish on it as well Dabbed it with white paint for a good shabby look! 


A few more fussy cut pieces from Cupid's Folly, a heart, florals and a wee butterfly. 


The embossed background looks so cool! I plan to do this again soon! The 14K just shimmers and the brocade stamp is the bomb!


A final shot to just show you some of the dimension on the page. 

Blue Fern Studios Products Used:
Paper:
Blush Celebration, Reminisce, Fondness, Cupid's Folly and Valentine Calling Cards

Chipboard:
Dreams Come True, Ironworks Medley

Embossing Powder:
Fern, 14 Karat and Copper

Stamps:
Brocade Texture, Forever

That wraps up my February projects. I am already working away on March.
Thank you so much for coming by the Blog today.

Remember that we are now on Instagram at @bluefernstudios and on Twitter @BlueFernStudios.
There are links on the side bar to all of our Social Media accounts.
See you next time!
Sandi

Thursday, January 14, 2016

Two layouts with the new collections and a video tutorial by Wilma

 My first post in 2016 and I am happy to tell you I will stay another year at Blue Fern Studio.   


My first layout for today is one with a start to finish video .
I hope you find time to watch it .

I used the beautiful Timeless collection.
All the stamps and embossingpowders are from Blue Fern studios.


The video:


My second layout is made with the blush collection.
A Valentine themed line of papers.
But I think it is perfect for all kind of pictures because of its lightness.

I kept this layout light and playfull.
The Corner flourish chipboard was painted with  acrylicpaint.
After that I took away some of the brightness with white ink.


There are some cute little images on the papers .
I fussycut them and used them as little embellishments.


Thanks for visiting the blog...
Have a nice day
x Wilma x


Thursday, January 7, 2016

My first projects for Blue Fern Studios: Marie-Eve Bernard

Hello,

I'm so happy to present you my first three projects for Blue Fern Studios!  I'm so proud of being choose to be part of this great talented team.  I really hop to inspire you all year long.

My name is Marie-Eve Bernard.  I live in the beautiful Quebec City, Canada, with my family.  I'm the mother of two girls, Delphine and Mathilde, and pregnant of the third one (It's for July).  My husband, Laurent, will be surrounded by pink and princesses!  My family is my source of inspiration.  I'm a scrapbooker since more then 10 years now.  My style changed a lot over the past years.  I'm now passionate by mixed media.  I can't do a layout without getting my fingers dirty.  One thing that do not change over the years: my love of gorgeous papers, chipboards and flowers. So, I'm in heaven here with Blue Fern Studios products.


You can follow me there:


First Layout: Laughter

My first layout is made with the gorgeous Déjà Vu collection. I love the soft look of this collection.


On this flourish piece, I completely recovered it with the Iris Embossing Powder.  After, I emboss it a second time entirely with the Pearl Embossing Powder.  Finally, I add a little touch of Icicle Embossing powder.


The frame is simply embossed with the Icicle Embossing Powder.  For my title piece, I cover it with heavy Gesso and create texture with a stiff brush, just like stucco.  When the gesso is dry, I used a spray ink to color it.

Blue Fern Studios Products used:

Papers
- Déjà Vu Lustre (background paper)
- Déjà Vu Luminaries

Chipboards
- Laughter, Happy, Smile
- Blooming Flourish
- Ever After Frame Set

Imagine Ink Embossing Powder
- Pearl
- Iris
- Icicle

Stamps set:
-  Texture Circle

Second Layout:  Sweetheart

My second layout is ma with the brand new collection Blush!  This collection is simply gorgeous, girly and romantique.  It is completely my style and fall in love with it immediately.


On my background work, you can see that I use two Blue Fern Studios Stamp set (listed bellow).  On my Berry stems, I used Garnet Embossing Powder first and a little touch of the Otmeal one. My title is cut from the Valentine Cards paper. I use a tool to distress it on the edges.


Blue Fern Studios Products used:

Papers
- Blush Fondness  (background paper)
- Blush Valentine Cards
- Blush Celebration

Chipboards
- Berry Stems

Imagine Ink Embossing Powder
- Oatmeal
- Garnet

Stamps set:
-  Brocade Texture
- Vintage Edges


Third Layout:  Fairytale

My third layout is  made with the new Timeless Collection.  Such a wonderful collection too!  I was perfect for a picture of me in front of the Château de Chambord in France.  


I covered my frame with the Garnet Embossing Powder and ad touch of Mistic Plum.  I cut the corner flourish in two to have one on each side of my photo.  I use Mystic Plum Embossing Powder on the flourish pieces. For my title, I use the same technique from the first layout, but i apply two colours of spray ink.


Blue Fern Studios Products used:

Papers
- Timeless Maçonnerie (background paper)
- Timeless Freedom

Chipboards
- Story, Fairytale, Magic
- Corner Flourishes
- Ever After Frame Set

Imagine Ink Embossing Powder
- Garnet
- Mystic Plum

Stamps set:
- Texture Circles
- Vintage Edges

I hop you enjoy.
Thank you for passing by and see you next month!

Marie-Eve