Hello all!
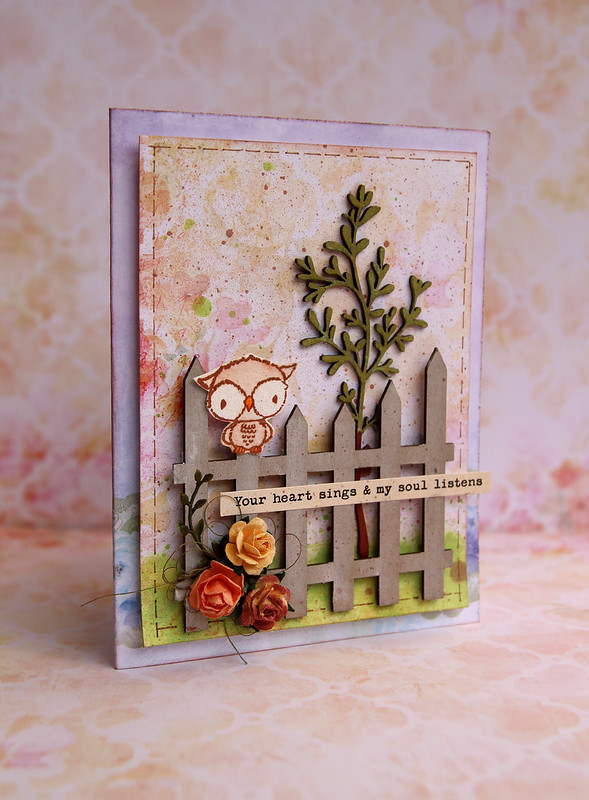
Today, I am featuring three cards that I created with the Ombré Dreams collection. Here they are!
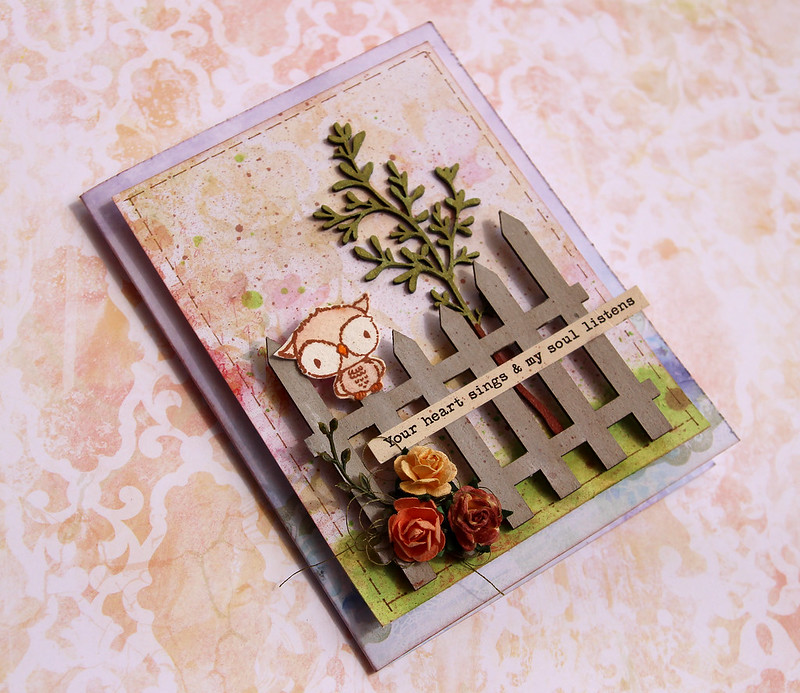
For the first card, I used the Shannon's Dream and Joyce's Dream papers.
I also used two pieces of chipboard, a piece of the Layering Stems (altered with Silks Acrylic Glazes) as well as the Country Picket Fence (altered with Gelatos). I cut the fence because it was too big for my card.
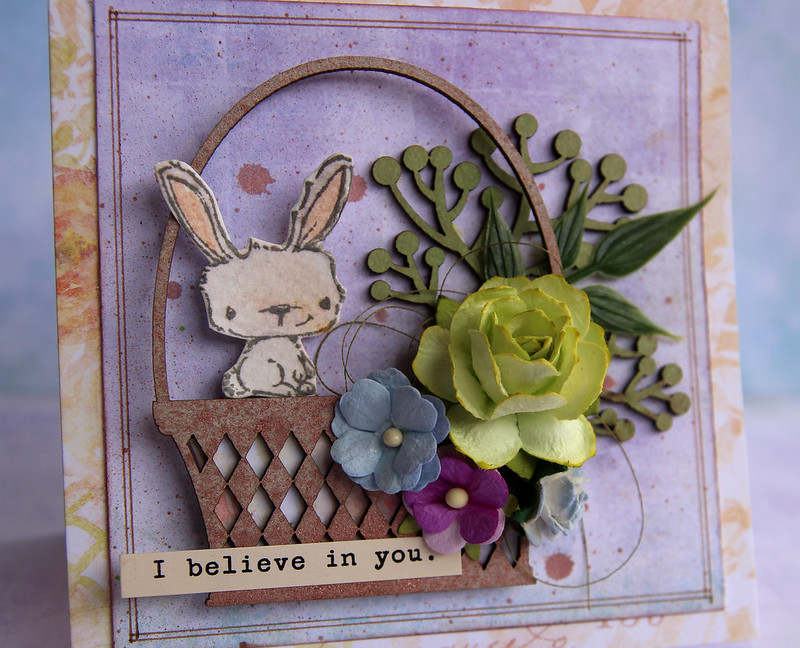
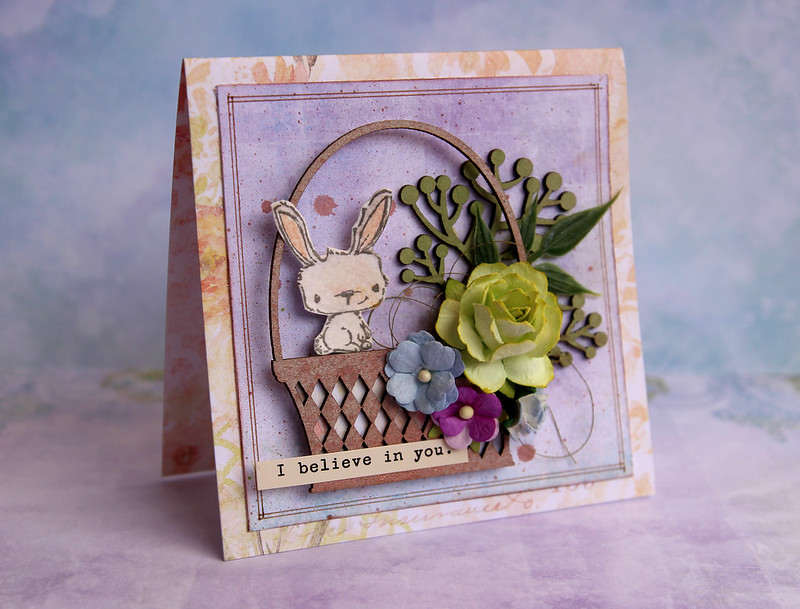
For the second card, once again, I used the Shannon's Dream and Joyce's Dream papers.
I also used two pieces of chipboard, a piece of the Berry Stems set as well as a piece from the Little Baskets set. Both were altered with mists.
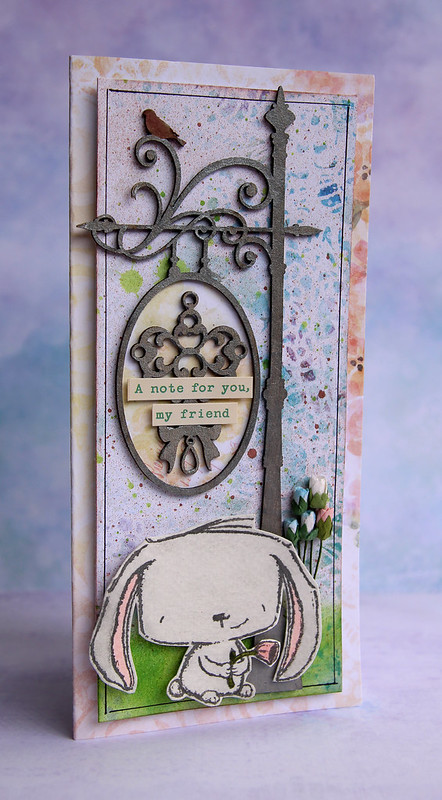
For the third card, I used the Charlotte's Dream and Shannon's Dream papers. I also used the Village Sign Post chipboard, altered with Silks Acrylic Glazes.
Sunday, July 13, 2014
Saturday, July 12, 2014
3 colourful layouts
Hi =) Maja here today to inspire you Blue Fern lovers with some layouts. I made three using both the new "Ombré Dreams" and the "Blue Fern Garden" papers for my projects. I love the watercolor effect on "Ombre Dreams" which goes so well with Distress Inks and stencils. It gives even more depth to the paper.
My first layout is of my son swimming in the pool. Here I have used a circle stencil with three differnt colors of Distress Ink. I also used a circle stiched stamp.
I have treated the chipboard pieces with Gelatos and Stickles.
Blue Fern Products used:
Papers: Ombre Dreams - Susan´s Dream, Dream Cards
Chipbord: Wild Florish Frame, Spring Trinkets
My next layout is also one made with Ombre Dreams using Distress Inks and Stencils. I have also used a couple of stamps.
Here I have treated my chipboard pieces with Gelatos, Silks and Primas chalk.
Blue Fern products:
Papers: Ombre Dreams - Joyce`s Dream, Dream Cards
Chipboard: Layering Steams, Mixed Chains
For my third and last layout I´ve used the Blue Fern Garden and also here a stencil and Distress Ink.
Here I have treated the chipbords with white Gesso and Prima chalk. On the bigger chipboard piece I also used white Embossing Enemal.
Blue Fern products:
Papers: Blue Fern Garden - Signature, Picnic
Chipboard: All Natural Set, Damask Motif
Thanks for stopping by =)
Friday, July 11, 2014
Two Paper Collections, Two Layouts
Hi everyone! It's Valerie Serfozo today to share a couple of layouts with you. Blue Fern Studios has two beautiful paper collections, and I have selected paper from each line. For the first layout I have used the Boudoir paper from the Blue Fern Garden Collection. I then selected the Roman Clock Small Set and Organic Vine chipboard pieces. When I use multiple chipboard pieces, I generally like to alter them differently. But in this case, I chose to make them all the same color,
For my second layout, I selected Leslie's Dream from the Ombré Dreams Collection. It is one of my favorites with a combination of orange and yellow in the background. This time, I treated each piece of chipboard a little differently.
The choice is totally up to you when you create your project with chipboard pieces, because you are the one deciding which colors to use, whether it be several different colors, or all the same.
Thanks for stopping by today. Enjoy your weekend.
I gave them all a coat of gesso, then used ink to color them. As you can see below, I like the coverage to be a little less than perfect. It adds a little character. I cut the Organic Vine in half and used it in two places on my layout.
The largest piece from the Roman Clock and the other half of the Organic Vine
The smallest piece from the Roman Clock Set
For my second layout, I selected Leslie's Dream from the Ombré Dreams Collection. It is one of my favorites with a combination of orange and yellow in the background. This time, I treated each piece of chipboard a little differently.
Here I used one of the Techno Rings as a small accent. I coated it with gesso, and used Distress Stain to color it.
Staying with the circle theme, I added a piece from the Circle Groups. This time I painted it with Distress Paint, then added some Inka Gold on top of that. The paint is barely visible, but it does peak out a little bit here and there. I also chose to fill in the circles with some embellishments.
And here is the beautiful Dream Big word title chipboard piece. Ink was applied to achieve the color I wanted.
The choice is totally up to you when you create your project with chipboard pieces, because you are the one deciding which colors to use, whether it be several different colors, or all the same.
Thanks for stopping by today. Enjoy your weekend.
Wednesday, July 9, 2014
Swirlydoos Blog Hop!
Welcome to:
July Scrapbook Kit Reveal & Blog Hop!
If you came here from Angelica's Blog, then you are on the right track. If not, go back to Swirlydoos' blog and
start from there. We have some amazing projects for you to see today !!
Make sure to leave a comment on all of the blogs for a chance to win!!!
Make sure you have LIKED & FOLLOWED Swirlydoos on Facebook!!!
Swirlydoos is proud to bring you our beautiful July collection:
Celestial Summer
And check out these coordinating add ons that perfectly compliment our July scrapbook kit!
Are you a subscriber? If so, your kit is on it's way! If not, check out the Swirlydoos store to see if there are any July kits or add ons in the store!
Has it sold out? - become a subscriber and not only will you never miss a kit again, but you'll also pay less for your monthly scrapbook kits!
*Mention this blog hop and save 10% on your first kit*
Make sure to leave a comment on all of the blogs for a chance to win!!!
You have until midnight, eastern time, on Thursday, 7/10 to complete the hop. Winners will be announced on the Swirlydoos Blog on 7/11. In order to qualify to win here is what you need to do:
1:
Visit all of the blogs and leave a comment on each. This way we know
you were there. Take your time. There are REALLY beautiful things to see
along the way.
2: Before you leave each blog, look for the “special” words and write it down.
Once you have visited all the blogs and collected all the special words, they will create a sentence.
3: Finally, go back to the Swirlydoos blog and
leave a comment letting us know how much fun you had, tell us the
sentence that was created with all of the special words you collected.
Can't wait to hear from you.
My special word is : KIND
The party continues over at Rae's blog. Have fun!
Celestial Summer
And check out these coordinating add ons that perfectly compliment our July scrapbook kit!
Are you a subscriber? If so, your kit is on it's way! If not, check out the Swirlydoos store to see if there are any July kits or add ons in the store!
Has it sold out? - become a subscriber and not only will you never miss a kit again, but you'll also pay less for your monthly scrapbook kits!
*Mention this blog hop and save 10% on your first kit*
Make sure to leave a comment on all of the blogs for a chance to win!!!
You have until midnight, eastern time, on Thursday, 7/10 to complete the hop. Winners will be announced on the Swirlydoos Blog on 7/11. In order to qualify to win here is what you need to do:
1: Visit all of the blogs and leave a comment on each. This way we know you were there. Take your time. There are REALLY beautiful things to see along the way.
2: Before you leave each blog, look for the “special” words and write it down.
Once you have visited all the blogs and collected all the special words, they will create a sentence.
3: Finally, go back to the Swirlydoos blog and leave a comment letting us know how much fun you had, tell us the sentence that was created with all of the special words you collected. Can't wait to hear from you.
My special word is : KIND
The party continues over at Rae's blog. Have fun!
Monday, July 7, 2014
July projects from Camilla
Hi! Camilla here with a layout and a card. For both projects I have used papers from the Ombré Dreams collection.
When I made the layout I created the background by using Color Blooms, masks, stamps and texture paste. Then I added some paper layers underneath the photos and then some flowers and chipboards. The chipboards are painted with white gesso, then I used a script stamp before I inked with fluid ink chalk in blue.
Here is a close-up of the Blue Fern Flourish:
And the By the Sea chipboard:
And finally the Checker Bits:
This is the card. The chipboards are painted in white gesso with a hint of orange in it. Then I stamped with a script stamp.
The chipboards I have used are Lace Rounds and Wild Flourish Bundle.
Thanks for looking!
Saturday, July 5, 2014
June Sketch Challenge WINNER & Top 3 Features!
Good morning and welcome to our very special day where we finally get to reveal to you the LUCKY winner of our amazing prize pack for last month's sketch challenge! And of course we get to boast a few features too!
So if you're ready, then let's get to it- no more waiting, right?!
First, our fabulous winner of THIS:
...
Congrats to Candy Cheeply!!!!!
Please e-mail me {erin@bluefernstudios.com} within 7 days to claim your prize!!
~*~
Now, our ever-talented Top 3 Features:
Thank-you for your beautiful work, ladies!!
And to every one of you talented individuals who took part in our sketch challenge last month, THANK-YOU!! You make our job VERY difficult when it comes time to thinning out the Top 3. So keep at it- we LOVE your work, your kind words of support, and the enthusiasm toward our products!
Have a wonderful weekend :)
Thursday, July 3, 2014
Layout and a tag...
Lisa here today, bringing you 2 more projects using Ombre Dreams and wonderful chipboard from Blue Fern Studios.The Ombre Dreams papers are so versatile. Although they are all watercolor pastel colors, you can dress them up in vibrant colors and it still wont take away from the beauty of the papers. To prepare my layout, I used 2 different papers from the collection. I mounted them on cardboard after using a border punch for the paper in the middle. I used molding paste and a mask for the background.
The small Circle Flourish Frame is BIG in design.There are so many different ways to adorn your chipboard. I used Lindys Flat Magicals to color all of my pieces, including my die cut leaves, and the spatters on the layout. I added a few pearls and gems to the middles of my flowers on the Circle Flourish piece. I touched it here and there with some clear crackle medium for texture.
For the Bohemian Butterflies, I primed them with white gesso, and after they dried, painted them with the Magicals in 2 colors. Then added pearls to their antennae.
My next project is a tag I created with the cutout pieces from my 12x12 layout above. I used 2 layers and did some machine sewing around the edges before putting them together. One they were layered, I used gesso and a mask on the tag and did some spattering with the Magicals.
I used one piece from the Romantic Page Dangles Set. I just created this one simple by adding some flowers and leaves. I colored some cream colored seam binding ribbon with Lindys Stamp Gang Starburst Sprays in 2 colors. a
For the Romantic Page Dangle, I heat embossed it using Lindys Embossing powder in Aurora Amethyst. Then just added a few pearls to finish the piece.
Thank you for joining me today. Don't forget to check out our July Sketch Challenge for a chance to win some beautiful BFS chipboard!!
Subscribe to:
Posts (Atom)