Showing posts with label Royal Monarchs. Show all posts

Saturday, February 6, 2016

February Projects by Cathi O'Neill

Got a whole lotta love, for these three! For the Blue Fern February Sketch I have made a layout featuring my husband and two girls. If you peek between their heads you can see the Shannon River and the Clare hills in the background, I just love where we live!  This layout features the Blue Fern Studios Blush Collection, Devoted and Calling Card papers.


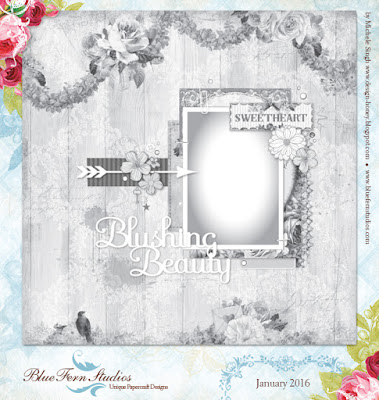
And here is the gorgeous sketch we used:


I used a lot of layers for my layout, all from the gorgeous Calling Cards paper. I tucked in some Tattered Diamond Bits covering them with the Imagine Ink Oatmeal Embossing Powder and used the Heart Set which I embossed with Imagine Ink Cotton Candy Embossing Powder.


I've used a lot of gorgeous flowers from my stash and added a twine bow. You can see the Postal Textures stamp I used  in the background along with some masking and splashes.

Blue Fern Studios Supplies:

Paper:
Blue Fern Studios Blush Collection~Devoted
Blue Fern Studios Blush Collection~Calling Cards

Chipboard:
Heart Set
Tattered Diamond Bits

Imagine Ink Embossing Powder:
Cotton Candy
Oatmeal

Stamps:
Postal Textures

My next project is a set of canvases, again using the gorgeous Blush Collecition. this time the Celebration and Enamoured papers and lots of gorgeous Blue Fern Studios chipboard.


I really wanted to try a folk art angel in the style of Kelly Rae Roberts, so my canvas on the left is my version of it!!The skin, bodice and skirt are all made from Blush papers and I used a ton of stamps on these!  


In this close-up you can see the gorgeous Essential Textures Netting stamp.I wanted something inspirational for my angel so I printed out onto some of the Blush sheets, "She thought she could. So she did."  For some extra depth of color I added gelato pigments to the edges of the skirts and the canvas.


For my angel's wings I used the flying wheel stamp from the Widgets stamp set and fussy cut them out!  The angel got her necklace from the Beads and Charms set.  I used the gorgeous Grassy Knoll Imagine Ink Embossing Powder to do some background masking and also on one of the Ornate Medallions. I also used more of the Ornate Medallions cut in half for part of her dress and as decoration on the canvas, these were covered with Cotton Candy Imagine Ink Embossing Powder.


I love my second canvas as well. It is a simpler design but I used the same papers and colors to tie the two together. Here you can see that I colored in the Follow Your Bliss chipboard with the same gelato colors I used on the angel canvas. I love the way I was able to layer the frame, butterlies and title.


For the Royal Monarch butterfly I used Cotton Candy Imagine Ink Embossing Powder. You can see around the edge here that I used more gelatos, the Essential Textures and the Needlework stamps.


At the base of my design I used the beautiful Ever After Frame and embossed it with Grassy Knoll Imagine Ink Embossing Powder.

Blue Fern Studios Supplies:

Paper:
Blue Fern Studios Blush Collection~Fondness
Blue Fern Studios Blush Collection~Celebration

Chipboard:
Follow Your Bliss
Royal Monarchs
Symphony Border
Ornate Medallion
Ever After Frame 

Imagine Ink Embossing Powder:
Cotton Candy
Grassy Knoll

Stamps:
Beads and Charms
Widget
Essential Textures
Needlework


My final project uses our newest paper line Serendipity! I just fell in love with this at first sight, so beautiful and vintage grungy! For my base I used the beautiful Serendipity Contemplation paper.


I have done my favorite thing to do with Blue Fern papers and used the Calling Cards cut apart page to layer behind my vintage image photo. I used the strip from the bottom of the paper as part of the design as well!


Here you can see where I have used one of the Graduated Circles frames to frame my image. I covered the frame in some gorgeous Claret Imagine Ink Glitter!  I made the frame a little more grungy by adding some gesso on top of the glitter .  You can just about see the chipboard flower in the frame. It is from the All Natural set and the stem is embossed with Imagine Ink Sage Embossing Powder while the flower has gorgeous Dusty Rose.Imagine Ink Glitter


Here you can see the flowers and nest I used from my stash. Tucked in with the flowers you can see another piece from the All Natural set, the little leaves which I have embossed with the Imagine Ink Sage Embossing Powder..


To finish off my layout with a title I chose Natural Beauty from the All Natural set, again embossed in Imagine Ink Sage Embossing Powder. As a final touch I added some splashes in pink and some stamping using the netting from the Essential Textures stamp set and the diamond pattern from the Forever stamp set..  Isn't this paper line just gorgeous? Thank you so much for stopping by and visiting!

Blue Fern Studios Supplies:

Paper:
Blue Fern Studios Serendipity Collection~Calling Cards
Blue Fern Studios Serendipity Collection~Contemplation

Chipboard:
Graduated Circles
All Natural Set

Imagine Ink Glitter:
Claret
Dusty Rose

Imagine Ink Embossing Powder:
Sage

Stamps:
Essential Textures
Needlework


Wednesday, January 6, 2016

My First Projects for Blue Fern Studios: Cathi O'Neill

Hi, I am so excited to be here today with my first projects for Blue Fern Studios!


My name is Cathi O'Neill and I am an American who wandered the world and married an Irishman. I have been living in Ireland since 1997. I live in a beautiful village on the Shannon River with my DH of 20 years (wow, that makes me feel old!) and my two beautiful daughters, Aine (onya) 13 and Aisling (ashling) 11, who are the subject of many of my projects!!

I have always loved crafting since I was a little girl. My grandmother taught me to knit and crochet and I remember sewing Barbie doll clothes with her on her front porch! I am a knitter and quilter as well, but have recently in the last few years found cardmaking and scrapbooking, and an obsession was born!! Barely a day goes by when I haven't done something crafty!!

I would say my style is a mixture of vintage, shabby chic with a hint of mixed media, you will often see me using vintage images! I hope you will come visit me at my blog at http://celticknotted.blogspot.com.


My first project uses the amazing new paper line, Blush. I have chosen a gorgeous vintage image that had just a tint of pink and blue in it...I used those to guide the layout's colors. I chose the beautiful Sweetheart paper for base of my layout.


I used many of the cut out cards and titles from the Blush Calling Card paper, layering them up! You can also see the Postal Textures stamps here in the background, I used Walnut Stain distress ink to make a weathered and distressed stamping background.


You can see two of the chipboard pieces I used, the gorgeous Floral Medley Frame and the Bits of Honey pieces. I used the Imagine Ink Sage and Bonny Blue on the frame leaving some sections plain for an overall distressed look. The Bits of Honey pieces were embossed with the Bonny Blue and I added some Walnut Stain distress ink to age them a little.


I used lots of yummy flowers from my stash in my floral cluster adding a ribbon for extra detail. I finished off the cluster with the heart lock from the Vintage Locks chipboard set.

Blue Fern Studio Supply List:
Paper:
Blush-Sweetheart and Calling Card
Chipboard:
Bits of Honey
Floral Medley Frame
Vintage Locks
Stamp:
PostalTextures
Imagine Ink Embossing Powder:
Sage, Honey, Bonny Blue


My next layout features the gorgeous new Timeless collection and a beautiful selfie my daughter took on my iPad. It is always fun to find new photos to use for my layouts taken for me on the iPad, a selfie addicted girl is great for a scrapper! I have used the Timeless Maçonnerie page for the layout base.


You can see some more layers in this page using the Timeless Calling Cards paper cut outs. Under the photo I have used the middle clock from the Roman Clock Set - Large. I used the Imagine Ink Mystic Plum embossing powder to color up the chipboard, adding some gesso for distressing.


I love the retro font used for the Timeless chipboard! This layout is called Timeless Beauty, which I happen to think my daughter is! I have used Imagine Ink Mystic Plum embossing powder and gesso again to color and distress the title.


I have added some gorgeous flowers and a nest which I think works well with the bird imagery in one of the calling cards. I have also tucked in some tags under the photo cluster. I also used Seedless Preserves distress ink and a stone wall mask to tone in with the papers. I added a bit of blue and brown splashes too.


I finished off my layout with a beautiful handcrafted butterfly by Renea.

Blue Fern Studio Supply List:
Paper:
Timeless -Maçonnerie and Calling Card
Chipboard:
Roman Clocks - Large
Timeless
Imagine Ink Embossing Powder:
Mystic Plum


You might have seen this layout in the challenge post earlier, this is my take on the January sketch challenge. I have used the Frolic Allegro paper for my base. Here is the sketch you can use to play along this month:


I have used the beautiful Royal Monarch butterfly chipboard and embossed it in Imagine Ink Honey and Cotton Candy. I have made a homemade satin and tulle flower and have used the Essential Textures and Texture Circle stamps for my background.


Here you can see lots of layers from the Montage Calling Cards paper and the Turkish Bits and Arrow Words chipboards.


Imagine Ink Honey and Cotton Candy are used here again to color the chipboard. To finish off the layout with my gorgeous vintage ballerina I simply added a little clip to the corner of the photo.

Blue Fern Studio Supply List:
Paper:
Frolic - Allegro
Montage - Calling Cards
Chipboard:
Turkish Bits
Arrow Words
Royal Monarchs
Stamps:
Essential Textures
Texture Circles
Imagine Ink Embossing Powder:
Honey
Cotton Candy

Thank you so much for having a look at my projects for this month. I am so excited to be here!

Monday, August 24, 2015

August projects & Video tutorial by Marilyn

Hi everyone!!  Marilyn  here with you today  to share two projects and a video tutorial using the beautiful Frolic collection.

DREAM

I recently traveled to Colombia to give workshops in a scrapbooking event in this country.  It was a wonderful experience and I want to make an album with all these lovely memories from the different places that I've been visited and here's my first page with a lovely memory with three new friends..I'm with the other two  teachers and the owner of the event.
I selected the Graduated Squares chipboards to create the design in my page.   You will see all the work process of this page in my video tutorial that I hope you  find some inspiration! :)

My title the word "Dream" that I applied stickels  but I can't captured the "frost"effect with the camera.

I love the Bird Ornaments and I applied stickles, too.


Blue Fern Studios Products Used:
Frolic collection: Amoroso paper
Chipboards:
Graduated Squares
Bird Ornaments
Dream- word


and the video tutorial...Enjoy it!!! :)


 LIFETIME
For my second project I worked a page  without lot of layers just more simple like I want my life lately, it is a photo that hubby took me a week ago while I was celebrating my birthday and although isn't a perfect photo I wanted to document. I'm celebrating and enjoying everything lately, a new day, the new opportunities, the little things in life...
I selected the calling cards papers...I just love it!!! and to complete my design I chose the beautiful Royal Monarch chipboards.
My title is from the Chunky words chipboard...the lifetime word that I gave a coat of gesso then I applied two colors of embossing powder in rose and white and I did the same technique to the butterflies, too.

I embossed  with the Journey stamp around my photo  .


Blue Fern Products Used:
Frolic collection: Calling Cards
Chipboards:
Royal Monarch
Chunky Words


Thanks for stopping by...Until next time!!
Have a great day!!xx

Marilyn Rivera


Thursday, July 16, 2015

Layouts Featuring Paisely & Vine By Debbie

Hi everyone, Debbie here with you today to share some layouts I created using the Paisley & Vine Collection which was introduced a few weeks ago.  I love the warm tones of the papers.

On  my first layout I used Bohemian, Nature, Vineland and Playing Card papers and added some masking, misting, paints and microbeads.

The Circle Flourish Chipboard surrounds my photo.  I first applied some gesso to the chipboard and then added some misting, water colors, gelatos and microbreads.

I painted a piece of the Quartre Foil chipboard with some yellow and blue paints and added more microbeads and tucked the chipboard behind the flowers.

Here I've used a piece from the Layering Stems chipboard, which I painted with watercolors and gelatos and added more of the blue microbeads.

My next layout was based on the July sketch.
I used the Nature, Pathway, Splendor, Passion and Playing Card papers along with some masking and inking.

 I incorporated 2 chipboard pieces as a base for my picture, Frills Panel and Vintage Labels.  Both pieces were embossed using a number of products to achieve the aged look.

Tuked beneath the flowers is a Leafy Page Accent and Mini Rings chipboard.  Both of which I embossed and inked.

More pieces of the Mini Ring Things chipboard with some gold microbeads.

My final layout you saw earlier in the month on the blog, again using papers from the Paisley and Vine Collection.
I used the Whimsy paper as my background, which I lightly
applied light pink ink around the outside of the paper.  I also used Playing Card and Passion papers from the collection.


I inked the chipboard Perfect with some dark red ink and placed pieces of the Framington Medley chipboard, which I embossed with white powder and added some blue ink around my picture.

A gorgeous Royal Monarch chipboard butterfly embossed white and placed within a flower cluster is the perfect touch!

I hope you enjoy my layouts!

Thanks for stopping by!
. . . Debbie

Saturday, July 11, 2015

Mixed media canvas+video tutorial and cards from Elena Morgun

Hello, friends, it's Elena Morgun here today. 

I have three new projects to share with you today using lots of gorgeous Blue Fern Studios products. Today I'll be inspiring you with the mixed media canvas and step-by-step video tutorial, and cards.

Mixed media canvas 'Fabulous'

All the details of creation process you can watch in step-by-step video tutorial.
Enjoy! 
A few details:
Blue Fern Studios product used

Paper
- Montage
- Déjà Vu

Chipboard
- Arrow Words
- Chelsea Frame
- Bohemian Flowers
- Chelsea Vines

Also I have made two more cards)
Blue Fern Studios product used

Paper
- Montage
LOVE STORY

Chipboard
Checker Bits
Postage Frames


Blue Fern Studios product used

Paper
- Montage
- Déjà Vu

Chipboard
Royal monarchs
Vintage Keys
Postage Frames

Hugs
Elena Morgun