Showing posts with label Layouts. Show all posts

Wednesday, August 3, 2016

August Inspirations with Jelissa

Hello friends, how have you been? 

July has been very exciting and now that August is here, I'm looking to better times ahead! Today I'm so glad to be sharing with you two creations using the fabulous new collection Seaside Cottages. This set of papers speak right to my heart and to say it was love at first sight is a great understatement. Michele has outdone herself yet again with this gorgeous beach-themed collection filled with soft colours and stunning images.


My first layout is of my eldest having some fun with his feet in the sand. Woodgrain is really my thing and I had to use it for the background. Seeing that the paper is so full of details, I toned down my background work and used to it accent the colors on the page. 

Details in the close-ups:


An anchor from part of the Seaside Flourish chippie which I had embossed with Copper EP from Imagine Ink and painted some turquoise acrylic paint over for a tarnished look. The petals were sprinkled with Dusty Pink glitter.


Layer, layer, layer! That's what you do when you have so many pretty papers at hand! Here, I built up lots of dimension with scraps from Calling Cards, Voyage and Splendour. 


Using a Calling Card sentiment as my title. The little stars on the flourish chipboard were also given a nice coat of Sunshine glitter.

Blue Fern Studios products used:

papers: Seaside Cottages - Calling Cards, Voyage, Splendour, Gala
chipboard: Seaside Flourish
EPs: Copper
Glitter, Dusty Pink, Sunshine


My second share is a mixed media canvas and I had used so many fun stuff on it! The starfish and shells that you see are actually from a potpourri set and they smell amazing!


This is the Seashell Frame which I had a lot of fun altering with EP and duo-toned acrylic paint.


A little sailboat from Nautical Set. Check out the background - it's one of the patterned papers from Seaside collection and I didn't have to do much to make it look so grungy and vintage all at the same time!


Who doesn't love a dolphin? I have one here with some seaweed chippies. Check out the Seaside Lilies that come as part of the coordinating flowers - they are so perfectly distressed that I didn't have to fiddle with them at all. 


Mr Octopus saying hi.


I seem to have a thing for anchors again! This one is embossed and wrapped with a piece of twine.


A title piece from Calling Cards, matched by the Seaside Roses.

And here is the video of how I put everything together. Sit back and enjoy!


Blue Fern Studios supplies used:

paper: Seaside Cottages - Calling Card
chipboard: Nautical Set, By the Sea, Seashell Frame, Seaweed chippies
EPs: Ebony, Clover, Fern, Grassy Knoll, Verdant, Sea Breeze, Blue Sky, 14 Karat
Glitter: Mermaid


Wednesday, July 13, 2016

July Projects plus Video by Bec

Hi, everyone. Today I'm sharing my July projects.
I made a canvas with video tutorial and a layout.
Remember Moments


First up I made this 8x10 burlap canvas using the Tranquility collection, chipboard and lots of embossing powders.

Here is my video:


And my close ups:


Blue Fern Studios Products used:
Paper:
Tranquility Collection: Hushed and Peaceful

Chipboard:
Remember Moments
Beaded Flourish

Embossing Powder:
Cotton Candy
Snow
Oatmeal
Mushroom
14 Karat

Glitter:
Pyrite

Flowers:
Attic Charm Daisies
Attic Charm Glitter Roses
Courtship Blooms
Courtship Roses
Tranquil Roses and Lillies


Adorable


For this layout I used the Courtship Lane Collection. I LOVE the soft pastel colours in this collection.
The papers are perfect to pair with flowers, lace and ribbons.
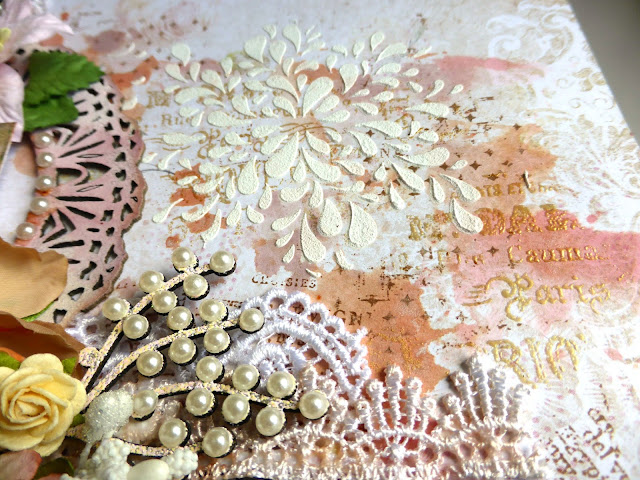
I chose the Courtship Lane Royal Street paper as my background. I added delicate details to this paper using distress ink and a stencil, along with a stencil and texture paste.


I used embossing powder to colour my chipboard pieces. For the word Adorable I used Mystic Plum and Petal. For the Swirly Circle I used Mystic Plum, Cotton Candy, Petal, and Lilac embossing powders.


I finished my layout with a generous amount of flowers and lace. I also used the embossing powder in Snow to stamp butterfly images onto Vellum paper.


Blue Fern Studios Products Used:

Courtship Lane Paper:
Royal Street
Town Gossip
Calling Cards

Chipboard:
Swirly Circle
Good Vibes Set

Embossing Power:
Mystic Plum
Cotton Candy
Petal
Lilac
Snow


Thanks for stopping by today

Bec


Monday, June 13, 2016

Attic Charm Project by Bec

Hi Blue Fern Fans, today I have three projects made with the new Attic Charm Collection.
This collection is filled with the most gorgeous papers and pastel colours.

Stillness

First up I have a layout

I started by tearing the Curio paper and layering it onto the Sachet paper.
I then added some stamping with brown ink and the Serendipity Medley & Forever stamps before I added some texture paste through a stencil.


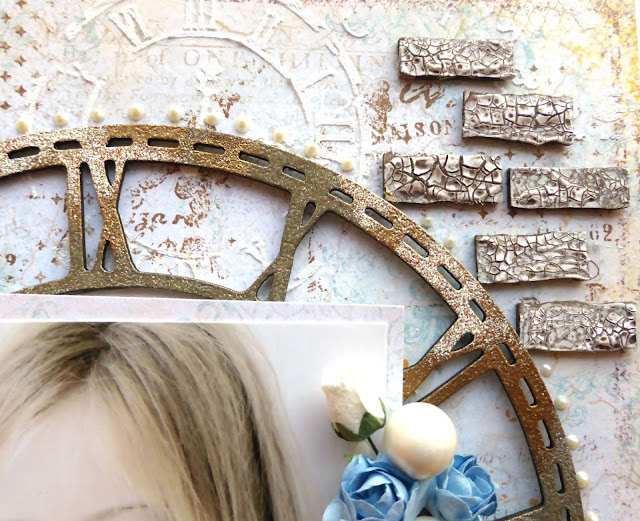
I treated the brick pieces out of the Shabby Brick bits with white crackle paste before I coloured them with a brown mist.


To colour the Roman Clock and Stillness title I used a mix of the Ginger, Oatmeal & Mushroom embossing powders.


I finished off the layout with some Tranquil Blooms & Tranquil Roses and Lilies mixed with a few extra flowers.


Blue Fern Studios Products Used:
Attic Charm Collection Papers: Sachet & Curio
Chipboard: Roman Clock Set Large, Shabby Brick Bits, Stillness from the Peaceful, Stillness, Contenment Set.
Stamps: Serendipity Medley & Forever
Embossing Powder: Ginger, Oatmeal & Mushroom 
Flowers: Tranquil Blooms & Tranquil Roses and Lilies

Tag Album


I made this tag min album by covering some tags with the Attic Charm papers.


For the cover I used the Swan Gate chipboard piece which I coloured with the embossing powders in Sea Mist, Breeze, Petal, Cotton Candy & Ginger


On the inside I used several of the Calling cards as well as lots of images I fussy cut.


Attic Charm Paper Collection
Chipboard: Crackle Bits & Swan Gate
Embossing Powder: Sea Mist, Breeze, Petal, Cotton Candy & Ginger

Memories


Finally I  have a layout made with the June Sketch.
I flipped the sketch so my photo is on the other side of the page.


To colour the Lace Rounds and Scalloped Border I used distress inks.
I covered the Berry Stems with Oatmeal embossing powder.


On my background I used the Serendipity Medley stamp with the Honey embossing powder and the Forever stamp with brown ink.


I finished my layout off with Attic Charm Daises, Courtship Roses, Tranquil Blooms & Tranquil Roses and Lilies


Blue Fern Studios Products used:
Attic Charm Collection Papers: Mercantile & Calling Cards
Chipboard: Lace Rounds, Scalloped Border & Berry Stems
Embossing Powder: Oatmeal & Honey
Stamps: Serendipity Medley & Forever
Flowers: Attic Charm Daises, Courtship Roses, Tranquil Blooms & Tranquil Roses and Lilies


Thanks for visiting

Bec.

Tuesday, February 16, 2016

Maja's February Projects

Hello, Blue Fern Studios Fans and welcome to the blog today :-)

For my today's post I created various projects, so I hope everyone would find something for themselves to get inspired. All of them feature our latest release, the Serendipity collection.
Let's start with the layout:


I first layered two papers in contrasting colours for the background and added some stamping. For the title, I traced the words of the "Always Remember" chipboard with embossing marker and heat-embossed them separately with Heavenly and Ginger embossing powders:


Then I cut out some journaling cards to mat my photo. I tucked some flowers in between then layers,  I also included some loose brick pieces I found with my Shabby Brick Panel (you can also find them in the Extra Bits sets :-)) that I covered with subtle crackle paint.


I created a custom button by attaching an epoxy sticker to the bird image and cutting it out. As for the extra pieces you might get with your chipboard, I decided to keep them and use for some interesting decor element :-) I first removed the pieces from the chipboard, covered them with various eps and but them back together, creating kind of a mosaic/stained glass element (to be able to mount it on 3D dots, I matted the shapes with some paper on the back side):


For the word part, I first embossed the background pieces with Breeze ep and then re-heat it a bit so that particles of Oatmeal ep would stick to it and embossed again to get a shabby chic look:


Always Remember:

Papers: Serendipity: Anticipation, Fascination, Imagination, Chronicle
EP: Ginger, Heavenly, Azure, Seven Seas, Breeze, Oatmeal
Chipboard: Always Remember, Charmed Page Dangles, Shabby Brick Panel/Extra Bits
Stamps: Photography, Forever, Vintage Edges

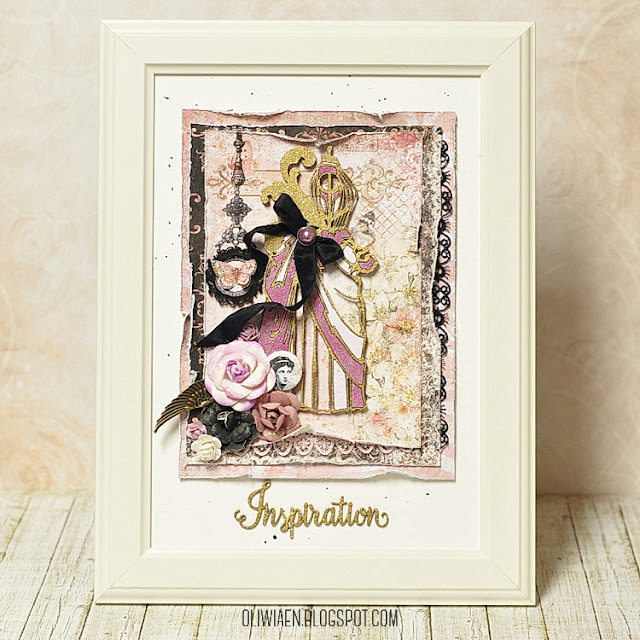
I used this mosaic/stained glass technique for my next project too, an OTP home decor piece with the beautiful Couture chipboard as the main image:


Just as with the Charmed dangle, I removed the pieces, covered them with Lilac and Mystic Plum eps and but them back into the main piece that I covered with 14 Karat ep.


For the background, I layered some papers, put some lace in between the layers and stamped a dangle from the Deja Vu stamp set, then added some dimensional elements to it:


I also included a flower cluster with a button and metal wing charm in it. Beneath my composition I put the Inspiration chipboard on the passe-partout I splashed with black ink:


Inspiration:

Papers: Serendipity: Inspiration, Merriment, Reminisce
EP: Lilac, Mystic Plum, 14 Karat
Chipboard: Couture, Serendipity Words 1
Stamps: Deja Vu

I also made two cards for this post - here's a wedding card that features the Boston Lattice chipboard piece:


I think it makes a beautiful bakcground for the flower cluster, and it also reminds me of a wedding pergola :) For the background, I layered two sides of the Glee sheet:


 I covered the chipboard with white chalk mist and used the extra pieces as propping places to hide 3D dots:


Wedding card:
Papers: Serendipity: Glee
Chipboard: Boston Lattice


It wouldn't make a February post without a Valentine's card ;) Here's one I gave to my own personal hubby:


I used the True Heart stamped image for the main motif: I stamped it on watercolour paper, coloured it with Distress inks, cut out and mounted on layered papers that I also stamped with Journey stamps:


For the sentiment, I used the "love" word from the Chunky Words set, covered it with glue and dipped in the Fool's Gold glitter. Just to make sure it would fall off, I secured it with glossy accents. 


Love card:
Papers: Serendipity: Contemplation, Inspiration
Chipboard: Chunky Words
Glitter: Fool's Gold
Stamps: Journey, True Heart

I wish you a lot of creating time - and see you next time!
Maja Nowak