Showing posts with label Halftone Stamps. Show all posts

Wednesday, September 23, 2015

Sandi's September Creations

Hello, Blue Fern fans! 
Sandi here with you today sharing my September projects. 

My most recent Design Team package contained the new Autumn Anthology collection, papers, chipboard, stamps and oh, yes, the new Imagine mists! Two of my September projects were already done but I managed to get one Autumn Anthology project done for this time around. More coming next month as I adore these papers and matching chipboard, mists and stamps! 

"Lucy @ 33"

I haven't done a "Lucy" layout in a few months, so I was definitely feeling the urge to scrap a photo of her. I chose the Penmanship paper and some matching Calling Card notes for a photo mat and title.  I prepared my background with gesso, stenciling and the new Essential Texture stamp along with a hint of the Leaf mist applied with a sponge. 


The Shrine Frame was gessoed, spritzed with a gold mist and then embellished with some random dark gold embossing powder as well as some clear embossing powder.  I didn't allow the gold embossing powder to completely melt. I left it with some grainy texture. Love the result! The Ginger's Poppies are one of my favorite BFS pieces! They are so intricate and unique. Here I have gessoed them and added touched of distress ink for color. I also colorized the leaf portion with the new Imagine Leaf spray mist. 


Just another close-up of Ginger's Poppies. 


My Garden Lattice Bits on the right were perfect for adding a little something along the edges of my layout. Here they were primed and spritzed with more of the dark gold, tea-stained mist.  This is also a great close-up of the Essential Textures stamp and the new Leaf mist. A few flowers, pearls and it was done. So fun! 

Blue Fern Studios products used:
Paper:
Autumn Anthology Penmanship
Autumn Anthology Calling Cards

Chipboard:
Ginger's Poppies
Garden Lattice Bits
Shrine Frame

Stamps:
Essential Textures

Imagine Mist:
Leaf

***

"The Best Day Ever"

Next, I used more of the Frolic collection to create a wedding layout. I've scrapped this photo before but gave it away, so maybe this one will be mine. I tore a few sheets of the Frolic paper to add layers and change up the look of the Frolic Allegro paper. Then I applied my mixed media, including the new Imagine Mist in Persimmon along with a gold from my stash. There will be new mist colors coming out with each new paper collection from what I understand.


The Butterfly Damask chippy was cut in half and used a layer beneath my photo. I've primed, inked and randomly embossed it. The Arrow Word set provided my little subtitle "Love This" which was primed and spritzed. Lots of paper layers beneath the photo just because I love layers.


Of course, my title was the fabulous Best Day Ever chipboard title. This time I painted it and then sponged it with white paint to shabby it up. The Frolic Dans le Jardin paper provides lots of great butterflies to fussy cut and add as embellishments! Get an extra of that one!

Blue Fern Studios products used:
Paper:
Frolic Allegro
Frolic Secretary
Frolic Adorn
Frolic Calling Cards
Frolic Dans le Jardin

Chipboard:
Arrow Word Set
Best Day Ever
Butterfly Damask

Stamps:
Halftone

Imagine Mist:
Persimmon

***

"Adorable"

Last is the layout I created for our September Sketch challenge. And yes, that is myself when I was about 2 years old. I've used the Frolic Mercantile paper as my base and kept the mixed media pretty simple on this one .. just heavy gesso and stenciling. 


I've treated all four pieces of chipboard the same for this project. The Destiny collage, Celebration Hearts, Princess Window, and the Adorable title from the Good vibes word set were all primed, misted and treated with distress ink to finish them. I wanted a very monochromatic feel to the chippys so that they almost blended with the paper. 


Loving the Celebration chippy on it's own in the upper right corner .. so sweet for a "toddler baby" page. 

Blue Fern Studios products used:
Paper:
Frolic Mercantile
Frolic Secretary

Chipboard:
Destiny collage
Celebration Hearts
Good vibes word set
Princess Window

***

Thanks for coming by the Blog today.

Don't forget to join in on the Sketch challenge! We'd love to see your creations!

Until next time …

Sandi

Friday, September 11, 2015

Frolic inspiration from Elena Morgun

Hello friends!

The weekend is around the corner. And I would like to inspire you with some new projects. Today I have prepared a layout with a video tutorial and ATC set.

This layout I created for a friend as a present. Her son's photo was my main inspiration. I decided to create layers with the help of chipboards. I painted them with Silks this time. I love the color transitions I got here. The layout turned out very shiny.
Video tutorial


Blue Fern Studios product used
Paper
Frolic: Veranda

Stamp
Journey
Halftone
Forever

Chipboard
Mod Squares
Perfect, Adorable, Special
Turkish Panel

I enjoy creating ATCs and swapping them. They are quite fast to make, but that doesn't make them less beautiful. Here is my recipe for today: stamp the background, add some elements such as papers, chipboards, butterflies and finish with adding some watercolors. Enjoy your creations!
Blue Fern Studios product used

Paper
Frolic: Secretary
Frolic: Dans le Jardin

Stamp
Journey
Halftone
Forever
Vintage Edges

Chipboard
Bohemian Flowers

Hope to see you soon again!
Take care,
Elena Morgun

Sunday, August 23, 2015

Frolic and More with Sandi Clarkson

Hello, everyone! 
Sandi here with you today sharing my August projects!

"Capture the Moment"

The B side of the Frolic Friendship paper is so gorgeous and I thought it would make a lovely background for this photo of my brother and youngest niece. I wanted to go with a bit of a monochromatic feel, so my chipboard was altered to blend in with the paper colors. 


The Jeweled Frame was so perfect for my photo because 1.) it is elegant and 2.) our family name is "Key." I kept my alterations pretty simple with mists and inks but did add some microbeads here and there throughout the entire page. You can also see the use of the Halftone stamp. 


This is a close-up of the Memories Captured title piece which is a nice 2 piece set. 

Blue Fern products used:
Paper:
Frolic Friendship
Frolic Adorn both sides
Frolic Calling Cards

Chipboard:
Jeweled Frame
Memories Captured

Stamp:
Halftone

***

"Smile"

I tried to go Clean and Simple on this layout. This beautiful damask paper from the Frolic collection, Petits Moments, is just divine and can stand on its own. Also, I wanted simple backdrop for the Timeless Floral Corner chipboard. I added a little bit of mixed media and did some stamping with the "Forever" stamp to add dimension. The Geometric Bits were misted and used as layers. 


Isn't that Corner piece awesome? So much beautiful detail! There are so many ways to alter this one but  I used mists, dimensional beads and some old nearly dried up glitter paint.  Loving this fun photo of two of the grandkids! 


Microbeads are a fun way to add a little umph to your chipboard without really doing too much .. just gel and beads and you're done! 

Blue Fern Studios Products Used:
Paper:
Frolic Petits Moments
Frolic Calling Cards
Frolic Adorn
Frolic Dans Le Jardin

Chipboard:
Timeless Floral Corner
Geometric Bits
Arrow Words

Stamps:
Forever

***

'Everyday Moments"

My next project was done with the Paisley and Vine collection. It was "in progress" when my Frolic collection arrived and I set it aside to work on a Frolic project for you. So, I decided to go back and finish this one up! 


I actually embossed the Frolic Bird Ornament this time! But the Treasured Floral Frame is fairly plain. Just gessoed and then some color added to the floral part with water colors. And also a dab of embossing on the ends. 


My Sweet Arrow Word was colored with water colors.  I also took this opportunity to use up some older flowers that were in my stash. Yay for that! 

Blue Fern Studios Products Used:
Paper:
Paisley and Vine Nature
Paisley and Vine Bohemian
Paisley and Vine Playing Cards

Chipboard:
Treasured Floral Frame
Arrow Words
Frolic Bird Ornaments

That's it for me this time! 
Be sure to ask your retailers to carry Blue Fern Studios if they are not already. 
There is a "Where to Buy" tab at the top! 
See you next time!

Thursday, July 23, 2015

Frolic and more with Sandi ~

"Fun in the Sun"

Hello, Blue Fern Studios fans! 
Sandi here with you today sharing a mix of new products along with some olders ones as well. I hope the month of July is going well for you. Mine is super busy, busy, busy! I hope August will be a little more "normal" and I'll have some leisure time for creating! 

Anyway, I have created a layout for you using the A side of the Friendship paper from the brand new Frolic collection.  I usually try to steer away from the A sides at least for a while but this blue was calling my name .. which is kind of unusual for me.  But I knew that it would be a great background for this photo of the grandkids taken on the Fourth of July weekend, a holiday here in the USA. My photo mat layers are the Adorn papers. 

As par for the course, I did some background work with gesso, a stencil, super heavy gesso and mists. Just a light touch as the papers are so pretty. 


This is the new Frolic Mesh chipboard piece! Gosh, I adore this one! It is for sure going to be a favorite. I inked it and then did sme random embossing in dark copper. 


I was excited to get these sweet Paisley and Vine Flowers chipboard piece in my design team kit! They are adorable ! Sweet and dainty. They were merely gesso-ed and inked. They picked a few random bits of embossing powder from my kraft mat and that created some fun texture


My title piece Fun in the Sun was painted, misted and the embossed all over for a shiny look. 

Blue Fern Studio products used:
Paper:
Frolic Friendship
Frolic Adorn

Chipboard:
Frolic in the Sun
Frolic Mesh
Paisley and Vine Flowers

***

"Cute Stuff"

Next, I decided to play up some of the greens from the Paisley and Vine collection for this photo of my granddaughter. The photo is rather poor quality but she needed it scrapped, so there you go! 
I did some photo editing and tried to have a little fun in the process. 

I've layered a sheet of Whimsy paper over Bohemian and then used torn strips of Bohemain (both sides) along with Splendor. Playing cards made for a perfect photo mat and subtitle. 

Have you seen the new Novelty trim pieces? That red piece in the center is one of them. Mine is painted and then misted in shades of red-orange. I also adore the Deja Vu Atelier Chippie! It made for a beautiful vertical piece to ground my layout. Gesso gave it some tooth and then I used paints and mists. The Cute Stuff title from the Good Vibes set is an oldie that I still enjoy using. I've simply inked it in brown. 

 The Halftone stamp was used to further frame the photo by adding texture and depth all around the photo area. 

Here are a couple of close-ups:


Swooning over the Atelier piece and stamps! 


Just another little close-up. 

Blue Fern Studios products used:
Paper:
Paisley and Vine Splendor
Paisley and Vine Whimsy
Paisley and Vine Bohemian
Paisley and Vine Playing Cards

Chipboard:
Novelty Trims
Déjà Vu Atelier Chippie
Good Vibes

Stamps:
Halftone

***

"Enjoy the Journey"

You might have already seen this one! It was made for last month's Sketch challenge but I never got a chance to share it.  I've used a combination of Ombre Dreams papers, Shannon's Dream and Julianna's Dream. Using a stencil, super heavy gesso and mist, I created a really fun background. A little brighter than I originally had in mind but I love the final result. All my chipboard was treated with gesso, chalk inks and microbeads and are listed below. 

Close-ups:


Love the layering stems.


Microbead fun! 


Blue Fern Studios products used:
Paper:
Ombre Dreams Shannon's Dream paper
Ombre Dreams Julianna's Dream paper

Chipboard:
Layering Stems
Enjoy the Journey title
Jeweled Page Baubles
Flutter Page Singles

Well, that's it from me this month. 
Hopefully next month will be a bit quieter around our house and I can get back to
 creating a little more leisurely. There are lots of new goodies on my desk. 


Thanks for coming by!

Thursday, July 2, 2015

July Inspiration with Jelissa


Hello Blue Fern fans! How has your month of July been? The weather has been blazing hot and we're doing whatever we can to cool down.

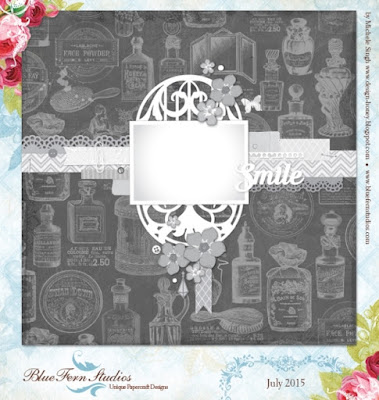
It's my turn on the Blue Fern blog today and I have two creations to share with you. The first is based on the fabulous July sketch. Here is what it looks like:


I've kept the orientation of the sketch, as well as the dark background and my papers came from a mix of Sanctuary and Love Story to create my layout.


My mixed media background was created Birdsong Melody from Sanctuary, with a lot of paint dabbing and layering with watercolors, as well as textural details using microspheres, dew drops and microbeads, as well as some string and stamping. I love it that Blue Fern tries in sneak in a few dark colored patterned papers into their collections for us to create our very own backgrounds.

Some close-ups:


The La Plume chipboard which I first painted with a light brown, followed by UTEE embossing for resist and layering with more browns. Beneath are paper layers made from scraps I had left over from Love Story collection.


The Notebook Edges chipboard, which I first heat embossed and then colored with different shades of blue. To add texture to my layers, I mixed chipboard, paper, lace and trims.


A close-up of some of the textural details I have in my background.

I hope my sample has inspired you to create a project of your own to participate in our monthly sketch challenge!

Blue Fern Studios products used:
Sanctuary collection - Melody Birdsong
Love Story collection - Concerto, Sweet Song, True Harmony
Notebook Edges
La Plume


And now for my video tutorial. For this project, I revisited one of my all time favourites from Blue Fern Studios, the Ombre Dreams collection. 


I used only "Susan's Dream" because the images on the paper fit my composition perfectly and had the exact type of watercolor imagery I had in mind to create for my background. I also used scraps from Dream Cards and Charlotte's Dream to build up my layers.

Some close-ups:


A die cut from Dream Cards which I used as my title, and a Bohemian flower piece tucked into my cluster. You can also see the half-tone stamp which I used to add minute details to my background.


I love the big chipboard pieces because they are simply value for money and so fun to play with. Here, you see Medley Border which I have cut up into four pieces and tucked them everywhere to maintain the flow of my composition, as well as to break up the monotony of paper layering.


Interspersed in the layers is also the Notebook frame which I had added some texture to.

Here is the start-to-finish video. I hope you enjoy watching it as much as I have creating the project.


Blue Fern Studios products used:
Ombre Dreams - Charlotte's Dream, Susan's Dream, Dream Cards
Notebook Frame
Bohemian Flowers
Medley Border
Halftone stamps

love,
Jelissa


Tuesday, June 23, 2015

Introductions! Sandi Clarkson mixes it up!


Hello, Blue Fern Studios fans! My name is Sandi Clarkson and I am new to the Blue Fern Design Team ... although very familiar with the product. Having worked with the Blue Fern Studios owner, staff and many of my fellow team members, I almost feel like I've come back home! It doesn't hurt that I live in the same state where Blue Fern is manufactured to strengthen that sense of belonging! (Texas, USA) 

I'm married with three grown, married daughters and a growing number of grandkids! I still work 3 days a week and so I truly enjoy getting "lost" in creating! I like trying new techniques but am usually happiest when the results still fit my "pretty" criteria. My scrap room is my happy place. I kind of love that my desks have paint, gesso and runaway micro beads all over them. I'm mostly a layout girl but love, love, love doing the occasional canvas. 


Now, on to my first three Blue Fern projects! 

"Authentic Treasure"

I have the distinct pleasure of being one of the first DT members to receive the new Paisley & Vine paper collection! This collection was introduced here on the Blog on June 10th.  I wish my photos could truly capture how lovely this range is, with lots of great warm colors and fun patterns. Although it is a bit of a departure from the classic Blue Fern style, it is earthy and rich and will be a great addition.  My mind is racing with the possibilities! 

I decided to go "shabby" with my photos and chipboard choices but chose some bold paper patterns,  Splendor  and Bohemian, and layered them against a lovely turquoise background, Pathway. I love this color combo! 


I also fussy cut some title notes from the Playing Cards sheet and distress them a bit with my distress tool and some white paint. You can see bits of my chipboard pieces that are a little higher on the page. 


My photos were framed with the Royal Heart Frame which was gesso-ed and inked, as was my Dashwood Bouquet piece. I embossed the tips of my Dashwood Bouquet for a bit of glimmer. Photo credits go to Raphael Tuck and Sons but are from a copyright free database. 


The Royal Gate chipboard pieces was used to balance my layout and was treated similarly to the Royal Heart Frame. A few embellishments and it was done! 

Blue Fern Studios products used:
Paper:
Paisley & Vine Pathway 
Paisley & Vine Splendor
Paisley & Vine Bohemian
Paisley & Vine Playing Cards

Chipboard:
Royal Heart Frame
Royal Gate
Dashwood Bouquet

***

"Good Vibes" 

Once in a while I really love to let loose and go a little Boho/Steampunk as I call it. I had not had a chance yet to use side B of the Love Story Amazing Hearts paper. The colors and collage appearance are so totally "me!" I've also been dying to get my hands on those BFS Goggles! The Steampunk photo from Tumblr just brought it all together. 

Here are some close-ups:


After gesso-ing the goggles, I applied chalk ink and paints in different colors, adding a little metallic Patina from a tube. I've used Embossing powder on the inner rim and then painted the magnifiers black so that they would stand out. I've paired them with the Notebook edges which were treated with chalk inks and some random paint. Love Story Calling Cards made for a perfect photo mat. There is also some Journey stamping to the left with the Journey stamp. 


Here you can see the Graduated Circles which I've used to frame the photo. They were treated the same as the Notebook edges. My Good Vibes title is from the Good Vibes word set. You can also see a bit of the Journey stamping here on the right which helps create depth. 


The Cogs and Gears were treated the same. Love the Industrial look they bring. 


Of course, I finished off with florals, metal and Flair. 

Blue Fern Studios products used:
Paper:
Love Story Amazing Hearts paper
Love Story Calling Cards paper

Chipboard:
Goggles 
Cogs and Gears 
Graduated Circles 
Notebook Edges
Good vibes word set

Stamps:
Journey Stamp

***

"Delightful"

I don't know about you but I've been on a purple kick lately along with a vintage photo binge! And so, the colors of the Deja Vu collection really called out to me. Here I've paired the collection with some sweet vintage photos, chipboard and purple and cream florals. 


The new Quatrefoil Frame made a fantastic photo mat here. It was simply gesso-ed with white. 


The Flutter Medley is also a newish piece and made for a great border at the bottom of my photos. I've used chalk ink to give it a tiny bit of color. The Delightful title is from the Optimist Word Set and was painted white, then off-set to provide balance. 


I'm in love with the new Peek-a-boos and used one at the top of my project. This photo also nicely demonstrates the use of the Halftone Stamp. 


Lots of fun dimension and texture! 

Blue Fern Studios products used:
Paper:
Déjà Vu Un Voyage a Paris paper
Déjà Vu La Plume paper
Déjà Vu Tresors paper

Chipboard:
Quatrefoil Frame
Peek-a-Boos
Flutter Medley
The Optimist Word Set

Stamps:
Halftone Stamp


Okay, that's it from me this month! 
I look forward to being with you in July.
Be sure to visit the "Where to Buy Blue Fern Studios" page for information on finding vendors. 

Sandi