Showing posts with label Butterfly Friends. Show all posts

Monday, November 2, 2015

November Inspiration with Jelissa

Hello friends! Hope your weekend of trick n treat has been fun!

I'm up on the Blue Fern Studios blog today to share two layouts. And if you've been wondering, here are my little girl's photos at last! I finally found the time to process them and print them out for scrapping. And I got to say, the feel of a newborn in my arms and their intoxicating smell is just so addictive!

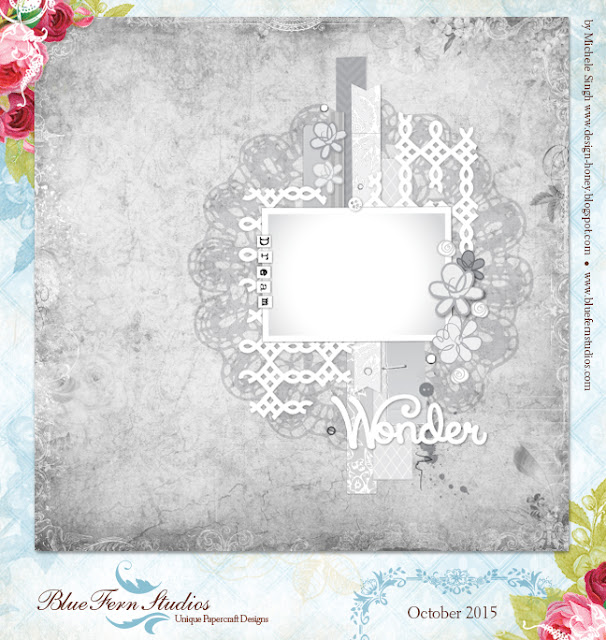
Here is my first layout, based on the November challenge sketch created by Michelle. I used lots of the gorgeous papers from the Autumn Anthology collection - pastels are really my favourite!


My take on the sketch:


This time I've pretty much stuck to the sketch changing only the title. My background is deliberately simple so as not to steal the limelight from the pretty papers  and chipboards.

Some closeups:

Under my flowers, I have the Floral Lattice Bits all heat-embossed and layered on top of strips of papers from the Autumn Anthology papers which I have the edges punched.


The French Ironwork chipboard which I heat-embossed as well - first with two different shades of brown and as an accent, I used the Fern Embossing Powder, one of the many new products from Blue Fern Studios. Some stamping in the background was done with the Garden Frolic stamp set.


Another half of the Floral Lattice Bit which I snipped off to balance the layout. Lots of layering too from different sheets of the collection.


My title, made up of words from two different sets - Baby Words and Perfect, Adorable, Special - which I brushed lightly with paint and inked the edges with gelato.

Blue Fern Studios products used:

Autumn Anthology - Parfumerie, Gazebo, Mercantile
Chipboard - French Ironwork, Perfect, Baby Words, Floral Lattice Bits
Mediums - Embossing Powder (Fern)

My next share is a video tutorial and I had heaps of fun doing it. Each and every one of my kids get a shadow box or canvas for their baby photo and my little girl is no exception. While I really love how sturdy the Blue Fern papers are, I wanted something that I could mount on a wall or display without warping over time. So I chanced upon the idea of transferring the entire sheet of patterned paper over on to my canvas.

Here is the project:


You can see just how different the background paper looks now! Because of the uneven-ness in removing the layers of paper, I had little patches of white all over, with some bits of the canvas exposed. It's a gorgeous white haze effect on top of a very pretty paper, and muted it just enough to fit the theme of the photo.

Some close-ups:


My title piece - I snipped off the "Hush" from "Hush Little Baby" to fit the composition of the canvas.


Aloha Flower chippie, sneaked in between all those layers of Calling Cards cut-outs.


My background is a mixture of simple stenciling as well as heat embossing with another sweet color "Petal" from Blue Fern Studios. I also cut out little butterflies and placed them all over the canvas.


Butterfly Friends chippie helping to fill out the layers and also to create visual flow.


Some of the background details.

And here is the start-to-finish video. That's all I have for you today, so sit back and enjoy!


Blue Fern Studios products used:

Autumn Anthology - Calling Cards, Newsworthy, Balcony
Chipboard - Aloha Flower, Butterfly Friends, Hush Little Baby
Mediums - Embossing Powder (Petal)


love,

Saturday, October 24, 2015

October projects from Zanka

Hello everybody!
I'd like to share some of my latest BFS creations with you.

'Dreaming in color'

This layout is based on one of the sheets from Deja vu which I have cut in pieces and rearranged to have most of the pattern crossing in the middle. I have covered the cuts with washi tape and chipboard pieces. The chipboards are treated with gesso and watercolours.
Chipboards:  Turkish panel, Crossing the lines.
Stamps: Halftone

'XOXO'

For this layout I have used both sides of the same sheet from Botanical Garden, to achieve contrasting yet beautifully coordinated colour layers.
Except for the title piece, the chipboards are plain. The title is painted white and embossed with BFS embossing powder Petal.
Chipboards : Lace Heart Border, Deja vu Luminaires, XOXO

Elegant Cards.
I'm ending with two simple cards, which I made of cardstock bases, pieces of Botanical Garden papers and some BFS chipboards, just slightly touched with glitter.


Chipboards : Bits of honey, Butterfly friends, Organic vine corner
Glitter: Pyrite

Thanks for stopping by today!
DT Zanka

Friday, October 23, 2015

Autumn Anthology with Sandi Clarkson

Hello, everyone! 

I'm here today to share my October Blue Fern Studios projects using the Autumn Anthology collection. Fall colors are a fave of mine, so this was just plain FUN!

 "Memories"

Starting with a vintage photo of my mom, I've used the Le Ballon and Mercantile paper as my base and focused on a few fave pieces of chipboard, the Oval Daisy Frame and the new French Ironworks .. so gorgeous! I painted them with some distress paint and then did some random embossing with a gold embossing powder. I was going for a very rusted look. I finished the pieces off with a dab of metallic patina. 

Of course, there is some mixed media in the background and use of the new Imagine Mist in Persimmon as well as the texture stamp. Persimmon is such a great color! I've fussy cut and layering in some pieces from the Calling Cards and some butterflies from Frolic Dans le Jardin. 

Close-ups:


Love to frame my photos with chipboard! 


This new French Ironwork is so intricate .. in love! 


I snipped it into two pieces and used some here. 


Blue Fern Products Used:
Paper:
Autumn Anthology Le Ballon
Autumn Anthology Mercantile
Autumn Anthology Calling Cards
Frolic Dans le Jardin

Chipboard:
French Ironwork
Oval Daisy Frame

Stamps:
Texture

Mist:
Imagine Ink, Persimmon

_____

"Love"

Next is just a very sweet romantic page of my daughter and her husband using the Gazebo paper. I've used lots of the new Imagine Ink mist in Leaf on my background to really give it some pop, then pulled the purple and gold flowers from the paper by adding similar 3 dimensional ones. I completed the background with Texture stamp. Behind the photo are Newsworthy and Calling Cards layered in. The little bird was fussy cut from the Newsworthy paper.

My Iron Signage, Ironwork Edges, Victorian Corner and Love from the Good Vibes set were all treated the same way. I first primed with gesso and then did a little experiment with some textured spray paint from the hardware store. Definitely something that needs to be done outside!! The smell is quite harsh but it gave the cupboard a fun look. After that dried completely, I misted all the pieces with some black mist.


The Doily Bunting (a fave) was left raw because it was a nice warm brown color and seemed to blend nicely as is with my photo. 


Love this new Iron Signage piece and can see myself using it a lot. 


I've been saving the Victorian Corner for just the right project and this was it.
 But now, it's on my re-order list!

Blue Fern Products Used:
Paper:
Autumn Anthology Gazebo
Autumn Anthology Newsworthy
Autumn Anthology Calling Cards

Chipboard:
Iron Signage
Ironwork Edges
Victorian Corner
Doily Bunting
Good Vibes

Stamps:
Texture

Imagine Ink Mist:
Leaf

____

"An Autumn Story" 

You've probably seen this one already because it was done using the October Sketch. The photo was of myself and one of my uncles taken many years ago at my Grandmother's farm. 


The title piece and Butterfly Friends were inked in brown, then some gold embossing was added to the butterflies for sparkle. 


Again, just some simple inking on the Seasonal Wildflowers and Berry Stems in green. Then I spritzed them with the new Leaf mist. Finally, I added a little glitter glue to the Wildflowers .. hardy ever use that stuff anymore! 

Blue Fern Products used:
Paper:
Autumn Anthology Balcony
Autumn Anthology Mercantile

Chipboard:
An Autumn Story
Butterfly Friends
Seasonal Wildflowers
Berry stems

Stamps:
Forever
Texture

Mist:
Imagine Ink, Leaf

That's it from me today.
Thanks for coming by the Blog today and supporting Blue Fern Studios!

Wednesday, October 21, 2015

Bentes October projects.


Hi there.
Today it's my turn to blog some Blue Fern goodness and to start with I have a page that I made
with the lovely Autumn Anthology. 


I used the Robin paper as a base and the Cottage paper on top.  I used a brayer to add a thin layer of gesso to prime my paper for the Imagine Ink Sky mist and the Love Story 2 stamp set.


I cut a piece from the Shabby Brick Panel chipboard and haphazardly  painted it white. I then just gave it a slight splash of the same mist I used earlier.


I picked a choipboard title to suit my page and after priming with gesso I paintd it with blue acrylic paint. To finish the look I added some Distress stickles on top. I useda third choipboard piece here as well, but it may be hard to detect,....-It's the arrow from the Directions set. 
But instead of painting it, this time I covered it in a cute washi tape. 


 So here's a last look at the pretty colours in this page, and as you see I also cut some strips of other pretty papers in this collection just so I could do a little layering.

My second project is a little different for me. I don't usually do scrap on canvas, 
but this round one looked fun, so I decided to give it a try!

Here's how it turned out;


As further inspiration for this canvas I used the October sketch. I turned it upside down and took  a free approach as you should with a sketch, but I think you can still see the resemblance.

Here's the sketch:


Read all about the challenge HERE.


I used calling cards from the Frolic collection as a title for my canvas/page.
The Butterfly Friends chipboard rceived a coat of white paint, some glitter and a light application of the green mist Imagine Ink Leaf. Also the large Frolic Mesh Bits chipboard was treated similarly.

I added a few leftover pieces of chipboard here and there, you can see them in the photo above. 
I dont ever throw those little tresures away :-)


Finally a close up of the gorgeous Butterfly Friends again!


Thank you so much for looking in today :-)


Wednesday, July 22, 2015

My First DT Projects and Video Tutorial by Marilyn

Hi everyone! Marilyn here excited to share with you my first design team creations and video tutorial for Blue Fern Studios
A little about me:
My name is Marilyn Rivera and I'm from Puerto Rico but I'm living in North Carolina with my lovely family now.  I have two wonderful teenagers and a very supportive husband.  I'm a Fashion Designer although the last 18 months I'm a SAHM.  I've been scrapbooking for 8 years and nowadays is become more than a hobby, I've been giving the opportunity to travel and give workshops. I love to share my knowledge and techniques in my classes and in my video tutorials.
In my work you will see some techniques that I use for my dressmaking  combined with paints, mediums, lace, pearls and lot of textures!
I'm so happy to be part of the Blue Fern Studios Creative Team and I hope my work and video tutorial inspired you.

You can see my work in my blog HERE and my videos tutorial in my YouTube channel HERE.

"MEMORIES" 
My first project is a layout with this special 25 years old picture when hubby and I were newlyweds.
I worked with the gorgeous new collection Frolic and I chose the Petits Moments and Amoroso papers.
I create the background design using the Ring panel and you will see all the creative process in my video tutorial.
I placed the 'Butterflies Friends' chipboard around my photo and cut out these butterflies from the Dans Le Jardin paper from the Frolic collection.

My title is the  'Memories' word chipboard that I painted in different tones, don't miss  the video tutorial.


I added glass beads and pearl in the rings of the chipboard to create dimension.

Supplies:
 Frolic Collection:  Dans Le Jardin, Mercantile, Amoroso
Blue Fern Chipboards: Ring panel, Butterflies Friends, Memories word


Here is the video tutorial, I hope it inspired you...Enjoy it!


"A Special Day"

My second page is about my daughter's birthday seven years ago.  I worked with the "Mercantile" paper from the Frolic collection.  I embossed the clock from the "Roman Clock Set"-small  and my title the word "Special".
I placed the beautiful clocks around my photo and between my flower cluster.


I painted with gelatos the "Blooming Foliage",  then I covered the leaves with gel medium and green micro beads.

Supplies:
Frolic Collection: Mercantile paper
Blue Fern chipboard: Blooming Foliage, Roman Clock Set, "Special" word

I hope you find inspiration in my first blog post.
Have a great day!

Marilyn Rivera


Tuesday, June 30, 2015

The Wait is Over - introducing Frolic!

There's no better way to wrap up the month of June than with the reveal of our new paper collection, Frolic.  
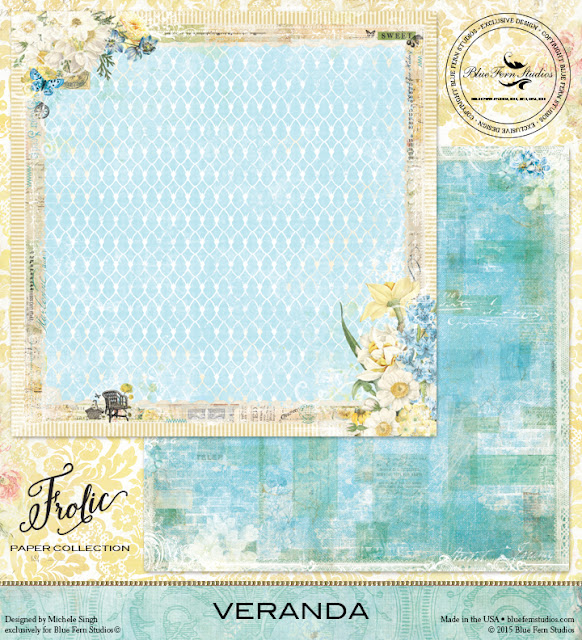
Frolic, as a verb, is to play and move about cheerfully, excitedly, or energetically, and that is just what we want you to think of when you see this collection.  The colors and designs are certainly cheerful and energetic.  How perfect for so many projects!  Here are the individual papers from the collection so you can see what we mean. 
 Take your time as you scroll through this beautiful 10-page collection. 


But we have more good news - we didn't stop with just the paper.  
We have chipboard pieces designed to coordinate with the Frolic Collection!

Butterfly Friends

Bird Ornaments


Frolic in the Sun

Frolic Mesh

Tea Medley


Have you had a chance to try our very popular stamp sets?  These 4x6 sets are of the highest quality
clear photo-polymer.  We have designed two stamp sets to coordinate with our Frolic Collection.

Washi Tape


Garden Frolic


We hope you are as excited as we are about Frolic!