Showing posts with label Heart Borders. Show all posts

Sunday, June 29, 2014

Layouts of Love with Patter

Hello Blue Fern Studio fans! It's the 29th so it's time for me to share my June creations with you.

I Love You More
For my first 8 1/2 x 11 layout, I used a photo of two of my daughters that I took while we were on vacation in May. As a family, we say "I Love You More" a lot to each other. I felt that this photograph looked like a time they would be saying that to each other. The Blue Fern chipboard title "I Love You More" was perfect for the page. I also used the Blue Fern Garden Parlour papers.

To color the chipboard, I coated it in white gesso. While it was still wet, I spritz on several different mist colors then let dry. Some of the color pooled in some areas but I liked that because of the effect it gave the chipboard.

And notice below how I left the branding strip on at the bottom of the patterned paper. The branding strip contains the paper name, UPC code, etc. Sometimes I cut them off, sometimes I leave them on the paper as I did here, and sometimes I use the strips on cards and layouts. On the far left hand side, you can still kind of see the word "garden" at the bottom. I covered it mostly in modeling paste but still some showed through which is fine. Don't be afraid to keep those branding strips on your pages! Have fun with them.
Blue Fern Studios products used:
Blue Fern Garden Parlour paper
I Love You More chipboard

Love Remember
For this 8 1/2 x 11 layout, I used the new Ombre Dreams Joyce's Dream paper. I also used the beautiful chipboard piece called Circle Flourish Small.

To color the chipboard, I coated it in white gesso and let it dry. I then used a paint brush to paint on several different mist colors. By using a paint brush I was able to control where the colors went and how dark they appeared.
Blue Fern Studios products used:
Ombre Dreams Joyce's Dream paper
Circle Flourish Small chipboard

Sketch Layout
And this is my 8 1/2 x 11 layout I created using the June sketch challenge. If you haven't joined in the fun yet, there still is time. Click here to see the details and join in!

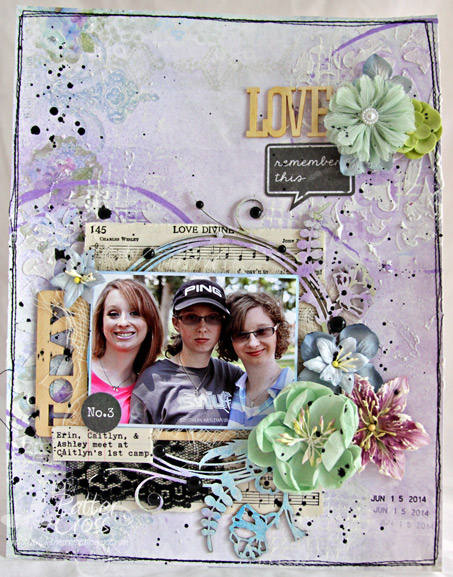
This layout is of myself and my oldest daughter (by a minute) and uses Ombre Dreams Shannon's Dream and Julianna's Dream papers. I also used the Heart Borders and Techno Rings chipboard pieces.

To color these chipboard pieces, I again painted each piece with gesso. After the chipboard was dry, I used mists and acrylic paints to achieve the various effects.

Blue Fern Studios products used:
Ombre Dreams Shannon's Dream paper
Ombre Dreams Julianna's Dream paper
Heart Borders chipboard
Techno Rings chipboard

Thanks for joining me today! See you again in July! Blessings,

Friday, March 21, 2014

"Girly-Girl Layouts" with Kelly Foster

Good morning! And...happy Friday!!! 
I hope you have some fun weekend plans - maybe some creating? If so, I hope to inspire you a little bit...
I have two super girly-girl pages to share today!

"Adorable"

I love this picture of my little girl...she looks to me just like a porcelain doll...ivory, smooth skin, sweet pink lips, and a frozen expression to go with it - lol!
Anyway, I wanted to go for a super feminine and soft look here. I started with the Rose Wreath, giving it a good coating of gesso, then let that dry.


Atop the gesso, I randomly dabbed Distress Ink and Distress Paint, then sprayed with water, dried, and repeat. The colors weren't quite where I wanted them, so I went in with my favorite chalk inks and added the green, and a bit more color here and there on the flowers. I think this is such a beautiful "statement piece" for any layout, and i based the entire design of my page around it!


For my title, I simply painted the word "adorable" from the Good Vibes Set white with a few coats of gesso so it would really stand out.

Blue Fern products:
Rose Wreath
Good Vibes Set

"Love"

Another ultra- feminine page..this one a bit more bright and wild! The colors I chose were based off of my photo 100%. I started with "Love Letters" from the Blue Fern Garden papers, and then cut and layered pieces from "Calling Cards", "In Bloom", and "Picnic". Much of this did end up being covered up, however, by my photo, chipboard, and media.


Next I took the Quatrefoil Panel and have used it in three ways. I cut a large rectangular piece of the panel and it is entwined in my paper layers beneath my photo. Next, I cut a few strips from the panel and added those here and there. I also popped out a few of the "inner pieces" of the panel and scattered them and added them to clusters as well. The panel pieces were all given a coating of white embossing powder, then painted with watercolor paints and Gelatos.


To ground my title, I added a section of one of the Heart Borders, and used the word "Love" from the Valentine Word Set for a simple title...once again painted white.

Blue Fern Studios products:
Blue Fern Garden - Calling Cards
Blue Fern Garden - Love Letters
Blue Fern Garden - Picnic
Blue Fern Garden - In Bloom
Quatrefoil Panel
Heart Borders
Valentine Word Set

Thank you so much for stopping in today. Until next time!

*Kelly*

Sunday, March 9, 2014

Remember

Hi it's Valerie Serfozo today with a layout to share with you.  I have used a photo of my son and nephew on the beach in Ft. Lauderdale when they were children.  I began this layout with the Signature paper from the Blue Fern Garden paper collection


After building the background with texture paste, Distress Ink, Gelatos, and stamping, I want to add even more dimension using Blue Fern chipboard.  I love to add some green to all my flower clusters, and there are many pieces of chipboard that are perfect for this.  Here I used the Tweet Friends piece for the greenery.  I first painted the chipboard with green ink, and then applied glitter.


I really love the Checker Bits because they can be tucked in just about anywhere on a layout.   I primed this piece with gesso, painted it, then stamped on it.  I wanted it to be 'less than perfect', so I smeared the ink a little.  Then I tucked this piece behind the photo.  I also painted a piece from the Directions set and used it on my layout.


Who doesn't have problems when it comes to titles for their layouts?  I love chipboard pieces that can solve that.  After covering this chipboard frame from the Memory Frames with embossing powder, I tucked it under the photo to serve as the title of the layout.


Although it probably doesn't look like the Heart Borders were used on this layout, they were.  Don't forget about the little pieces that you punch out of the chipboard.  They are great little gems to add to your layouts.  These little pieces were heat embossed like the frame.


Thanks for stopping by today.  Be sure to stop by tomorrow to see what Jackie has to created!