
Hello Paper and Blue Fern Studio Fans!
I'm so proud and happy to be part of this company and Design team!
Before I go any further let's introduce myself.
My name is : Lydia Guijt

I'm married to my best friend Peter for 25 years, a Mom to 2 adult children and our fur-baby Wesson. Being Dutch with an Australian passport living in Houston, Texas makes for some interesting conversations. My whole life I've been into crafts but after a special vacation in 2007 the pictures just deserved that little something more. So started my addiction to Scrapbooking.
I hope I can inspire you a little on this journey.
You can find me on social media here:
Facebook : https://www.facebook.com/lydia.guijt
Instagram : https://www.instagram.com/duzzietx/
Pinterest : https://www.pinterest.com/LydCG65/
Lets get started with my layouts. The first one is :
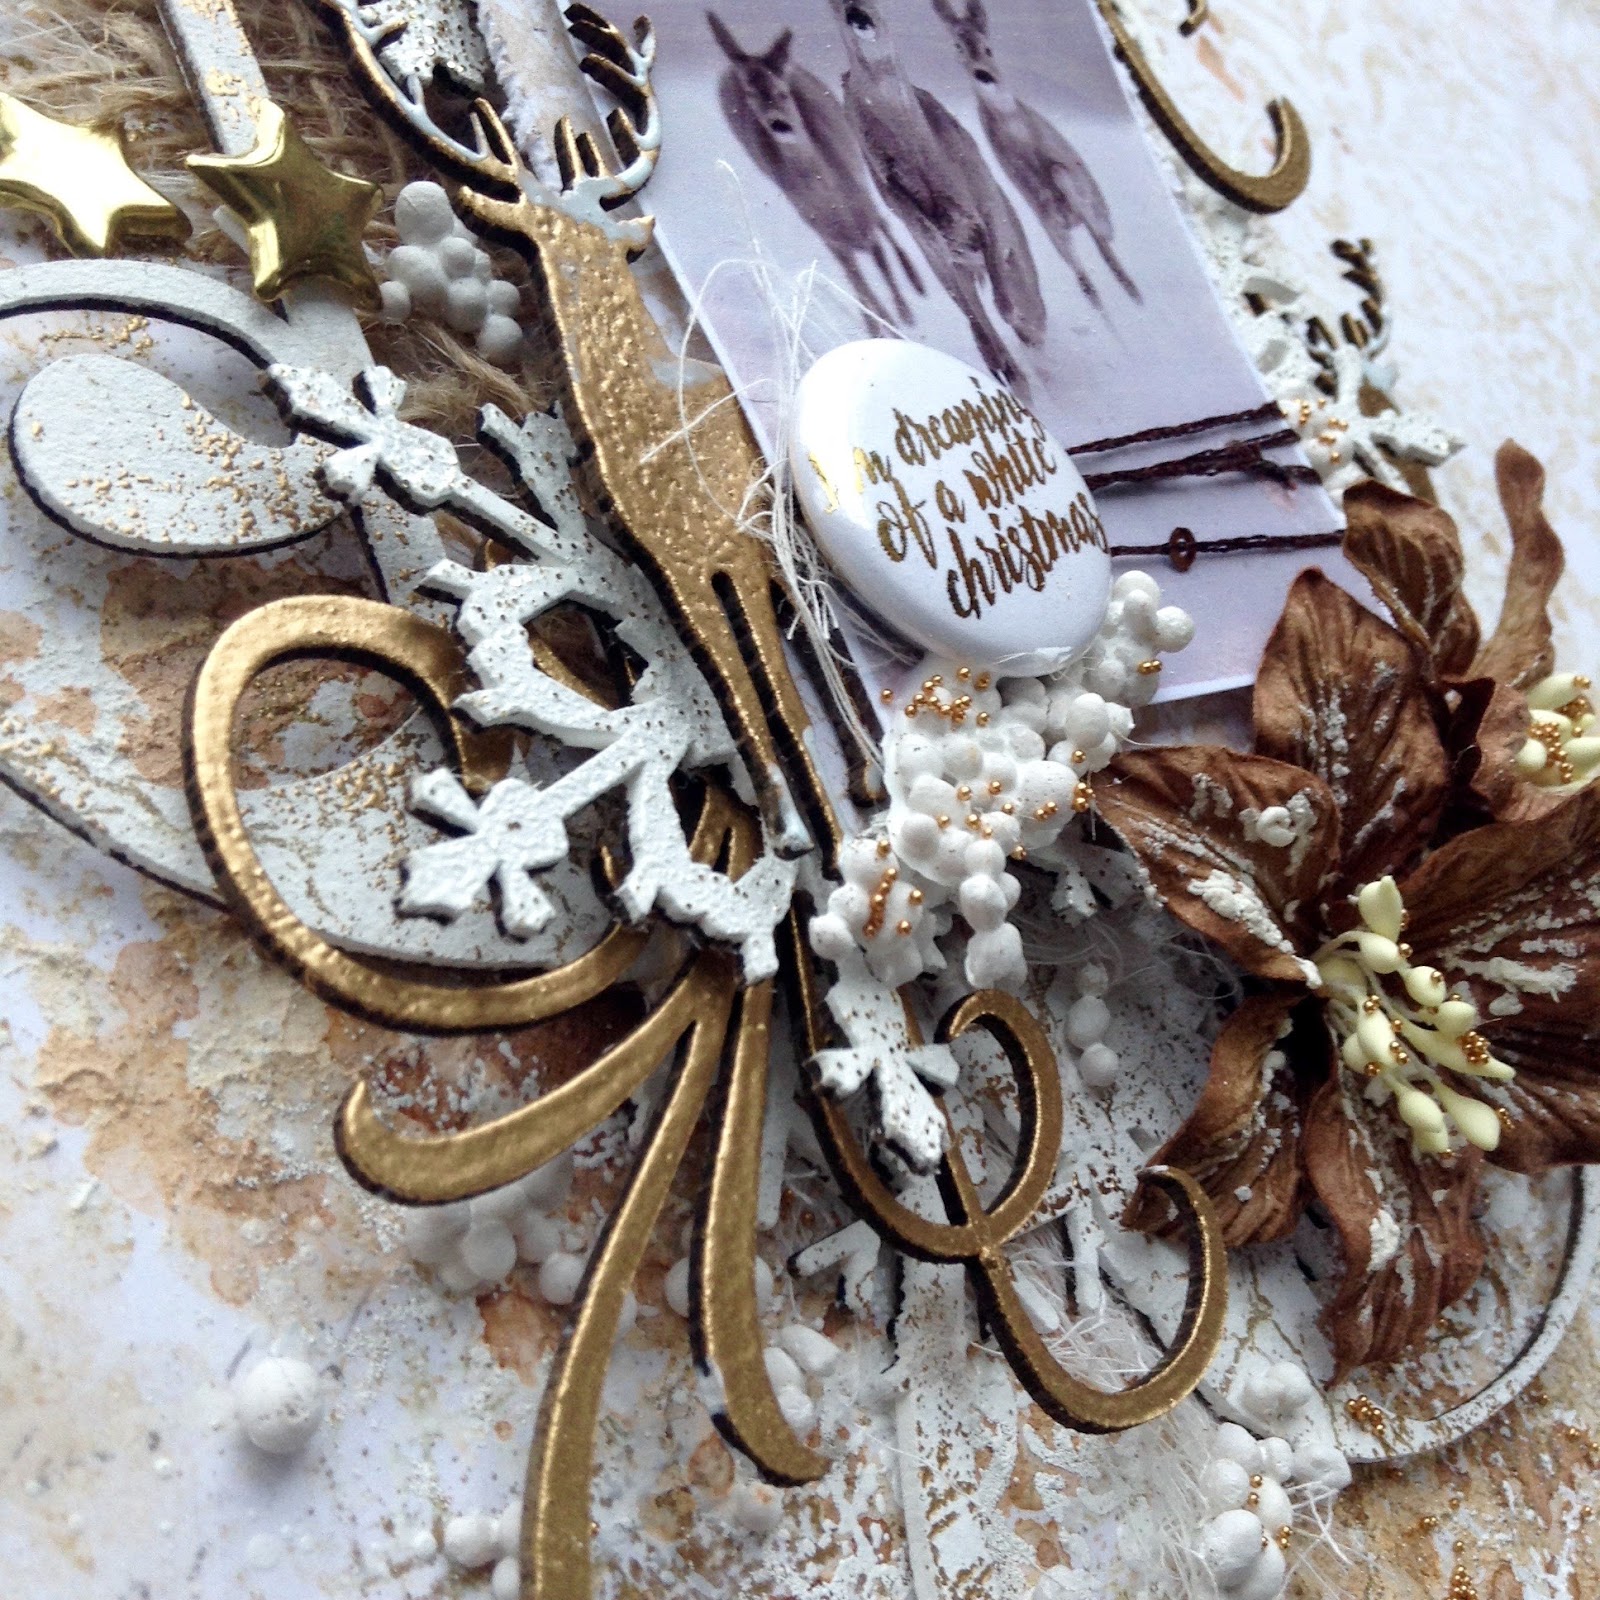
It's a holly jolly Christmas

Once a year my kids will pose for me for the Christmas picture. The rest of the year I have to be sneaky. So these pictures are extra special.

For the Snow Medley chipboard piece I first stamped it with white ink and then used the Icicle Embossing Powder giving it a wonderful sparkle. For the It's a holly jolly Christmas I started of stamping again and then embossed it with Verdant Embossing Powder, while still warm I went over it with Fire Engine Glitter. Heat setting is on top. To temper the brightness of the color I went over it with a white stamp.

For my background I did lots of fuzzy cutting from the Vintage Christmas - Magical and Wonderland papers. So many beautiful details.

I created an inside mat with the same Vintage - Noel paper that is also used for the background. Layering my fuzzy cut pieces, chipboard and extra paper cutouts to give it some depth. Using the beautiful Christmas Blooms to finish off my page.

Paper
Vintage Christmas : Noel - Wonderland - Magical
Chipboard
It's a holly jolly Christmas
Snow Medley
Embossing Powder
Icicle
Verdant
Glitter
Fire Engine
Flowers
Christmas Blooms
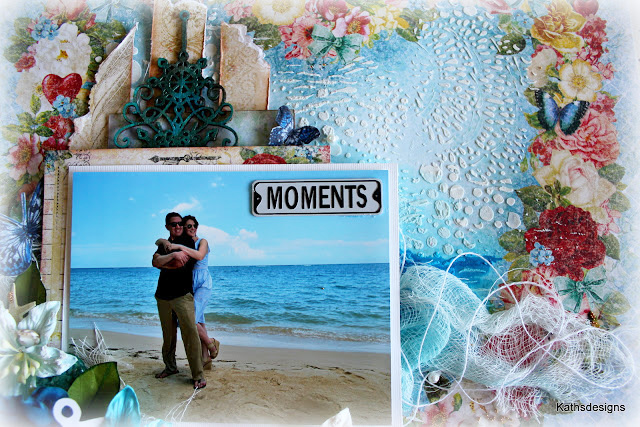
Just the 2 of Us

For Thanksgiving we had a trip to Las Vegas, we love to walk around the casino's there, look at the decorations and have a great time. You'll be seeing a lot more layouts with "Just the 2 of Us"!

For the background I used the Heartland - Love Blooms paper. To create some interest I misted and splattered it with some inks and sprays using the same colors found in this gorgeous paper.

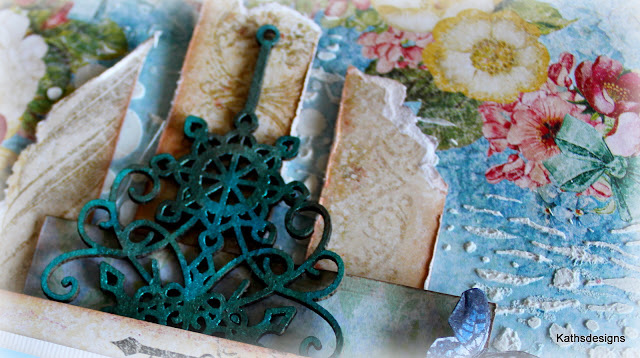
The Crackle Bits and Heartland - Just the 2 of Us chipboard pieces I first prepped with ink and then embossed with Sea Mist Embossing Powder. While the title chippie was still warm I sprinkled it with the Peacock Glitter. Heat setting to stay in place for that extra sparkle.

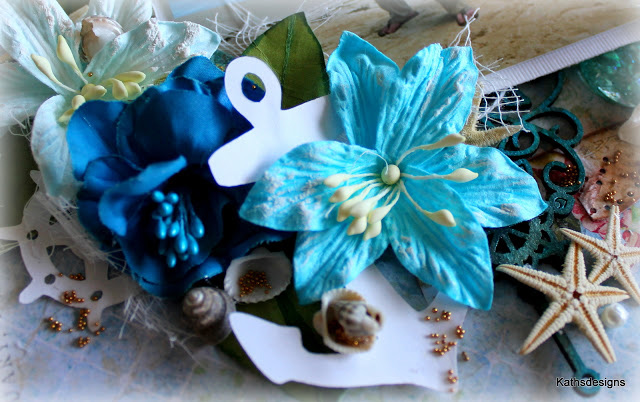
The layers behind between the Crackle Bits are cut from the Heartland - Love Notes paper, with the love heart cut from the Love Song Serenade paper. Once all is assembled, time for the flowers. I used quite the collection. Some final splatters and we're all done!

Paper
Heartland : Love Blooms - Love Notes - Love Song Serenade
Chipboard
Heartland - Just the 2 of Us
Crackle Bits
Embossing Powder
Sea Mist
Glitter
Peacock
Flowers
Heartland : Blossoms - Roses and Blooms
Attic Charm Glitter Roses
Spring Lilies
Love

Time for my third and last layout for this month. These colors make me think about Spring already. Heartland is the perfect collection to pick your favorite colors, it has it all.

For my background I used a stencil with paste and once dry I went over it with mists. I also used some of the Pearl Embossing Powder and the Texture 1 stamps for some extra details.

The chipboard pieces Love, Shabby Brick Bits & Spirit of Heartland I first pre-inked before embossing with the Verdant Embossing Powder with some detailing in Oatmeal Embossing Powder.

Behind the picture I layered Heartland - Kiss Kiss and Love song Serenade paper details with lace and other embellishments. I used a variety of beautiful Blue Fern Studios flowers to add to the layout. Adding some micro beads and sequins around the page for that extra sparkle.

Paper
Heartland : Red Rose Ball - Kiss Kiss - Love Song Serenade
Stamps
Textures 1
Chipboard
Heartland - Spirit of Heartland
Shabby Brick Bits
Love, Cherish, Adore
Embossing Powder
Pearl
Verdant
Oatmeal
Flowers
Courtship Roses
Soft Blossoms
Late Winter Lilies
Thank you for looking!
See you next month!


