Monday, March 17, 2014

Lace Organization Project, and a Shabby Chic Tag

Hello everyone, Joyce here to share an organization idea for your lacy bits.  I had several boxes of acquired lacy bits, and after some time, the boxes became overfilled, disorganized, and I quit reaching for them to use on projects.  They were just too pretty not to be used. I organized them so that I could see all the different patterns, and hopefully make them easier to reach for any put away too.  I made a template out of a 4 x 6 index card in the shape of an “H”, just like those organizational embroidery cards for DMC floss, and cut the “H” shape out of various old scrapbooking papers.  Then you simply wind all the lacy bits over each card.  Don’t they look pretty all organized in the box?  They sure make me want to use them now.  Of course, I couldn’t just leave them in a plain white photo box.  Each boxed lid is embellished with some lovely Blue Fern Studios chipboard pieces.  Even though each chipboard piece is different, the boxes look like a collection because they were designed with the same colors, and similar elements.

Here’s the lid on the first box featuring the blooming foliage chipboard treated with paints, and the fiber tissue paper technique on those little buds:


Here’s the lid featuring a Bohemian Flower and the  Leafy Page Accent chipboard treated with paint  a homemade glaze, and crackle.


Shabby Chic Tag:

 The base of the tag was created with the Boudoir Blue Fern Garden paper, and Signature paper pattern was torn in strips and applied to the base with a heavy gel medium.  Various stamps were applied to the paper before the application of gesso and creamy colored acrylic paint.  After the gesso/acrylic paint application dried, another application of various stamps were used on top of the strips and the base of the tag.  After all the products were dried, a lot of tea bag throwing went on to render an aged look. 

The apothecary jar was created with white acrylic paint, one layer of fiber paper, stamping, stencil and molding paste, and finally some application of pink mist.  It looks so pretty and feminine.

Here’s a picture of the front of the tag.  


Here's a picture of the back of the tag, see how he front flap folds over?  That's because of the jump rings attached to each of the three eyelets.

Thanks for the visit.  I hope I have inspired you to use your Blue Fern Studios chipboard pieces on an organizational idea.

Sunday, March 16, 2014

Tutorial - Mixed media canvas by Marie-Josée

Hello all!

Today, I will show you how to create this mixed media canvas in 10 steps.


Supplies:

- Small canvas (I used a 5" x 7" canvas)
- Glue
- Sponge
- Paintbrush
- Heat gun (usually used for embossing)
- Paper towels
- Stamps
- Black ink
- Piece of a Blue Fern panel or any other Blue Fern chipboard (I used a piece of the Chickenwire panel)
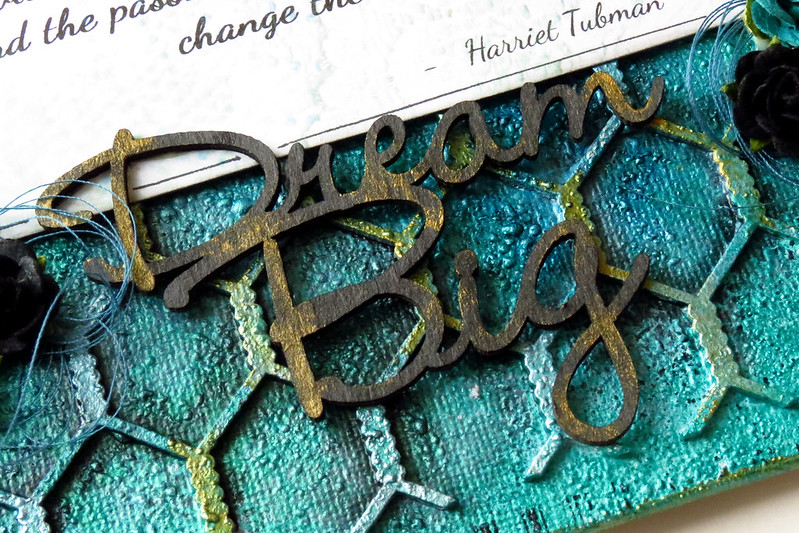
- Blue Fern words for the title (I used the "Dream Big" phrase from The Optimist set)
- Quote of your choice written by hand or printed on a piece of paper or cardstock
- Gesso

- 2 or 3 differents colors of Silks acrylic glazes
- Acrylic paint in a color that matches your Silks paints
- Black mist (mine is made with water and Memento ink)
- 1 or 2 mists matching your Silks paints
- Inka Gold paint in Gold and Silver, or any other gold or silver medium.
- Various embellishments (I used flowers and thread)

Instructions: 

First of all, I want to apologize for the ugly background. I was working on my kitchen table and had to use some flyers to protect my table. I hope the bright colors --and the chicken-- won't be too distracting! :)

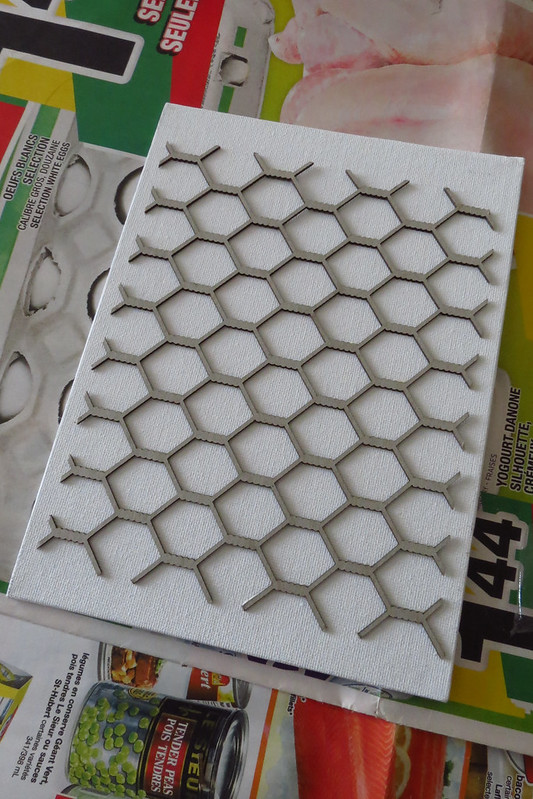
1) First, glue your piece of chipboard to the canvas.


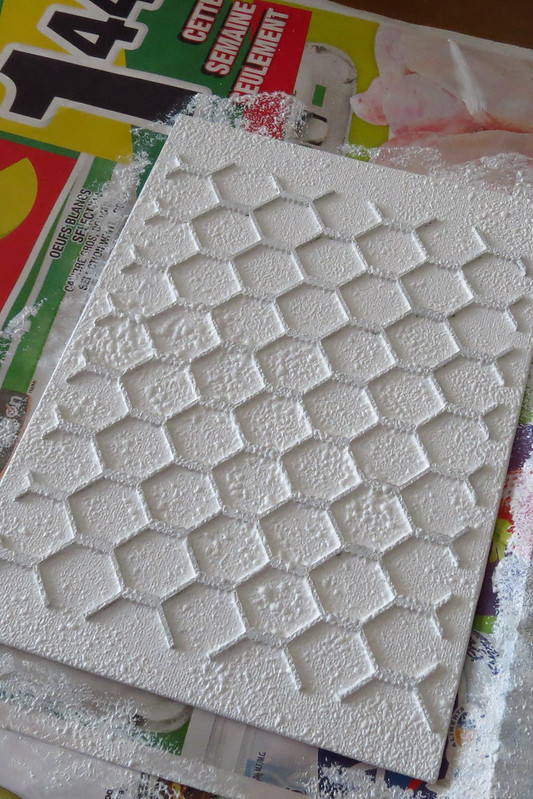
2) Apply gesso with the sponge all over the canvas and the chipboard. Dry with the heat gun to create texture and bubbles. Wait until it is completely dry before moving on to step 3.


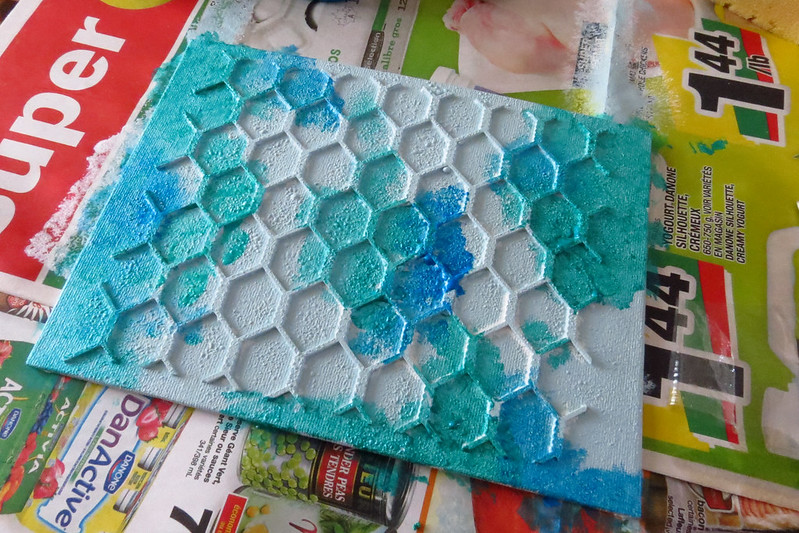
3) Apply acrylic paint with the sponge. As you can see, I used a very light shade of teal. You can use a darker color if you want. Dry with the heat gun if you wish to speed up the process. Wait until it is completely dry before moving on to step 4.


4) Using your paint brush, dab touches of your first Silks color all over the canvas. Don't let the color dry.


5) Do the same with the second color. Ensure the colors overlap. Then proceed with the third color if you use one. -- I'm sorry, I forgot to take a picture of the finished background with the third color. :) -- Once you are done, dry with the heat gun if you wish to speed up the process. Wait until it is completely dry before moving on to step 6.


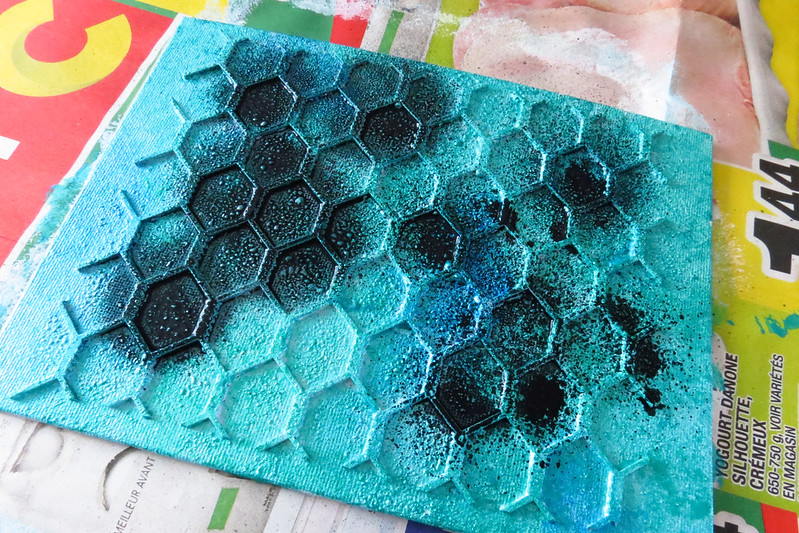
6) Spray black mist all over your canvas.


7) Immediately after spraying the black mist, use some paper towels to wipe most of it, as if you were dabbing some paint on the canvas. However, try to leave as much black as possible in the creases to add dimension to your project. Add more mist if needed. Once you are done, dry with the heat gun if you wish to speed up the process. Wait until it is completely dry before moving on to step 8.


8) Spray the other mists all over your canvas. Dry with the heat gun if you wish to speed up the process. Wait until it is completely dry before moving on to step 9.


9) Apply both colors of Inka Gold with your finger on the chipboard. If your Inka Gold is dried out, like mine, just dip your finger in water. This will dilute the Inka Gold and you will be able to add color.


10) Use the black mist to color your title. Add a touch of Inka Gold to it. Glue the quote, the title and the embellishments on the canvas. Stamp some details with your stamps and black ink around the canvas.

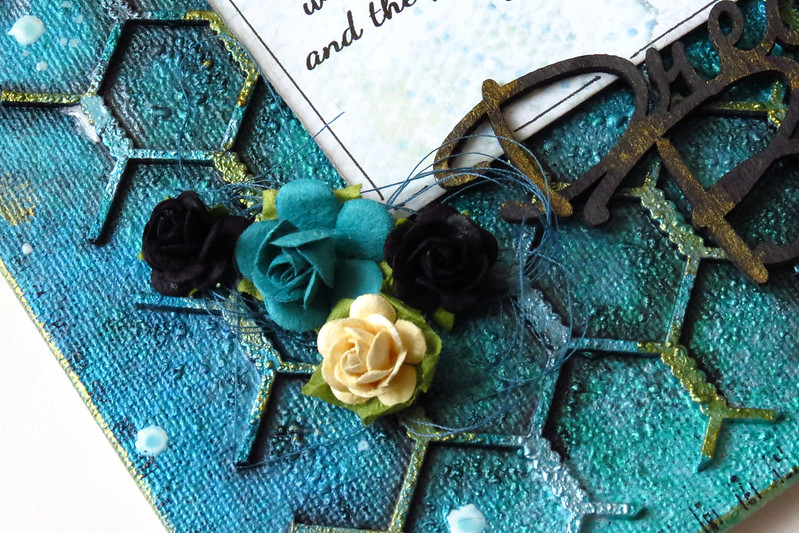
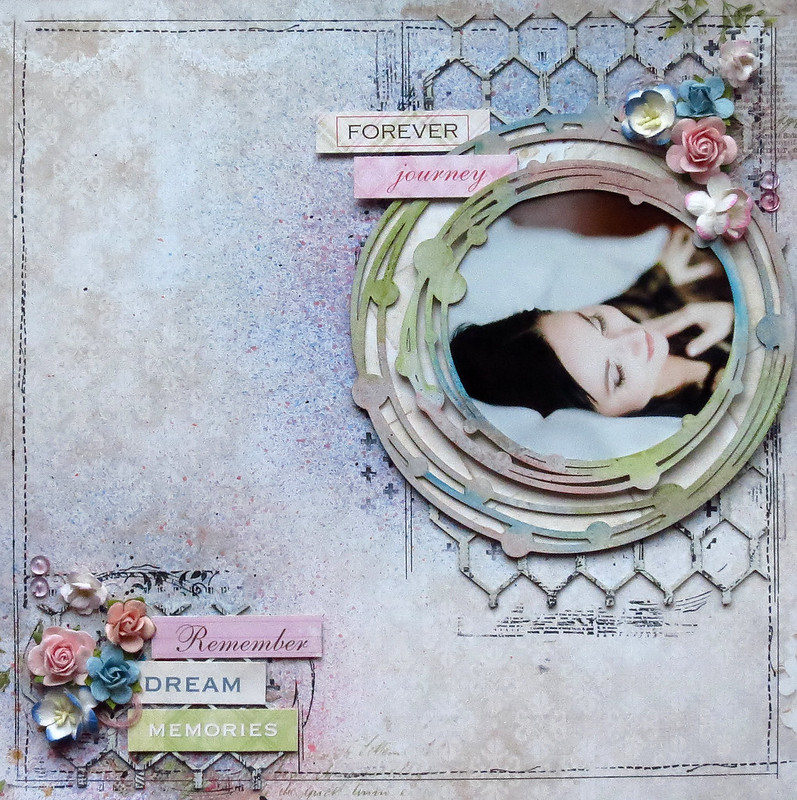
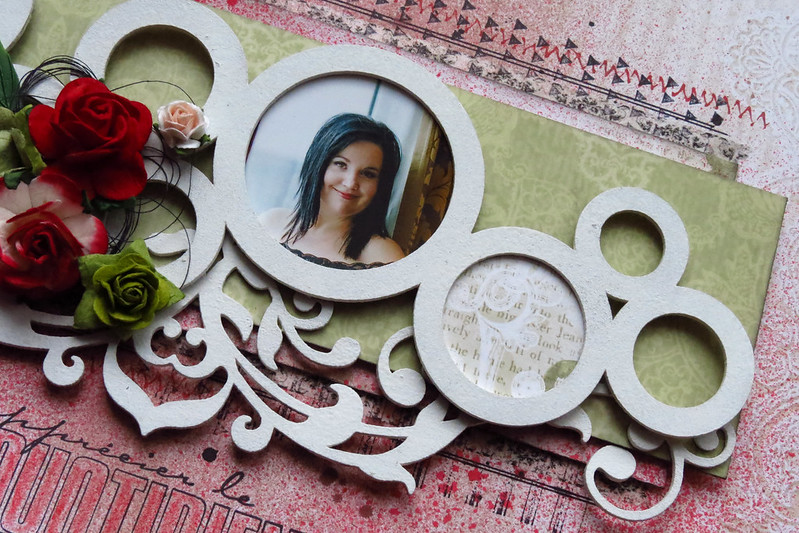
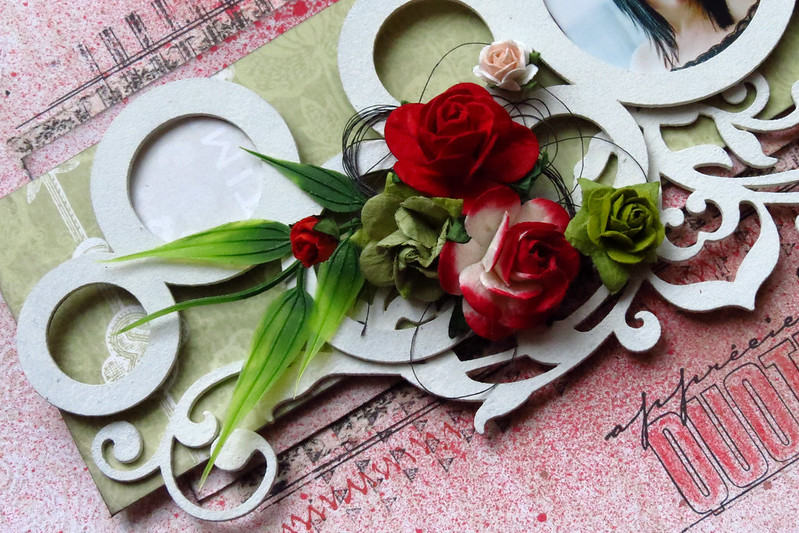
Here's the end result:


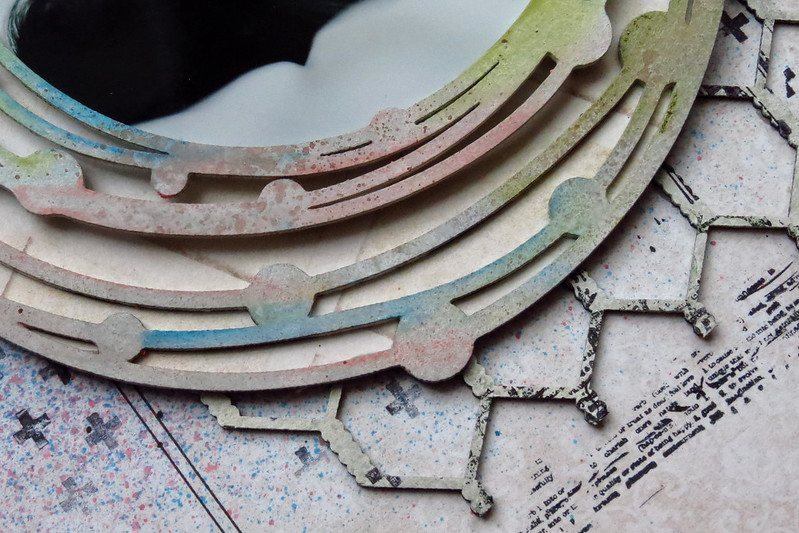
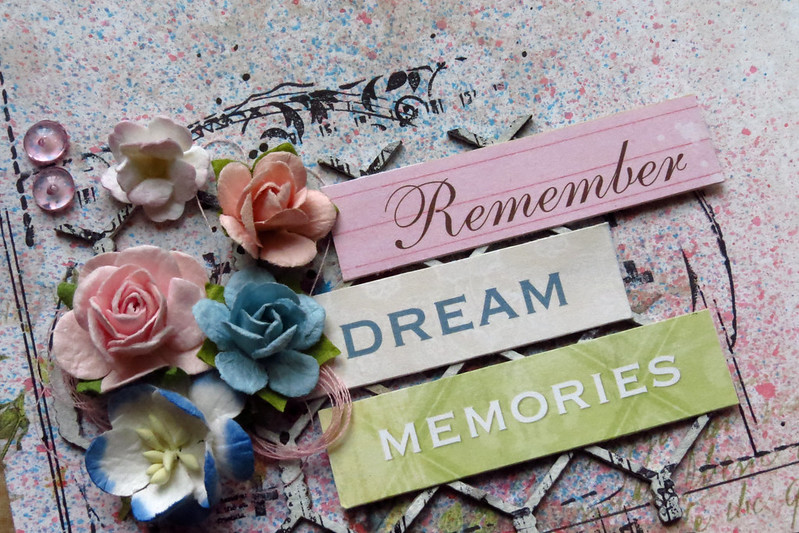
And some close-up views:


Friday, March 14, 2014

2 Cards and a Fabric Journal by Evgenia Petzer

Hello dear friends! Its Evgenia Petzer with you today, I have 2 cards to share with you today and a handmade fabric journal/notebook.
Both cards that I amde use the gorgeous Blue Fern Garden paper. I really LOVE everything about it the designs, the quality, just great!

Blue Fern Studios chipboard used: doily bunting, swirly doodle.

 The swirly doodle is painted with 2 colors of acrylic paint and then I applied glossy accent on top


and the second project is fabric-covered handmade notebook. Pretty in pink, hey?:) for a little girl.
Blue Fern Studios chipboard used: Brigitte Butterfly Set, Symphony border

and some close ups:
 the pages inside are hand-dyed in coffee

and another card
Blue Fern Studios chipboard used: bits of honey, all natural set


 microbeads on top of the chipboard leave from All natural set.

Hope you will have  a wonderful day!
Evgenia.

Thursday, March 13, 2014

Three layouts with Blue Fern Garden by Marie-Josée

Hello all,

I hope you are doing fine! Today, I have three projects to show you, all using the Blue Fern Garden paper collection. Here they are.

"Memories Captured" layout:


To create the background of this layout, I used the Turkish panel. Panels sent to DT members sometimes have smaller pieces still stuck to it. I decided not to get rid of those and to use the panel as is. I glued it to a piece of 12 x 12 chipboard, applied gesso and then white acrylic paint. I altered the background with mists, stamps and ink.


I used two different Blue Fern Garden papers on this layout, Love Letters and Picnic (both sides). I used pop dots to add dimension.


I also used a phrase from the Captured Words set as a title. I decided to leave it bare to make it stand out.


"Forever" layout


For this layout, I used a Blue Fern paper as a background (In Bloom). I altered two pieces of the Chickenwire panel with gesso and glued it to my background.


I also used two pieces of the Beaded Strings set. I used one as a frame for my photo and the other one as a second frame around it. I applied gesso and three different colors of Gelatos. I used a bit of water and the tip of my finger to blend the colors. I also sprayed a touch of brown mist.


Then, I cut some words out of the Calling Cards paper and used them in the corners of my layout.


"Apprécier le quotidien" layout


For this clean and simple layout, I chose to use a color not found in the Blue Fern Garden papers, that is, red! :) Here's what I did. I chose a rather plain paper for my background (Parlour, B side). As you can see below, originally, the color blue was found on the paper:


Since I wanted it to match the rest of my layout, I used a watercolor pencil and added a touch of red to the blue flowers! :)


You also noticed that I only used a tiny picture. That is because I wanted to use a piece of chipboard from the Circle Groups set as a frame. I painted this piece of chipboard with white acrylic paint.


I used the Royal Border - Large, also painted with white acrylic paint, under the "frame" to add interest and texture to my layout.


Wednesday, March 12, 2014

Summery kids by Maja

Hi everyone. Up here in the north of Sweden where I live it´s still winter, but the sun is back and the snow is melting. Guess thats why I got in a summery mood when I made these two layouts that I will show you today.
First up is my sons swimming in the lake last summer. They were really focused on learning!


I have used the gorgeous "Blue Fern Garden" Papers for this layout and chipboards used are Swirly Doodle, Little Bird Set and Captured words.


To colors I have used on the chipboard is Distress Inks in three different colors. I covered the word with Glossy Accent.


Next layout is a bit more "messy". A messy wild son needs a messy page, right? This photo is taken a few yers ago and I so love it!


Here I have painted the chipboard word with Distress Paint in blue and yellow and let it dry. After that I used some black gesso and before it was dry I used a babywipe to dry off some of the color.


Here with the Turkish Panel I did it the opposite way... used black gesso let it dry and went over with white gesso and dried off some of the paint with babywipes.

Thanks for stopping by =)

Tuesday, March 11, 2014

A Dose of Inspiration!

Good morning, our Blue Fern friends! We thought we'd start doing something special to give you a little boost of inspiration from our beautiful design team :)

A couple times a month we are going to blast the blog with an array of projects that our designers have created outside of their DT commitments here, whether they be for fun, a challenge somewhere on the web, or another team. Whatever the case, they've been using BFS products everywhere and we would love to share some of those projects with you, just in case you didn't see them somewhere else!

So here we go 
{prepare to be inspired}

Jackie Clark

Kelly Foster

Keren Tamir

Lisa Gregory

Maja Stokk

Marie-Josee Hamel

Patter Cross

Valerie Serfozo

I hope you've enjoyed an extra dose of inspiration today!