Showing posts with label video tutorial. Show all posts

Monday, November 2, 2015

November Inspiration with Jelissa

Hello friends! Hope your weekend of trick n treat has been fun!

I'm up on the Blue Fern Studios blog today to share two layouts. And if you've been wondering, here are my little girl's photos at last! I finally found the time to process them and print them out for scrapping. And I got to say, the feel of a newborn in my arms and their intoxicating smell is just so addictive!

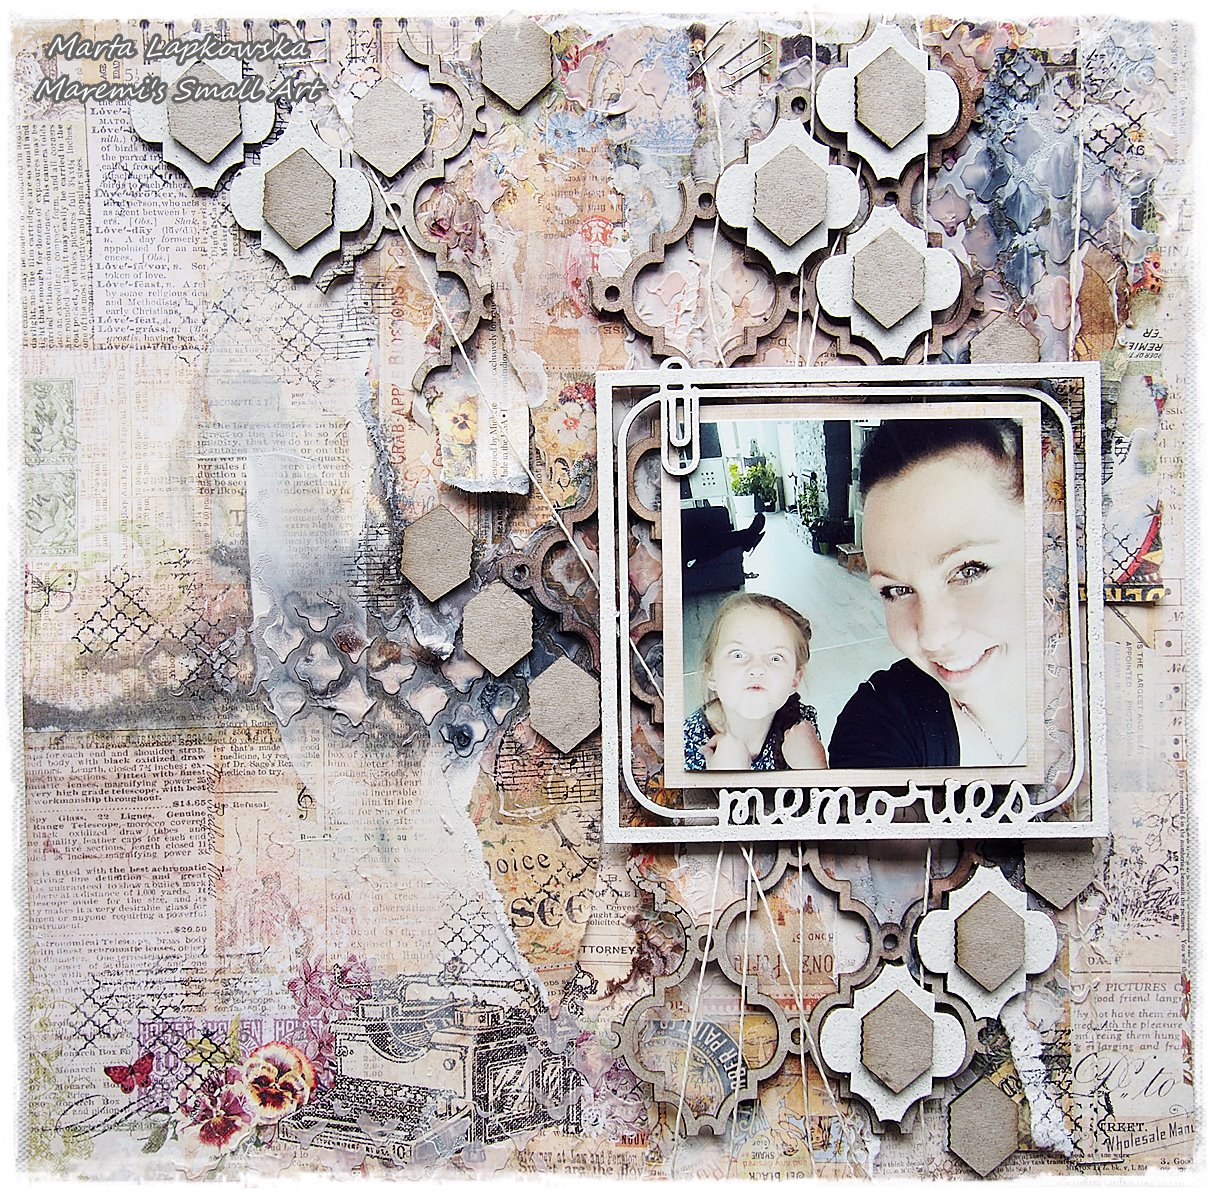
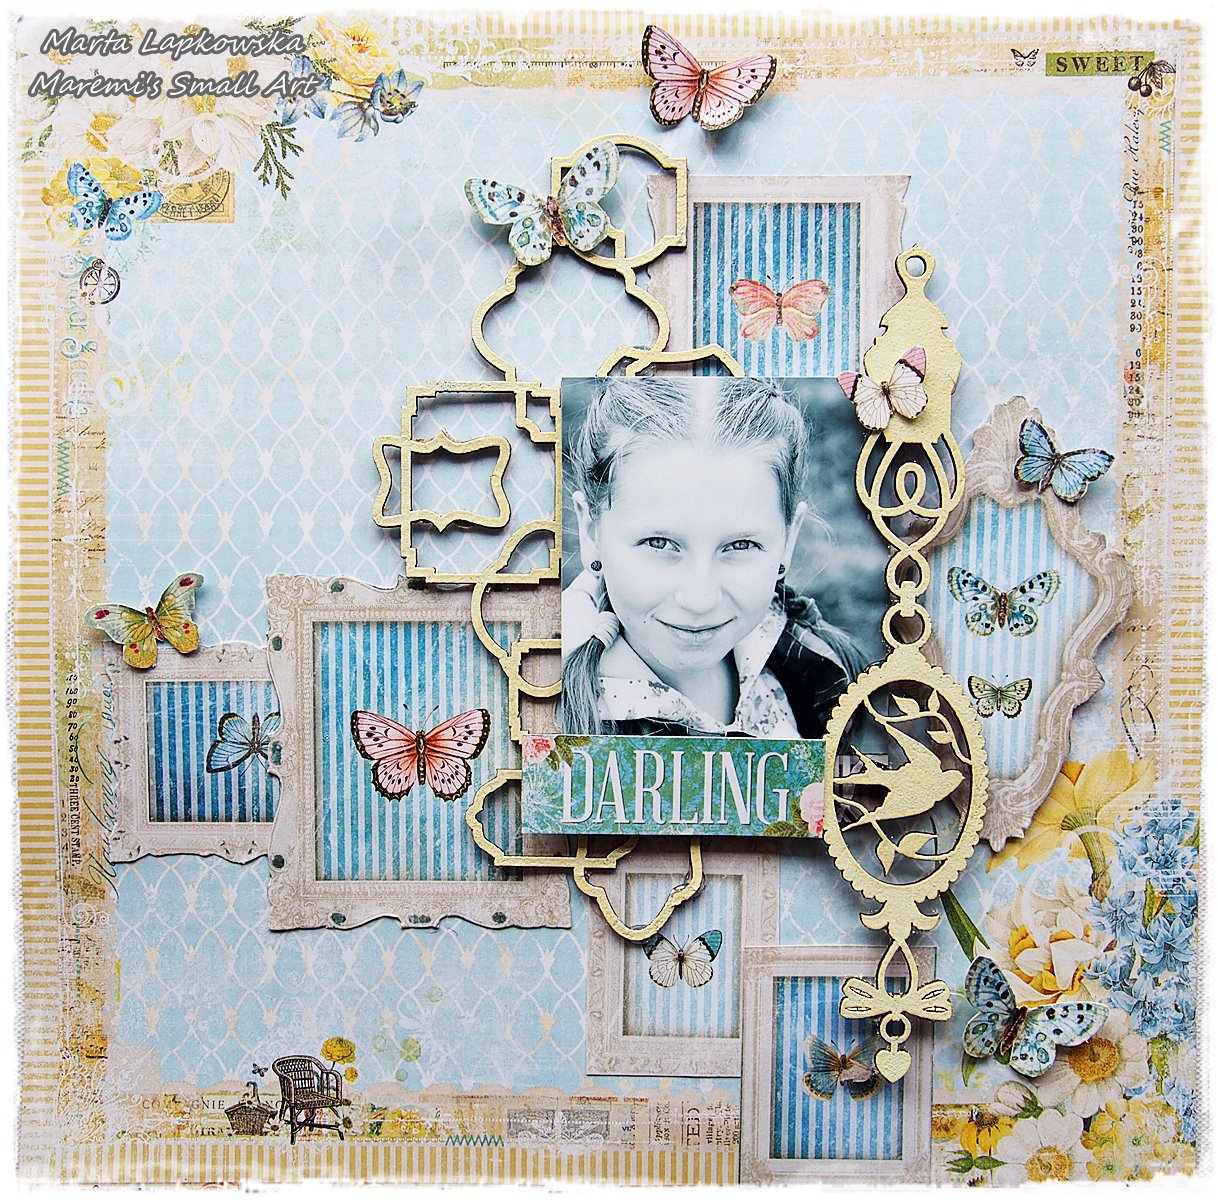
Here is my first layout, based on the November challenge sketch created by Michelle. I used lots of the gorgeous papers from the Autumn Anthology collection - pastels are really my favourite!


My take on the sketch:


This time I've pretty much stuck to the sketch changing only the title. My background is deliberately simple so as not to steal the limelight from the pretty papers  and chipboards.
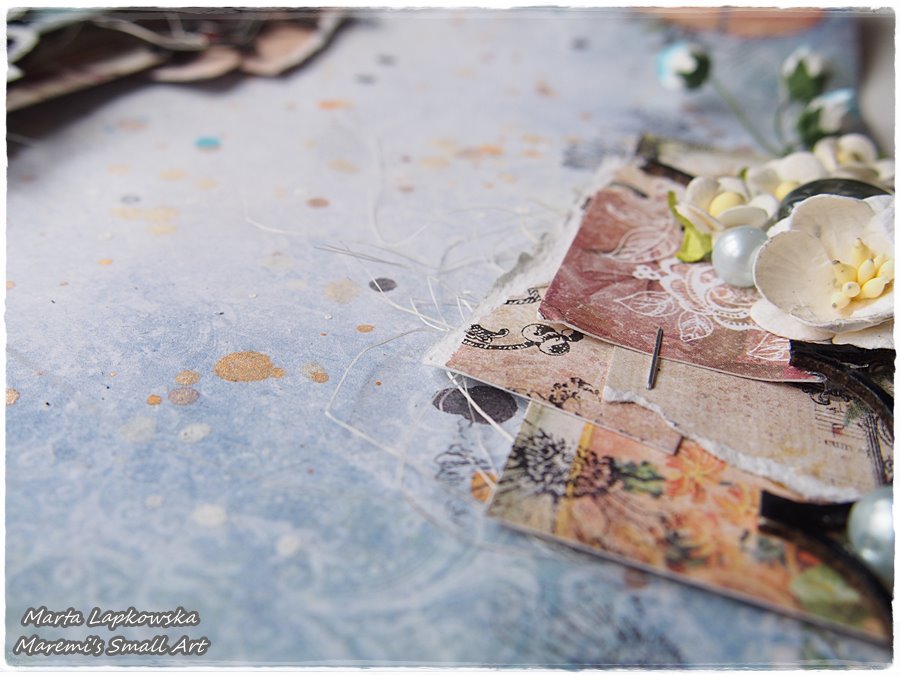
Some closeups:

Under my flowers, I have the Floral Lattice Bits all heat-embossed and layered on top of strips of papers from the Autumn Anthology papers which I have the edges punched.


The French Ironwork chipboard which I heat-embossed as well - first with two different shades of brown and as an accent, I used the Fern Embossing Powder, one of the many new products from Blue Fern Studios. Some stamping in the background was done with the Garden Frolic stamp set.


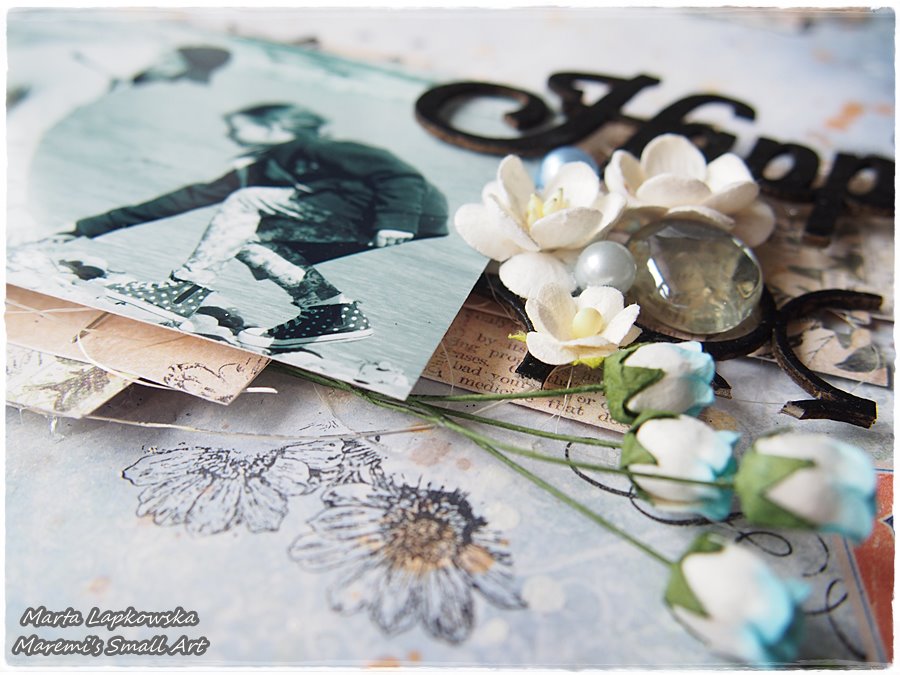
Another half of the Floral Lattice Bit which I snipped off to balance the layout. Lots of layering too from different sheets of the collection.


My title, made up of words from two different sets - Baby Words and Perfect, Adorable, Special - which I brushed lightly with paint and inked the edges with gelato.

Blue Fern Studios products used:

Autumn Anthology - Parfumerie, Gazebo, Mercantile
Chipboard - French Ironwork, Perfect, Baby Words, Floral Lattice Bits
Mediums - Embossing Powder (Fern)

My next share is a video tutorial and I had heaps of fun doing it. Each and every one of my kids get a shadow box or canvas for their baby photo and my little girl is no exception. While I really love how sturdy the Blue Fern papers are, I wanted something that I could mount on a wall or display without warping over time. So I chanced upon the idea of transferring the entire sheet of patterned paper over on to my canvas.

Here is the project:


You can see just how different the background paper looks now! Because of the uneven-ness in removing the layers of paper, I had little patches of white all over, with some bits of the canvas exposed. It's a gorgeous white haze effect on top of a very pretty paper, and muted it just enough to fit the theme of the photo.

Some close-ups:


My title piece - I snipped off the "Hush" from "Hush Little Baby" to fit the composition of the canvas.


Aloha Flower chippie, sneaked in between all those layers of Calling Cards cut-outs.


My background is a mixture of simple stenciling as well as heat embossing with another sweet color "Petal" from Blue Fern Studios. I also cut out little butterflies and placed them all over the canvas.


Butterfly Friends chippie helping to fill out the layers and also to create visual flow.


Some of the background details.

And here is the start-to-finish video. That's all I have for you today, so sit back and enjoy!


Blue Fern Studios products used:

Autumn Anthology - Calling Cards, Newsworthy, Balcony
Chipboard - Aloha Flower, Butterfly Friends, Hush Little Baby
Mediums - Embossing Powder (Petal)


love,

Tuesday, October 27, 2015

Goodbye post from Video Educator Marta Lapkowska

Hello everyone,

It's Marta Lapkowska here. I am back to you with my last projects created for Blue Fern Studios.
I had such a great time being Video Educator for Blue Fern Studios. Wonderful products with great quality and original designs.
I will miss my team mates and all of you great followers.

I hope you will enjoy my two last layouts and grab some inspiration for yourself.

My first make is a mixed media based page. I love Autumn Anthology paper collection. It's beautiful, romantic and sophisticated!


I used mediums to add texture and colour to my background.


Another great way to add interest to your page is to stamp. Blue Fern has a wonderful selection of stamp sets.


As you can see I embossed my chipboards using white embossing powder.
You can follow whole creative process on my video tutorial. Enjoy !


My second project for today is clean and simple page.
I used paper from Autumn Anthology collection called 'Le Ballon'.


To add some interest to my background I added some splashes with sprays and stamping.


Chipboards were embossed with black embossing powder. I like the contrast created by adding black colour. Title 'Happy' stands out greatly.


I wish to thank for having me here!
It was my great plasure.

Hope to see you soon. Hugs, Marta Lapkowska xx

Friday, October 2, 2015

Frolic Fun with Jelissa

Hello friends!

How time flies and we're already in the month of October! Honestly I can't wait for the rest of the year to come by as I know the weather will be a lot cooler (and the northeast winds will be blowing the haze from Indonesia far, far away....)

I'm up today on the Blue Fern Studios blog with two creations for this month. Firstly is this layout of my second boy when he was still a little baby. When our little girl was born she looked exactly like her eldest brother. But as the days went by and I looked at her again, she resembles her second brother! It's amazing how babies change over time in character and appearance.

I'm using the oh-so-gorgeous Frolic collection designed by Michelle Singh. Just love the bright happy colors perfectfor a day out under the sun or just about any other memory that warms your heart. My background work is simple because there were just so much detail in the papers that I wanted to show off.

Some close-ups:


The Deja Vu Atelier chippie which I have covered with a few different mediums. What you see here is crackle paint in pewter (for some reason my cracks are not showing up nicely all over), Perfect Pearls and Sticklers.


For this part of the same chippie, I've painted the flowers with matt paints and leaves with Twinkling H2Os.


Some more detailing here with plastic fillers on one of the chipboard flowers and silver microspheres dotting the leaves. I've layered my photos with pieces from "Calling Cards" from the collection.


My title piece double heat-embossed and sprinkled with distress glitter.

And my balancing cluster with simple fussy cut designs.

Blue Fern Studios products used:

Paper: Frolic - Calling Cards, Friendship, Petite Moments, Veranda, Secretary
Chipboard: Deja Vu Atelier chippie, Mommy's Boy


 My second creation is a layout with a video tutorial. This one is of one of my cats who passed on some years back at the age of 13. Grumpy one she was, but always so elegant and graceful (until the day she tried to sneak up on a grasshopper and it backfired spectacularly).


I used lots of pinks from the Frolic collection because she was such a lady.

Some close-ups:


The Framington Medley chipboard layered on top of fussy-cut frames.


Chained Bits chipboard which I snipped and tucked all over.


My title piece from the Love Story collection. It was sitting in a box full of these cut outs and looked perfect for this layout.


My floral cluster.

And here is the video of how I put everything together. Sit back and enjoy the process!


Blue Fern Studios products used:

Paper: Frolic - Secretary, Amoroso, Allegro
Chipboard: Chained Bits, Framington Medley


And that's all I have for today. Thanks for dropping by!

love,


Sunday, September 27, 2015

'Memories' by Marta Lapkowska

Hi everyone,

It's Marta Lapkowska here! Are you rady for some inspirations ?
I have made two layouts for today's post. Two different styles but two equally interesting projects.

First page is totally mixed media based layout.


I used brand new paper collection 'Autumn Anthology'. For some interest I added some white string across the page.


I have added some modelling paste through the stencil. Everythig was coloured with sprays.


As my final touch I added chipborad 'Clip Frames'.
You can follow the whole creative process on the video tutorial.
I hope you will enjoy it:


My second make is plain and clean.
As you can see this layout is flat and easy to store. Even tho I am a mixed media girl I like to make sometimes easy pages which could be challening for me. No art mediums ? Oh yes, just stunning papers and few wonderful chipboards!


I must say I love the papers from 'Frolic' collection. Bright, very colourful and beautiful!


I embossed all the chipboards with yellow embossing powder.


I love fussy-cutting :)


I wish you a very creative day !
Love, Marta xx

Wednesday, September 2, 2015

September Inspiration with Jelissa

Hello friends and welcome to the month of September!

Things are definitely going at warp-speed for me now that little baby is due any time now. Sometimes I do feel like I'm getting affairs in order, which sounds so morbid!

Anyhow, I'm in today to share my September creations for Blue Fern Studios. I couldn't resist using the sketch that Michelle has created for this month's challenge even though I had a different project planned. So here is her sketch:


And my take on it:


I've never used so much purple before! But the soft palette of the Deja Vu papers made it so easy and pleasing. This is one of my favourite photos of Number 2 and hubby - don't they look so happy with their bright smiles?

Lots of close-ups:


My title, which I have left untouched but just simple priming with gesso. Not forgetting the paper layers I have under my photo.


Part of the Circle Vine chipboard which I used to frame my photo. I had cut out one end so that the whole piece fits and still gives me the flow I wanted for the page. I had also die cut some leaves out for adding into the floral cluster.


Die cut doily from one of the Deja Vu sheets.


Using the collection title from the info strip as a sentiment in my top cluster. I used the Deja Vu stamp set to create a resist for my watercolor background, plus the little piece which I had snipped off the Circle Vine chipboard. I also added some beads and distress glitter for extra texture.

Blue Fern Studios products used:
Papers: Deja Vu collection - Tresors, Atelier, Lustre, Petite Cartes
Deja Vu Stamp set, Widgets
Chipboards: Laughter, Happy, Smile
Circle Vine

My next share is a educator video I've created. I had wanted a relatively simple layout without too much clusters and a comfortable amount of white space. 


Again, using Deja Vu papers. I can't seem to get enough of this gorgeous collection! The drawings on this paper is so subtle but yet they actually help to create a visual flow that framed my main cluster beautifully.

Many, many close-ups again:


The Township Collage chipboard which I had altered in a few different ways.


I've always wanted to use that bird cage stamp!


I like the dangling trinkets in the Deja Vu stamp set a lot because of the intricate details they have, just like BFS's laser-cut chipboards. 


My title piece.


Main cluster with the pretty papers all layered up and I sneaked in bits of lacy flowers.

And here is how I created this page:


Blue Fern Studios products used:
Papers: Deja Vu collection - Friperies, Petite Cartes, Lustre, Atelier
Deja Vu Stamp Set
Chipboards: Township Collage, Frolic in the Sun