Showing posts with label Wild Flourish Bundle. Show all posts

Saturday, July 23, 2016

July's inspiration by Pascale

Hello Sweeties,

Today I'm up on Blue Fern Studios blog with three new projects. The first two features the Timeless collection.

I take th photo of the Astrance in the garden of the castle of Chaumont-sur-Loire (Loire Valley, France)


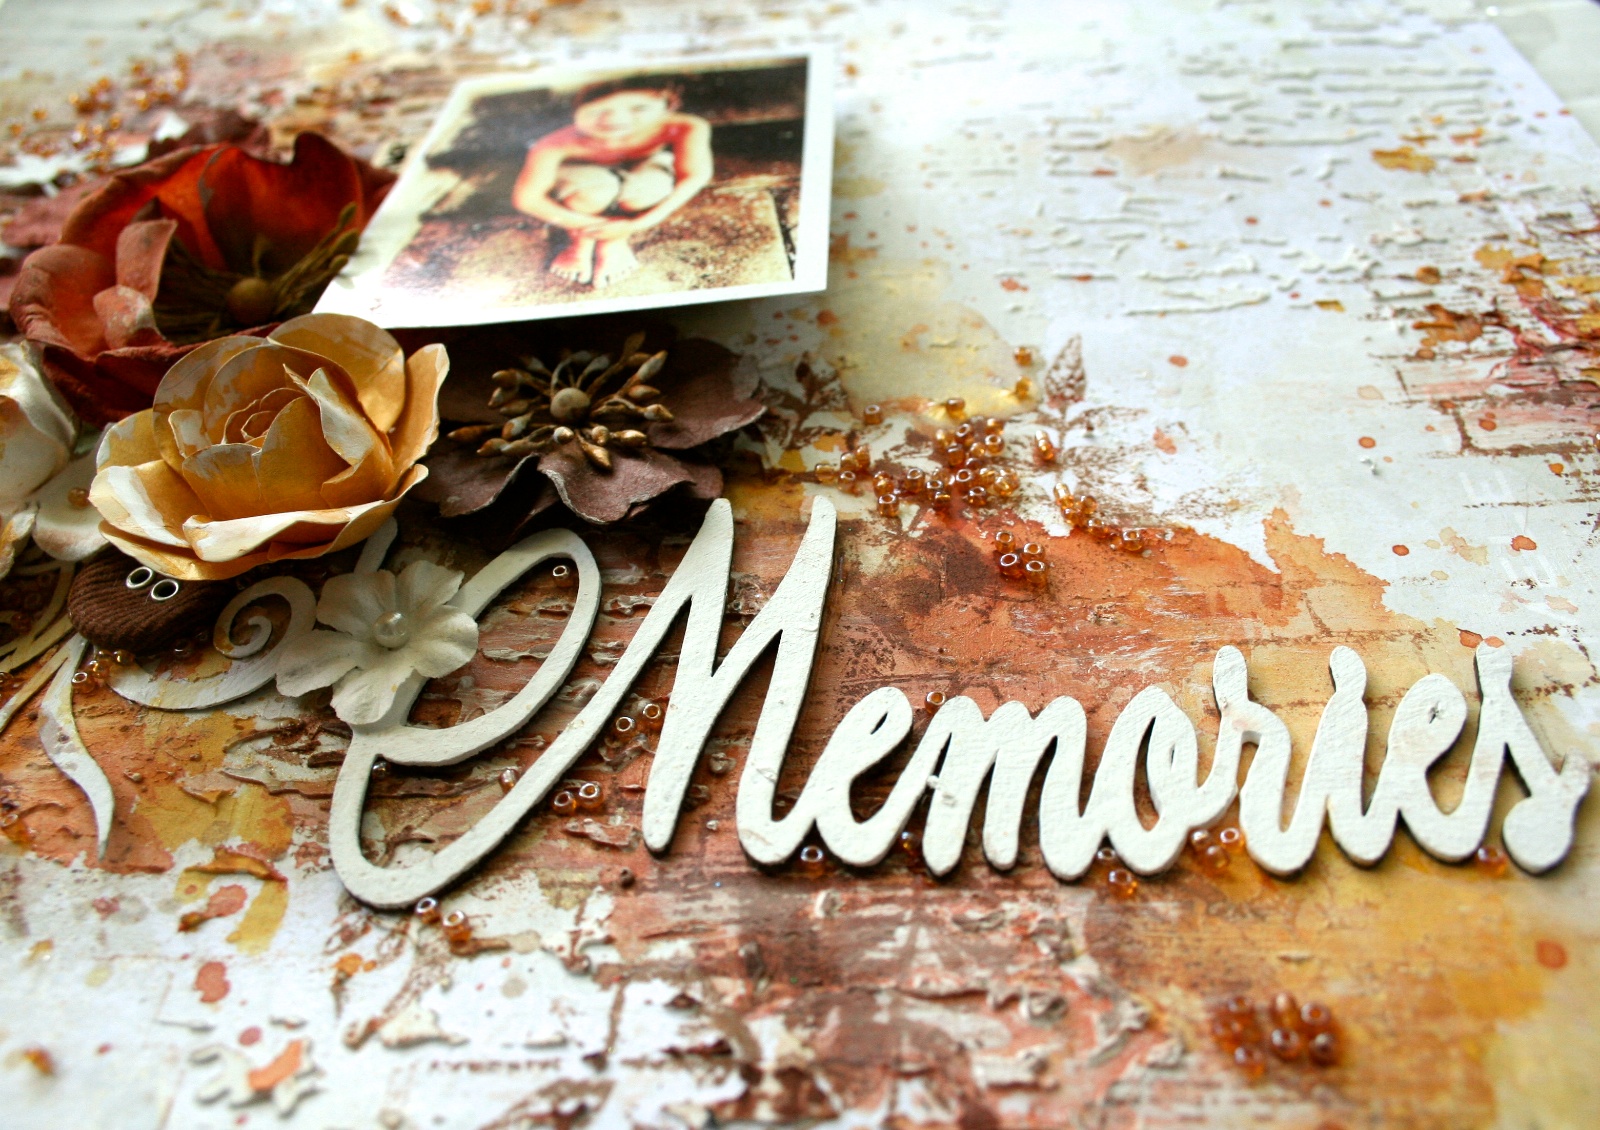
First I primed the Song paper from the Timeless collection with clear gesso. Then I added a design with a stencil and 3D Gloss Gel.


When dry, I added some color in green and burgundy to match the photo. I splattered a mix of Merlot glitter, gel medium and water as well as white gesso. I added also a design with the Postal stamp and the Ginger embossing powder.


I primed the Wild Flourish Bundle with white gesso before coloring it with watercolor. I sprinkled the leaves with Verdant and Lime embossing powders to add some texture.


I primed the Persian Ornement with clear gesso and covered it with a clear crackle paste. When dry, I used two mica powders to color it.


To finish, I added some random stamping with the Halftone stamp.

Blue Fern Studios products:

Papers - Timeless (Song, Freedom) ;
Chipboards - Wild Flourish Bundle, Persian Ornament ;
Stamps - Journey, Haftone ;
Imagine Ink - Embossing Powders (Verdant, Lime, Ginger) ;
Imagine Ink - Glitter (Merlot).

------------------------------

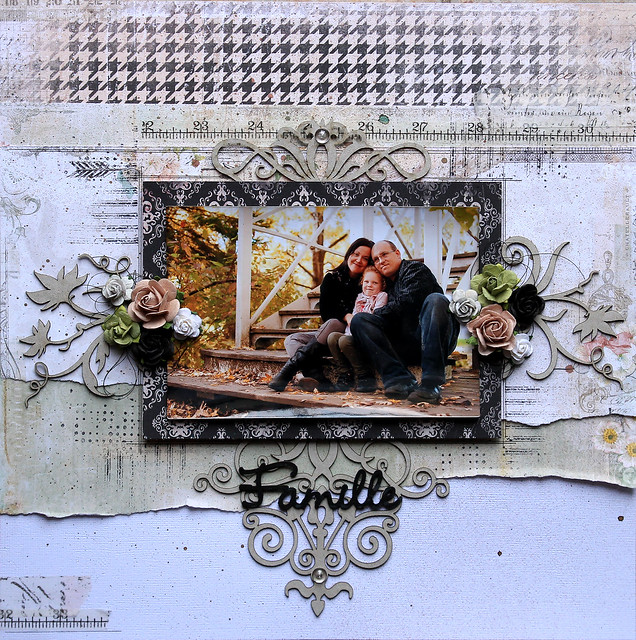
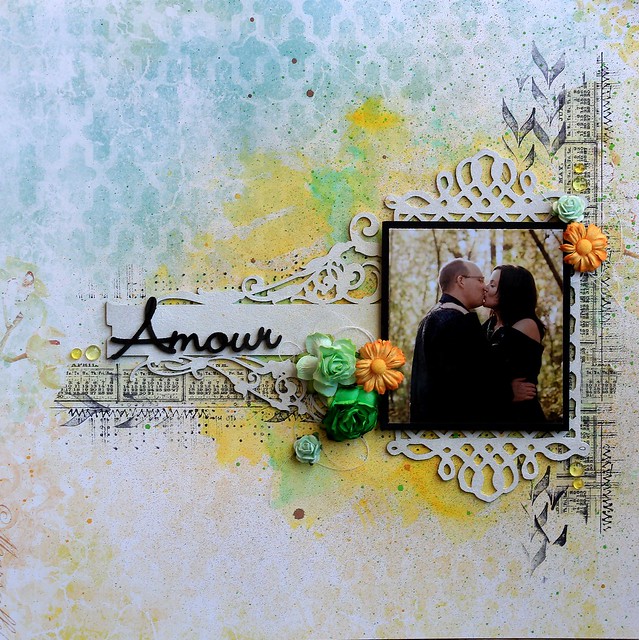
I also use the Timeless collection for the second layout but as you can see the result is really different. I take this photo during an street event we have recently near the place I live. This clown is called Lullaby and the show was so entertaining.


I cut in the Freedom and Main Street papers from the Timeless collection some squares that I glued on the background with a soft gel. When dry I covered everything with clear gesso.


Then I added a design with a stencil and a white crackle paste. I let dry naturally before coloring the background in various shades of brown and green.


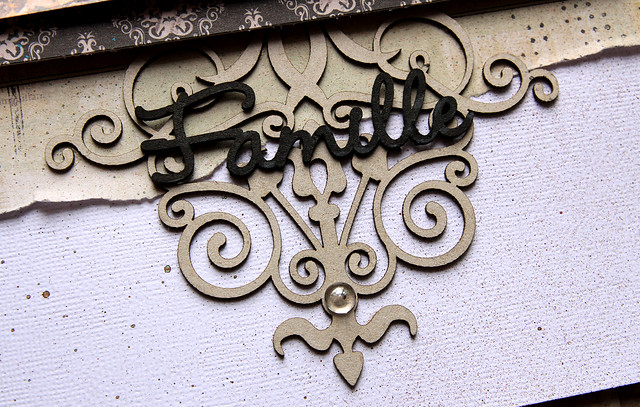
I primed all the chipboards with clear gesso The title Glee was just paint in green. The Chelsea Vines were painted in brown, then sprinkled with two shades of green embossing powder.


I covered the Mod Squares with the Rust Effect Paste and splattered them with the same green watercolor I used on the background and the title.


Before gluing all the elements, I stamped randomly the background with the Making Plans stamp.


Blue Fern Studios products:

Papers - Timeless (Couture, Freedom, Main Street) ;
Chipboards - Mod Square, Chelsea Vines, Serendipity Words 2 ;
Flowers - Tranquil Blooms ;
Stamp - Making Plans ;
Imagine Ink - Embossing Powders (Fern, Grassy Knot).

------------------------------

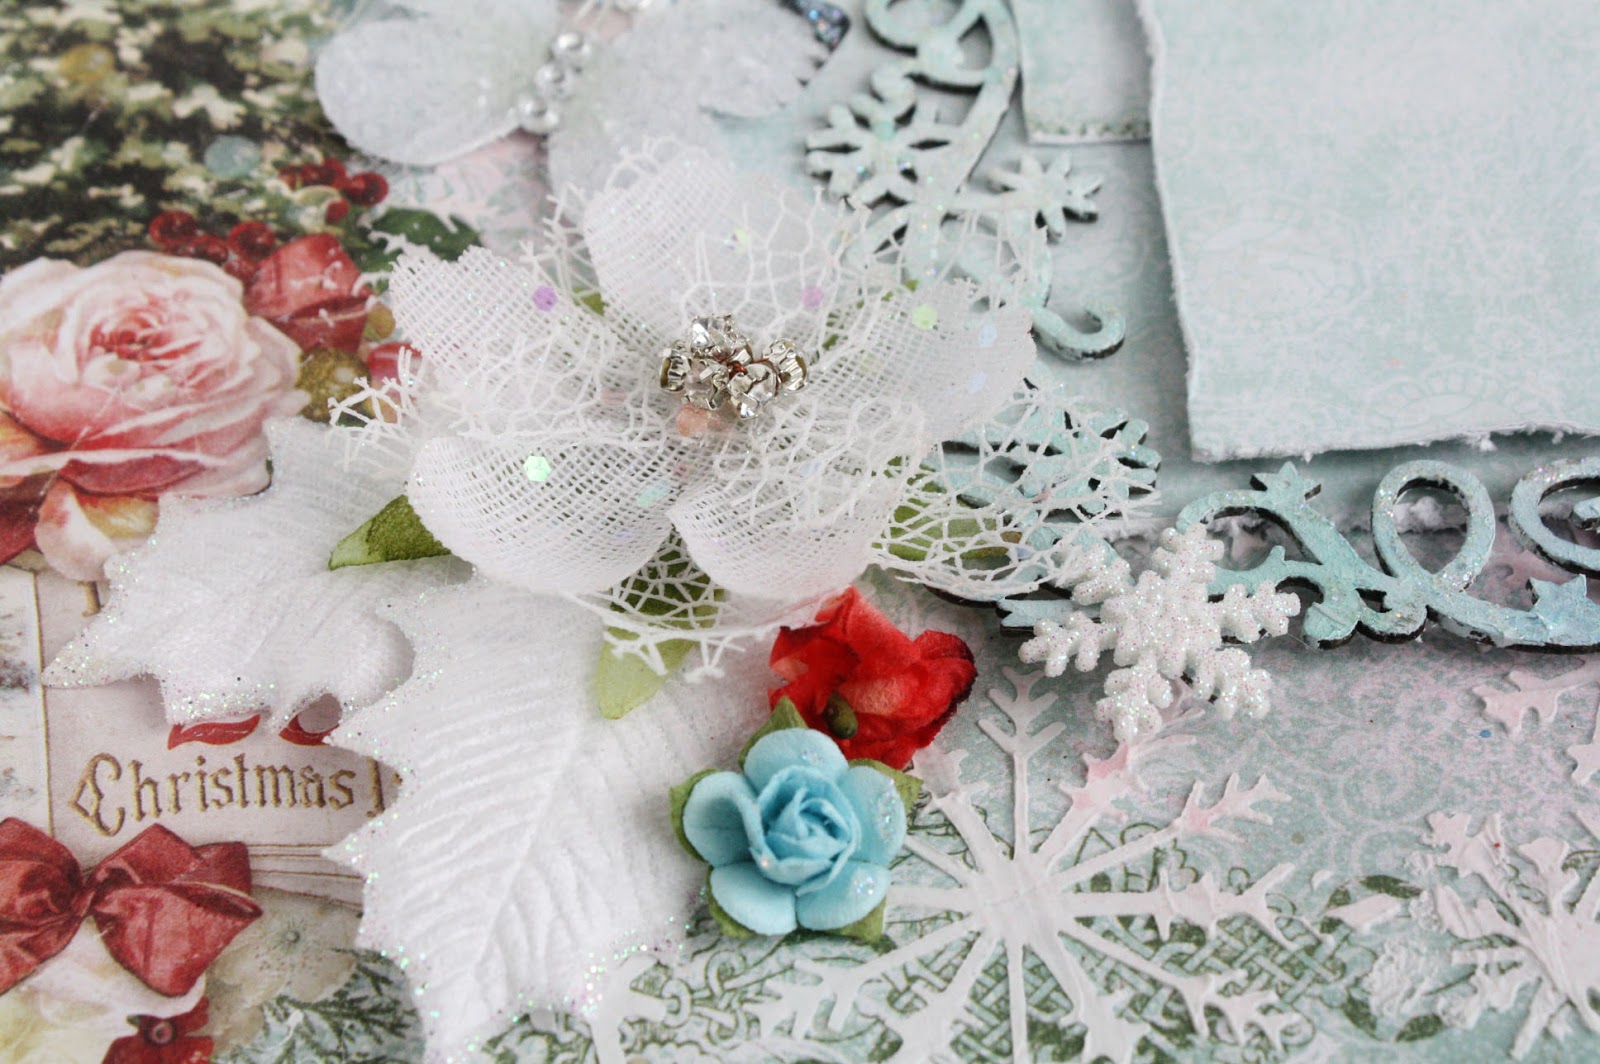
Here is my third project:  I chose a photo of the Duncaire Castle situated on the shore of Galway Bay (Kinvara, co. Galway, Ireland) and the new collection Seaside Cottage was just the perfect choice.


I started to prime the background with clear gesso before adding a design with a stencil and 3D gloss gel. When dry, I added a second design with another stencil and white crackle paste.


I primed the chipboards with clear gesso. I painted the title Magique from the French Adjectives 2 set with a silver watercolor as well as the Seaside Flourish. While the watercolor was still wet I sprinkled some Icicle embossing powder.


I colored the background with different shades of blue and green. Then I mixed some Silver Prism glitters with water and gel medium and splattered the mix on the background to remind the reflections in the water. I repeated the process with the Blue Ice glitters. 


After having glued all the embellishments, I added some stones to remind the ones in the photo.


Blue Fern Studios products:

Papers - Seaside Cottage (Calling Cards, Whitewash)
Chipboards - Seaside Flourish, French Adjectives 2
Flowers - Tranquil Blooms
Imagine Ink - Glitters (Silver Prism, Blue Ice)
Imagine Ink - Embossing Powder (Icicle)

Thursday, November 19, 2015

November Projects with Angelica

Hello there, scrappy friends! I can't believe that Christmas is almost here!! Divulging in the Christmas spirit I have 3 projects to share using the new Vintage Christmas Collection.

This page is based on the November Sketch. I used the Deck the Halls paper as my background and left over scraps of the Magical paper for the layering. I used a card from the Greeting Card paper as my photo mat. For the French Iron Works and Winter Title Magical I painted with gesso, lightly sprayed with Cotton Candy mist, and used Phoenix glitter for that sparkle.


Winter pages are always fun to make because I love the sparkle! For this page I used Wonderland for my background paper. I did some masking and used Sky and Cool Mint mist. I also used the Greeting Card paper(love the sheet....a must have) and  Auld Lang Syne. The chipboard pieces, Holiday Frame and Framed Winter words, were painted with gesso and misted.


Instead of another layout I wanted to do something different. So, I made this pocket using a glassine bag. I cut out a bunch I tags from the Greeting cards paper, made a larger tag with Noel paper and tucked them inside the pocket. I used the Wild Flourish bundle for the front of the pocket and the Winter Title Noel. I used Leaf and Cotton Candy mist.


This is the pocket without the tags inside. I used the Noel Papers to cover the bag.

Thanks stopping by!

Friday, February 13, 2015

Two layouts with the Love Story collection by Marie-Josée

Hello all!

I am happy to be back today to share two layouts made with the latest Blue Fern Studios paper collection, Love Story, as well as my sketch layout. Here they are!

"Famille" layout

For this layout, I used white cardstock as a base. Then, I tore the Grand Ball paper from the Love Story collection in two and used each side on my layout. I also added a piece of the Concerto paper at the top.

Here's a little trick: on this layout, I used two different chipboard that I cut in half.

Here's the Britannia Flourish (above and under my picture):


The title, Famille, is from the French Words set: 


And here is the Wild Flourish Bundle (on the left and right sides of my picture):


"Love Story" layout

Here's my second layout with the Love Story collection. I used the Twenty One paper for my background. As you can see, I used the "Love Story" words from the strip of paper we always cut and toss to create my title.


To frame my picture, I used a piece of the Lace Rounds set. Under it is the Symphony border. Both were altered with black spray ink


I cut a small piece of the Symphony border to put on the left side of my layout.


Sketch layout

And finally, here's the layout I created for the sketch challenge back at the beginning of February.

I used a paper from the Ombre Dreams collection to create my background, the Ginger's Dream paper.
 

Then, under my picture, I added the Boston Lattice chipboard. I altered it with gesso.


Then, on the left, I used the Fancy Signage chipboard, also altered with gesso, and on top, the word Amour from the French Words set.


Wednesday, October 22, 2014

'Memories' by Lisa Griffith

Hello Blue Fern Studios fans! 

I hope this post finds you all well....
I had so much fun creating this layout using some beautiful fall colors and 
pretty Blue Fern Studios chipboards and papers.

'Memories'


I started with the paper 'Timeless' from the Blue Fern Garden collection. I created the background by  masking with texture paste and then used watercolors to paint some browns, oranges and golds.


I used the title chipboard called 'Memories' and also added pieces of the 'Wild Flourish Bundle'.


My second project is a card I made for a friend.


Here I started with the paper 'Leslie's Dream' from the 'Ombre Dreams' collection as my base and glued some pieces of the chipboard 'Turkish Panel'. Then I added my flowers and did some painting on the background with yellow and pink watercolors.


My third project for this month was a layout using the October sketch 
designed by Michele Singh for the Blue Fern Studios October sketch challenge.


Here is the sketch for October...you still have time to enter! There is a wonderful prize pack 
of new chipboard to be won!


I hope you have enjoyed my projects this month....
Until next time...
Lisa xo


Saturday, October 18, 2014

My October Inspiration - by Keren Tamir


Keren here and I really can't believe its October already. The end of the year is just around the corner and I can't believe it will be soon 2015. It feels like it was just yesterday when the millennium started and now we are well into it!!

With our world the way it is nowadays, I felt I needed to create a piece of art that sends some love and peace energy to the world. I painted this "Free Spirit" Peace girl on a A4 water-colour paper pad and used watercolors and Blue Fern Studios Chipboard to bring her to life.

Peace


The Blue Fern Studios Ginger's Poppies were embossed in both Gold and Copper embossing powders. I cut them up into separate pieces to embellish the girl's hair.


The word peace, from the good vibes chipboard set, was simply painted in gold acrylic paint.


<<<<<<<<<<<<<<>>>>>>>>>>>

Sweet Treasures

For my second project this month I created a layout using the Montage Collection and some bits and pieces from the Blue Fern Garden Collection.


I framed the photo in one of the graduated squares after adding lots of layers. The background is from the Montage collection- Calling Cards paper.


I also used the word Sweet from the Arrow word set and the wild flourish bundle.


Thank you so much for visiting the Blue Fern Studios Blog!!
Have a wonderful day!

Keren

Monday, July 7, 2014

July projects from Camilla

Hi! Camilla here with a layout and a card. For both projects I have used papers from the Ombré Dreams collection.

When I made the layout I created the background by using Color Blooms, masks, stamps and texture paste. Then I added some paper layers underneath the photos and then some flowers and chipboards. The chipboards are painted with white gesso, then I used a script stamp before I inked with fluid ink chalk in blue.


Here is a close-up of the Blue Fern Flourish:


And the By the Sea chipboard:


And finally the Checker Bits:


This is the card. The chipboards are painted in white gesso with a hint of orange in it. Then I stamped with a script stamp.


The chipboards I have used are Lace Rounds and Wild Flourish Bundle.


Thanks for looking!