Showing posts with label Valentine's Word Set. Show all posts

Tuesday, March 18, 2014

Different Ideas by Keren Tamir


Hi Blue Fern Studio Fans.

 I have a fun and diverse post for you today. 
This month, I've created three different kinds of projects all very different from each other yet original on their own.
The first one is a layout. I know its just a layout, not so original lol, but continue scrolling down I made two more projects that you might think are more unique.

"Timeless Me"


The picture above is a picture of me when I was a kid. I think I'm probably 4 years old here. I created this layout using the green toned papers from the Blue Fern Garden collection.


I used the inside part of the Helen's Doily. It was a leftover piece from a previous layout. I also used one of the Jeweled Page baubles. Both these pieces were covered in green chalk edger ink and then stamped and edged in brown ink.


 The title Me from the Valentine word set was simply coloured in brown ink,


<<<<<<>>>>>>>

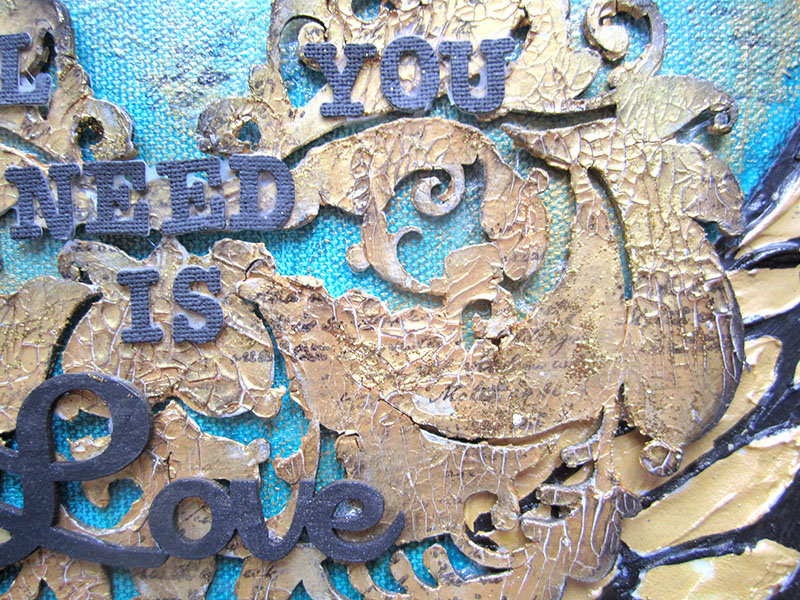
"Love & Thanks Journal"

My second project today is a journal that I created for a friend. I only altered the cover and left the inside blank for her to fill in.


The background was altered using crackle paint, ink and stamping. Once dry, I added a few of the Blue Fern Studio chipboard pieces on top.
I used the Shabby Brick bits, Two of the Veranda Cages, one little bird and the "&" sign from the Valentine Word set.


<<<<<<<<<>>>>>>>>


"Bookmarks"

For my third and final project for March I thought of a great idea on how to use some of the new Blue Fern Studio dangles to create bookmarks. I just thought they were the perfect size to fit inside a book and still have the bottom dangle through the pages.

I believe this would be a perfect gift for a friend's birthday or a teacher's end of the year gift.

I created a step by step  tutorial on how I made these bookmarks:

Step 1: Prime both dangles with Gesso on both sides. Let each side dry before applying it on the other side.


Step 2: Cover the chipboard with crackle paint. I only covered the top side. Let it dry overnight.


Step 3: Cover one of the dangles in brown and yellow chalk ink and the other with green and yellow ink. Do this on both sides. (of course you may choose any colours you like)


Step 4: Seal both sides of the chipboard using Glossy Accents, Diamond glaze or equivalent transparent gel. Let one side dry first before applying it on the other side.


Step 5: Punch a hole through the chipboard at the top of a dangle if it doesn't have one. Then insert a tassel and a fancy brad for decoration.


well I hope you enjoyed my fun and diverse post today!!
Enjoy the rest of March!!!!
Have a wonderful day!!

Keren

Saturday, January 18, 2014

My First Post By Keren Tamir


Hi Everyone!!
Keren here with my first post for Blue Fern Studios and I'm really excited to showcase my work with these beautiful chipboards!!


but first a little about myself:

I'm 39 years old. I am a wife to a wonderful husband who is very supportive of my scrapbooking and a mother of two amazing kids; a 12 year old boy and a 7 year old girl. I've been scrapbooking for 10 years and I mainly scrapbook about my family. I love to create and experiment with many different mediums and techniques.

My style is a combination of Shabby chic and mixed media. I use lots of flowers and vines together with different artistic mediums on my layouts. My style is always evolving and that’s one of the things I love about this art.

One of the main reasons I started scrapbooking was to preserve memories and photos for my children. However over the couple of years, I’ve started to enjoy another aspect of scrapbooking. I love the artistic outlet that it gives me. I love to create and I’m passionate about what I do.

I’m delighted to be joining Blue Fern Studios on this new journey!!

I hope you enjoy my creations!!

you can also find me HERE on my blog.


Now without further adieu here is my first project:


"All You Need Is Love"
Altered Canvas


This is a 12x12 Canvas I created for a friend. 
Its one of the most powerful messages, sang by one of the greatest bands of all times.
If all of us just loved, this world would be a better place!!!


I covered the Ornate Heart with gold crackle paint. Then I edged it with brown ink and stamped it randomly all over with a script stamp. I also used the script stamp on the background. Finally I smeared some gold glitter stickles all over the heart.


You can see the heart's texture a little closer below. The crackle paint gave it an antique look.
The Love title from the Valentine's Word set was simply sprayed in black ink.


Blue Fern Studios chipboard used on this Canvas:
Ornate Heart
Valentine's Word Set (Love)

<<<<<<<<<>>>>>>>>

"You Shine"


In this bright and cheerful layout of my son I have used a few pieces of the Tattered Diamond bits. I cut them in different places so I could spread them throughout my page.
They were first covered in Turquoise acrylic paint and then stamped with a script stamp using a darker shade of acrylic turquoise paint.


You can see the diamond bits in a close-up below. I also smeared some white gesso on them to blend it with the rest of the layout.


The title "You Shine" is from the Optimist Word Set.  It was covered in the same dark hued paint from above.


Blue Fern Studios chipboard used on this layout:
Tattered diamond bits
The optimist Word Set (You Shine)


Thank you so much for visiting the Blue Fern Studio's blog.
I hope you enjoyed my creations

Have a wonderful day!!
Keren

Monday, November 25, 2013

LO's and Project life by Kotlyarova

Hi there!
Olga is here today to show few layouts and Project Life spread.

I've decorated shipboards with different ways, hope you like it :)
For this Clean&Simple lo I've used two Blue Fern pieces. I've made ombre effect with acrylic paind and glossy accent. Looks great, isn't it?

BFS Chipboard Used:
All natural set 
Valentine's Word Set 

 I've made this lo with 7dots paper and two Blue Fern Studios pieces I painted with acrylic paint
  BFS Chipboard Used:
Brigitte Butterfly Set
Petite Boutique Frames

And the third lo is with my little cutie too:)
I wanted to add a little brown color here, so I didn't paint chipbord and just covered it glossy accent.

BFS Chipboard Used:
Quatrefoil Panel 
 All Natural Set 


And one week from my Project life album. I like use simple color cheapboards for making accents in it.


 BFS Chipboard Used:
Mini Ring Things 
Chunky Heart Panel 
 Picture Perfect

Have a nice week :)
Olya

Thursday, July 11, 2013

Three Layouts by Kelly Foster

Hello Blue Fern fans - Kelly here.
Today I have three  layouts to share...so I will just get right to it!

"You Are So Fun"

For this layout, I have followed the sketch for this month's challenge...I hope you will play along, too! (Find the link in the right sidebar.)


Below you can see a section of the Renaissance Border, and the word "You" from the Valentine's Word Set. These both were dabbed lightly with gesso, then painted with various colors of water color paint. Once they were dry, I dabbed around the edges randomly with a green chalk ink.


Below is a section of the Twiggy Branch, which was left mostly bare, with just a touch of  green chalk ink.

Below are the other bits of the Renaissance Border and Twiggy Branch, and bottom left I have used one of the Nifty Tags and Tickets to ground my title. I placed one of the adorable little Vintage Keys below that.

Chipboard used:

Renaissance Border
Renaissance Border - Click Image to Close
Nifty Tags and Tickets
Nifty Tags & Tickets - Click Image to Close
Vintage Keys
Vintage Keys - Click Image to Close
Twiggy Branch
Twiggy Branch - Click Image to Close

Valentine's Word Set
Valentine's Word Set - Click Image to Close


"Good Vibes"

I used a wide variety of chippies on this one, too...I just really had fun with this page, for the photo that I love so much. First up, the title...this was simply embossed with a white detail embossing powder..I just adore the font for the Good Vibes set, so fun!

Below..one of the Circle Motifs..painted with a shimmery pearl acrylic paint,  a few dots of gold paint for the flower centers, then the leaves were colored with a green watercolor pencil. A touch of stamping with a script stamp was done on top of that.


Up next...Garden Daisies (Large), I applied the same technique as I did the flowers on the Circle Motif, but to top them off I painted on just a bit of a textured medium. The stem was misted with a shimmery green mist.


Good Vibes Word Set
Good Vibes - Click Image to Close
Garden Daisies - Large

Circle Motifs
Circle Motifs

"Smile"

Another "summer" page. This one is loaded up with bits and pieces of chipboard..see if you can spot them all! Below you will find one of the Nifty Tags and Tickets, which was stamped lightly with green and teal ink. Also, you can see the end of the Calligraphic Border, which was painted with a gold acrylic glaze, then dabbed with a bit of teal acrylic glaze. I also tucked in pieces of the Natural Sprigs, which were distressed, then embossed with green and gold embossing powder. 

For my title, I used the cute "Smile!" polaroid frame from the Picture Perfect set. This was left mostly natural, with a few dabs of ink here and there, and a dark brown chalk in around the edges for definition.


Last but not least, I have added a section of the Blue Fern Frame..I cut this apart and have slowly been using pieces of it. I stamped with a script stamp and then embossed with gold. I then added touches of all of the paints and inks that I used on all of the other pieces in my project to make it blend nicely.


Calligraphic Border
Calligraphic Border
Blue Fern Frame
Blue Fern Frame
Nifty Tags and Tickets
Nifty Tags & Tickets
Natural Sprigs Set
Natural Sprigs Set
Picture Perfect
Picture Perfect

Thank you so much for stopping in today, I hope you have enjoyed my projects. See you soon!