Showing posts with label Tutorial. Show all posts

Friday, February 27, 2015

'Happy' by Marta Lapkowska + VIDEO tutorial

Hello crafty souls :)
It's Marta here with my very first video tutorial just for you.

 
Firstly I would like to say how happy I am joining Blue Fern Studios team. I hope to inspire you with my video tutorials and welcome you in my mixed media world.

I was born and raised in Poland. I am currently living in Ireland and have been for nearly ten years.
I graduated as a Sociologist from Wroclaw University in Poland. I am a proud mum of a beautiful girl Emily. My inner soul is trully a creative person. Since I remember I have loved art, craft, creations and have a passion for innovative techniques.
My craft journey started from making cards for close relatives. Slowly I was trying new things, learning new techniques. After all I fall in love with mixed media and journaling. I adore teaching people and share my knowledge.
I love playing around, experimenting and creating unique pieces.
From cards and tags to layouts, mixed media canvases, journal pages and altered objects.
For the past three years art and craft is my way of living - so far it's the best journey I could have imagined.
If you would like to see more of my works please feel free to visit my blog:
http://artistycrafty.blogspot.ie/

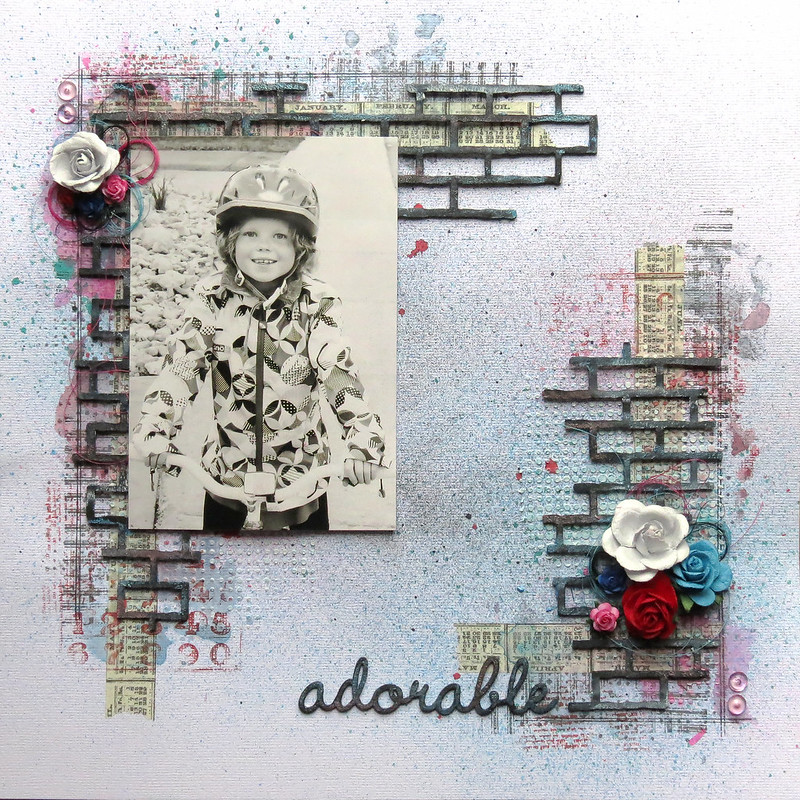
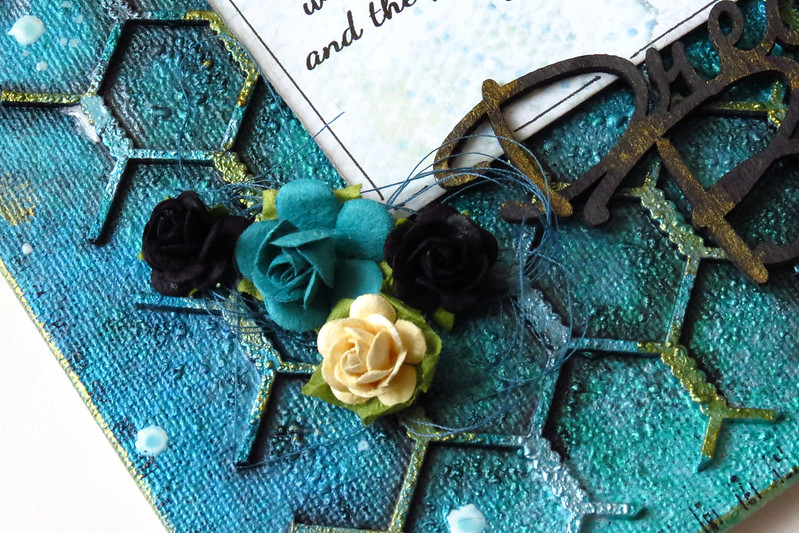
For todays post I created mixed media scrapbooking page 'Happy'.
This beautiful photo shows my friend's Wedding Day.

 Stunning 'Sanctuary' collection was a perfect match to the photo. I used paper called 'Bountiful'
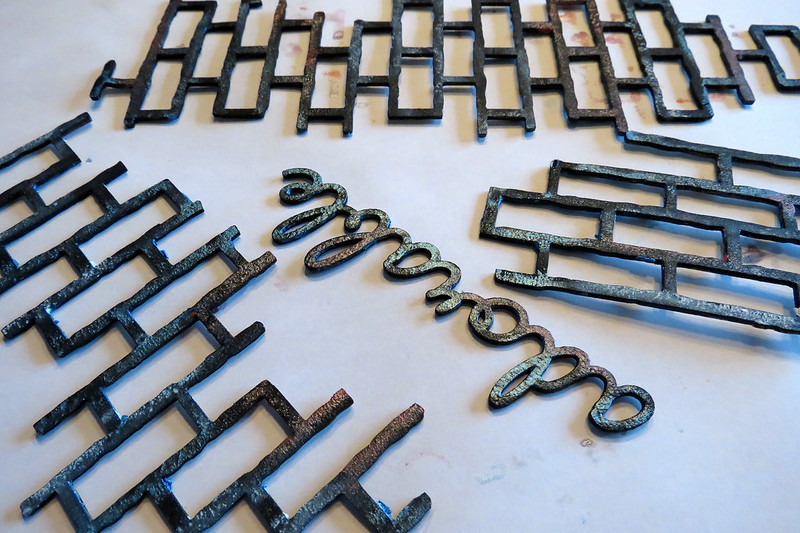
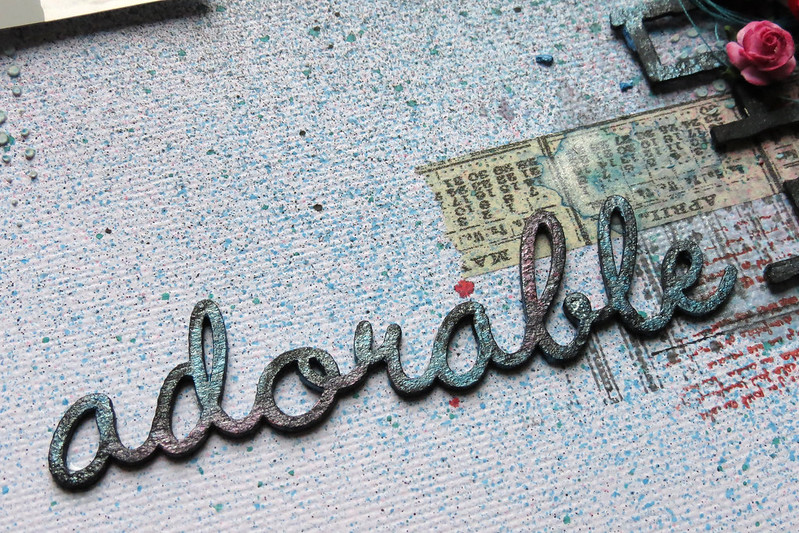
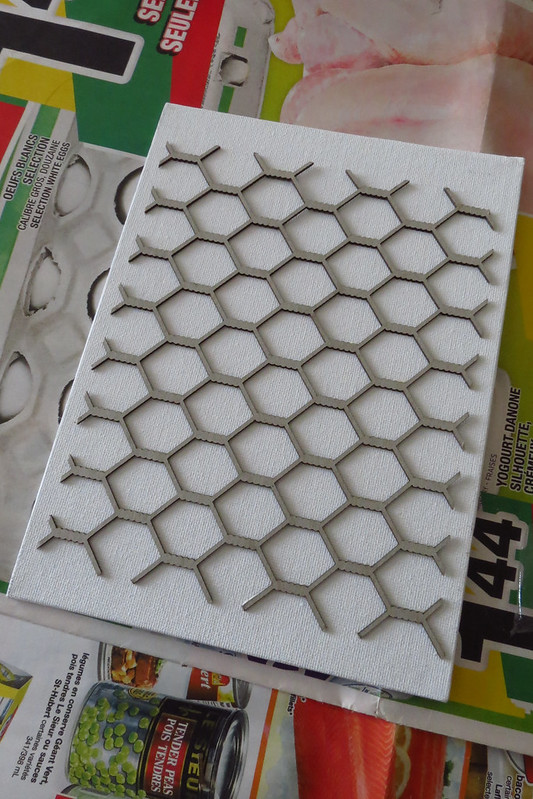
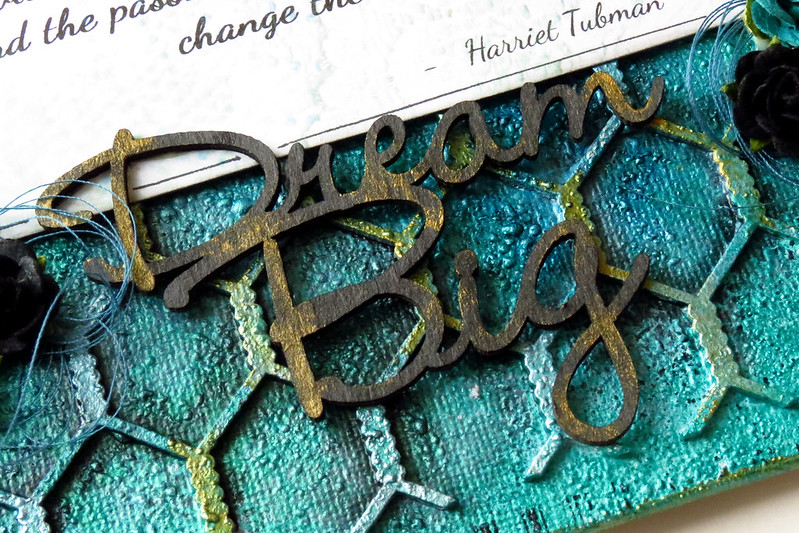
I added few different chipboards and stamps.

Used products:

Laughter, Happy, Smile   Sanctuary: Bountiful   Bohemian Flowers
 Mini Ring Things   Forever Stamp

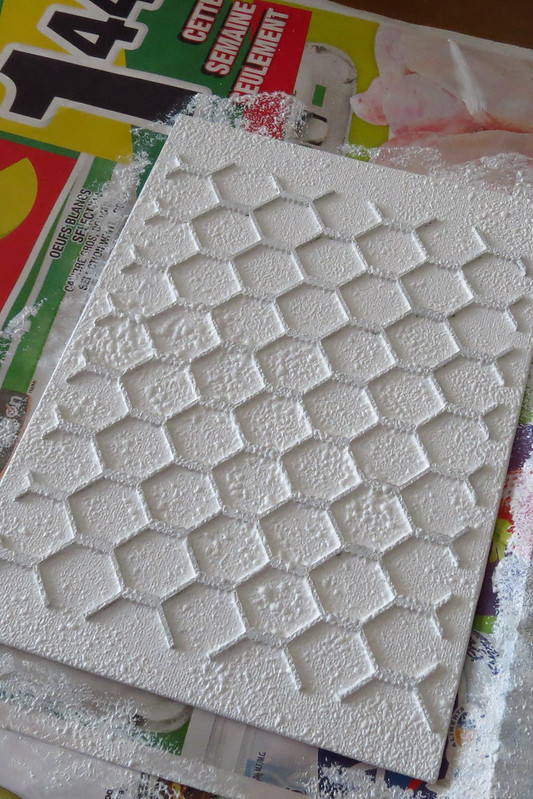
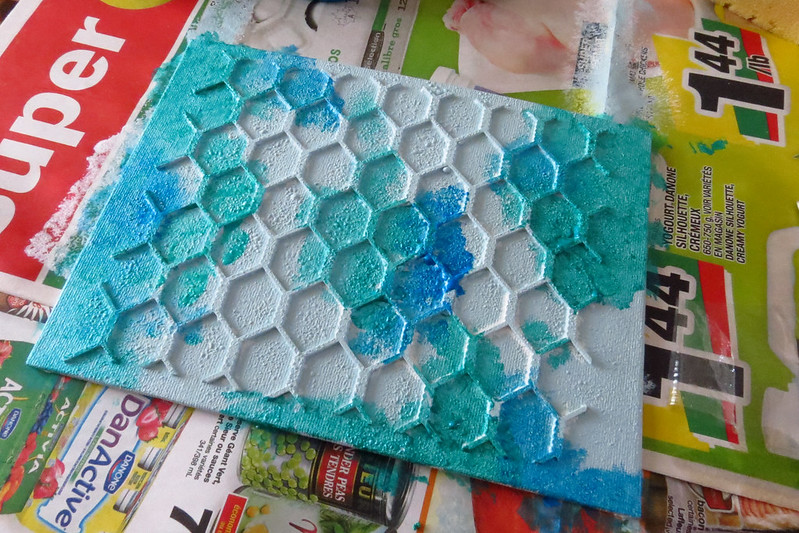
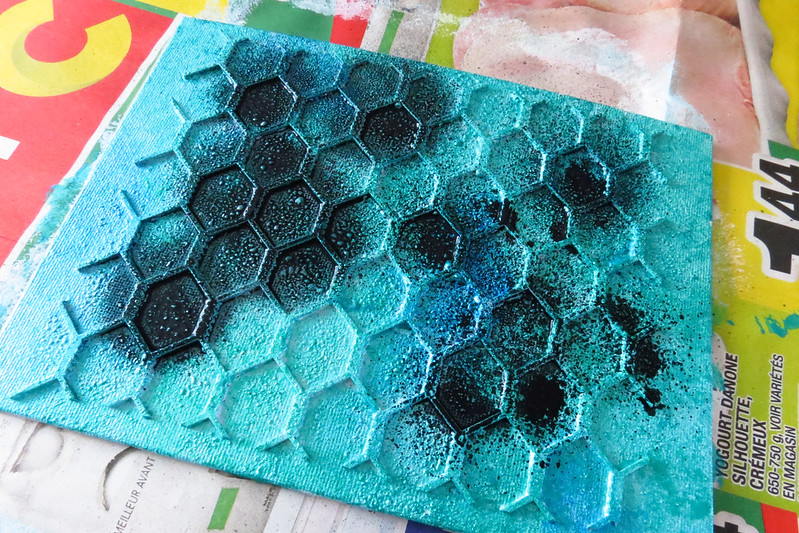
I used embossing powder to alter the chipboards. 
This is a great way to add dimention to your project.
Few close-ups:


I hope you will enjoy my video and get some inspirations.


Happy crafting, Marta xx


Sunday, January 11, 2015

Elena Morgun wiht a video tutorial

Hello!

Elena Morgun here, to share with you my first video as an Educator for Blue Fern Studios, and I am so excited to join this amaizng team!
But first a little about myself:

I'm 25 years old. I live in Ukraine. I am a happy mother to 2 lovely kids.
Scrapbooking is a huge part of my life, and it is more than a hobby by now. I can not imagine my day without scrapping. I am happy to share my tips and knowledge in my tutorials.
I am constantly learning new things. I am playing with new techniques and materials all the time. I am open to the experiments and you can often see their results in my creations. One of the most distinctive characteristics of my style is that I love mixing dark grunge accents with the tender flowers and lace.
I’m delighted to be joining Blue Fern Studios on this new journey!

I hope you enjoy my creations!

You can also find me HERE on my blog and HERE on my Youtube Channel.

Layout "Sunshine"


Blue Fern Studios products used:
  • Paper - Sanctuary: Bountiful
  • Chipboard - Panels - Rings Panel
  • Chipboard - Textures - Turkish Bits
  • Chipboard - Shapes - Vintage Keys
  • Chipboard - Words - The Optimist Word Set
And I have new card to share with you.
Blue Fern Studios products used:

  • Chipboard - Flourishes - Damask Flourish (2)
  • Chipboard - Shapes - Vintage Keys
  • Paper - Montage - Calling Cards

I hope I have inspired you today :)

Take care,
Elena Morgun

Wednesday, April 16, 2014

Chipboard alteration tutorial by Marie-Josée

Hello all!

Today, I have a quick and easy chipboard alteration tutorial for you.

Here's the layout I created with the altered chipboards. I used chipboards from the Shabby Brick Bits set and the Good Vibes set.

We usually prime our chipboards with white gesso, but for this layout, I used black gesso instead to create another effect.


To alter your chipboard, you will need:

- Black gesso
- A sponge
- Various colors of Faber-Castell Gelatos (choose them according to the colors of your project: here, I used white, metallic blue and metallic pink)
- Paintbrush
- Water

1) Alter your chipboard with black gesso. Apply it with the sponge, it's easier and less messy. Let dry or dry with a heat gun.


2) Apply various colors of Gelatos randomly on your chipboard.


3) Dip your paintbrush in the water and blend the colors. Don't use too much water. Let dry or dry with a heat gun. Once dry, if needed, add more color.


Here are some close-up views of the altered chipboard on my layout.


Sunday, March 16, 2014

Tutorial - Mixed media canvas by Marie-Josée

Hello all!

Today, I will show you how to create this mixed media canvas in 10 steps.


Supplies:

- Small canvas (I used a 5" x 7" canvas)
- Glue
- Sponge
- Paintbrush
- Heat gun (usually used for embossing)
- Paper towels
- Stamps
- Black ink
- Piece of a Blue Fern panel or any other Blue Fern chipboard (I used a piece of the Chickenwire panel)
- Blue Fern words for the title (I used the "Dream Big" phrase from The Optimist set)
- Quote of your choice written by hand or printed on a piece of paper or cardstock
- Gesso

- 2 or 3 differents colors of Silks acrylic glazes
- Acrylic paint in a color that matches your Silks paints
- Black mist (mine is made with water and Memento ink)
- 1 or 2 mists matching your Silks paints
- Inka Gold paint in Gold and Silver, or any other gold or silver medium.
- Various embellishments (I used flowers and thread)

Instructions: 

First of all, I want to apologize for the ugly background. I was working on my kitchen table and had to use some flyers to protect my table. I hope the bright colors --and the chicken-- won't be too distracting! :)

1) First, glue your piece of chipboard to the canvas.


2) Apply gesso with the sponge all over the canvas and the chipboard. Dry with the heat gun to create texture and bubbles. Wait until it is completely dry before moving on to step 3.


3) Apply acrylic paint with the sponge. As you can see, I used a very light shade of teal. You can use a darker color if you want. Dry with the heat gun if you wish to speed up the process. Wait until it is completely dry before moving on to step 4.


4) Using your paint brush, dab touches of your first Silks color all over the canvas. Don't let the color dry.


5) Do the same with the second color. Ensure the colors overlap. Then proceed with the third color if you use one. -- I'm sorry, I forgot to take a picture of the finished background with the third color. :) -- Once you are done, dry with the heat gun if you wish to speed up the process. Wait until it is completely dry before moving on to step 6.


6) Spray black mist all over your canvas.


7) Immediately after spraying the black mist, use some paper towels to wipe most of it, as if you were dabbing some paint on the canvas. However, try to leave as much black as possible in the creases to add dimension to your project. Add more mist if needed. Once you are done, dry with the heat gun if you wish to speed up the process. Wait until it is completely dry before moving on to step 8.


8) Spray the other mists all over your canvas. Dry with the heat gun if you wish to speed up the process. Wait until it is completely dry before moving on to step 9.


9) Apply both colors of Inka Gold with your finger on the chipboard. If your Inka Gold is dried out, like mine, just dip your finger in water. This will dilute the Inka Gold and you will be able to add color.


10) Use the black mist to color your title. Add a touch of Inka Gold to it. Glue the quote, the title and the embellishments on the canvas. Stamp some details with your stamps and black ink around the canvas.

Here's the end result:


And some close-up views:


Saturday, April 27, 2013

Chipboard Tutorial; Canvas; and a Matchbox Mini Sewing Kit


Hello everyone, Joyce here again, and I'm going to share with you a quick and easy tutorial that you can use on any of your chipboard pieces:


Canvas made with the Blue Fern Studios petite boutique frame, using the same technique posted above on the Regal Ornaments.  I posted a quick and easy tutorial for the canvas background on my blog if you'd like to try it and the tutorial above using some Blue Fern Studios chipboard:


On the Iron Works piece below, simply apply white crackle paint, mist, and apply some drywall tape over the piece and highlight the textures squares with some rub-on  metallic paste.


Matchbox Mini Sewing Kit.  I took a part a medium sized matchbox to use as a pattern and created this little sewing kit using the Miss Taylor chipboard pieces.  Simply rub-on some metallic paste on the scissors but don't cover up the entire chipboard piece and then lightly mist a color of your choice on the entire chipboard piece. Easy, right?


Let us know if you try out the tutorial on your Blue Fern Studio chipboard pieces so that we may visit you and see what you created too.