Showing posts with label Miss Tailor Set. Show all posts

Saturday, April 27, 2013

Chipboard Tutorial; Canvas; and a Matchbox Mini Sewing Kit


Hello everyone, Joyce here again, and I'm going to share with you a quick and easy tutorial that you can use on any of your chipboard pieces:


Canvas made with the Blue Fern Studios petite boutique frame, using the same technique posted above on the Regal Ornaments.  I posted a quick and easy tutorial for the canvas background on my blog if you'd like to try it and the tutorial above using some Blue Fern Studios chipboard:


On the Iron Works piece below, simply apply white crackle paint, mist, and apply some drywall tape over the piece and highlight the textures squares with some rub-on  metallic paste.


Matchbox Mini Sewing Kit.  I took a part a medium sized matchbox to use as a pattern and created this little sewing kit using the Miss Taylor chipboard pieces.  Simply rub-on some metallic paste on the scissors but don't cover up the entire chipboard piece and then lightly mist a color of your choice on the entire chipboard piece. Easy, right?


Let us know if you try out the tutorial on your Blue Fern Studio chipboard pieces so that we may visit you and see what you created too. 


Tuesday, April 23, 2013

Two layouts and a Tag from Irene


Hello everyone! First of all, I would like to share a layout which I've created based on this month's sketch challenge.


I've painted the Blue Fern Studio's floral clock with some black acrylic paint and detailed it with some metal embellishments, flowers and pearls.


Here is a picture of the chipboard piece used:

Floral Clock


My second project is a tag.


I've used a couple of feminine chipboard sets on this tag.


I've painted the mirror with white and later brush a thin layer of glitter on top of it. As for the dress form, I've painted it with black and deco with a small lace flower.


On the perfume bottles, I've painted them with dimensional paint and later covered them with stickers and glossy accents.

Here are the chipboard used:

Miss Tailor Set

Vanity Set

My last project for this month is another layout.


Here are some close-ups on the chipboard used.


All the chipboard pieces on this layout are misted with paints and later paint over with some dimensional paints.

Here are the chipboard pieces used:

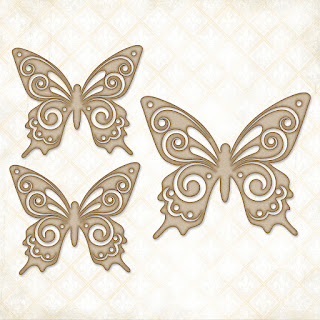
Brigitte Butterfly Set

Floral Clock


Garden Daisies - Large


Garden Daisies - Small


Hope you all like all these projects. Happy scrapping!


Wednesday, April 3, 2013

A Layout, A Tag and a Trio of ATC's...oh my...

 April Showers Bring May Flowers.... But here in Sunny Florida where I live, the flowering is all year around. So I thought I would spread some Springtime with you today.    Lisa here with your Blue Fern Studios Blog Post. My first project is a tag I created using Lots of Prima product, and The Blue Fern Studios Royal Border is a perfect match to the elegance of the tag. It was the perfect size to sideline the edge.

 I had a bottle of Martha Stewart Flocking powder in the perfect color to match the flowers. I applied some Multi Medium to the Regal Border and covered it with the flocking powder, tapping off the excess. It gave the chip board a soft fuzzy look. Softening the hard edge of the tag.

 I created the journaling in Photoshop, printed it, cut the words out, inked them, then adhered to the tag. The tag was created using Tim Holtz Tag and Bookplate die.


                                                                      Royal Border 2
                                                             
 My next prject is a trio of ATC cards. The smaller pieces of chip board are just perfect for Cards, Tags and ATC cards. I was thinking of turning this trio of ATC cards into a small banner.


Here is a view of the ATC cards individually. Together they form the journaling. "May Your Bobbin Always Be Full". I love to sew and there is always thread in my machine. That makes me happy!! I wound some String (part of my Tim Holtz Tattered Floral contest prize package) around the Miss Tailor bobbins and topped them with a tiny Tim Holtz safety pin.
                                                                      Miss Tailor Set


 My last project revolves around my entry for The Tim Holtz Tattered Floral Challenge entry. The paper flowers I created. I wanted to create some flowers for my Blue Fern Studios project that would compliment the Spring Iris chip board. I love the tall stalky delicate flowers.


To technique I used on the chip board was using Silks Acrylic Glaze in various colors of blues and greens. Once the paint was dry, I applied a thick layer of Crackle Accents. To get the  most out of the glaze color, I first painted the chip board with a coat of white acrylic paint.


 I used the same technique on the Happiness chip board.


                                                                    Large Spring Iris
                                                          
                                                                  Good Vibes Word Set

Thank you for stopping  by and  allowing me to share my projects with you today. Keep checking back as every  other day, one of the fabulous designers will be displaying new projects with the Blue Fern Studios beautiful chip board. And there is always new stock and new designs being added to the store frequently. Blue Fern Studios is growing in leaps and bounds and I am very proud to be designing for them!!


Wednesday, March 13, 2013

Achieving Different Looks w/Erin Blegen

Hey everyone :)~ Erin Blegen here with you today to share with you three different projects, all using the same paper collection but achieving different looks using Blue Fern Studios chipboard! We've got a lot to get through, so let's get started :)...

"Lilah"
This project was created on an 8"x10" canvas. I love this beautifully soft photo of my niece Lilah, so I wanted to create a romantic piece with lots of stamping and bursts of color. Let's take a closer look at the Blue Fern Studios chipboard used here:

I've used pink crackle paint on the Princess Window piece before smattering with microbeads. Then I topped it off with a piece cut from the Symphony Border, misted it, and stamped to correlate with my bakcground.

I LOVE keys. I've painted this one from the Vintage Keys set with gesso, applied a very light pink mist to it, and then stamped over top. Then I brushed on some Stickles, added the heart gem and some tulle at the top.

This Vintage Locks piece was also lightly misted and then stamped.

Blue Fern Studios Products Used:

Princess Window 074578

Vintage Locks 074783

Vintage Keys 075032


"Our Bond"
My second project is a layout, featuring how easy it is to use chipboard in its raw fashion, which I love to do! 

The Calligraphic Border provides dimension, texture, and detail to the layering beneath my photos. I felt that by leaving it raw, it really stood out like I wanted it to :).


Blue Fern Studios Products Used:

Calligraphic Border 074363

Vintage Keys 075032

"Hello" {Tag}
My final project today is this tag. I love the smaller chipboard pieces for projects like these! So much fun to put together :)

I've combined a dress form from the Miss Taylor Set, as well as the larger butterfly out of the Brigitte Butterfly set to dress up this tag. I used a combination of Glimmer Mist and embossing powder to set the base of my dress form. I then added the tulle skirt and some seed beads for the bodice. Finally, the little heart accent was put in place.

For the butterfly, I used some light misting and embossing powder as well, before adding my stamping. Finally I trimmed up the tops of the wings with some microbeads.

Blue Fern Studios Chipbpoard Used:

Miss Taylor Set 074721

Brigitte Butterfly Set 074387

Thanks so very much for stopping by the blog today! I hope you enjoyed my projects- and that you're inspired to go out and get some BFS chipboard for yourself!

Take care and see you again soon :),

xErin