Showing posts with label Ginger. Show all posts

Friday, May 27, 2016

May inspiration by Elena Volchkova

Hi everyone! Today, I have prepared three layouts using Tranquility Collection. And I'm happy to show it to you.

"Two fairies" layout

Mom and daughter. Beautiful and young. Such similar! And so different!
My layout about it. And about love, of course.
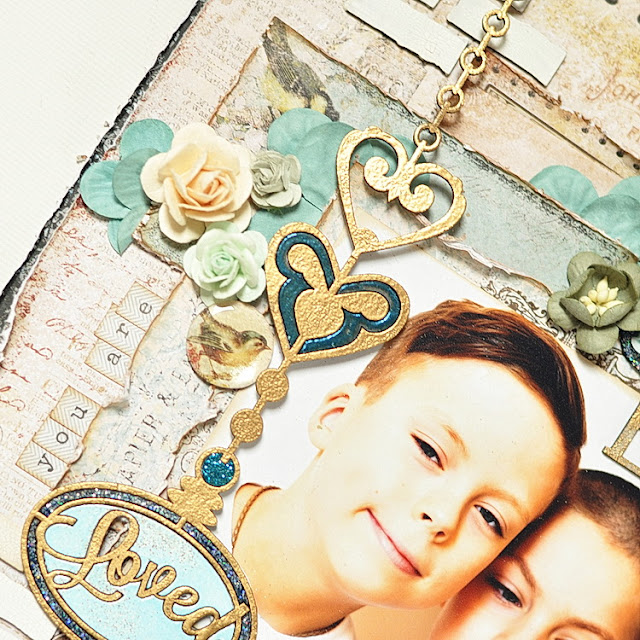
Paper Tranquility-Patience was the perfect backdrop for this green layout. Against the background there is a small golden spots created with Honey Imagine Ink Embossing Powder. The same powder covered chipbord Crackle Bits.
"Love" covered Azure Imagine Ink Embossing Powder. It combines perfectly with flowers and shades in the photographs.
Beaded Strings сhipboard and circles from Circle Groups was covered with mixture of Imagine Ink embossing powders in Lime and Sage, which give the the perfect combination!


Blue Fern Studio Supply List:
Paper: Tranquility - Patience
Chipboard: Beaded Strings, Circle Groups, "Adore, Love, Cherish" set, Crackle Bits
Imagine Ink Embossing Powder: Sage, Lime, Azure, Honey
Flowers: Attic Charm Daisies


"The charm of country life" layout

This layout for one wonderful young girl. Mischievous and fun! She likes to enjoy life! A wonderful girl! I wanted to capture the moment of spring joy. Joy of the simple life.

I used the Calm paper from the Tranquility Collection as my background paper. Paper with a summer mood!

"Blissful" I covered with Imagine Ink Seven Seas embossing powder. Circle Groups was covered with Imagine Ink Ginger embossing powder. By Ginger and Heavenly powders I added accents in the background.


For richness tone I added Dreamy and Weathered Doilies Stamps on the background.

Blue Fern Studio Supply List: 
Paper: Tranquility - Calm
Chipboard: Circle Groups, "Blissful, Jubilation, Patience" Set
Stamps: Dreamy, Weathered Doilies
Imagine Ink Embossing Powder: Seven Seas, Ginger, Heavenly
Flowers: Attic Charm Daisies

"Light oriental tale" layout

And the third ...  light, weightless ... oriental tale. Princess in a tent on the beach, waves lace wind. Flowers and sunlight glare.

Paper is so beautiful that define a background mood.
Symphony Border and Eastern Lantern I covered with Imagine Ink Honey embossing powder. This is my favorite shade of gold. Quiet and noble.
"Adore" was covered with Imagine Ink Garnet embossing powder.
This layout decorated with a lot of light and imponderable elements - lace, feathers, tulle. Beads and crystals add luxurious accents for our princess.


Blue Fern Studio Supply List:
Paper: Tranquility - Serenity
Chipboard: Symphony Border, Eastern Lanterns, "Adore, Love, Cherish" set
Imagine Ink Embossing Powder: Honey, Garnet
Flowers: Tranquil Roses and Lilies

I hope you enjoy viewing my projects. See you next time :)
Hugs, Elena

Saturday, May 14, 2016

Three layouts ideas with the new tranquility collection made by Wilma Voermans..

Today I would love to show you three different mixed media layouts .
All three made with the tranquility collection.
I love the line , it has many possibilitys.


My first layout is one with a grunge beach look.
On the beach you always find things like old wood, bitses and pieces.
On most of my beach layouts I like to use that feeling by adding things I find around me.
I started with the Contentment paper.
The B-side is perfect for a beach look.

I wanted a sandy feeling to the whole layout.
I added many layers, starting with joint compound in my background .
It has already a sandy feeling.
Two colors glimmerspray ,  turqoise and sandcolor.
Next some paper from a old notebook , very light swimmpearls
 (the ones you use in flowerarrangements).


Around my picture pieces of a old shirt .
A little story about the titel ....
I came home and found my best shoes half eaten by my dog.....
I was very angry and dissapointed, but it is a dog that was found on the streets of Spain
She still has to learn some domestic things :)
So I thought, take the pieces and use the brandname as a titel.
On the layout you see more pieces I collected on the ground from my beloved shoes.


I used two chipboard pieces, seaside charms and Frolic mesh.
 Stippled light gesso and than used three different embossingpowders .
I sprinkled them all three in the wet gesso and just heatet it here and there.. 

I did the same in the background, but did not heat at all.
The three colors: oatmeal, ginger and mushroom.
They gave me the perfect sandy look I wanted.

*******


My next layout was based on the Stillness title that comes with the Tranquility collection.
The background paper is the b-side of the Serenity paper.
I used the May sketch for the design:


I totally love the tranquil foliage chipboard piece .
With the title and mood of the picture I did not want too much on the page.
Sometimes enough can be enough for me.
The circle is a negative piece of chipboard that I never throw away.

ITo all the chipboard I stippled gesso .
When it was not completly dry I sprenkled orange Peel glitter .
After that a little sage embossingpowder.
I heatet with the heatgun, but not too much.
It gave me a rough surface.
On the title also the gesso, orange Peel glitter and some orange paint.
When it was still wet I went over the under part with gesso .
Just lightly to get the ombre effect. 

*******


For the last layout I wanted a soft babyfeeling without getting sweetness all over the place.
I think the picture has enough sweet in it :) 
I used the Stillness paper as my background aswell as behind the picture.
Behind and between I used a chipboard piece that comes to the Attic Charm collection.
This collection will be released soon !
I embossed it with Pearl embossing powder .
After that it got some gesso with pinkish ecoline here and there.
The heart was embossed with Garned Embossing and dulled down with gesso.
The title was very easy, just some black ink that gets into the chipboard very easy.
*****

Thank you so much for visiting the blog and looking at my monthly post.
x Wilma x


Wednesday, March 16, 2016

March Layouts by Maja

Good morning, BFS Fans, welcome to the blog today :) It's Maja here to share three layouts I made using our latest collection, Courtship Lane. 
Ladies first, so let's start with a girly page :)


I like to layer papers for the background and add stamps - and so I did here. For the top layer I chose the Concert Hall paper as the young lady in the photo plays the violin. I also matted the photo with various papers and formed a semi-frame using Whimsy Flourishes, "closed" on the other side of the photo with the Village Sign Post piece embossed with Copper ep. Then I added some flowers and embellies:


The title word "Happy" is embossed with three eps in the purple palette for an ombre effect:


Papers: Calling Cards, Concert Hall, West Plaza, Royal Street
Stamps: Deja Vu, Forever, Vintage Edges
Chipboard: Whimsy Flourishes; Happy, Heart, Love;Village Sign Post
EP: Iris, Lilac, Mystic Plum, Verdant, Copper

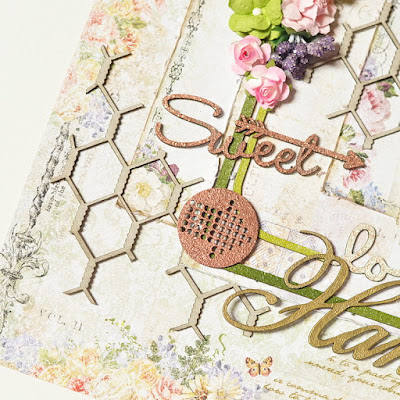
For my second layout I opted for a cheerful spring palette of colours. This time the background features only one paper, Parkway, and no stamps.


I used several designs to mat the photo and they fill the beautiful frame Clip Frames set. I added colour to it with two shades of green embossing powders: Sage and Lime. I made the words stand out by embossing them with Oatmeal ep. Together with the large "Handsome" piece (embossed with Honey) they form my title:


Then I added some chipboard accents from the Arrow Words and Directions sets - to highlight them against the green frame I used Copper ep to emboss. I also added pieces of the Chickenwire Panel that I left saute.


I use flowers also on my boys' layouts, as they still don't mind ;) Here I used beautiful Courtship Blooms and Courtship Roses:


Papers: Parkway, Royal Street, Calling Cards
Chipboard: Handsome, Arrow Words, Directions, Clip Frames, Chickenwire Panel
EP: Sage, Lime, Copper, Oatmeal, Honey

And finally my last layout for March for which I chose orange tones of papers and embellishments:


I composed my background by tearing the house image off the West Plaza paper and layering the rest upon the Lover's Lane sheet. Then I added some stamping and a backet pattern using white modeling paste and stencil and then splashed some tangerine, golden and white mists:


Using two pieces from the Circle Groups I arranged a triangle-shaped design under the photo. I embossed them with Ginger ep and added some pieces from the Cogs & Gears set. I embossed them with Nutmeg ep for more contrast and placed upon or inside the circles:


One of the Arrow Words makes my title - I embossed it with Copper ep because it's very glittery and really makes this small piece pop out:


To finish off my page, I added some Courtship Blooms and metal charms:


Papers: Bourbon Avenue, West Plaza, Royal Street
Chipboard: Arrow Words, Circle Groups, Splattered Circles, Cogs & Gears
Stamps: Widgets
EP: Honey, Ginger, Copper, Nutmeg

I like how by selecting papers I could concentrate on main colours of the collection - green, purple and orange - separately to create varied backgrounds and climates for my pages.

That's all for today, thank you for visiting and see you later!

Maja

Tuesday, February 16, 2016

Maja's February Projects

Hello, Blue Fern Studios Fans and welcome to the blog today :-)

For my today's post I created various projects, so I hope everyone would find something for themselves to get inspired. All of them feature our latest release, the Serendipity collection.
Let's start with the layout:


I first layered two papers in contrasting colours for the background and added some stamping. For the title, I traced the words of the "Always Remember" chipboard with embossing marker and heat-embossed them separately with Heavenly and Ginger embossing powders:


Then I cut out some journaling cards to mat my photo. I tucked some flowers in between then layers,  I also included some loose brick pieces I found with my Shabby Brick Panel (you can also find them in the Extra Bits sets :-)) that I covered with subtle crackle paint.


I created a custom button by attaching an epoxy sticker to the bird image and cutting it out. As for the extra pieces you might get with your chipboard, I decided to keep them and use for some interesting decor element :-) I first removed the pieces from the chipboard, covered them with various eps and but them back together, creating kind of a mosaic/stained glass element (to be able to mount it on 3D dots, I matted the shapes with some paper on the back side):


For the word part, I first embossed the background pieces with Breeze ep and then re-heat it a bit so that particles of Oatmeal ep would stick to it and embossed again to get a shabby chic look:


Always Remember:

Papers: Serendipity: Anticipation, Fascination, Imagination, Chronicle
EP: Ginger, Heavenly, Azure, Seven Seas, Breeze, Oatmeal
Chipboard: Always Remember, Charmed Page Dangles, Shabby Brick Panel/Extra Bits
Stamps: Photography, Forever, Vintage Edges

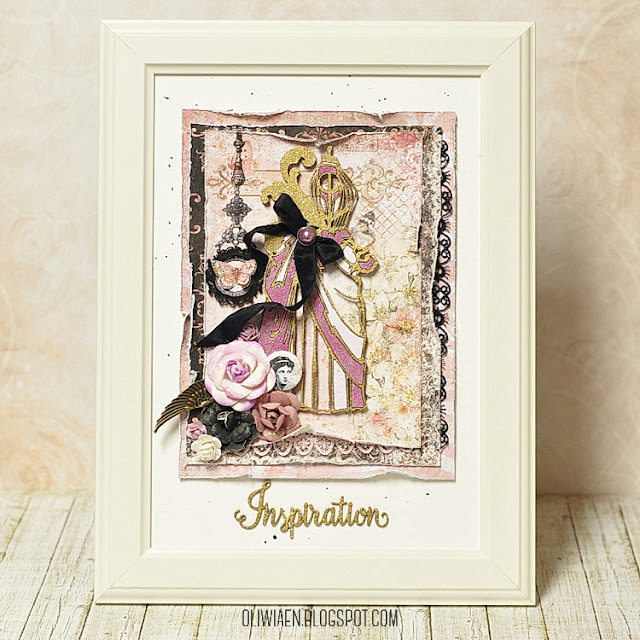
I used this mosaic/stained glass technique for my next project too, an OTP home decor piece with the beautiful Couture chipboard as the main image:


Just as with the Charmed dangle, I removed the pieces, covered them with Lilac and Mystic Plum eps and but them back into the main piece that I covered with 14 Karat ep.


For the background, I layered some papers, put some lace in between the layers and stamped a dangle from the Deja Vu stamp set, then added some dimensional elements to it:


I also included a flower cluster with a button and metal wing charm in it. Beneath my composition I put the Inspiration chipboard on the passe-partout I splashed with black ink:


Inspiration:

Papers: Serendipity: Inspiration, Merriment, Reminisce
EP: Lilac, Mystic Plum, 14 Karat
Chipboard: Couture, Serendipity Words 1
Stamps: Deja Vu

I also made two cards for this post - here's a wedding card that features the Boston Lattice chipboard piece:


I think it makes a beautiful bakcground for the flower cluster, and it also reminds me of a wedding pergola :) For the background, I layered two sides of the Glee sheet:


 I covered the chipboard with white chalk mist and used the extra pieces as propping places to hide 3D dots:


Wedding card:
Papers: Serendipity: Glee
Chipboard: Boston Lattice


It wouldn't make a February post without a Valentine's card ;) Here's one I gave to my own personal hubby:


I used the True Heart stamped image for the main motif: I stamped it on watercolour paper, coloured it with Distress inks, cut out and mounted on layered papers that I also stamped with Journey stamps:


For the sentiment, I used the "love" word from the Chunky Words set, covered it with glue and dipped in the Fool's Gold glitter. Just to make sure it would fall off, I secured it with glossy accents. 


Love card:
Papers: Serendipity: Contemplation, Inspiration
Chipboard: Chunky Words
Glitter: Fool's Gold
Stamps: Journey, True Heart

I wish you a lot of creating time - and see you next time!
Maja Nowak