Showing posts with label Broken Rings. Show all posts

Wednesday, April 9, 2014

A Little Bit of Spring

Hi, it's Valerie today, and I've got spring on my mind.  With Easter approaching, I pulled out the Blue Fern Garden paper collection, along with a few chipboard pieces, and created an Easter layout and card.

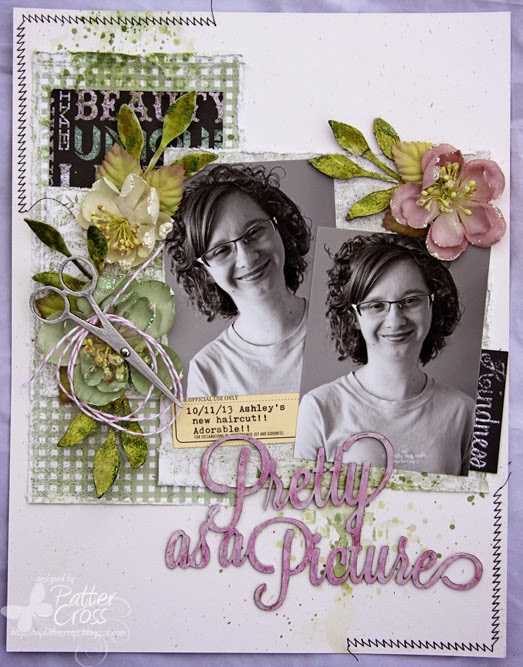
First up is a layout using the "Picnic"  and "Timeless" paper and a photo of my niece that was taken last Easter. 


I chose the Cosmos Basket as a backdrop for the photos, tucked in a Bohemian Flower with the cluster, and painted some Checker Bits green, as a page accent.  

Here are a couple of close ups of the chipboard pieces:


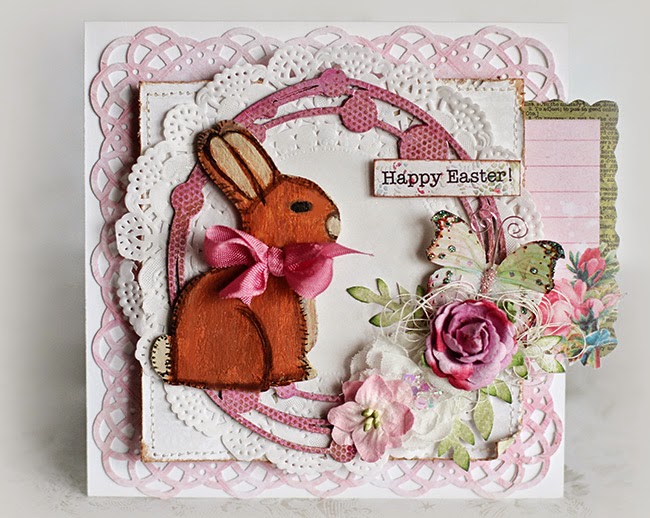
Next, I created a little Happy Easter card using the Timeless and Calling Cards papers from the Blue Fern Garden collection.  I painted the bunny in the Bunny Basket chipboard set, and used the smallest circle from the Beaded Strings set.  


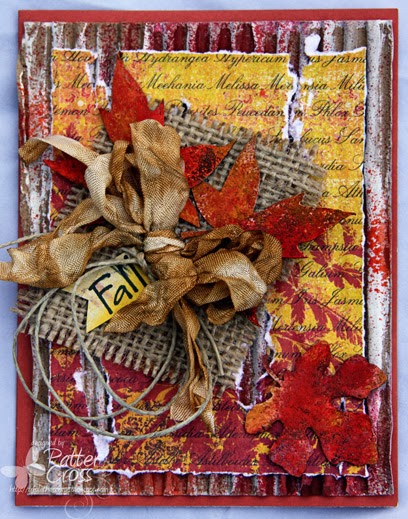
Lastly, I've had this sweet photo of my nephew that I took when he an infant, that I wanted to use with the Parlour paper.  I first worked with the background to create a grunge look (the Blue Fern Garden paper is perfect for this, since it's good and heavy).  I primed the Lattice Gate with gesso, applied a coat of Inka Gold (Old Silver), and unevenly sponged on some gold Prima Metallic Chalk Edger, to give it a distressed look.  I also primed the Broken Rings, and inked them with black ink.


Here is a close-up of the chipboard pieces:


That's all from me this month.  I love trying to achieve different looks with this chipboard!  
Be sure to stop by tomorrow when Jackie will share a few of her projects with you!

Monday, March 24, 2014

Springtime crafts

Hi Guys !
Its Olga here. Today i have for You 3 of my last works with BFS chipboards.

I Made LO with simple composition. As background I use Rings Panel . As a title I use Valentine's Word Set and as element of composition Memory Frames . I really like those frames they look amazing as element of composition and Photo cover as well .


Second work is motivational little canvas in purple:) I used here Shabby Brick Bits as base for my whole composition . I useThe Optimist Word Set and Winter Titles as title and positive message to my work


My last work is optimistic card . Its simple but when You use lots of layered chipboards You don't need other embelishments ;) I use here Broken Rings  as background , Heart Set and banner form Picture Perfect are main elements here  And the The Optimist Word Set as saying 


Wednesday, December 11, 2013

My very last projects By Kristine Henanger

Hi Everyone!
This is my very last post for Blue Fern Studios!
It has been an amazing journey and I have been so lucky to be a part of this talented team! 

Here is my December projects:
"Happy"
On this layout I used glimmermist, papers, chipboard leftovers, modeling paste and stencils to create my background. Then I put on the picture and title.
For this layout I used following chipboard pieces: Quatrefoil Panel, Mini Rings Panel

"Tullekopp"
On this layout I used a stencil and modeling paste to create the chevron pattern, and then I made a paper cluster with leftovers. Putting chipboard pieces under and between the papers.
For this layout I used following chipboard pieces: Broken rings, Mini ring things, Directions

"Memories"
 On this layout I mixed modeling paste and glimmermist and applied it where I wanted my "cluster" to be.
Then I put on chipboard, cheesecloth, and some bling.
For this layout I used following chipboard pieces: Screen Panel, Picture perfect, Memory Frame 

I hope you found some inspiration here today! :)
Thank you all, its been a fun six months and I hope you have enjoyed my projects :)

Kristine Henanger


Thursday, November 21, 2013

Circle Love - with Kelly Foster

Good morning, Blue Fern fans :)
Kelly here today...
I have been playing with some of the newest chipboard designs...they are really awesome! I am particularly enjoying all of the circular designs..

"Perfect"

I started this page by layering strips of paper with pieces of the Checker Bits. The chipboard was left partially bare but with a bit of chalk ink, followed by a brushing of a metallic ink.


Next I added in a couple of the Circle Links to create a unique page design. These pieces were simply brushed with a silver metallic ink, as well.


Blue Fern products:
Circle Links
Checker Bits


"Create Memories"

On this one, I have used various "circle" pieces....including Broken Circles, Mini Rings Panel, and the Blue Fern Bits resulting from these pieces. I used one of the strips of circles to mask/stamp on the background. I then added in the little bits of circles, along with larger ones which were embossed first for fun texture.


Tucked below my photo I added pieces of the Mini Rings Panel which I had simply covered in black ink. I love using chalk ink on chipboard for a full coverage effect without the need to prime first!


Blue Fern products:
Broken Rings
Mini Rings Panel
Blue Fern Bits

Thank you for having a look today!! Have a creative day!
*Kelly*

Tuesday, October 29, 2013

{3} Projects with Patter

Hello! It's Patter Cross with you today sharing my October projects. Today I have two layouts and a card. So, let's get started with a layout.

Pretty as a Picture
This is an 8 1/2 x 11 layout of one of my daughters and her new haircut. All of my girls have naturally curly hair, and trying to find a hairstyle can be difficult. We think this one is a keeper. :)
Pin It
I used the scissors from the Miss Tailor Set since the layout was about my daughter's haircut. I added various silver paints and a silver brad so that the scissors would look more realistic. I also used leaves from the Natural Sprigs set. I added watercolors, mists, and embossing powders to vary the colors and textures on the leaves.
For the title, I used the Pretty as a Picture chipboard piece. I started with a layer of gesso then added various pink paints and mists to get the colors you see below.
Miss Tailor Set
Natural Sprigs Set
Pretty as a Picture

A Fall Card
The new Fall Foliage chipboard by Blue Fern Studios was perfect for this Fall card. I have plenty of inspiration around as I watch the leaves changing in our yard. I am sure a lot of you do also!
Pin It
I misted the leaves with water to peel up the edges and make them look realistic. I then covered them with various mists, embossing powders, and gelatos to make the color of each leaf different.
Fall Foliage

Say Cheese
For this 8 1/2 x 11 layout, I used photos of the little girl my daughter takes care of. She is such a cutie. Each layout I create, I give to her mom to put in an album I have given to the family. She does not scrap so I hope she enjoys this latest page for the album!
Pin It
To color the Broken Rings chipboard, I added a layer of gesso then various paints and mists to get a variation of color on the rings.
On the title "Say Cheese" piece from the Picture Perfect set, again I added gesso, paints, and mists to get the different colors of orange you see. I liked the dotted effect too. Sometimes when my mister causes these dots, I will smooth them out with a paintbrush but I left the dots this time.
Broken Rings
Picture Perfect

I hope you have enjoyed my creations today and that you are inspired to grab some Blue Fern Studios chipboard and begin creating! Thanks for stopping by!

Sunday, October 13, 2013

October projects by Frau_Muller

Hello everyone!This is Frau_Muller here to share with you my October projects using Blue Fern Studios chipboard
The first is layout about my son
I add different colors of Dabber to circle

Graduated Circles (the set contains 5 circles graduating in size from 3" to 11")

And now i show you 2 cards
First card i painted with spray Ditto and added microbeads
 

 I used

Berry Stems

Berry Stems - Click Image to Close

Next card is a little crazy :)
I add liquid pearls
I used
Broken Rings


Broken Rings - Click Image to Close 
Hope I've inspired you to use your Blue Fern Studios chipboard. :)