Showing posts with label Altered Object. Show all posts

Friday, March 28, 2014

Pink & Blue with Leila Cardoso

Hello Ladies

Leila's here today to show you 2 projects using the gorgeous Blue Fern Studios products, chippies and papers.

The first one is a blue layout 12x12, Boys will be Boys...


The circles I applied a layer of gesso and then with a brush applied  blue ink irregularly.


In the title I made the same thing with the circles, then applied some colorless relief.

BFS products:
Blue Fern Garden collection - Parlour paper
Graduated Circles
Boys will be boys


My second project for this month is a pink paper craft bag for gifts, I customize it with stencil, modeling past and spray ink, put some piece of paper and other little cute things...


Here I used the chippie with no change...


And this I colored with acrilic paint and put some spray ink and little drops...

BFS products:
Blue Fern Garden collection - Boudoir paper
Blue Fern Garden collection - Calling cards
Symphony border
Natural Sprigs set

So, this it is! Thanks for stopping by.

xoxo

Leila

Monday, March 17, 2014

Lace Organization Project, and a Shabby Chic Tag

Hello everyone, Joyce here to share an organization idea for your lacy bits.  I had several boxes of acquired lacy bits, and after some time, the boxes became overfilled, disorganized, and I quit reaching for them to use on projects.  They were just too pretty not to be used. I organized them so that I could see all the different patterns, and hopefully make them easier to reach for any put away too.  I made a template out of a 4 x 6 index card in the shape of an “H”, just like those organizational embroidery cards for DMC floss, and cut the “H” shape out of various old scrapbooking papers.  Then you simply wind all the lacy bits over each card.  Don’t they look pretty all organized in the box?  They sure make me want to use them now.  Of course, I couldn’t just leave them in a plain white photo box.  Each boxed lid is embellished with some lovely Blue Fern Studios chipboard pieces.  Even though each chipboard piece is different, the boxes look like a collection because they were designed with the same colors, and similar elements.

Here’s the lid on the first box featuring the blooming foliage chipboard treated with paints, and the fiber tissue paper technique on those little buds:


Here’s the lid featuring a Bohemian Flower and the  Leafy Page Accent chipboard treated with paint  a homemade glaze, and crackle.


Shabby Chic Tag:

 The base of the tag was created with the Boudoir Blue Fern Garden paper, and Signature paper pattern was torn in strips and applied to the base with a heavy gel medium.  Various stamps were applied to the paper before the application of gesso and creamy colored acrylic paint.  After the gesso/acrylic paint application dried, another application of various stamps were used on top of the strips and the base of the tag.  After all the products were dried, a lot of tea bag throwing went on to render an aged look. 

The apothecary jar was created with white acrylic paint, one layer of fiber paper, stamping, stencil and molding paste, and finally some application of pink mist.  It looks so pretty and feminine.

Here’s a picture of the front of the tag.  


Here's a picture of the back of the tag, see how he front flap folds over?  That's because of the jump rings attached to each of the three eyelets.

Thanks for the visit.  I hope I have inspired you to use your Blue Fern Studios chipboard pieces on an organizational idea.

Friday, January 24, 2014

Bring the colors by Olga Heldwein

Hi !!

Hello everyone. Its my firs post at Blue Fern Studios blog and its time to say "Hello"


    My name is Olga Heldwein and I'm from Poland ;). I live with my hubby, son and two crazy cats in Warsaw. All evenings I spending in my little craft(almost)room and messing , splashing, distressing, inking and generally crafting :) You could say that I'm scrapbooker but its not only thing thats turns me on.
    
I'm making workshops too :) (and like it very much this chance to meet all those creative girls amazing experience every single time)
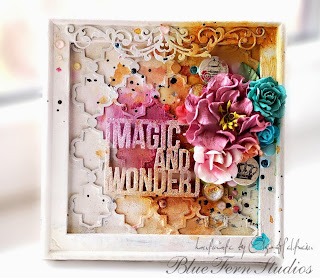
At start picture frame. I use here Marrakesh panel as background and Framed Words and Damask Fluorish as part of composition. covered everyhing with Gesso and colorsprays.


Canvas with saying. I use  Spring Iris - Large in background and  Shabby Layered Frame and Dare to Dream element as central part of my comosition.


And Last Work. Its Joy box . I use here many geometric elements. You will find: Rings Panel as background, Directions, Picture perfect and Winter titles as embelishments.


Saturday, July 27, 2013

Keep it Whole or Take it Apart w/Erin Blegen

Hi everyone! Erin Blegen here with you today with some projects showing how you can keep your chipboards "as is" or piece them apart in order to best compliment your work. We all like to make the most of our products and it can sure be fun to see how far you can stretch something. While at other times, we want to use something in its entirety to really make a statement!

Let's see how I did both :)

"Pause to Live"
 This piece is an 8"x10" canvas. Normally, when I create something, I don't necessarily start with the chipboard. But that wasn't the case here. I knew I wanted to use the gorgeous Ornate Heart piece- and I definitely knew I didn't want to take this one apart. It's such a gorgeous design and I really wanted to make something special with it.

Here are the steps I took in coloring this piece:

1. Prime chipboard with gesso; dry.
2. Stamp chipboard with a favorite stamp and clear embossing ink.
3. Sprinkle on some white embossing powder and set with heat gun.
4. Randomly apply some watercolors. The embossed stamping will resist.
5. Apply clear embossing powder to some areas of the wet watercolors. Set with heat gun.


Products Used:

Ornate Heart

"Pretty Creative Girl This Afternoon"
This project is a bit of an interesting one as my background is made of sandpaper. I actually have a full step-by-step tutorial on how I went about creating this HERE on my blog if interested.
For this project, I chose to piece apart my chipboard. I've done so with two different pieces, the Quatrefoil Garden Panel and one of the Ironwork Accents. I've kept them raw for the most part, save for a few beads on the panel bits.

I've added a couple of the punched out bits that come with these panels.


Products Used:

Quatrefoil Garden Panel

Ironwork Accents

"Key to My Heart" Tag
My final project today is a tag. I've created a collage-style piece using the bird/flourish cut from the Village Sign Post, and a heart from the Heart Set pack.

I actually ended up using the backside of the heart piece. I'd done some stamping and coloring and just didn't like it- but when I turned it over and discovered the random gesso look that it had, I decided I wanted to keep it that way :). I backed it with a transparency before cutting off a piece from the Village Sign Post, applying some sandy colored chalk ink, and then topping off the heart with it.


Products Used:

Heart Set

Village Sign Post

Thank-you for hanging in there with me today! I hope you enjoyed my projects :)
See you soon- and don't forget about the July Sketch Challenge!

Saturday, July 6, 2013

Altered projects with Yvonne Yam


Greetings from sunny Singapore! My name is Yvonne and I'm excited to share my creations using  Blue Fern Studios chipboard. :) I love to make stuff, especially using unexpected "found" stuff around my house (or someone else's!) *Winks*  Old vintage photos. Cute kawaii things. Pretty trinkets.  I love them all! :)  Stop by my blog Do More With Less where I share weekday inspiration through projects, tips and tutorials. 


My first project for July is a 6 x 6 canvas. 


I painted my Seasonal Wildflowers chipboard with gesso then added some translucent beads for some added texture.


The "dream big" chipboard was painted with gesso and metallic medium.

Seasonal Wildflowers

The Optimist Word Set


My next project is an upcycled tea tin to store pretty trinkets in. :)


I love that the chipboard adds such awesome dimension to the project. :)

Butterfly Kisses

I misted the butterfly kisses chipboard, then added some glass beads for extra texture.   

Hope that you've enjoyed my projects. :)