Wednesday, December 21, 2016

December Inspiration By Debbie

Hi everyone!  Debbie here with you today to share my last projects for Blue Fern Studios.   I've enjoyed the last year and a half designing for Blue Fern Studios.  I want to thank Leslie and Valerie for the opportunity given to me to work with all of the amazingly beautiful products.   My final 3 projects include both of the Vintage Christmas collections.

I went in a different direction for my first project and decided to create a Christmas Canvas, a gift for my sister.  I used a mixture of the both of the Vintage Christmas paper collections.
 I worked with an 8x8 canvas, which I covered with the Let It Snow (side B) paper from
Vintage Christmas 2.  Lots of paper layering from both collections and of course chipboard and flowers! Some masking on the background as well as some micro beads.

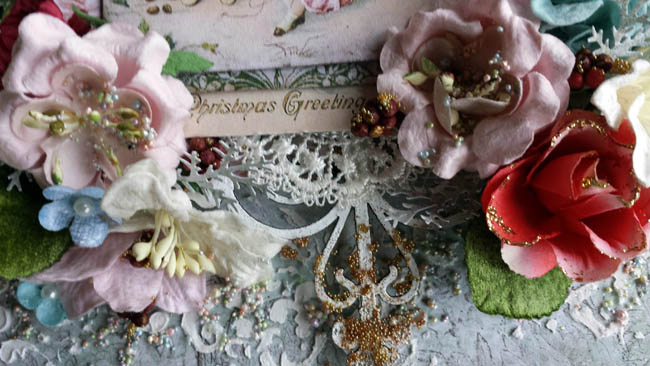
Under my layering I used the Grand Ornament chipboard which I cut in half and embossed with some Snow and Oatmeal embossing powders.  Lots of gorgeous Blue Fern flowers  including Attic Charm Glitter Roses, Harvest Lilies, and Soft Blossoms.

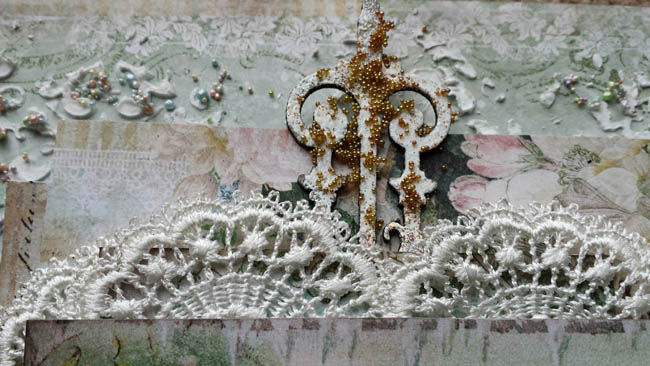
At the top of the canvas is the upper portion of the Grand Ornament chipboard.

On each side of the canvas I placed the Frosty Flake chipboard which I embossed with Snow embossing powder.

Blue Fern Studios Products:
Paper:  Vintage Christmas 2:  Let It Snow, Holiday Cards
Vintage Christmas:  Auld Lang Syne
Chipboard:  Grand Ornament, Frosty Flake
Embossing Powder:  Snow, Oatmeal
Flowers:  Soft Blossoms, Attic Charm Glitter Roses, Harvest Lilies

My next project features both of the Vintage Christmas paper collections.
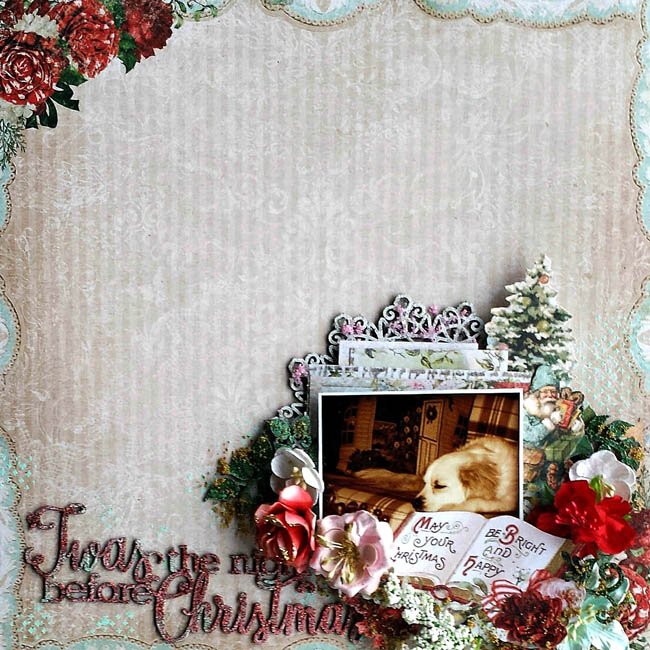
Love this picture of my sweet dog, Zoey.  She loves to lay on the couch next to the Christmas tree,  I used Twas The Night paper from Vintage Christmas 2 for my background.  Lots of layering and fussy cutting using Holiday Cards and Jolly from Vintage Christmas 2 and Wonderland from Vintage Christmas.

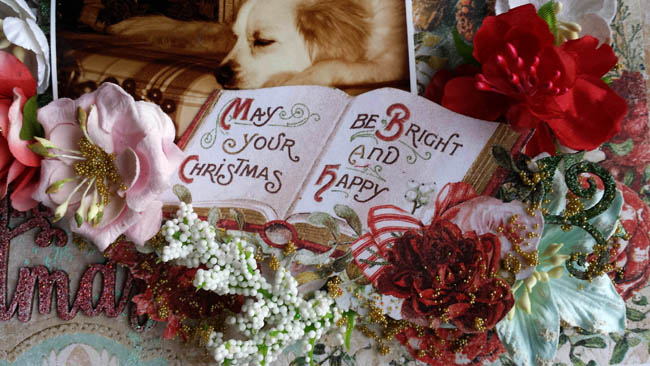
Here's a close up of the beautiful Blue Fern flowers, Christmas Blooms, Soft Blossoms and Attic Charm Roses.

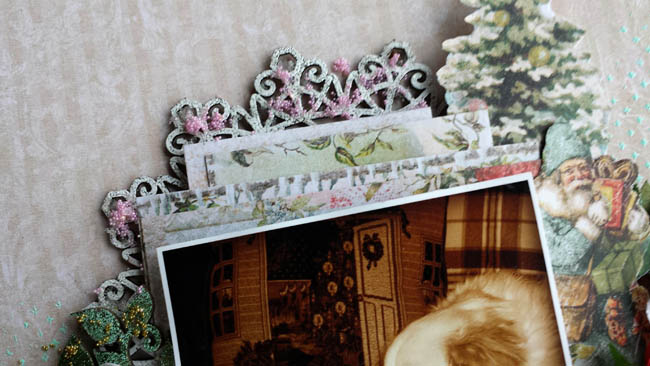
Here I used the Dream Catcher chipboard, embossed with Snow.

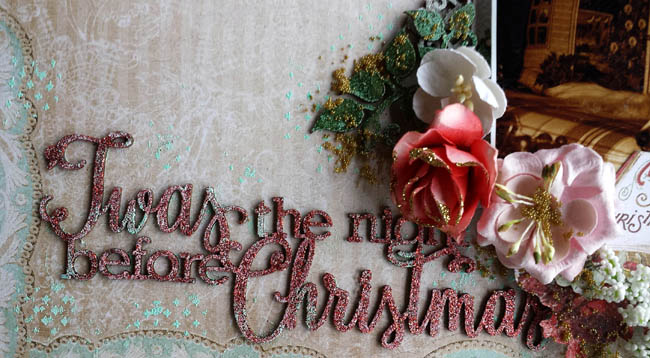
To the left of the photo I placed a past of the Leafy Bough chipboard which I embossed with Verdant and Sea Mist embossing powders.  The title was embossed with a mixture of Poinsettia and Sea Mist.  I added some random stamping with the Forever stamp and added Sea Mist embossing powders.

Blue Fern Studios Products:
Paper:  Vintage Christmas:  Wonderland
Vintage Christmas 2:  Twas The Night, Holiday Cards, Jolly
Chipboard:  Dream Catcher, Leafy Bough, Twas The Night Before Christmas
Embossing Powder:  Poinsetta, Sea Mist, Snow
Flowers:  Attic Charm Glitter Roses, Christmas Blooms, Soft Blossoms

My final layout features papers from Vintage Christmas 2.
I used the Tree Trimmings paper for the background.  I added some light  inking along with some random stamping, some scattered dots covered in Fire Engine Glitter. Lots of layering under the photo using the Holiday Cards paper. Flowers include Attic Charm Glitter Roses, Christmas Blooms and Soft Blossoms.

On both sides of the photo I used the Floral Lattice Bits chipboard embossed with a mixture of Antique Gold and Golden Bricks.

Beneath the photo is a Tree Toy chipboard piece embossed with Golden Bricks along with some Fools Gold and Fire Engine Glitter.

The title was embossed with a mixture of Antique Gold and Golden Bricks Embossing powders.

Blue Fern Studios Products:
Paper:  Vintage Christmas 2:  Tree Trimming, Holiday Cards
Chipboard:  Tree Toye, Floral Lattice Bits, Colorful Candles Buring Bright
Embossing Powder:  Antique Gold, Golden Bricks
Flowers:  Christmas Blooms, Soft Blossoms, Attic Charm Glitter Roses
Glitter:  Fools Gold, Fire Engine

And now it's time  to say good bye.  I hope I have inspired you each month with my projects.  It's been an honor and joy to design for Blue Fern Studios!

Thanks for stopping by!
. . . Debbie

Tuesday, December 20, 2016

Christmas inspiration by Karolina

I defenitely prefer to say "hello" than "goodbye", but it's time to move on. It's my last post on BFS blog, but I'm sure it's not my last projects with BFS products!  I'm really thankful for the opportunity to be a part of this amazing DT. Thank you girls for everything! You are totally unique!

Today I would like to show you my 2 projects (one of them with mini tutorial) with gorgeous Vintage Christmas collections.

Calm

Let's start from the layout. What I love most in these collections is their versatility. You can prepare very traditional project with these papers as also more delicate and sweet, like my layout. When I look at this page I thinking about peppermint candies and candy canes, but also about something warm and cozy. I really like a combo of colours. 


Papers: Vintage Christmas 2 - Holiday Treats, Let it snow, Jolly, 'Twas the night;  Vintage Christmas - Greeting Cards, 
Embossing powder: Snow
Glitter: vintage gold
Chipboard: Serenity, Calm, Hushed, Seeing Stars

Magic and Wonder

My second project it's a Christmas canvas.  I prepared a little photo-tutorial for you.

I started from cover my canvas using old book pages. I'm pretty sure I said it few times, but I really love this effect. 


Next I cut some holly leaves and branches to make a wreath. I also cut a hoop from the common cardboard with scissors to have a shape of my wreath. It doesn't have to be perfect. it's only the skeleton of our construction and it will be unvisible. Then we can start to build our wreath.


We also need  two stripes of paper. We can make it look older using blending tool and the paper knife. We can also use stencil and modeling paste to make our background more interesting.


Next we need to prepare our chipboards. I have used copper and ginger embossing powders to colour them and I put gold glitter on a frame. Then I used a cardboard to make a distance between layers. 


And that's all! Now we need put everything together and add some extra embellishments. I made a snow paste with modeling paste, powder and gel medium.

And here is a result:


Papers: Vintage Christmas 2 - Greeting Cards, 'Twas the night;  Vintage Christmas - Magical, Deck the Halls
Embossing powder: Copper, Ginger
Glitter: vintage gold
Chipboard: Framed Winter Words, Winter Deer, Seaside Lanterns

So that's all. I wish you a Merry Christmas and Happy New Year! :)


Sunday, December 18, 2016

Vintage Christmas inspiration by Marie-Eve Bernard

Hello,

It's my last post here.  The years flies so fast.  I was thrilled to be on such a wonderful Desing Team: a dream came true!  I enjoy every moment of it!  So, I wanted to inspired you a last time with the wonderful Vintage Christmas Collections.  I love Christmas and it's magic.  I add a lost of pleasure to work with those two absolutely gorgeous Christmas collections.

It's a Holly Jolly Christmas:

I use the Let it snow paper for my background.  I had laces between the layers of papers for a Vintage look. Just add a little bit of green watercolor to makes the layers pop.  


 For the frame, I first paint it green.  Then, I add glue to the berries and add the Fire engine glitters.  I did the same with the bow but with the Caribbean glitters. 


I simply embossed my title chipboard with the clover embossing powder.  The color is just perfect!

Blue fern Studios list of supplies

Papers

Vintage Christmas 2, Let it snow
Vintage Christmas 2, 'twas the night
Vintage Christmas 2, Holiday treats

Chipboards

It's a Holly Jolly Christmas
Berry frame

Imagine Ink Embossing Powder

Clover

Imagine Ink glitters

Fire engine
Caribbean

Flowers

Dark tropic lilies
Memoires blooms


Noel:

On this second layout, I wanted a snow effect on my chipboards.  I first cover them with white gesso. Then I add snow effect texture paste and glass bead gel.


I use the Greeting cards paper and cut the merry christmas and the tree image.  I add snow effect to my paper too.  The Christmas blooms were the perfect addition to the layout. I add snow on the flowers.


Blue fern Studios list of supplies

Papers

Vintage Christmas , wonderland
Vintage Christmas , deck the halls
Vintage Christmas, Greeting cards

Chipboards

Bubbles and bows
flourish tree
winter titles

Flowers

Christmas blooms

Sparkle:

My last layout is not with the traditional christmas palette of colours  but I love the soft feel of it.
I use the Holiday card twice.  One for my background and the other, I cut out some of the cards.


The soft blooms were perfect for this layout.  I just add them some snow effect.


My title was emboss twice:  First in pearl then in It's a girl.  It came from the Winter titles chipboard set.


All my snow flakes were painted with a clear iridescent ink.  I enjoy the result.  It just add a discrete shinning effect.

Blue fern Studios list of supplies

Papers

Vintage Christmas 2, Holiday Cards x2
Vintage Christmas 2, Jolly

Chipboards

Large flake
shabby flakes
Winter Titles

Imagine Ink Embossing Powder

Pearl
It's a girl

Flowers

Soft blooms

Thank you Blue Fern Studios for the opportunity to work with all those wonderful products. Finally,  I want to wish you all  a wonderful Christmas and a happy new year.  Hope you have some crafty time to play with your favourite Blue Fern Studios products!

Marie-Eve

Saturday, December 17, 2016

December's Social Media Feature and YOU!

Happy December, Blue Fern fans! 

We hope you are enjoying this special holiday Season and are finding at least a little bit of time to be creative! Today we are sharing just a few of our finds from the past few weeks! 

Remember to post your work and tag Blue Fern Studios for a chance to be featured … and just so that we can be sure to see your  creations! 


First up we have this lovely album by Aida Haron of Singapore. If you visit her Instagram account at 
@aidaville, you will find a quick video that she uploaded showing you all it's gorgeous hidden spots for photos and journaling! Great way to use Vintage Christmas, Aida! 


Kylie Kingham's posted this lovely creation on Instagram, stating that shabby chic is her favorite style! Here she has used Blue Fern Studios Memoires to perfection! You'll want to follow her on Instagram at @paper_sweetpea. Also, be sure and check out her blog Paper Sweet Pea because this gal does it all … clean and simple, shabby, planners and altered art! 


Hiromi Yasuda is a very busy scrapper and posts often! We are pleased to see her work with Blue Fern Studios products because she truly inspires. This is one of the most amazing uses of the Seaside Cottage paper collection that we have seen! She certainly has the perfect photo! The Perfect Day chipboard is a great final touch. Please follow her on Instagram at @nyanhiro.


If you have followed our Social Media posts for long, you know that we like to feature some altered art each month.  Here Aira Hashimoto has used cut files to create this amazing hot air balloon. This could be re-created with almost any of our paper collections to achieve different effects. Please follow Aira at @airahashimoto on Instagram. 


Last but not least, we have this gorgeous Frolic creation by Kathy Martin. Kathy can be found on Instagram at @pinkieto07. We love how the warm tones blend perfectly with her outdoor photos. The dangling chippy and flower cluster are wonderful finishing touches.

***

We will be back later this month featuring some our Creative Team's favorites from this past year!
We thought it would be fun to see what the designers like best!  (If you visit us on Pinterest or Instagram, you'll get a sneak peek into ALL our 2016 inspiration!) 

Next year we will be doing several Social Media posts a month, so don't forget to tag us so that we can find you! 

See you soon!  
Sandi 

Friday, December 16, 2016

Maja Is All About Christmas

Good morning, Blue Fern Studios friends, welcome to the blog today!

Christmas is just a week ahead and Blue Fern Studios has two fabulous Christmas collections, so my today's post is filled with Christmas-themed projects :-)
Let's begin with a Vintage Christmas 2 layout:


I just love the colour combo of this latest collection! Coral pink and mint perfectly match the traditional red, white and green in a fresh,cheerful palette. And plaid is one of my all-time favourite patterns, so I built my composition on the "back" side of the Jolly paper. I added strips of papers on the upper edge of the page and the title word directly on the photo:


I used journaling cards to mat my photo, and then added Christmas Toys and Winter Page Dangles chipboard pieces. I embossed the bauble with Icicle and the heart dangle with Pretty in Pink and Golden Bricks eps.


Here's a little trick: if you heat up the Sea Mist powder a little longer, the colour gets pushed off the edges and a white core begins to show - and you get a nice double tone effect on your piece :-) That's what I did with the Holiday Vine piece, and then added a couple of crystals for some bling. I also used epoxy crystal stickers to make some custom buttons using images from the Tree Trimmings:


I only needed to add the flower cluster with Christmas Blooms and jingle bells :-)


Joy:
Papers: Vintage Christmas 2: Jolly, Tree Trimmings, Twas the Night, Holiday Cards
Chipboard: Holiday Vine, Tree Toys, Winter Page Dangles, Chunky Words
Flowers: Christmas Blooms
EP: Sea Mist, Icicle, In the Pink, Golden Bricks

BFS papers are great for cardmaking too! And here are Christmas cards I made using the Vintage Christmas 2 papers:


Each card features a chipboard piece. Here are the baubles from the Tree Toys set, embossed with 14 Karat ep and matted with mint paper pieces:


In this card I used the Dangled Flake as a frame for the stamped sentiment. The chipboard piece is embossed with Icicle and decorated with small flowers:


And this card presents the gorgeous Frosty Flake piece that I embossed with my custom-made mint tinsel (Icicle, Snow and Sea Mist mixture):


Christmas Cards:
Papers: Vintage Christmas 2: Jolly, Holiday Treats, Holiday Cards, Let It Snow, Twas the Night
Chipboard: Dangled Flake, Tree Toys, Frosty Flake
Flowers: Christmas Blooms
EP: 14 Karat, Icicle, Icicle+Snow+Sea Mist

And finally the layout for which I returned to the original Vintage Christmas collection:


I knew I would want to use the Magical sheet for the layout background the moment I opened the DT box :-)) It's so easy to build up a design with it, I didn't even feel the need to use other papers, just matted the photos with two sides of the Deck the Halls sheet.


For the title I used the Holly Jolly Christmas piece painted with white gesso:


I used two Winter Page Dangles to create a vertical divider on the page. I embossed the star with Ginger and the snowflake with Frozen eps. Then I added some Christmas Blooms, die cut snowflakes and crystal twogs to decorate the photos:


It's a Holly Jolly Christmas:
Papers: Vintage Christmas: Magical, Deck the Halls
Chipboard: Holly Jolly Christmas, Winter Page Dangles
Flowers: Christmas Blooms
EP: Frozen, Ginger

And now it's time to say good bye, as my term on the Blue Fern Studios DT comes to an end. It's been an honour and privilege to work with these great products and share my projects here with you. Thank you, BFS, for this opportunity, and thank you, dear blog visitors, for your visits and comments. See you around!
Maja Nowak