Saturday, May 17, 2014

The Colors of Blues and Browns by Joyce

Greetings everyone, this month I found inspiration in the colors of the blues and browns found in the Blue Fern Garden papers.

The Love Letters Paper was used on this layout:

Most of the flowers in the layout were made with a die cut and the Parlour paper,  the bike surrounded by the flowers near the photo is the Penny Farthing cycle chipboard.
 
Here's a little mixed media tag using the Signature paper as the base, with lost of stamping and gesso on top of the reverse side of the paper which was then torn into strips. The little fussy cutting ribbon came from the Calling Cards paper. The Apothecary jar was treated with some white paint, fiber paper, and blue mist applied with a fine paint brush, then it was placed on top of one of the many Ever After Frames.


And, finally here's a greeting card using one of the Calling Cards, applied on top of the back side of the Parlour paper.  The little humming bird was treated with white paint, script stamp, and some blue mist.

 
Thank you for stopping by and allowing me to share my design team creations with you.  I'll be seeing you again on June 17th with some creations from the new Blue Fern Studios Ombre Dreams paper collection. 

Friday, May 16, 2014

Save Those Punch-Outs Tutorial

Hello, Blue Fern fans! Jackie here today with a little tutorial about using those little bits of chipboard you might normally recycle.

I don't know about you, but as soon as I get an order of chipboard, I tend to punch out the little extra bits of chipboard. The pieces that I don't think will find use as design features on a one of my projects I put into a Ziploc bag to be used to add height in my layering later on. Those that I feel I will use go into another bag. But recently I've started looking at those castoff pieces in a different light, as parts of a whole.

Take the Garden Window set.


You might normally punch out the flourishes and set them aside (I did), but they make wonderful additional details to your piece.


If you are planning on reassembling your chipboard pieces, you want to be sure to use media that will just coat the top of the piece and not cause the sides to change dimension. For this reason I chose to use embossing enamel rather than paint.


I prefer my embossing ink in a dabber so that I have better control of where it goes (using either the dabber top or by removing the top and painting the ink on).


Cover your main piece with one colour of embossing enamel and heat emboss.


The white is pretty stark, so once it had cooled I went in with several colours of chalk ink to add some depth, making sure to heat set each colour before I added the next.


 I then heat embossed the insert pieces in a different colour of embossing enamel.


Here's what the finished piece looks like:
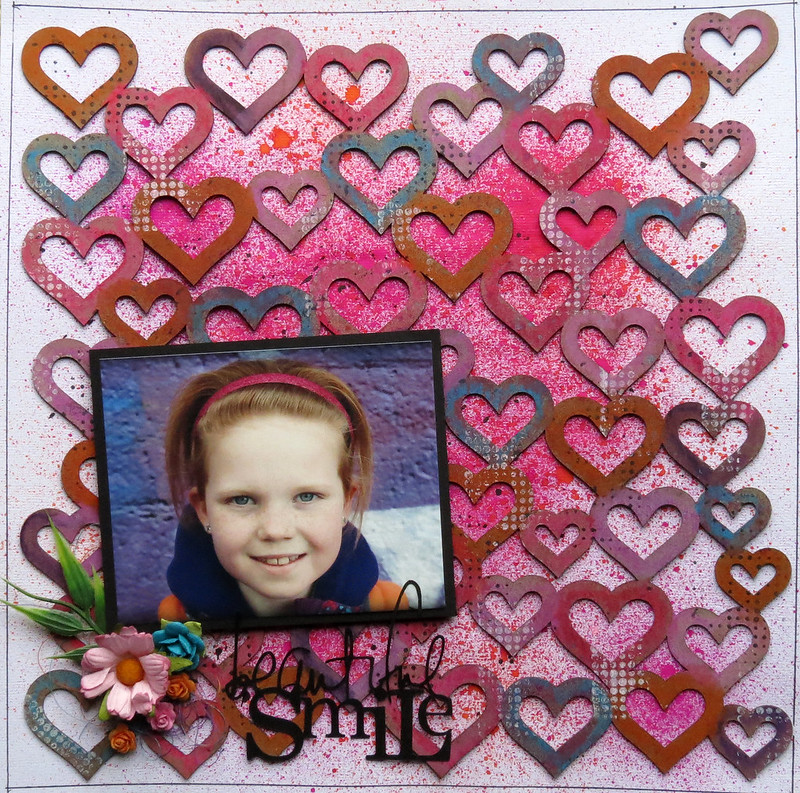

And my layout:


Some closeups:

From the Heart Set, misted.


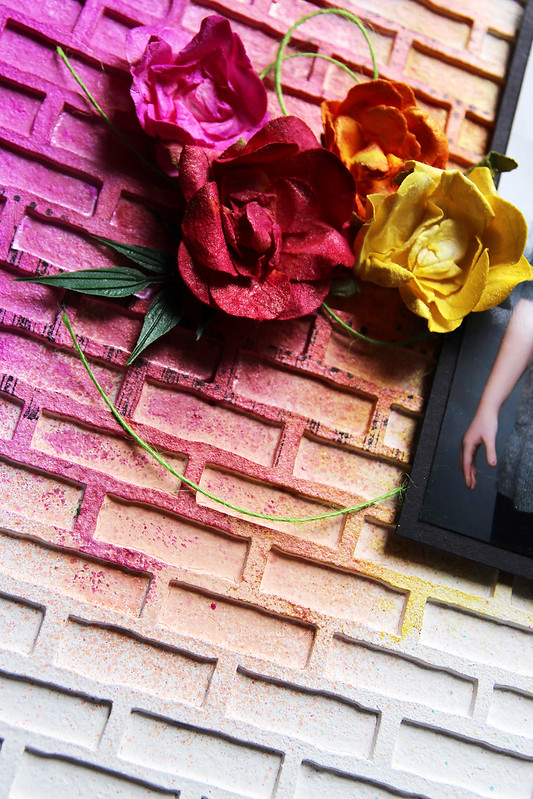
A piece from the Shabby Brick Panel, treated in the same way as the Garden Window.


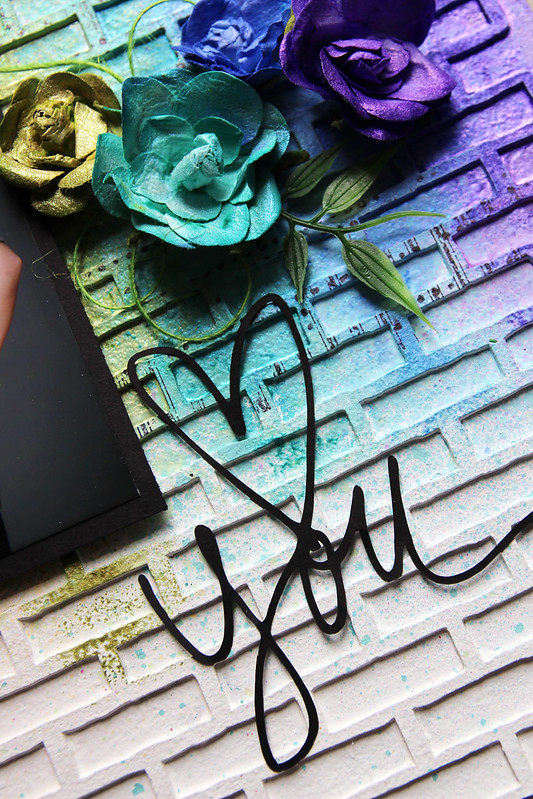
I love the shutters that go with the Garden Window - they seem very Old World to me. I've added the sprigs from the All Natural Set, treated with the same colour embossing enamel as the punch outs for some continuity and to give the impression of a window box. The "Click" is from the Picture Perfect Set.


The masking on the Parlour paper from Blue Fern Garden was done using Ceramic Stucco, which gives amazing texture and accepts other media beautifully - I coloured mine with mists and chalk ink.


I love the way chipboard pieces add so much interest to your flower clusters.


Thanks for stopping by today. I hope that you'll start looking at those little throwaway bits of chipboard in a new light!

Thursday, May 15, 2014

Watching YOU Put Our Designs to Work!

We've been on the search once again for projects around the web featuring our products...and like any good treasure hunt, we came up with riches! SO many gorgeous samples out there to choose from; we're absolutely blown away by the beautiful talent that has taken our designs and created such incredible things!

Here's a sampling of what we dug up:


 Tracy Christine Funk

Absolute pure gorgeousness!!

Thank-you wonderful ladies SO much for sharing your inspiration with us, and for loving our products as much as we do :)

If YOU would like to be featured in our monthly "WATCH" post, be sure to upload your projects to our gallery {HERE}; include a blog link too so we can make sure everyone else can find you! Thanks so much and we wish you a beautifully creative day!

Wednesday, May 14, 2014

2 Projects by Evgenia Petzer

Hello dear BFS friends! Its Evgenia Petzer with you today with my 2 May shares.

First i have got a feminine card, that also uses BFS papers

Blue Fern Studios products used: Grande Cages, Organic Vine Corner Large, Blue Fern Garden papers

And some close ups:
 The cage and the large organic vine corner (i have used only one third of it on this card) are coverd with tattered angels glimmer glam.


And second is the fabric notebook


Blue Fern Studios products used: Fancy Birdcage, Vintage Keys
 The cage is covered with 2 colors of acrylic paint, the glossy accent over it and sprinkled with some microbeads

 The hand-died in coffee sheets  that ive more vintage look to it.
I hope I have inspired you a little bit:) Have a good and crafty day everyone.

Evgenia.

Tuesday, May 13, 2014

Two layouts with the Blue Fern panels by Marie-Josee

Hello all!

I hope you are all doing fine! Spring is finally here in Canada and the weather is great. Flowers are blooming everywhere, so I was inspired to create these two colorful layouts with the Blue Fern panels.

If you have been reading the blog for a while, you know that I am a huge fan of those panels and that I don't really like to cut them: I like to use them as a background on my layouts. Without further ado, here are my two projects! :)

"Heart You" layout
To create this layout, I used the Shabby Brick panel. I glued it to my background (I used a piece of 12 x 12 chipboard) and applied gesso with a sponge.


Once dry, I applied all the colors of the rainbow, plus pink, using various mediums: Twinkling H2Os, Silks and various sprays. Here are some close-up views:


"Beautiful smile" layout:

For this layout, I used the Chunky Heart panel. I altered it with various colors of Gelatos. 


Then, I glued the panel to my white cardstock and sprayed some mists on top. I also added patterns with stamps and black and white ink.

Here are some close-up views:


Monday, May 12, 2014

A card and something altered from Maja

Hi all Blue Fern Lovers. I´m here today to share some small projects I made using  papers from the "Blue Fern Garden" line  and of course some of BFS lovely chipboard. First up is a card.


Blue Fern Products used:
Papers: Love Letters, Timeless and Calling Cards.
Chipboard: Grande Cages


My next projects turned out to be some kind of a frame. I have used a small wooden "box" or what you should call it. I ordered some resin embellisment and got them in this box. I started with painting the box with white paint and then used some of BFS papers, BFS chipboards and flowers to decorate it.


The beaded sting that I have used around my photo here is painted with crackle texture paste.


I have chalked the chipboard pieces. On the word "Love" I also used some Glossy Accent.

Blue Fern Products used:
Papers: Parlour
Chipboard: Petite Boutique Frames, Little Bird Set, 2Hearts Set, Beaded Srtings and Veranda Cage Set.


Thanks for stopping by =)

Sunday, May 11, 2014

Designer Inspiration: Mixed Media Madness!

Today we want to give you an  

Inspiration Overload!

{Hey, we're nearing the end of the weekend and we NEED it, right??}

And if you love mixed media, then today you've most definitely come to the right place! We've compiled for you a batch of projects from several of our design team members using various mixed media technique and {of course} plenty of Blue Fern Studios chipboard!

Evgenia Petzer

Jackie Clark

Kelly Foster

Keren Tamir

Leila Cardoso

Maja Stokk

Marie-Josee Hamel

Rae Moses

Yuko Tanaka

Such lovely mixed media inspiration, ladies!! 

{Is it just me, or is there suddenly an incredible need to snatch up the nearest mediums and let playtime begin?!}

Thanks for coming on over for some weekend inspiration. We hope you find a moment to be creative today, and always :)