Tuesday, March 7, 2017

March Scrapbook Page Inspiration by Kris Berc

Hi, Blue Fern Studios friends and fans!  I have some scrapbook page inspiration for you today featuring the brand new beautiful Spring Parade collection.  If you didn't have spring fever before, just wait until you get a look at the pretty pastel colors and gorgeous patterns in this collection.  They are perfect for all of your Spring and Easter projects.

Brilliant

I chose the back side of the Spring Parade Susie's Garden paper as the base of this layout.  I covered it with clear gesso so that I could apply mixed media products.  Then I added 3 shades of pink and purple spray.  It is important to let each color layer dry before adding the next color, otherwise the colors will blend together.  Next, I applied modeling paste through a stencil.  Then I used the Tattered Newsprint stamp to add detail and contrast.


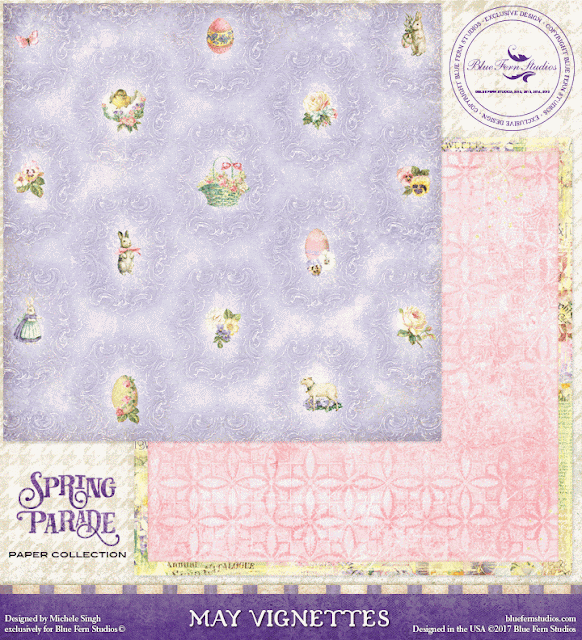
I chose the Spring Parade May Vignettes paper and used both sides of it under my photo.


I used the Blooming Flourishes chipboard set under my photo.  I embossed it with the new Lavender Eggs Imagine Ink embossing powder.  Isn't it pretty?!


I used Imagine Ink 14 Karat embossing powder on the title piece from the Brilliant, Amazing, Dazzling chipboard set.  I also sprinkled some gold beads here and there to coordinate with the gold title piece.


I dabbed the embellishments with a bit of heavy gesso to soften up the look.

and yes, I'm proud of my little girl for her academic accomplishment :)

Blue Fern Studios products used:

Paper
Spring Parade - Susie's Garden
Spring Parade - May Vignettes

Chipboard
Blooming Flourishes
Brilliant, Amazing, Dazzling

Embossing Powder
14 Karat
Lavender Eggs

Stamp
Tattered Newsprint

Flowers
Attic Charm Daisies
Courtship Roses
Dark Tropic Lilies
Heartland Blossoms
Spring Florals

-------------------------

Perfect

For my second layout, I could not resist the Spring Parade June paper!  This paper is so very pretty.  I love the lace print border, the sweet flowers and in the bottom left corner... the Easter egg.  I added just a bit of color to the focal point area of the paper with 3 shades of purple and pink spray.  I topped that with a thin layer of modeling paste through a stencil.


I used three layers of the Spring Parade May Vignettes paper to mat my photo.


The chipboard piece behind my photo is from the Circle Groups set.  There are 5 pieces in that set, so it can be used on several projects!  I embossed it with Imagine Ink Lavender Eggs embossing powder.  It's so sparkly in person!


I was inspired by the colorful Easter eggs in my photo to add several colors of flowers to the page.  I tucked in one of the new Fancy Eggs chipboard pieces which I heat embossed with Imagine Ink Cotton Candy embossing powder.


I also used the Cotton Candy embossing powder on my title piece, which is from the Perfect, Adorable, Special chipboard set.


Blue Fern Studios products used:

Paper
Spring Parade - June
Spring Parade - May Vignettes

Chipboard
Circle Groups
Fancy Eggs
Perfect, Adorable, Special

Embossing Powder
Cotton Candy
Lavender Eggs

Flowers
Attic Charm Daisies
Late Winter Lilies
Soft Blossoms
Spring Florals

Thank you for stopping by today.
I hope I have inspired you to create with your Blue Fern Studios products!

Friday, March 3, 2017

Introducing Spring Parade - our new collection!

Are you tired of waiting for spring?  We sure are, so we thought we would share a little bit of spring with our new paper collection, Spring Parade.  This collection, created by the amazing Michele Singh, includes 10 double-sided sheets of paper that are sure to make you anxious for spring!  You will find beautiful spring colors, gorgeous flowers, and little bits of Easter sprinkled throughout this collection.

Here it is............Spring Parade.


We sure hope this gets you in the mood for warmer weather, and longing to see flowers beginning to pop their heads out of the ground.  

In addition to the paper collection, we also have coordinating chipboard, stamps, flowers, embossing powder and glitter.  We will be featuring those items over the next several weeks, so be sure to check back.  And expect to see some projects from our design team in the near future.

Thursday, March 2, 2017

March projects by Tartine Peluche

Hi Everyone!

Today it's my turn and I'm so excited to share with you my new projects.

For beginning, here is my first layout..
I used a paper from Chesterville collection.
I worked a lot on my background again, and I really love the result.

-It's your story-


The main chipboard is Rose Wreath which I cut into parts.
I embossed with the Snow embossing powder.

I wanted to give impression that the chipboard flowers were packed in fabrics.
I use coarse fabric jute. All the background is created from pearls and small rocks such as a packing full of jewelry. Just add some flowers harmoniously and the trick is played.

This chipboard is the rest of the Spirit of Heartland which I used last month on another layout. I simply embossed with Sand & Sea Embossing Powder after putting white gesso.
For this page I wanted to use white flowers, so I chose that of Heartland Blossom tissue.

Blue Fern Studios products I've used:
Paper:
Chesterville - Whitford
Chipboards:
-
Rose Wreath
- Rose Frame
- Spirit of Heartland
Imagine Ink Embossing Powder:
-
Sand & Sea
- Snow
Flowers:Heartland Blossom

------------------------------
For the second layout you can see my face, a page I made with everything I love.
This page is really me a condensed of my style. Hope you love it.

- Bonheur -

I started my layout with Generation from Attic Charms collection.
I created my background with Crackles Texture and Serendipity stamps. I put some texture paste and work with inks. A few small rocks and beads an a little bit of mika flakes and some bits of thread gave the result of my background ... and you know everything.

I chose the perfect flower, that of the collection Harvest Lilies.

For chipboard, I wanted a small frame to accompany that of paste fimo that I made.
The kit Sweet & Lucky was perfect to use as a frame; I used the '' Lucky ''. I started by coating it with white gesso and used a thermal powder ( heat & stick powder ) When heated to heat gun this powder becomes a super adherent for glitter. So for this one I put the powder and then Pyrite Glitters.
My Title comes from the French Words kit. I chose Bonheur ( Happiness ) because it reflected well the energy of the photo.


Blue Fern Studios products I've used:

Paper:Attic Charms - Generation
Chipboards:-Sweet & Lucky
- French Words
Imagine Ink Embossing Powder:
-
Oatmeal
Imagine Ink Glitter:- Pyrite
Stamps:
- Crackles Texture
- Serendipity
Flowers:- Harvest Lilies

------------------------------

And the last one for this month, my lovely dream catcher.
I really love this layout I'm really proud of the result.

- Believing -

I used Preston from Chesterville paper collection.
Like the other pages I made mybackground in the same way.
Texture paste, paints, inks and small embellishments.
I used two chipboards to create my dream catcher. The Jeweled frame and the dream catcher.
I altered them separately and then tied them together with a rope.
For chipboard Dream Catcher I simply covered with black gesso and used a mauve and opalescent fushia paint. Then I added some beads and rhinestones. The other chipboard, the jeweled frame, I made it simpler. Just a little powder to emboss silver on the chain parts and opalescent gray paint.


I used the pink flowers of Courtship Lane Collection, Courtship Roses.

I added a last chipboard, one from the Spring Trinkets kit, I worked like the Dream Catcher, black gesso and purple opal paint and fushia.

Blue Fern Studios products I've used:
Paper:Chesterville - Preston
Chipboards:
- Jeweled Frame
- Dream Catcher
- Spring Trinkets
Stamps:
- Scratched
Flowers:
- Courtshipe Roses

------------------------------

So there it is! Hope you like it.
Thank you for stopping by!
See you in April
Tartine xxx

Wednesday, March 1, 2017

Meet our March Blue Fern Fan of the Month!

We are super excited to introduce our March Blue Fern Fan on the Month - Edith Cloutier of Canada. You're going to love the combination of Edith's style and Blue Fern products.  We will be featuring a project from her each week during this month, and you are in for a treat.  We will turn it over to Edith now so you can find out a little bit about her, and take a look at her first layout:  


Hi! My name is Edith and my pseudo is cloutiere on the Internet. I live in Quebec, Canada with my husband, our daughter and some pets. I have been scrapping since 2009. My style is a mix between Shabby Chic and Mixed Media, I love to try new things! 

I generally scrap 12x12 layouts and canvases. My principal inspiration is my family of course, but also everything around me. The inspiration is everywhere!! I love to be in my craftroom in my scrapworld and it will be a pleasure to share it with you!


Thank you, Edith.  We are thrilled that you will be creating for us this month.

Check back next week when we will have another layout from Edith.
  I've been told she will be using the Chesterville Collection!

Tuesday, February 28, 2017

Februari Projects By Wendy Scholten

Hi Everyone,

Today it's my turn to show you my projects for this month, 2 of them feature the new Chesterville collection, it's absolutely stunning!

For my first page

"All Natural"

 i used the Chesterville Hargrave paper, when i saw this one i knew i had to use it!


I mixed some white gesso with artsian powders and created a background for my photo.
Then i used the harlequin of the Texture 1 stamp and one of the vintage phrases
 and also a stencil i used with paint to give my background more texture.
 a few chrystals and string from my own stash.
The Chesterville collection comes with some beautiful grungy chipboard pieces, i used the Chesterville Collage which i cut in pieces to fit my photo right and an older set called All Natural, which matched my theme for this page perfectly.

I treated the Chesterville Collage with Oatmeal embossing powder, The All natural Set with Mushroom  and Sand and Sea embossing powder except for the butterfly (It's a girl embossing powder) and my title, on that one i used Vintage Gold embossing powder.
I also used a few Lilies from the Havest, Late Winter and Spring Lilies, thes are so gorgeous and can be used on everything!
Blue Fern Products used:

Papers:
-Chesterville- Hargrave

Chipboard:
-Chesterville Collage
-All Natural set

Stamps:
-Texture 1
-Vintage Phrases

Embossing Powder:
-Oatmeal
-Mushroom
-Vintage Gold
-Sand and Sea
-It's a girl

Flowers:
-Harvest Lilies
-Late Winter Lilies
-Spring Lilies

---------------------------

Now for my second one

 "Two Hearts" 

i made a smaller canvas with Attic Charm papers and a picture from our wedding day in 2012.


 I used the Spring Posy papers as well as a few cards from the calling cards paper and strips of paper from the Sachet paper where i put some lace behind and between the layers to give it some depth.
I created the background with the Forever stamp and
i also used some It's a girl embossing powder and the essential texture stamp for different textures.
For my chipboard pieces i used the Floral clock and the Symphony border which i treated with snow embossing powder mixed with some glitters.
The Title Two Hearts from the Wedding Words Set i embossed with mushroom embossing powder but i found it was too dark so i used a little Gesso to tone it down a little.
i used some glitter, small flowers, chrystals and beads from my own stash.
For the flower clusters i used the Harvest Lilies.


 Blue Fern Products Used:

Papers: Attic Charm
- Spring Posy
  -Calling cards
-Sachet

Chipboard:
-Floral Clock
-Wedding Words
-Symphony border

Stamps:
-Essential Texture
-Forever

 Embossing Powders:
-Snow
-It's aGirl
-Mushroom

Flowers:
-Harvest Lilies

----------------------------

And for the third one

"Sassy"

i also used the new Chesterville Collection.
For this page i used the Whitford paper and placed the Bretton paper (this one is so pretty with the small flowers) which i cut a bit smaller on top.
I cut the inside of the Whitford paper and used a piece of it behind my photo.
I made a lot of photo's of our little girl on our last vacation, i like them so much combined with these papers as you can probably see, because i used two already this month, lol.
 For the background i used modeling paste with a stencil which i colored with artisan powders and mica powders. I tucked in some Cheesecloth behind my photo.
I used the Manchester Frame which is part of this Chesterville Collection and the title Sassy from the Cute Sweet Sassy Set.
The Frame was embossed with the mushroom embossing powder and the title Sassy was treated first with crackle paste for some texture and then i used the vintage gold embossing powder.
 I used the  Late Winter Lilies and the Harvest Lilies.
 To give it al some more texture and depth i used some different sizes of art stones.
 I also used some small embesllishments and flowers from my own stash.
Blue Fern Studios products used:

Papers:
-Whitford
-Bretton

Chipboard:
-Manchester frame
-Cute, Sweet, Sassy

Embossing Powder:
-Mushroom
-vintage Gold

Flowers:
-Late Winter Lilies
-Harvest Lilies


This Chesterville Collection is so stunning and versatile, i'm sold!
Thanks for visiting and have a nice day!
Hugs Wendy