
For my first Project, I teamed up the Blue Fern Studios May Sketch with the newest Paper Release Tranquility. I love this paper collection!! The natural, slightly grungy paper designs allowed me to capture one of my FAV looks, Country Chic!!
The following is this month's sketch, and you can join in on the sketch challenge here:
http://bluefernstudios.blogspot.com/2016/05/may-sketch-challenge.html
The following is this month's sketch, and you can join in on the sketch challenge here:
http://bluefernstudios.blogspot.com/2016/05/may-sketch-challenge.html

And here is my take on the sketch:

I started with 2 layers of the Blue Fern Tranquility Papers that I distressed heavily and did some random punching on.

Here you can see where I did some peek a boos of with lace.

I created another layer with distressed and inked paper to matt out my photo, and added a metal lock to make it look like the photo was latched to the papers.

I then took a Blue Fern Wallflower Stamp, and stamped the pattern randomly onto my background paper. I love doing this kind of stamping, it adds the illusion of even more depth and allows you to bring in coordinating colors into your design.

Next, I took some Blue Fern Leafy Page Accents Chipboard and 1st heat embossed the pieces with Imagine Ink Oatmeal Embossing Powder, and then took an embossing dabber and inked just the edges and dipped them in Imagine Ink Peacock Embossing Ink, and heat set it.
I then added a Blue Fern Roses and Lillies Flower, and a couple of stash flowers. creating a floral piece at the top corner of my photo.
I then added a Blue Fern Roses and Lillies Flower, and a couple of stash flowers. creating a floral piece at the top corner of my photo.

I added strips of the papers that I distressed and inked, and then over layered them with a piece of Blue Fern Scalloped Border Chipboard that was heat embossed with Imagine Ink Mushroom Embossing Powder, and cut it into two pieces so that I could layer a piece here, and

a piece at the bottom of my photo. I added more flowers and lace and some of my hand crafted Peacock Feather Dragonflies and more lace.

For the large floral piece at the bottom left hand corner of my photo, I used a Blue Fern Leafy Bough Chipboard, and did the same 2 tone embossing that I did on the page accents. I then added on a Blue Fern Roses and Lillies Flower, and a couple of stash flowers.
Blue Fern Studios Supply List:
Paper:
Tranquility-Calm
Tranquility-Serenity
Tranquility-Jubilation
Chipboard:
Chipboard:
Scalloped Border
Leafy Bough
Leafy Page Accents
Stamp:
Wallflower
Flowers:
Leafy Bough
Leafy Page Accents
Stamp:
Wallflower
Flowers:
Tranquility Roses & Lillies
Imagine Ink:
Imagine Ink:
Oatmeal Embossing Powder
Mushroom Embossing Powder
Peacock Embossing Powder
Mushroom Embossing Powder
Peacock Embossing Powder
I love working with natural fibers, colors and subject matter, and the new Blue Fern Tranquility Collection has the perfect colors for layering in with those natural accents!! This second project is a layout that I created that expresses my love for nature, and creates a Hushed Tranquility:

The background layer is Blue Fern Tranquility Blissful Paper, and the 2nd layer is the Blue Fern Jubilation Paper that has been distressed heavily along the edges.

I used some Burlap Fabric that I cut down and frayed the edges on for a photo matte, added my photo and then topped it with a Blue Fern Treasured Floral Frame

that I first inked then dabbed with embossing ink and heat embossed with Imagine Ink Oatmeal Embossing Ink, adding on some mulberry paper flowers for accents.

Here you can see all the detail on the frame.

I just love the wood grain feel of this paper!

At the top corner of my layout, I added a large Blue Fern Tranquility Roses and Lillies Flower , a Blue Fern Courtships Flower, feathers, some stash mulberry paper flowers, and then took some of the pieces that I frayed off the burlap fabric tied them together and tucked them in.
My hand crafted Secret Garden Butterflies contained the perfect colors to accent with!
My hand crafted Secret Garden Butterflies contained the perfect colors to accent with!

For the bricks that you see throughout this layout, I used the Blue Fern Shabby Brick Bits that I cut into pieces embossed with Imagine Ink Nutmeg Embossing Powder, and then dabbed embossing ink randomly onto them, sprinkled them with Imagine Ink Oatmeal Embossing Powder, and heat set that. I then took some of the centers and painted them with some sand texture paste and put them back into the skeletons.

I added some of the texture painted bricks to the peek a boo at the bottom as well.

For the large flower layer, I added more feathers, more burlap strings, some more of the Blue Fern Tranquil and Courtship Flowers, a sweet bird nest, a burlap daisy and more mulberry paper flowers.
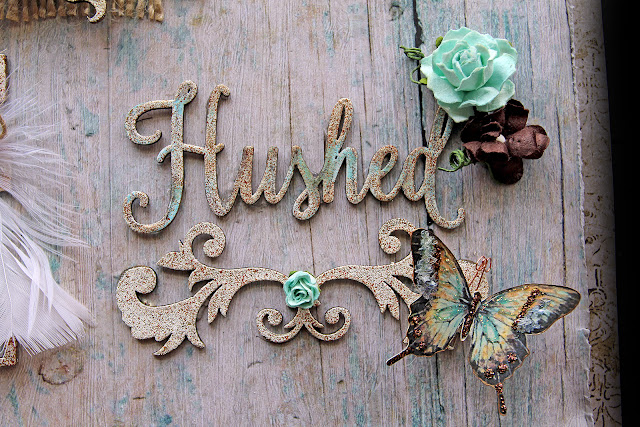
For the title work, I used another chipboard piece from the Leafy Page Accents, and a Blue Fern Hushed from the Serenity, Calm, Hushed Word Chipboard Set.

I first heat embossed the pieces with Imagine Ink Oatmeal Embossing Powder, and then did some random embossing on the Hushed piece with Imagine Ink Breeze Embossing Powder, and added flower accents.

Here you can see all the dimension and textures that I achieved using all of the Blue Fern Studios Products.
Blue Fern Studios Supply List:
Paper:
Tranquility-Blissful
Tranquility-Blissful
Tranquility-Jubilation
Chipboard:
Treasured Floral Frame
Shabby Brick Bits
Leafy Page Accents
Serenity, Calm, Hushed, Set (I used Hushed)
Flowers:
Tranquil Blooms
Courtship Blooms
Imagine Ink:
Oatmeal Embossing Powder
Nutmeg Embossing Powder
Breeze Embossing Powder

and then took a Blue Fern Parisian Ornament, and first coated it with Imagine Ink Pearl Embossing Powder, and then top coated it with Imagine Ink Snow Embossing Powder. Both layers were heat seat and the double layer gave me the look of aged white, Wrought Iron-love it!!!

I added on a Blue Fern Calling Card from the Tranquility paper that I distressed the edges on.
Next came some Blue Fern Tranquil & Courtship Blooms, along with some mulberry paper flowers and leaves. I added a sweet metal, handmade tag and one of my hand crafted Tiny Treasures Emmie's Dream Butterflies.

Here you can see all the tuck ins that I created using the Blue Fern Tranquility Calling Cards. They include:
2 Large Double Sided Pull Outs
1-Folded Piece
2-Smaller Note Cards
Thank you so much for the visit!! I hope that you have enjoyed all of my May projects, and that you get a chance to grab some of those amazing Blue Fern Products and create something beautiful for yourself!! Until next time,
Hugs ~Renea
Nutmeg Embossing Powder
Breeze Embossing Powder
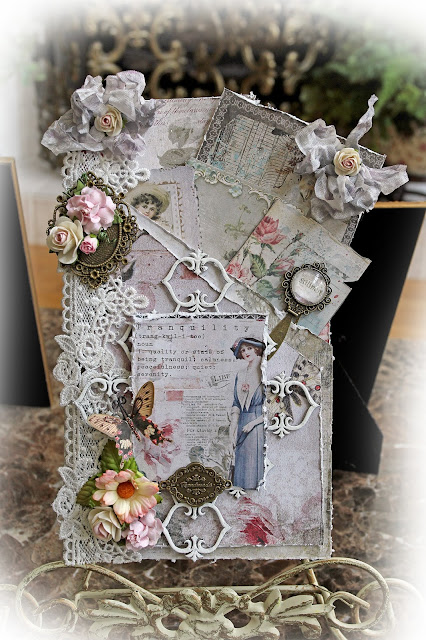
For my last Blue Fern Studios Project this month, I have a Vintage look pocket journal to share with you. I used the new Tranquility Paper Collection and lots of YUMMY Blue Fern goodies to put this one together with.

For the base of the folder I took a piece of the Blue Fern Tranquility-Blissful Paper, folded it in half to get a Width of 6 Inches, and cut it down to a 9 Inch Length, and then cut out an angle so that I could glue the edges and form my pocket for all my tuck ins.
I added lace down the side,
I added lace down the side,

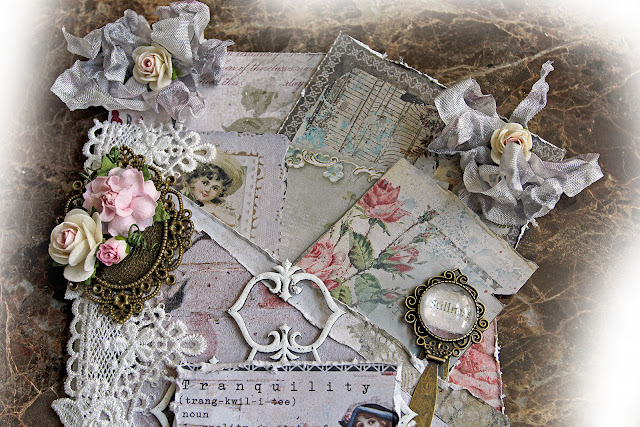
and then took a Blue Fern Parisian Ornament, and first coated it with Imagine Ink Pearl Embossing Powder, and then top coated it with Imagine Ink Snow Embossing Powder. Both layers were heat seat and the double layer gave me the look of aged white, Wrought Iron-love it!!!

I added on a Blue Fern Calling Card from the Tranquility paper that I distressed the edges on.
Next came some Blue Fern Tranquil & Courtship Blooms, along with some mulberry paper flowers and leaves. I added a sweet metal, handmade tag and one of my hand crafted Tiny Treasures Emmie's Dream Butterflies.

At the fop corner of my pocket, I added a Baroque Metal Frame and filled it with more flowers. Added a Vintage look metal clip that I took some of the paper with the word "stillness" on it and mounted it under the glass cabochon.

Here you can see all the tuck ins that I created using the Blue Fern Tranquility Calling Cards. They include:
2 Large Double Sided Pull Outs
1-Folded Piece
2-Smaller Note Cards
Thank you so much for the visit!! I hope that you have enjoyed all of my May projects, and that you get a chance to grab some of those amazing Blue Fern Products and create something beautiful for yourself!! Until next time,
Hugs ~Renea
Blue Fern Studios Supply List:
Paper:
Tranquility-Stillness
Tranquility-Hushed
Tranquility-Calling Cards
Chipboard:
Persian Ornament
Flowers:
Tranquility Blooms
Tranquility Blooms
Courtship Blooms
Imagine Ink:
Snow Embossing Powder
Pearl Embossing Powder


