Showing posts with label Tattered Diamond Bits. Show all posts

Friday, November 28, 2014

Pink & Clean layout by Leila Cardoso

Hello

Leila's here today to show you 2 clean layouts about the new baby on the family, Kyra...I also choose work with 1 color, pink, in the both layouts.

Let's see!


The first is Cute Stuff, Kyra and my daughter together in the first day we have her in our home.

I painted the chipboards pieces with chalk, gelatos and spray ink.

BFS supplies:
- Paper Mercantile - Montage Collection
- Frilly hearts chipboard
- Good vibes chipboard


The second is Love and in this one I used some chipboards in natural.


BFS supllies:
- Paper Boudoir - Blue Fern Garden Collection
- Paper Shannon's dream - Ombré Colletction
- Tattered diamonds bits chipboard
- Good vibes chipboard
- Chunky heart panel (little hearts)

So, this it's for today, tks fot stopping by

xx

Leila

Monday, November 3, 2014

2 Layouts and a Gatefold album by Lisa Gregory

Hi There, Lisa here, welcoming you to November! That  means 3 more designs from me to inspire you.

For this first layout, I was in a purple kind of mood. I used Ombre Dreams paper in  Joyces Dream. I loved the purple and blue tones in the paper. I did a little masking with molding paste and chose sprays to enhance the colors. I mounted the paper on a piece of corrugated cardboard and did some distressing  around the edges.


Surrounding the photo I used Tattered Diamond Bits chipboard that were sprayed with spray in 2 colors. I also took apart the Organic Vine chipboard and used it in 2 places on the layout.


I took 1 piece from the Gingers Poppies Set and used embossing powder on it. Then I sprayed it with spray for added color and shimmer.


 I tucked some of the Tattered Diamond Bits in between the paper and cardboard in my peekaboo spots around the edges.


For my next layout I wanted to go for the golden theme of Autumn. I used the Montage Collection in Invitation.


I heat embossed gold embossing powder on the Royal Monarchs butterfly. Then I used some German Gold Glass glitter on spots of the wings. Once it was set. I glued on some rhinestones in different colors. It looks like jeweled brooch. This brooch was my inspiration. I didn't want to distract from the beautiful intricate details of the Monarch butterfly, so I only added a few rhinestones.

 I treated the Treasured Floral Frame  the same as in the butterfly.


I heat embossed the Blessings chipboard from the Spiritually Speaking set. 


This next project is a 6x6  Gate Fold album. I found I could use the word cutouts on the inside along with some room for journaling, or photos, or both!

I used the Blue Fern Garden paper collection in Boudoir for the front, back and inside covers.


The inside tiers were made from a variety of tags, small pictures and wording  from Ombre Dreams and Montage.


 I created 3 tiers to the Gate Fold album. There is plenty of room to add pictures and journaling.


 The backs of each section would be perfect to place small photos.


I added a small clasp closure to keep the album closed. The Spring Frame was heat embossed using  embossing powder. There is a gold undertone that simply shimmers in the powders and the coverage on chip board is amazing!


Thank You for joining me today for my November Blog post. I hope you visit us often as the Design Team always has gorgeous inspiration for you. Don't forget our Sketch Challenge as well as the arrival of the new Blue Fern Studios paper collection "Sanctuary"!! We are very excited!!
 xoxo


Sunday, October 12, 2014

October creations with Maja

Hi =) Today I have three project to show you. Two totally different from eachother and then a layout made using this months sketch for the sketch challenge. So lets begin!

First up is a layout of my youngest son. I´ve used the new Montage papers for this one and the new cool chipboard triangles.


For this background I used a lot of different colors of Distress Stains. Love that splashing effect =).

Blue Fern Products used:
Papers: Montage - Fairyland
Chipboards: Triangle Eclipse & Adore, Love Cherrish words
  
My next layout is much softer and romantic. Also for this page I used the Montage papers.


Blue Fern Products used:
Papers: Montage - Invitation,Calling Cards & Now And Then
Chipboard: Collage Frame

Last is my sketch layout. There is still time for you to play with us. To find all information on how to participate in our challenge check this blogpost. Below is the sketch.


And my take on the sketch.


Blue Fern Products used:
Papers: Ombre Dreams - Charlotte´s Dream, Joyce´s Dream & Susan´s Dream
Chipboards: Forest Mushrooms & Diamond Bits.

Thanks for stopping by  =)

Saturday, August 2, 2014

August Education Video with Jelissa

Hello friends,

today I'm sharing with you a start-to-finish video on making a mini canvas, as well as how to use the gel transfer technique to "print" designs on your favourite Blue Fern Studios chipboard products.


I've used the Tattered Diamond Bits for this project. This technique is suitable for chipboards with more surface as the images or designs you're transferring will be more visible. Some other suitable chipboard pieces would be "Manor Hinges", "Cloudy Skies", "Winter Trees"and "Nifty Tags".
Some close ups:


My mini canvas also made used of left over scraps from my Ombre Dreams papers which I used for layering as well as stamping my sentiment.


Here's the video, and I hope you enjoy it!


Blue Fern products used:

Tattered Diamond Bits
Charlotte's Dream


love,
Jelissa

Wednesday, February 26, 2014

Blue Fern Garden papre layout and card Yuko


Hello! Yuko here!
New paper "Blue Fern Garden" is very beautiful!!!
I love these  papers and chipboards!


I made the layout using this beautiful paper and chipboard!


【CAPTURE the moment】
Vintage Keys

The texture was attached to the paper of pasteboard with modeling paste,
 and pan pastel colored. 


The paper was cut off in the shape of a lattice. 


The chipboard of this title is easy-to-use in a very good size. 
It was processed with texture paste and acrylics paints. 


And one more layout.


【dream】
Heart Borders
The Optimist Word Set
 Tattered Diamond Bits

Even if a paper is very thick and it processes it in mist etc.,
a favorite does not curve!


I painted the crackle paint to this title.


 And I made ​​a card with the remaining paper.


Blue Fern products: Royal Page Baubles


Thank you for seeing! 
Making a layout from this wonderful product from now on enjoys itself, and it is !. 


Yuko


Saturday, February 22, 2014

3 New Projects by Lisa Griffith

Hello everyone! It's my turn to share my February projects today. I'm sure you've all
seen by now the gorgeous new line of papers by Blue Fern Studios. I love the soft 
colors and the sweet girly feel, I was inspired to create this...

"Flowers for Lily"


This is a photo of my niece Lily. My sister told me that last Valentine's Day her Daddy
brought her her very first bouquet of flowers, Lily just loved them and thought they were so special.
So, so sweet. I used the paper "In Bloom" as the background, and then cut up some pieces
of the "Calling Card"paper as layers underneath my photo. I have taken a piece from the
Manor Hinges and a piece of the Ironwork accents and painted them with cream colored paint
and then stamped them with Ranger Distress ink in Vintage Photo. For the
word 'Delightful' from the Optimist Word Set, I painted with the cream colored paint,
added a touch of pink mist and then a coat of Glossy Accents. 
Here is a close up:


Blue Fern Studio products used:
Blue Fern Studios "In Bloom"
Blue Fern Studios "Calling Card"
Ironwork Accents
Manor Hinges
Optimist Word Set

Next is a tag I created using Blue Fern Studios paper and several chipboard pieces, which I embossed 
in white and then splashed with a bit of blue and orange mist to match the flowers. I cut out 
some of the diagonal pieces of the Love Letters paper so that it would highlight the pattern.


And a close up:


Blue Fern Studios products used:

Blue Fern Studios "Love Letters"
Tattered Diamond Bits
Hearts from the Chunky Heart panel
Ever After Frame Set

And lastly I have a card to share. I really enjoyed making this. I am madly in love with
Blue Fern Studios panels! I love to give them a really distressed look by cutting them up
in jagged pieces and then adding different mediums, they add such a great textural element to any
project.  I painted both the Turkish panel pieces and the butterfly  with Ranger Antique Linen Distress 
paint, did just a touch of embossing with Ranger Antique Linen embossing powder and then 
once that was all dry, painted them with some Silks paint in Emperor's Gold.


I have to admit I haven't made many cards, but after seeing how adding a few
pieces of altered chipboard to a card makes it so pretty, I will definitely
be making more! It's so nice to send someone special something hand made 
and from the heart.

Here is that beautiful butterfly:


Blue Fern Studios products used:

Butterfly Grid Panel 
Turkish Panel

Thanks so much for stopping by today!

Hugs, Lisa xo

Monday, February 10, 2014

2 Bright and Bold Layouts

Hello, Jackie here today to share my February design team projects, including one with the new Blue Fern Garden papers. I was so excited to receive these papers; they are so beautiful I almost couldn't bear to cut into them. Almost. I did get over it, and had a lot of fun in the process.


I love the lattice pattern of the Love Letters paper, and started by cutting it out with an X-acto knife, then used the pattern on the background Signature paper dictate how I trimmed the lattice. I wanted to leave the lovely birdcage and doily in the bottom right and the flowers and flourishes in the top left corners visible.


I glued the lattice down, then applied all my media overtop to make it an organic part of my background.

Lots of Blue Fern Studios chipboard scattered throughout. Frames are a great way to highlight a focal point on your photo; here I printed a second copy of the photo and fussy cut my son and the swing out of it and adhered it over the frame to bring movement to the picture. Of the three of us in the picture, there is no doubt who is the focal person (even more helpful when the photo is not particularly flattering of my eldest son and I). I started by rubbing a candle on the chipboard to create a bit of a resist, then painted and splattered on various coordinating colours of watercolour paints for a fun, artsy feel.


In addition to the lattice, there are lots of layers of paper and media on my background. I didn't want to cover these completely with additional layers of paper, but did want to add some additional bulk behind the photo; the Shabby Brick Bits were ideal for this purpose, and grounded the photo and cluster while allowing the background to peek through. I simply painted the chipboard with two coats of gesso, then added stamping and splattering.


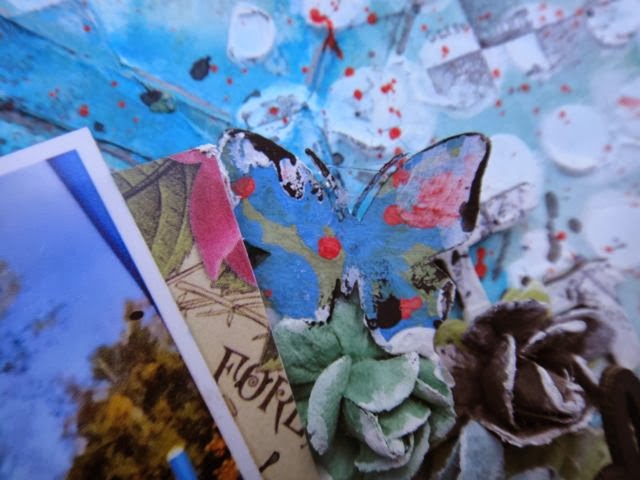
Your chipboard doesn't always have to be the focal point of your layout. I needed a little something to bulk up my cluster, and this butterfly, painted randomly with watercolours, fit the bill perfectly.


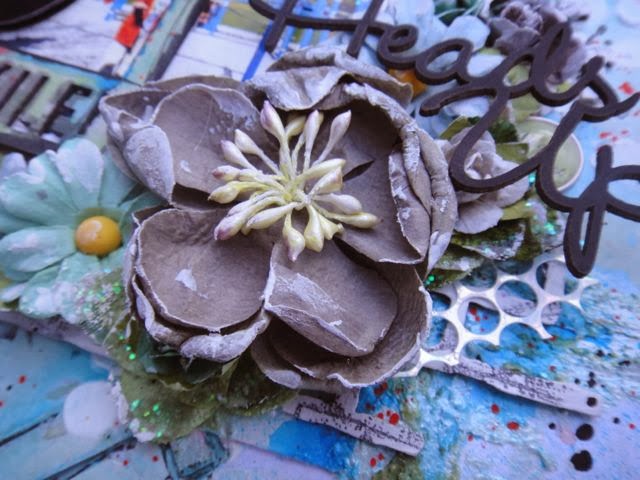
With such a busy background, I wanted to make my title bold and simple to help it really stand out. A simple coat of black watercolour paint did the trick. I mounted the title on top of the flowers in my cluster with some wet adhesive.


Products Used

- Blue Fern Garden Signature paper
- Blue Fern Garden Love Letters paper
- Blue Fern Garden Calling Cards paper
- Shabby Brick Bits chipboard
- Picture Perfect chipboard
- The Optimist Word Set chipboard
- Icons Set One chipboard

I had so much fun playing around with this next layout. I love this picture of my middle son, and the look of disdain on his face, and wanted to use chipboard to draw the eye in to the photo.


The Graduated Circles were perfect for the task. I started by colouring the piece with a white Gelato, then built up additional colours with Gelatos and finished the whole thing off with random spots of coordinating embossing powder. I would later use the Graduated Circle as a frame for my clusters, which keeps the eyes moving around the centre of the page.


The Tattered Diamond Bits ground the photo within the circle, preventing it from looking as though it is just floating there. I started by heat embossing them with a weathered embossing powder, then added in Gelatos in orange and brown to marry it to my colour scheme.


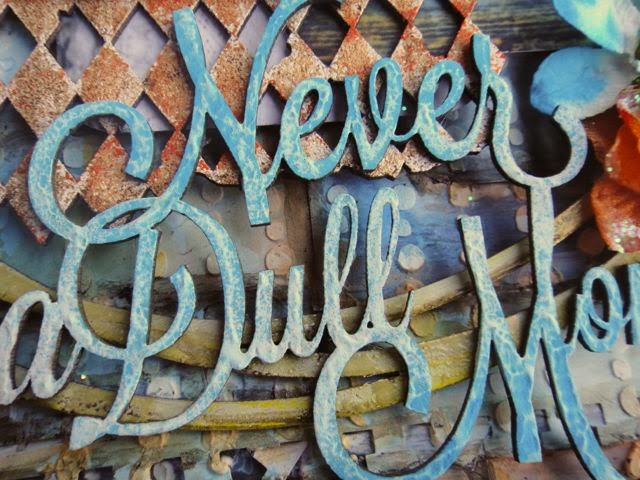
For the title, I painted it with gesso and my finger, leaving texture behind, then misted it randomly to achieve an ombre effect.


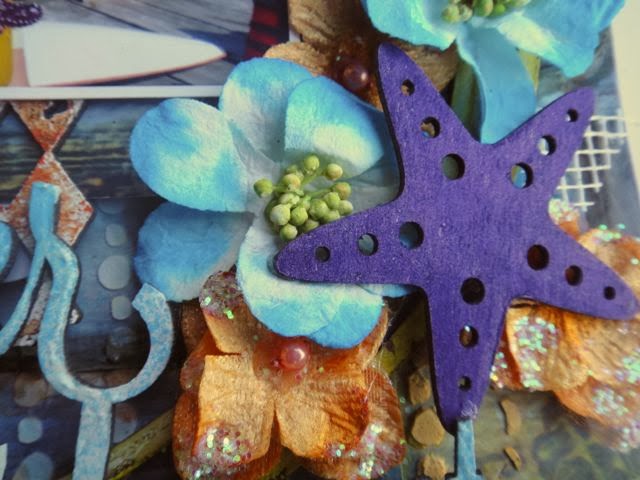
And last but not least, a pop of purple to coordinate with the purple in the photo.


Products Used

- Never A Dull Moment chipboard
- Graduated Circles chipboard
- Tattered Diamond Bits chipboard
- Seaside Seashells chipboard

Thank you for stopping by today!