Showing posts with label Snow. Show all posts

Tuesday, February 14, 2017

February Projects by Babi

Hi Everyone,

Today it's my turn to share with you my new projects with the upcoming collection Chesterville.  It's such a beatiful grunge style collection and  it will be available soon for you to work with it.

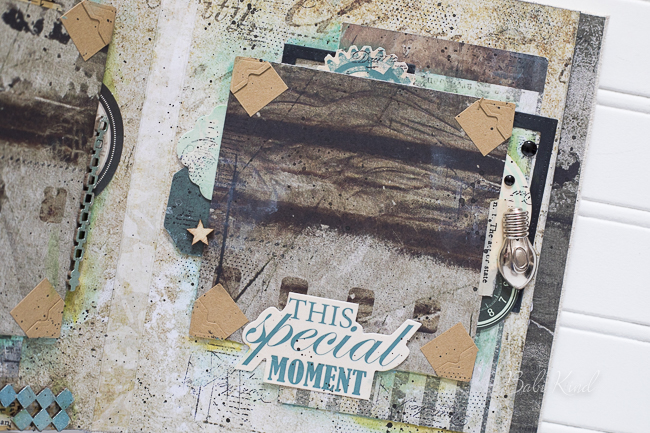
I used the Chesterville - Bretton and Whitford papers to create my first project, called "Smile Today".


I applied some texture paste with stencil, watercolor and paint to create a more girly background.

Then, I covered  the Manchester Frame Chipboard with Antique Gold and Fern embossing powder and acrylic paint.


I finished  the layout with some gorgeous paper flowers - Spring  and Late Winter Lilies.  


Supplies using Blue Fern Studios:
Papers: Chesterville - Bretton  and Whitford 
Chipboard: Manchester Frame
Embossing Powder: Fern and Antique Gold
Flowers: Spring and Late Winter Lilies

--------------

My next projet is a  mini album  that I made with several papers from  Chesterville collection. You can check the names in the supplies list.

For the Cover I used the Chesterville GeorgeChester and Holmes  papers.


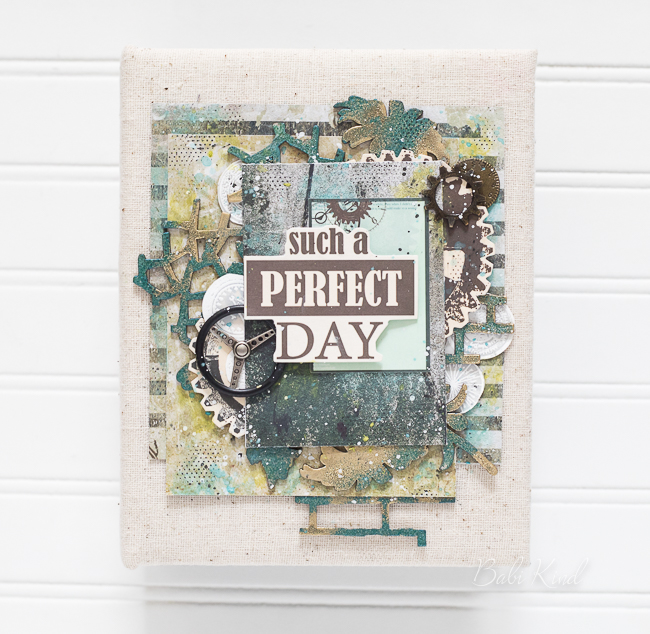
I used the Texture Wildflowers for the coverthen I embossed it  with  Antique Gold (a must have :)) and Fern Embossing Powder.

I stamped on a vellum paper a few images of the  Widget Stamp and added  Snow Embossing Powder to it.


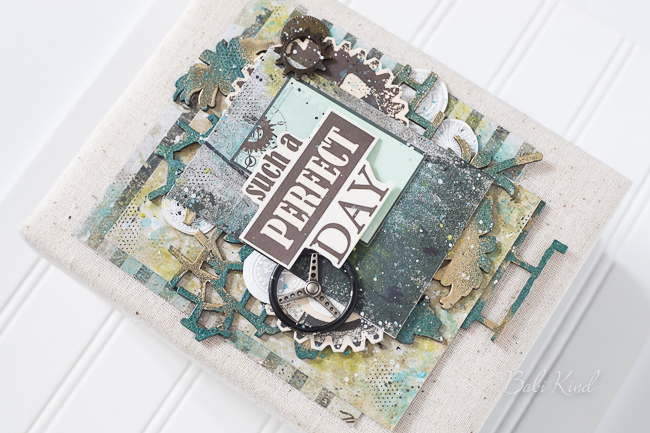
To finish, I added some embellishments, gesso and watercolor to create more dimension.


Now I would like to share my video tutorial that shows  how I decorated the cover for my mini album. You can see the whole project at the end of the video.


Supplies using Blue Fern Studios:
Papers: Chesterville (Barton, Bretton, Buckley, Chester, Geroge, Hargrave, Holmes, Keswick, Preston).
Chipboard: Texture Wildflowers, Romantic Page Dangles, Shabby Bricks Bits and Checker Bits and Gears
Embossing Powder: Antique Gold, Fern and Snow
Stamp: Widget
**Hope you enjoy it**
Thank you so much for stopping by today!
Babi

Sunday, December 25, 2016

Merry Christmas for My Last Post- By Keren Tamir


Hi Everyone,
Its Keren here for the Blue Fern Studios blog for the last time.
After 3 amazing years being on the Blue Fern Studios Design Team it is time for me to say goodbye.
It was wonderful to be part of the team for so long and use their wonderful products.
I'm very grateful to have had this opportunity!!!

Here are my projects for this post!!


"Scandinavian Winter"

I created this 5x7 canvas depicting a scandinavian winter.


I used the Tree Trimmings paper from Vintage Christmas 2 collection for the background.
I embossed 2 of the Winter Village chipboard pieces and a snowflake with Icicle embossing powder and then added some gold glitter on it.
Once I glued everything I added some snow paste to enhance the winter feel.


<<<<<<<<<<<>>>>>>>>>>>

"Winter"


I created this wintery layout using a picture of myself from a few winters ago.
I used the  back of the Holiday Cards paper from the Vintage Christmas 2 for the background.


I used the large chipboard flake to frame my photo. I cut the inside of the flake so I would have a space in the middle to frame my photo. Then I embossed it with Sea Mist embossing powder.


I used some shabby flakes and winter flakes to embellish around the frame. I embossed them along with the Winter title with Snow embossing powder.
I also added some snow paste to enhance the wintery feel.


<<<<<<<<<<<<<>>>>>>>>>>>>>

 "Chritmas Cards"

Finally I created 3 Christmas cards: 


The first one uses both the Vintage Christmas collections and the Dangle flake as an embellishment. The chipboard was embossed with Golden Bricks embossing powder.


The Second Card also uses both Vintage Christmas collections


To embellish I added some Blue Fern blooms and a Holiday Deer that was also embossed in golden Bricks embossing powder


For the last card, I used the Deer ornament which was embossed in 14 karat embossing powder.


I used some flowers and cheesecloth to embellish the card as well!!


Thank you so much for visiting Blue Fern Studios Blog

and thank you for supporting me for so many years!!!

Have a Merry Christmas and a Happy and Healthy New year!!

Love,

Keren


SaveSave

Tuesday, December 20, 2016

Christmas inspiration by Karolina

I defenitely prefer to say "hello" than "goodbye", but it's time to move on. It's my last post on BFS blog, but I'm sure it's not my last projects with BFS products!  I'm really thankful for the opportunity to be a part of this amazing DT. Thank you girls for everything! You are totally unique!

Today I would like to show you my 2 projects (one of them with mini tutorial) with gorgeous Vintage Christmas collections.

Calm

Let's start from the layout. What I love most in these collections is their versatility. You can prepare very traditional project with these papers as also more delicate and sweet, like my layout. When I look at this page I thinking about peppermint candies and candy canes, but also about something warm and cozy. I really like a combo of colours. 


Papers: Vintage Christmas 2 - Holiday Treats, Let it snow, Jolly, 'Twas the night;  Vintage Christmas - Greeting Cards, 
Embossing powder: Snow
Glitter: vintage gold
Chipboard: Serenity, Calm, Hushed, Seeing Stars

Magic and Wonder

My second project it's a Christmas canvas.  I prepared a little photo-tutorial for you.

I started from cover my canvas using old book pages. I'm pretty sure I said it few times, but I really love this effect. 


Next I cut some holly leaves and branches to make a wreath. I also cut a hoop from the common cardboard with scissors to have a shape of my wreath. It doesn't have to be perfect. it's only the skeleton of our construction and it will be unvisible. Then we can start to build our wreath.


We also need  two stripes of paper. We can make it look older using blending tool and the paper knife. We can also use stencil and modeling paste to make our background more interesting.


Next we need to prepare our chipboards. I have used copper and ginger embossing powders to colour them and I put gold glitter on a frame. Then I used a cardboard to make a distance between layers. 


And that's all! Now we need put everything together and add some extra embellishments. I made a snow paste with modeling paste, powder and gel medium.

And here is a result:


Papers: Vintage Christmas 2 - Greeting Cards, 'Twas the night;  Vintage Christmas - Magical, Deck the Halls
Embossing powder: Copper, Ginger
Glitter: vintage gold
Chipboard: Framed Winter Words, Winter Deer, Seaside Lanterns

So that's all. I wish you a Merry Christmas and Happy New Year! :)


Tuesday, November 22, 2016

Vintage Christmas 2 by Marilyn

Hello everyone! 
Marilyn here with you today to share two projects and a video tutorial with the new Vintage Christmas 2 collection. 

I love the combinations of turquoise, beige and red colors  in the Twas the night paper . The tree Trimming and the Holiday Cards papers made the perfect complement to my page.

The chipboard were embossed with snow and sea mist embossing powders.

I mixed the new Christmas Blooms and the Soft Blooms .

 My title is the new "Twas the night before Christmas" chipboard.

Supplies:
Christmas Vintage 2; Twas the Night, Holiday Cards, Tree Trimmings papers
Chipboard: Twas the night, Large Flake
Flowers: Christmas Blooms, Soft Blooms
Embossing Powder: Snow, Sea Mist


Here's the Video tutorial, I hope you find inspiration!!


A Christmas Greeting Box
My second project is an altered Christmas box .  I played with the lines and design of the Holiday Treats paper around the box. I added one of the ornament of the Tree toys chipboard that I covered on Cranberry glitter.

Here's the back of the box, every side has a different detail.

Supplies:
Vintage Christmas 2: paper- Holiday Treats
chipboard: Tree Toys
Glitter: Cranberry
Flower: Soft Blossoms


Thanks for stopping by....Until next time!


Marilyn Rivera


Sunday, November 20, 2016

First Christmas projects by Karolina Czajkowska


Hello all Bue Fern Studios fans!
Karolina here with you today sharing my November inspiration for Blue Fern Studios. 

This time I have a very big problem with prepare anything for my inspiration, because Vintage Christmas collections are so beautiful, that I would like to look at them, and look and look, without cutting ;) 
But of course i made a bold decision and finally I cut them all :D


Oh, Deer!

My first Christmas proposition in this year is a wooden shadow-box in a shape of a house. First I painted a house using chalk paint, then I could start to add papers and flowers and chipboards. I used a lot of chipboard pieces! I covered them with embossing powder - white ones with a "snow" embossing powder, the Deer ornament with "oatmeal" and a "antique gold" embossing powder and the Dangled Flake with three embossing powders - "breeze", "snow" and "frozen". I mixed it together in a small jar to make sure that it will be looking good, and then I put it on a chipboard. It's a great idea to make new embossing powders effects. 


Christmas Cards

I really like to make Christmas cards. It's very sentimental for me because I started my scrapbooking adventure from exactly Christmas cards :D This time I prepared for you 4 cards with using Vintage Christmas collections. I think you can treat these collections like a one very big collection because papers are matching together perfectly.


Blue Fern Studios Products
Papers: Vintage Christmas, Vintage Christmas 2
Flowers: Christmas Blooms, Soft Blossoms, Late Winter Lilies, Harvest Lilies,
Embossing Powders: Snow, Breeze, Oatmeel, Antique Gold, Frozen
Chipboards: Deer Ornament, Holiday deer, Dangled flake, Damask Flourishes