Showing posts with label Shabby Flakes. Show all posts

Thursday, October 5, 2017

October inspiration by Tartine Peluche

Hi everyone!
I'm back to the blog to share with you my october inspiration.
My first one is:


 100% Natural Moment


First, I arranged my two paper ( Chapters & Yesteryear) together to create perspective.
I cut the yellow roses from the paper Sunny Disposition and I placed this one under my first layer of paper. Under the top paper and a few other places I placed Lace 3.
As I used the chipboard Happy Moment in the background,
I cut out the words so as not to lose them.

Birds come from 
Amber and Apricot Printed Chipboard.
Yellow butterfly come frome Garden Life Printed Chipboard.
Chipboard Moment have just a layer of white gesso, Rose Leaves was embossed with Avocado Embossing Powder and base of Happy Moment chipboard was embossed with Hot Cocoa embossing powder.


I choose to alter the yellow rose with copper ink in order to have a color a little more orange which better mixed with background paper.

I tried to give the colors to my chipboard Floral Spray, with seedlings... not exactly the result I had in mind but it's pretty I think ...


Blue Fern Studios Products:

Paper:
Chapters
Yesteryear
Sunny Disposition
Chipboards:
Happy Moment
Rose Leaves
Floral Spray
Amber & Apricot - Printed Chipboad
Embossing Powder:
Hot Cocoa
Avocado
Stamps:
Tattered Newsprint
Lace:
Lace 3
Flowers:
Fresh Frorals
Wanderlust Vine
Spring Florals
Seedlings:
Green Leaf
Mustard
Paprika
Twig
------------------------------------------------------------

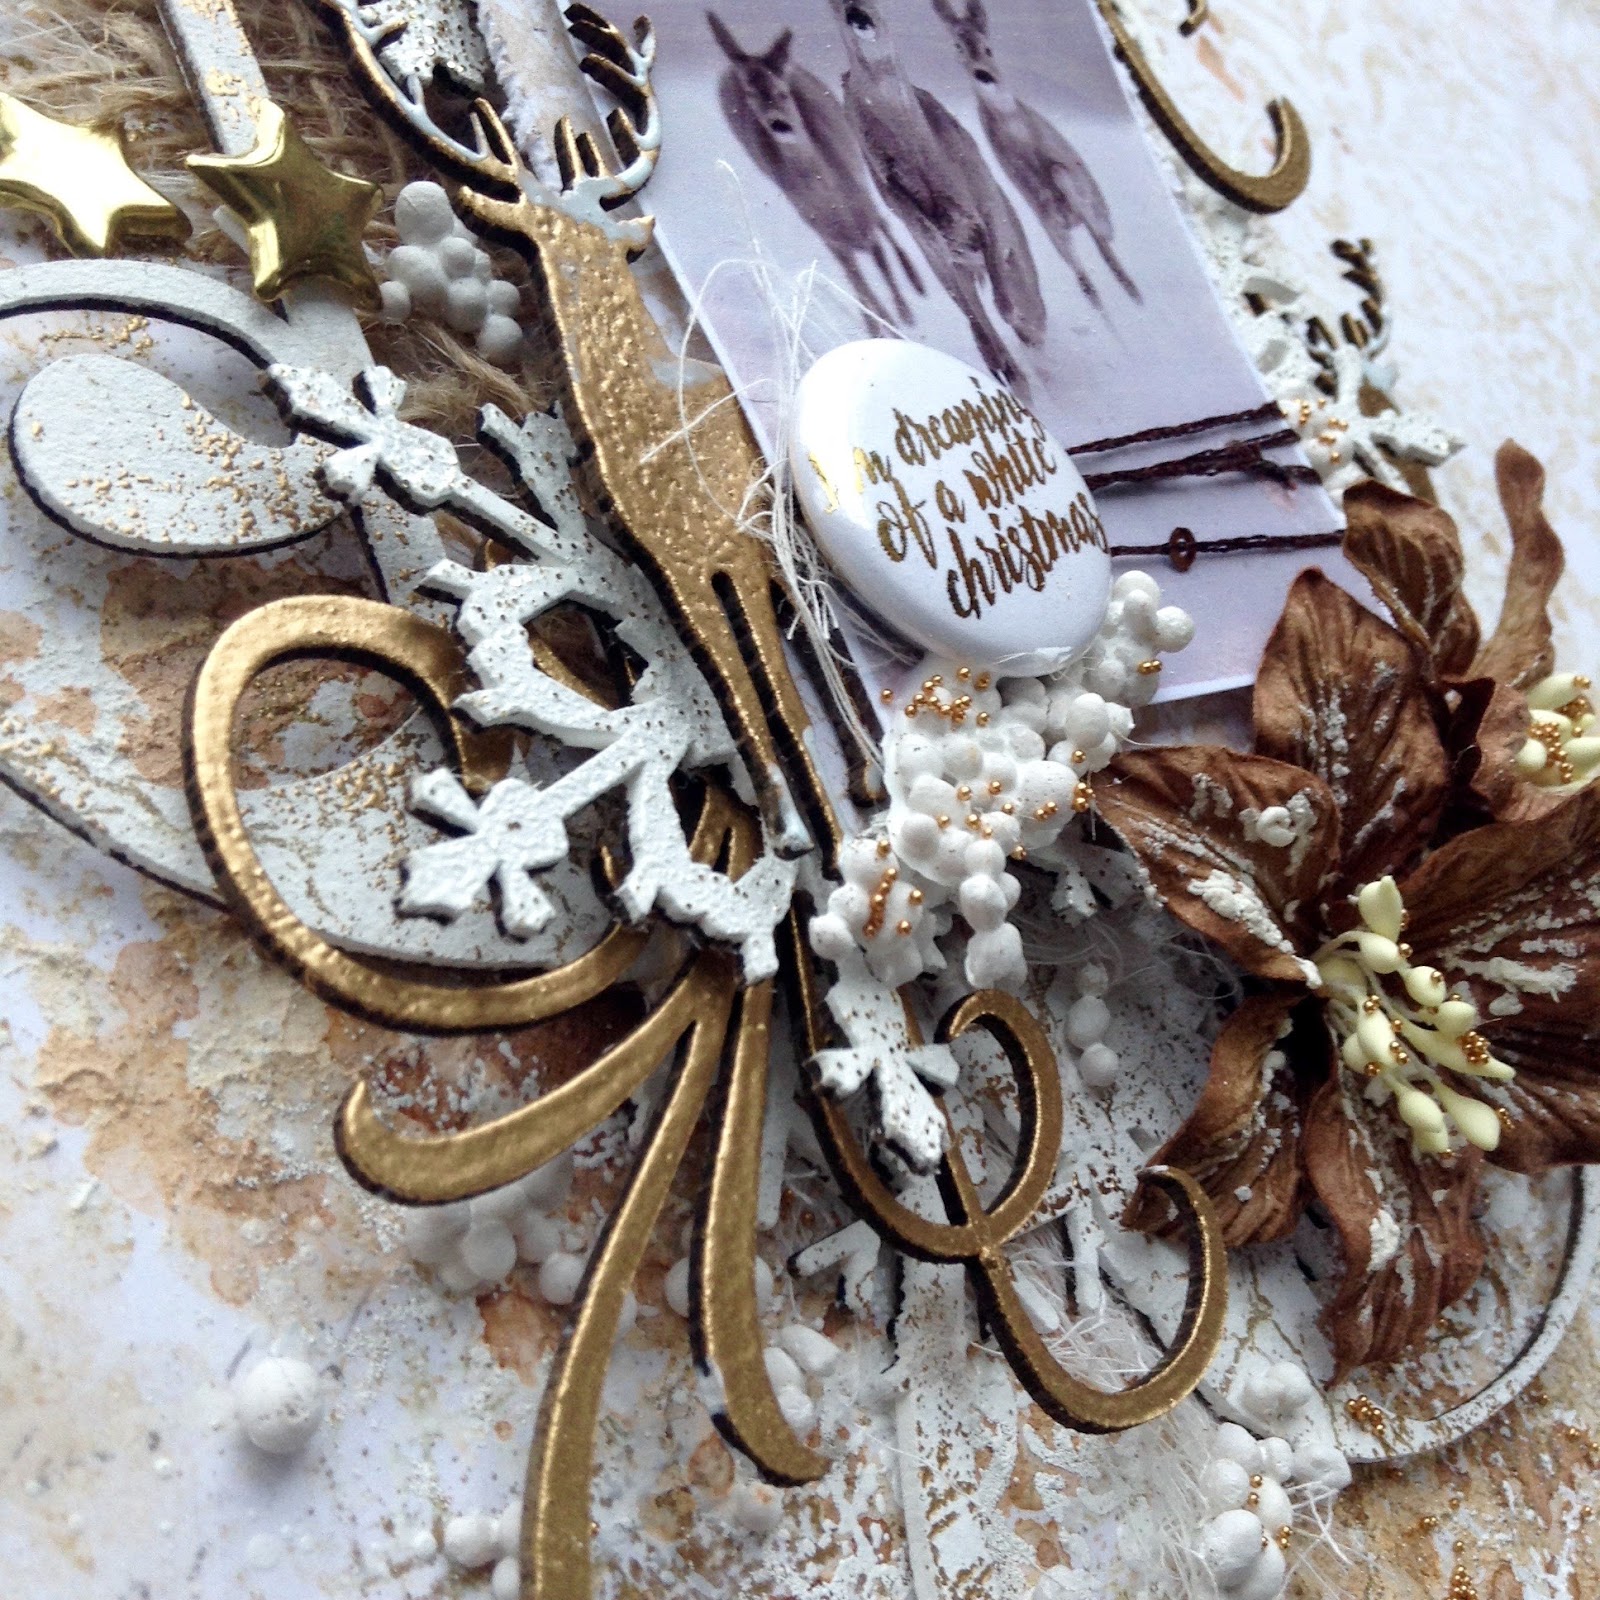
Christmas in October? Why not?
Here is my second layout with Vintage Christmas collection.
I'll be home for christmas


I started by working my background with blue ink and Lucky embossing powder. I used this last with scratched stamp. I used also serendipity and grungy grid stamps with brown ink,
Then I placed my chipboard panel ( Harlequin) that I embossed with Snow. 


My chipboard Fern (imagined by Pascale B), was embossed in Lucky. I found that it also resembled branches of fir.
For this layout I used all my package of Chritsmas Blooms flowers.

My Snowflake Frame Square, embossed in whole with Fern and stamped in Lucky using Bourbon Street Stamp. Mixt of this two colors are so magical! And with piece of Lace 6 ... realy beautiful.


All my chipboard pieces received in part, a layer of false snow...

Blue Fern Studios Products:
Paper:
Vintage Christmas - Deck the Halls
Vintage Christmas - Noel
Chipboards:
Snowflake Frame - Square
Shabby Flakes
Fern Leaves
Harlequin Panel
Embossing Powder
Fern
Lucky
Snow
Stamps:
Stamp - Grungy Grid
Serendipity Medley
 Scratched
Flowers:
One Package of Christmas Blooms

------------------------------------------------------------

My lastest layout features the Attic Charm collection.
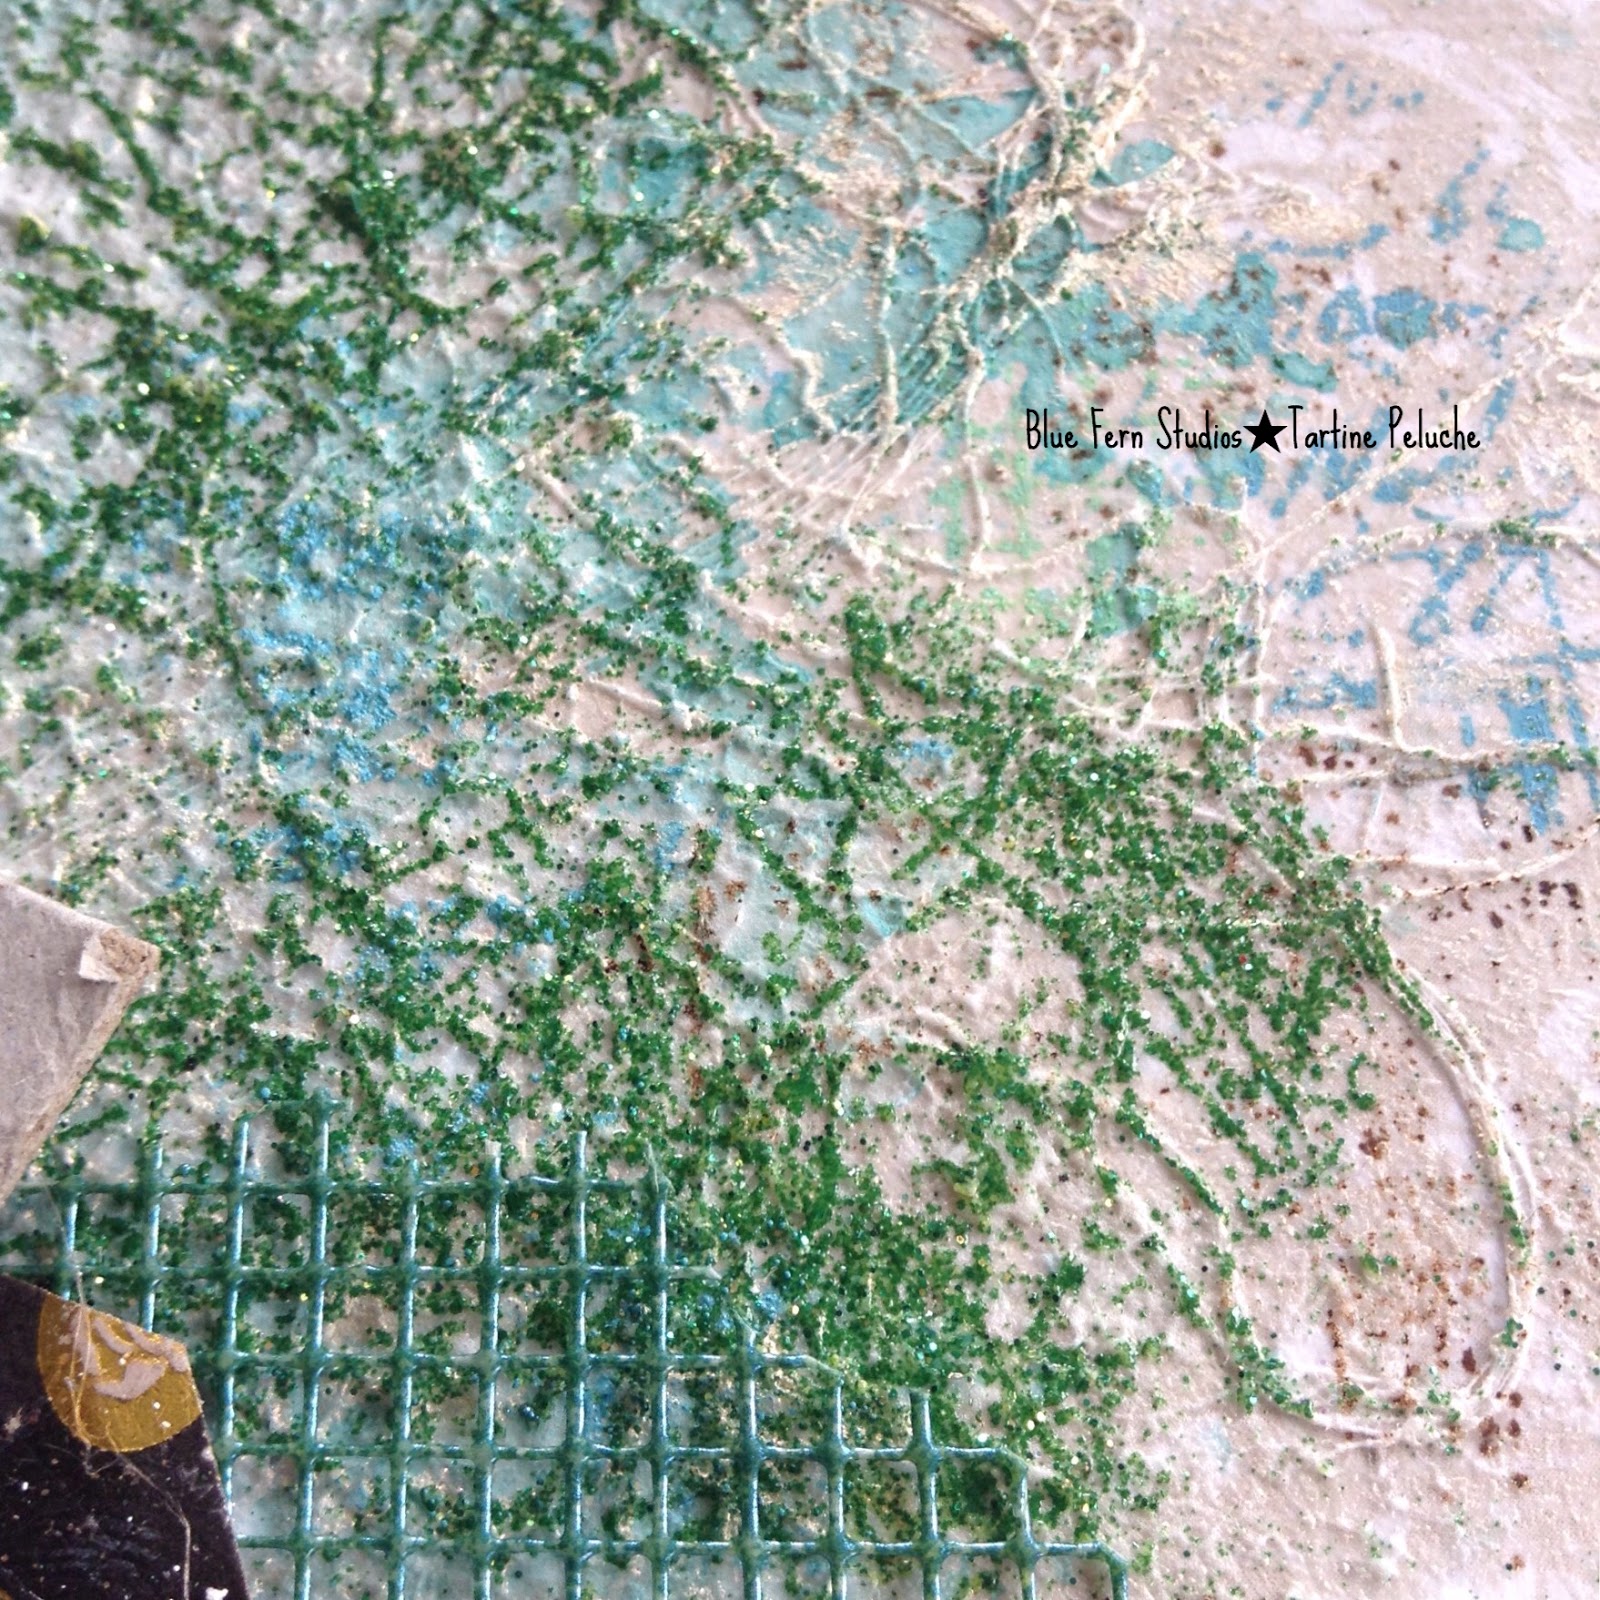
Sweet & Lucky


 This page does't seem it, but it's rather simple to make it,
I start with my Garden Frolic stamp, then I put a bit of texture paste
and I finish with my inks.

After embossing my chipboard Treasured Floral Frame with Oatmeal embossing powder, I can start decorating my main element of the page, my photo,
with Attic Charm Daisy, Dark Tropic Lilies ( light pink) and Garden Blooms flowers. I added some cut pieces of Lace 4 and I cut in the paper Attic Key the flowers and I placed under the photo.
I used the embossing powder Baby Pink for my title Sweet this color is very pretty, light soft and bright, almost white.


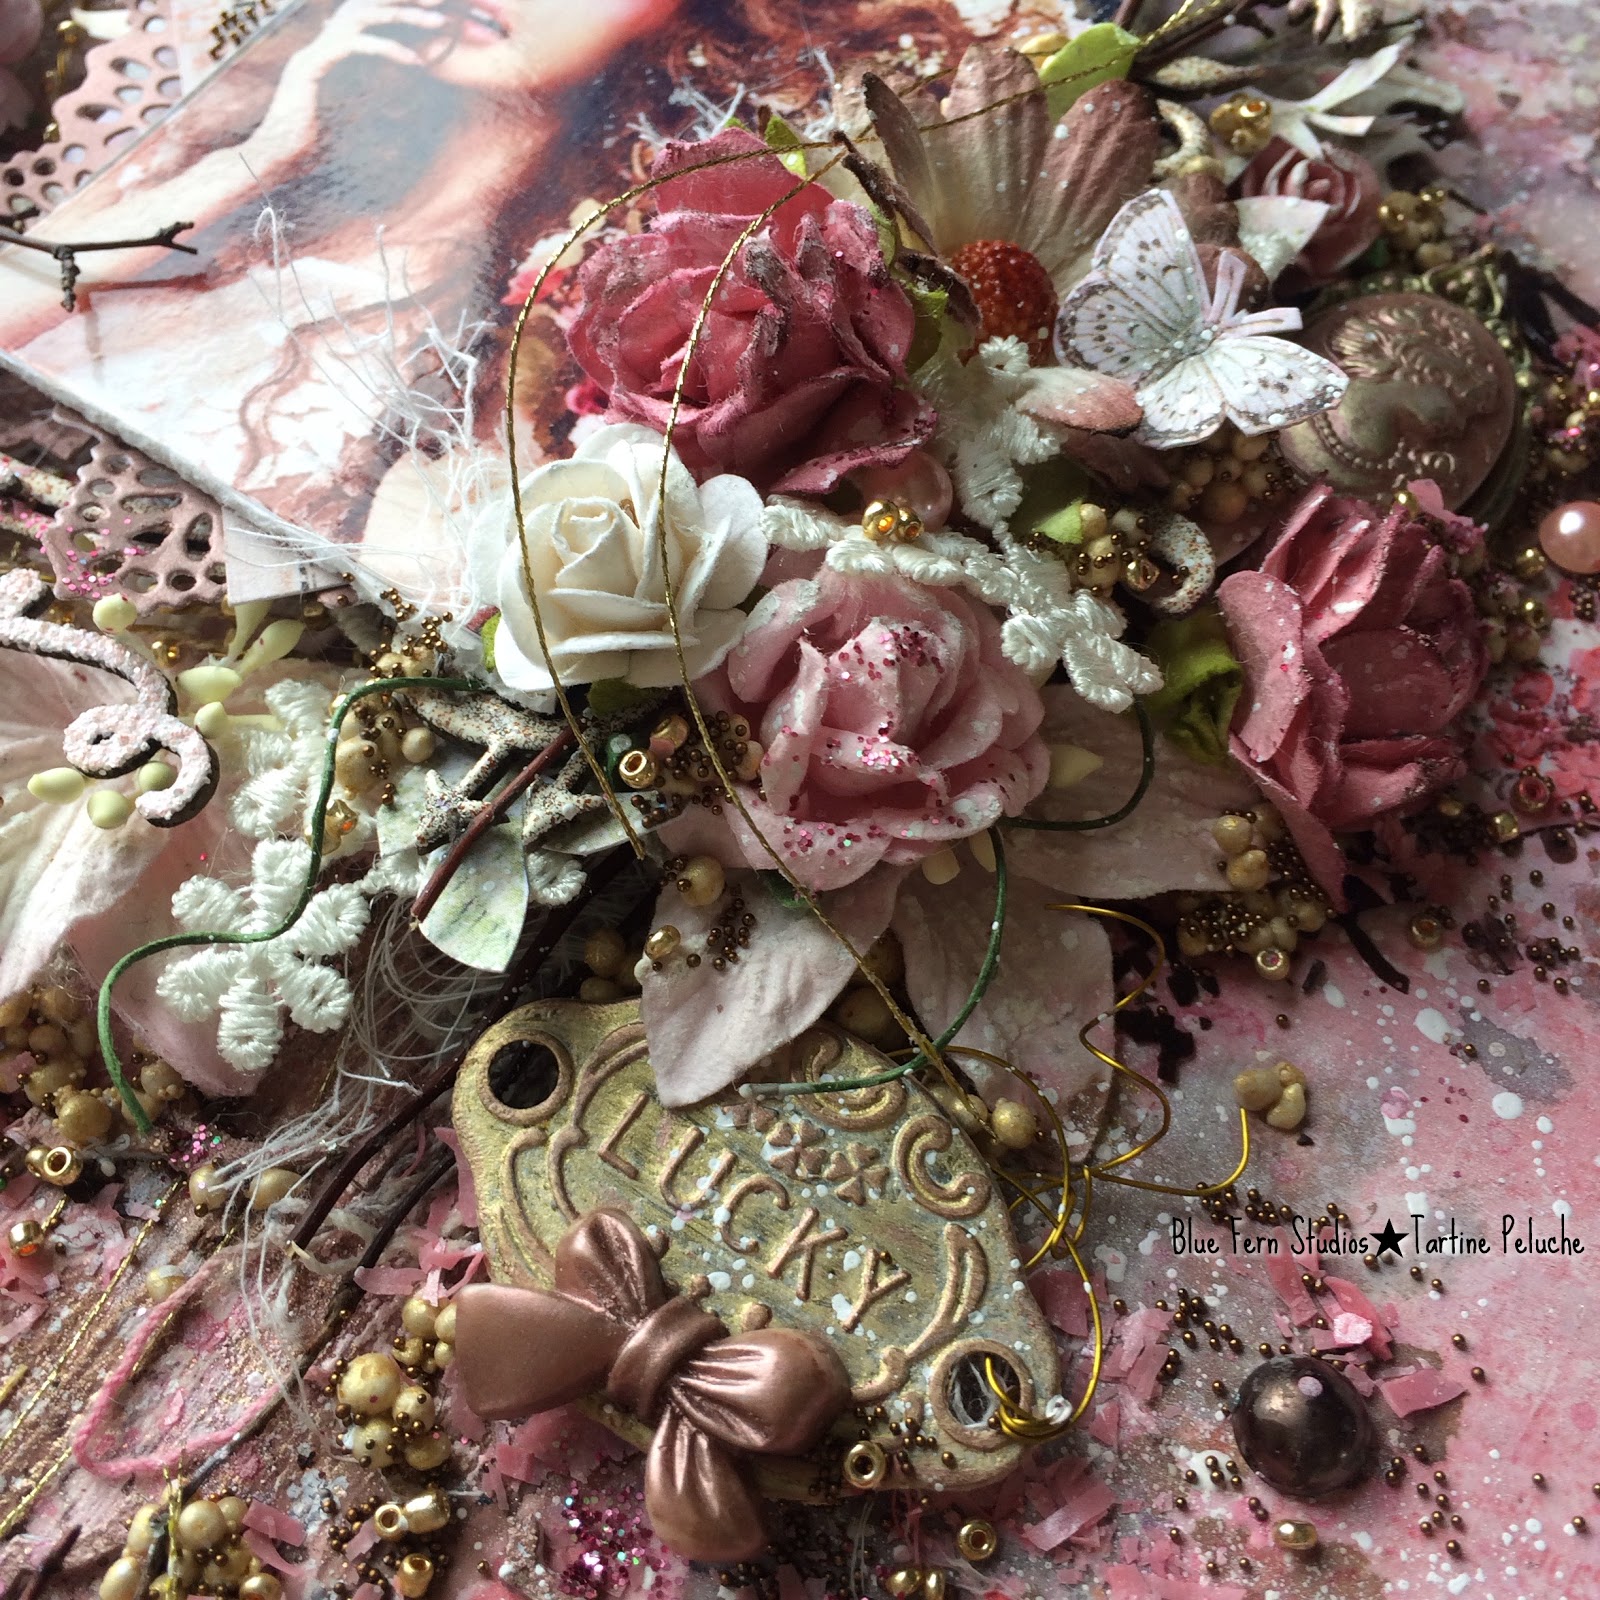
I altered my chipboard 
Quatrefoil Panel only with colored wax, rose gold.
On my flowers and has some place on my page I also added Pink Diamond glitters.


Blue Fern Studios Products:
Paper:
Attic Charm FOYER B-side

Attic Charm Attic key ( Flower)
Chipboards:
Quatrefoil panel
Treasured Floral Frame
Sweet as Honey
Embossing Powder:
14Karats
Oatmeal
Baby Pink
Glitter:
Pink Diamond
Stamps:
Garden Frolic
Flowers:
Garden Blooms
Attic Charm Daisy
Dark Tropic Lilies
Seedlings:
Twig
Lace:

Lace 4

------------------------------------------------

Thanks for watching
and I hope you will have a good month of creation.
Hugs
 Tartine xoxo

Thursday, January 5, 2017

January projects by Tartine Peluche

Hi everyone!
I'm so excited to share with you my first projects for Blue Fern Studios;
such an honor and a pleasure to be a part of this fabulous team.
So let me introduce myself.
My name is Melanie, Tartine Peluche on social media. I'm 34 years old and I live Quebec in Canada.
I do principally layouts, sometime cards and canvas. I've been scrapbooking for several years, starting with cards. Since a year I've changed for layouts and I really love that. My style is mostly shabby but I like touch everything and discover new techniques.
What is sure, my style is very detailed and full of flowers.

This is me

My works are always evolving and that's one of things why I love this art.
You can find me on:


I hope to inspire you all year long.

===============

My First layout: I'm dreaming of a white Christmas.
I used the back of " Wonderland " paper from the Vintage Christmas collection for the background.
I simply put some texture paste and added a little brown ink and I finished with crackles textures stamps that I emboss with snow embossing powder
and grungy grid stamp emboss with ginger embossing powder.


The main chipboard of this layout is Snowflake Frame-Square. I started by embossing it in snow embossing powder. Then I used crackles textures stamp with brown ink pad and finish with grungy grid stamp emboss with ginger embossing powder.
To add contrast to the main chipboard I used Shabby Flakes. I made a mix of snow embossing powder and vintage gold glitter that I used to emboss the flakes.
Under the flakes I used two pieces of kit Mini Flourishes. I simply embossed with Ginger Embossing powder to bring out the flakes.

I used two deer from the kit Winter Deer also embossed in Ginger Embossing Powder.
I added dimensional paint for simulate snow.


You can better see the effect of mixing glitter and embossing powder on snowflakes here and dimension of white paint on deer.
You can see also the shinning of background create with stamps and embossing powder.

I kept the most beautiful for the end. These flowers are so beautiful. They are perfect!
I add a few micro beads on the pistils.


And a small snowflake to decorate the metallic golden deer.
Love this.

Blue Fern Studios products I've used:
Paper:
- Wonderland - Vintage Christmas
Chipboards:
- Snowflake Frame-Square
- Shabby Flakes
- Mini Flourishes
- Winter Deer
Embossing Powder:
- Ginger
- Snow
Glitter:
- Vintage Gold
Stamps:
- Grungy Grid
- Crackles Textures
Flowers:
- Late Winter Lilies

===============

My second project is " Follow your heart "
I use the " Love Song Serenade " paper from the Heartland collection as my background paper.
I added white gesso, a doily stencil and just a little bit of teal ink.

I covered the chipboard "Follow Your Heart " with black gesso and give some shinning with pigment ink silver. I added some small details with teal wire thread.
I cut the chipboard Rose Frame and after putting white gesso I added a small layer of metallic teal paint. Some flowers and beads added the final touch of the top part.

Here I used the same procedure on another piece of chipboard Rose Frame
and completed with flair. Still some beads and small
piece of cheesecloth and this part is finished.

This is my favorite part of my layout.
I covered with white gesso and emboss with Snow embossing powder
I decided to customize my chipboard Treasured Floral Frame with flowers and wire thread, exactly like the chipboard. I really love the result.
Under This chipboard I added other pieces of Rose Frame chipboard,
still altered with white gesso and metallic paint.

Then I used the white flowers Christmas Blossom and coated the center of Caribbean glitter.

Some beads ans stars sequins to add a littles details .


Blue Fern Studios products I've used:

Paper:
Heartland - Love song serenade
Chipboard:
- Rose Frame
- Treasured Floral Frame
- Follow Your Heart
Imagine ink Embossing Powder
- Snow
Glitter
- Caribbean
Stamps
-Grungy Grid
Flowers
-Heartland Roses and Blooms
- Christmas Blooms

===============

My last layout " These moment "
 I used the back of  " Love Blooms " paper from the HEARTLAND collection. I love this blue!
I slightly bleached the paper with white gesso, I used crackle textures stamp with black ink pad then I applied with texture paste. To finish the background I added a little bit of spray ink with a brush.

I used the chipboards Heartland XOXO, the bird of chipboard Spirit of Heartland
and one heart of  Heart Set. I first applied white gesso and I painted all the chipboards
 in the same way, with metallic
watercolor paint teal, white and blue.

You can see more the shinning of the paint on this picture on the chipboard with this picture.

I really love the lilies flowers of Blue Fern Studios. For this projet I chose to use the light blue of kit Spring Lilies. They are so beautiful and really perfect for my layout.

To finish I simply added several small details
everywhere on my creation: pearls, sequins and brads.

Blue Fern Studios products I've used:

Paper:
Heartland -  Love Blooms
Chipboards:
Heartland XOXO
Spirit of Heartland
Heart Set
Stamps:
Crackle Textures
Flowers:
Spring Lilies===============

Thank you for stopping by!
See you soon.
Tartine xxx

Sunday, December 25, 2016

Merry Christmas for My Last Post- By Keren Tamir


Hi Everyone,
Its Keren here for the Blue Fern Studios blog for the last time.
After 3 amazing years being on the Blue Fern Studios Design Team it is time for me to say goodbye.
It was wonderful to be part of the team for so long and use their wonderful products.
I'm very grateful to have had this opportunity!!!

Here are my projects for this post!!


"Scandinavian Winter"

I created this 5x7 canvas depicting a scandinavian winter.


I used the Tree Trimmings paper from Vintage Christmas 2 collection for the background.
I embossed 2 of the Winter Village chipboard pieces and a snowflake with Icicle embossing powder and then added some gold glitter on it.
Once I glued everything I added some snow paste to enhance the winter feel.


<<<<<<<<<<<>>>>>>>>>>>

"Winter"


I created this wintery layout using a picture of myself from a few winters ago.
I used the  back of the Holiday Cards paper from the Vintage Christmas 2 for the background.


I used the large chipboard flake to frame my photo. I cut the inside of the flake so I would have a space in the middle to frame my photo. Then I embossed it with Sea Mist embossing powder.


I used some shabby flakes and winter flakes to embellish around the frame. I embossed them along with the Winter title with Snow embossing powder.
I also added some snow paste to enhance the wintery feel.


<<<<<<<<<<<<<>>>>>>>>>>>>>

 "Chritmas Cards"

Finally I created 3 Christmas cards: 


The first one uses both the Vintage Christmas collections and the Dangle flake as an embellishment. The chipboard was embossed with Golden Bricks embossing powder.


The Second Card also uses both Vintage Christmas collections


To embellish I added some Blue Fern blooms and a Holiday Deer that was also embossed in golden Bricks embossing powder


For the last card, I used the Deer ornament which was embossed in 14 karat embossing powder.


I used some flowers and cheesecloth to embellish the card as well!!


Thank you so much for visiting Blue Fern Studios Blog

and thank you for supporting me for so many years!!!

Have a Merry Christmas and a Happy and Healthy New year!!

Love,

Keren


SaveSave