Hi everyone, today I'm here today with my February Shares. I've made layouts with the amazing my Blush and Timeless collection.
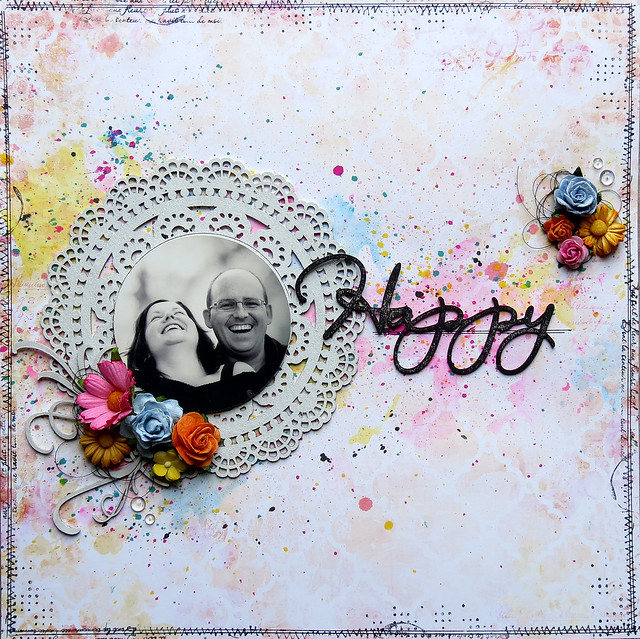
Special
I used the new Blush collection for this layout. To start my layout I began my tearing the edge of the Reminisce paper from the Blush collection. I layered the torn edge under the paper as well as adding the border strip in too. I attached these layers to a strip of the Enamored paper to make a full 12x12 page. Next I took the rest of the Enamored paper to mat my photo.
To add details to the background I used the brick stamp from the Essential Textures Stamp set with the Cotton Candy embossing powder. I also used some modeling paste through a script stencil.
I coloured all my chipboard with embossing powder on this layout, I used the Icicle embossing powder on the main part of Ruth's Doily and Cotton Candy on the centre piece of the doily, I used Icicle again on the word 'Special' from the Perfect, Adorable, Special Word Set. And on the Flourish Medley I used Icicle, Cotton Candy and Honey.
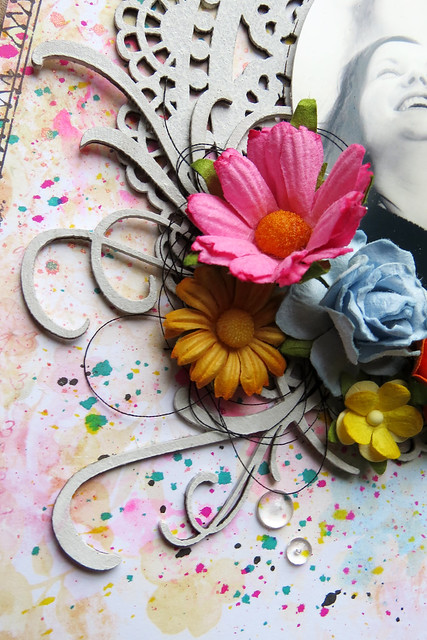
I cut the Ruth's Doily into two pieces, one larger than the other. I tucked the larger piece under my photo and the small piece to the edge of the page, with the centre piece of the doily popped under the flowers on the side of the photo. Next I tucked the Flourish Medley under the other side of my photo to add interest to both sides of the photo.

Finally I layered on all my embellishments, I used flowers, cheesecloth, resin pieces, buttons, pearls and vellum butterflies
Blue Fern Studios Products Used
Paper: Blush collection - Reminisce and Enamored
Chipboard: Ruth's Doily, Flourish Medley, and Perfect, Adorable, Special Word Set.
Embossing Powder: Icicle, Cotton Candy and Honey
Stamps: Essential Textures Stamp
Adorable
For this layout I used the Fondness paper from the Blush Collection as my background paper, and a piece of the Sweetheart paper to back my photo.
To my background I added some light pink stamping with the Weathered Doily Stamp, I put pink Gelatos through a flower stencil and then some white texture paste with a flourish stencil
I embossed the chipboard word 'Adorable', from the Perfect, Adorable, Special word set with the embossing powders Buttercup and Cotton Candy. I coloured the chipboard pieces from the Bird Ornaments and the Leafy Rings (the large one in pack) with Gelatos
I mounted my photo on cardboard to prop it up and layered flowers around my photo. I cut the Leafy Rings in half, one half went under the top corner of my photo, the other tucked under the flowers. I glued the on of the Bird Ornaments to the top of the page and added flowers down one side. For extra embellishing I used seam binding ribbon, pearls, resin and mini lace flowers
Blue Fern Studios Products Used
Paper: Blush Collection - Fondness and Sweetheart
Chipboard: Bird Ornaments, Leafy Rings and Perfect, Adorable, Special word set
Embossing Powder: Buttercup and Cotton Candy
Stamps: Weathered Doily Stamp
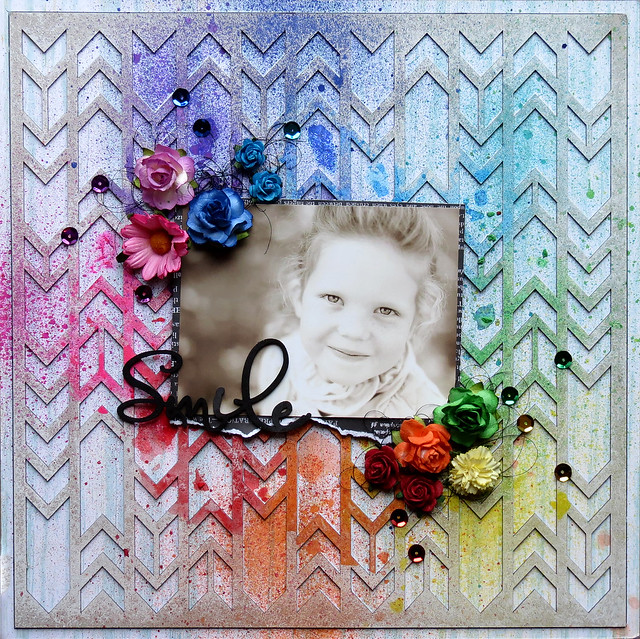
Sassy
This layout was made using the February Sketch
I used the Timeless Collection on this layout, I chose the back side of the Calling Cards as my background paper, then I backed my photos on the Abode paper.
On my background I used the Vintage Edges stamp set with the Iris embossing powder. Next I mixed modeling paste and a light beige mica powder to put through a flourish stencil.
I used this same mix of paste and mica to cover the a piece from the Classic Ornaments set. I then went around the edges of the chipboard with brown ink before I tucked in between my paper layers.
I covered the Deco Shelf chipboard piece with the embossing powder in Oatmeal, I tucked this under the bottom of my photos. Then I covered the chipboard word Sassy, from the Cute, Sweet, Sassy word set, with embossing powder in Garnet.
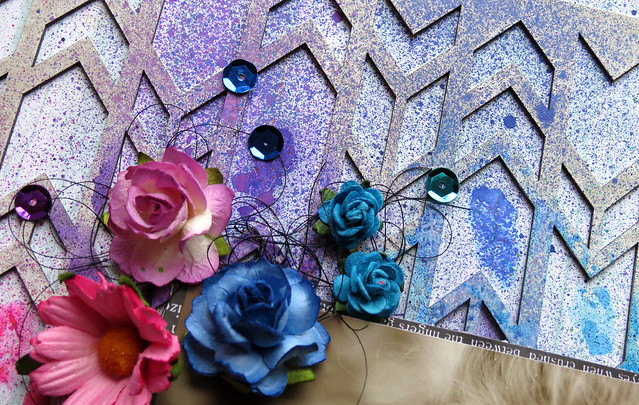
I added some flowers in coordinating colours, putting little peices of frayed cheesecloth amongst them. Finally I added a few vellum butterflies and pearls to complete the layout
Blue Fern Studio Products Used:
Paper: Timeless Collection - Calling Cards and Abode
Chipboard: Classic Ornaments, Deco Shelf and Cute, Sweet, Sassy word set
Embossing Powder: Iris, Oatmeal and Garnet
Stamps: Vintage Edges
Thanks for visiting today
Bec