Showing posts with label Princess Window. Show all posts

Saturday, May 11, 2013

The beauty of raw chipboard

Hi ya!

I often hear less advanced scrappers say how much they would love to use chipboard on their pages, but that they are a tad afraid of doing that because they think it takes a lot of difficult techniques to make them look good.

The 3 pages I am going to share with you today, show how easily chipboards can be tailored to suit those who are still experimenting with techniques.

My first page is kept in a muted shabby style and the chipboards I have used have been dressed to reflect the same.
 
The Art Nouveau Frame was painted, misted and chalked in many different hues of alabaster, cream, peach, marigold, orange and brown to blend in with the other details of the page.

The Country Picket Fence was randomly and unevenly primed with gesso before misted. Look how weather beaten it looks! I just love when the raw chipboard peeks out.

Chalk is a quick and easy way of achieving any colour effects you want.

Blue Fern Studios products used:

Art Nouveau Frame 
Art Nouveau frame (074332)

 Country Picket Fence 
Country Picket Fence (074561)

 Good Vibes 
Good Vibes wordset (074899)

The next page also shows quick touches to colour match your chipboard with the colour scheme of your page.
 

The Calligraphic Border was cut in smaller sections and painted in a couple of different layers of pink. Cutting up pieces make them last longer and can be used on several layouts.

The Fancy Fob Watch had the same treatment as the Calligraphic Border.The chain that belongs to the Watch will be used on another layout.

Blue Fern Studios products used:

 Calligraphic Border 
Calligraphic Border (074363)

Fancy Fob Watch 

Fancy Fob Watch (075148)

My last page shows again how beautiful peeks of raw chipboard can be. 


The Princess Window was not even primed before I just randomly swiped paint over it and then added a dab or two of gesso. The Royal Border - Large got the same treatment. Look how wonderfully their shape stand out.


Blue Fern Studios products used:

Princess Window 
Princess Window (074578)

Royal Border 
Royal Border large (074615)

Thank you so much for your visit! There is still plenty of time to join in on our May sketch challenge - YOUR CAN FIND THE DETAILS HERE

Cheers! Eila


Sunday, April 7, 2013

3 Different Ways With Blue Fern by Svetlana Austin

Hello dear friends! 
Svetlana is here today to share with you a few different projects I created this month 
with Blue Fern Studios gorgeous chipboard.
I will begin with a little romantic frame I altered using some pretty chipboard pieces.

"Home Is Where The Heart Is" Altered Frame

The Princes Window I used for this project acts here rather as a door and it can actually open. I used little metal hinges to attache my window-door to the frame.

I used a sponge brush to apply gesso over my chipboard pieces. It is a very simple way to add some textured shabby look. Then I randomly added a few drops of glossy here and there and sprinkled it over with micro-beads. Once it was dry I rubbed a little gesso over the beads.

Blue Fern Studios products used for this project:

Princess Window (074578)

Country Picket Fence (074561)
Country Picket Fence - Click Image to Close


"Beautiful St. Petersburg" layout

For this layout I used Village Sign Post and Ornate Medallions.
The Village Sign Post did a great job highlighting that beautiful cathedral in the background of my photo.
I covered it with black distress embossing powder. I love the uneven shiny look it gave to my chipboard - 
it looks so real.

Little beautiful pieces of chipboard from Ornate Medallions set are defiantly among my favorites. 
They are perfect to create some pretty embellishments to decorate your projects. 
I used orange glimmer mist to color this medallion. Once it was dry I covered it with crackle accents. 
You see - very simple ways to make your chipboard look perfect for any kind of projects you have in mind!


Blue Fern Studios products used for this project:

Village Sigh Post (074776)

Ornate Medallions (074462)
Ornate Medallions - Click Image to Close


Decorated Drawer Unit


It have been already a while that I wanted to decorate this drawer unit to use it in my craft studio to store some bits and pieces. 
I cut the small Craftsman Frame to make decorative corners. These were sprayed with glimmer mist and covered with Crackle Accents for nice antique look.

Blooming Foliage was also cut in many small pieces to create pretty accents in the flower clusters I added to some of the drawers. I painted them with gesso then rubbed some areas with green ink and some areas with blue liquid pearls. I finished it off with Glossy Accents. I decorated the butterfly in the same way.


Blue Fern Studios products used for this project:

Craftsman Frame (074949)
Craftsman Frame - Click Image to Close

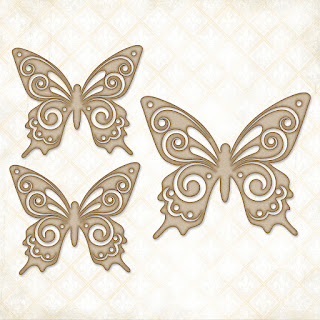
Brigitte Butterfly Set (074387)

Blooming Foliage (074851)
Blooming Foliage - Click Image to Close


I hope you were inspired to create something beautiful with Blue Fern Studios gorgeous chipboard.
Don't forget to share with us your projects in our gallery.
Thank you for visiting our blog today! Keep on coming - there is always something new and exciting!
Keep well!


Friday, April 5, 2013

Two Layouts, and a Canvas, with Kelly

Hello Blue Fern friends, happy Friday!! Kelly here, with three projects to share.
First up, this layout of my sweet, sweet girlie, Paisley...


First, I have used the gorgeous Damask Motif, I just love this peace! I painted it with gesso, then hit it with a heat gun to get that awesome bubbly texture. I then went over it with mulitple layers of Lindy's Stamp Gang mists in various pastels, to give it a really beautiful shimmer. I brushed on some Prima chalk ink here and there to accent.


Next up, one of the hearts from the Heart Set. I treated this one in a similar fashion, painted with gesso first, then I sprinkled just a bit of pearl embossing powder, then set with my heat gun, once again achieving the stunning bubbly texture. I then repeated the steps above with mists/ink. I painted a thin border around the edge with gesso, as well.


Damask Motif
Damask Motif

Heart Set
Heart Set - Click Image to Close


Next, we have this 8x10 "Joy" canvas...I really had a blast with this one!


 Below you can see the beautiful Spring Iris and Garden Daisies, which were a long process of trial and error...I started with the stems, painted them with a green mist, then then dabbed with chalk ink. The flowers were first embossed with Stampendous Embossing Enamel in Aged Wine, then painted over multiple times with various colors of mists until I got the colors right. After they were dry, I used a Sharpie Paint Pen to add some white accents and details.

I blended the bottoms of the stems into the "grassy" background with modeling paste and mists.


 Above you can see I used one of the Leafy Page Accents, to add a touch of elegant detail and interest. This piece was embossed with the Aged Embossing Enamel in Aged Green, then once again I used the paint pen.


Spring Iris -Small
Spring Iris - Small
Garden Daisies - Small
Garden Daisies - Small - Click Image to Close
Leafy Page Accents
Leafy Page Accents - Click Image to Close

 And lastly..

 On this one I have used the gorgeous Princess Window, which I simply colored with gesso and chalk ink, then outlined with acrylic paint to accent.


 Below I have used just a small segment of the Floral Wreath, which I treated in the same manner as the window.

Princess Window
Princess Window - Click Image to Close
Floral Wreath
Floral Wreath - Click Image to Close

Thank you so much for stopping by today!!! Have a wonderful and creative weekend!

Wednesday, March 13, 2013

Achieving Different Looks w/Erin Blegen

Hey everyone :)~ Erin Blegen here with you today to share with you three different projects, all using the same paper collection but achieving different looks using Blue Fern Studios chipboard! We've got a lot to get through, so let's get started :)...

"Lilah"
This project was created on an 8"x10" canvas. I love this beautifully soft photo of my niece Lilah, so I wanted to create a romantic piece with lots of stamping and bursts of color. Let's take a closer look at the Blue Fern Studios chipboard used here:

I've used pink crackle paint on the Princess Window piece before smattering with microbeads. Then I topped it off with a piece cut from the Symphony Border, misted it, and stamped to correlate with my bakcground.

I LOVE keys. I've painted this one from the Vintage Keys set with gesso, applied a very light pink mist to it, and then stamped over top. Then I brushed on some Stickles, added the heart gem and some tulle at the top.

This Vintage Locks piece was also lightly misted and then stamped.

Blue Fern Studios Products Used:

Princess Window 074578

Vintage Locks 074783

Vintage Keys 075032


"Our Bond"
My second project is a layout, featuring how easy it is to use chipboard in its raw fashion, which I love to do! 

The Calligraphic Border provides dimension, texture, and detail to the layering beneath my photos. I felt that by leaving it raw, it really stood out like I wanted it to :).


Blue Fern Studios Products Used:

Calligraphic Border 074363

Vintage Keys 075032

"Hello" {Tag}
My final project today is this tag. I love the smaller chipboard pieces for projects like these! So much fun to put together :)

I've combined a dress form from the Miss Taylor Set, as well as the larger butterfly out of the Brigitte Butterfly set to dress up this tag. I used a combination of Glimmer Mist and embossing powder to set the base of my dress form. I then added the tulle skirt and some seed beads for the bodice. Finally, the little heart accent was put in place.

For the butterfly, I used some light misting and embossing powder as well, before adding my stamping. Finally I trimmed up the tops of the wings with some microbeads.

Blue Fern Studios Chipbpoard Used:

Miss Taylor Set 074721

Brigitte Butterfly Set 074387

Thanks so very much for stopping by the blog today! I hope you enjoyed my projects- and that you're inspired to go out and get some BFS chipboard for yourself!

Take care and see you again soon :),

xErin