Showing posts with label Mini Flourishes. Show all posts

Tuesday, November 24, 2015

Christmas cards and a mixed media canvas from Zanka

Hello!
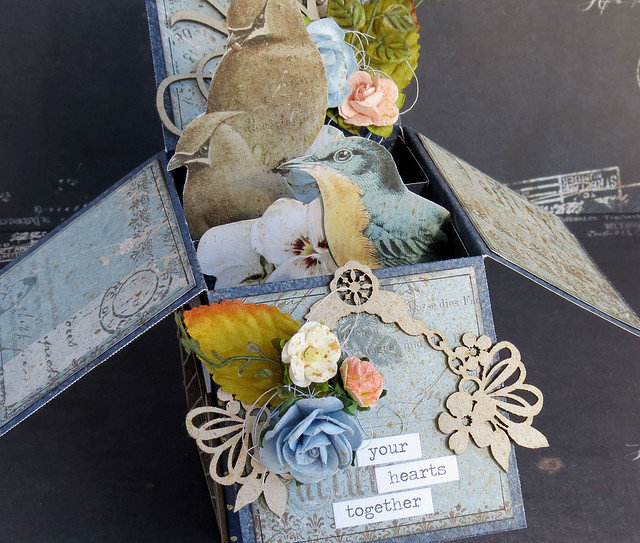
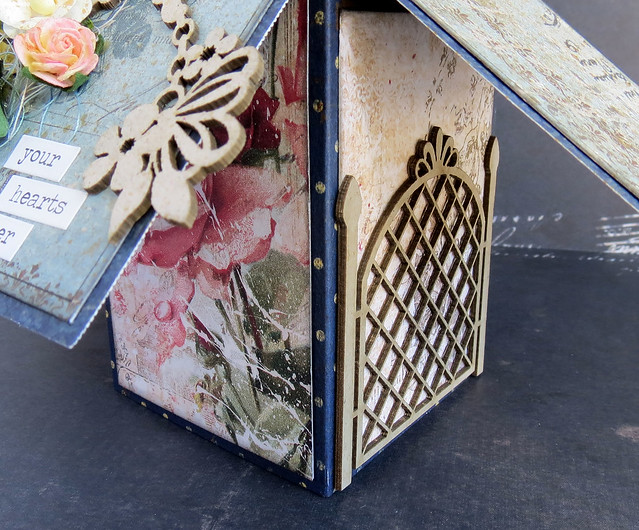
Today I'm gonna show you some of my first Christmas cards made for this season. They are all based on the same idea and composition but I played with the whole colour scheme of Vintage Christmas line - so I have the green, the red and a combo of both .
All cards are decorated with a mix of plain and glittered or embossed chipboard pieces and trust me, there are no dimensional flowers - only cut outs from the BFS papers! It's easy to create an illusion of dept with the layers of embellishments, while the cards are relatively flat and easy to post.


Supplies: papers Vintage Christmas, BFS glitter Pyrite, BFS embossing powder Cotton pink, chipboards : Blue fern frame (piece) , Floral lattice bits, Garden lattice bits, Twiggy branch, Mini flourishes.

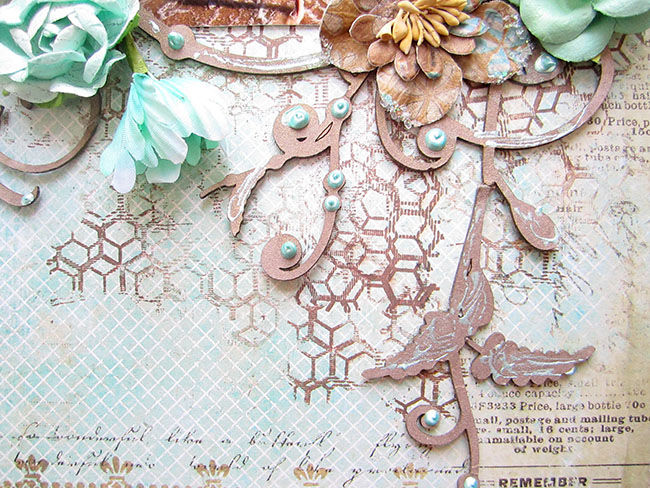
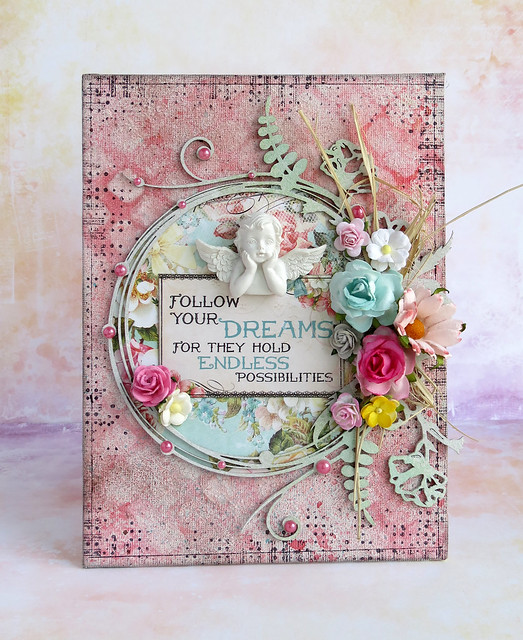
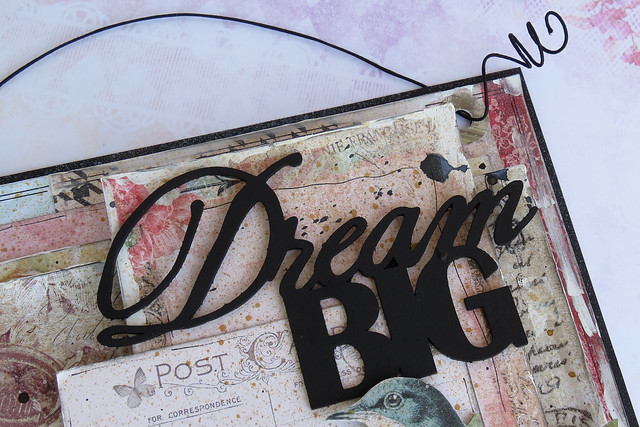
My last November project is a mixed media canvas - I had a blast with this one, layering the paper strips, laces, chipboards and embellishments. Chipboard pieces are brushed with a white texture paste.


Supplies: papers Vintage Christmas, Frolic. BFS mists: Cotton candy, Winter mint. Chipboards Swirly circle, Garden lattice bits, Ironwork edges.

Thanks for staying here for a moment & have a great day!
DT Zanka (Zaneta)

Wednesday, September 16, 2015

Three Layouts Featuring Autumn Anthology and Frolic

Hi everyone!  Debbie here with you today sharing 3 layouts I created.  My first two layouts feature the
 new paper collection Autumn Anthology!  Absolutely love this new collection!  The colors and details
in the paper are beautiful!    

I thought the new Autumn Anthology collection worked well with some old treasured family photos.
I love this old photo of my grandparents, my mom and her siblings.  I used Newsworthy, Mercantile, Gazebo and Calling Cards papers.  Lots of layering behind my photo and some fussy cutting.

I used one of the new Blue Fern Studios Imagine Ink Mica Color Mists, Sky on my chipboard title and then stamped it with the new Essential Textures stamps.

Tucked beneath layers of papers I used the Roman Clock chipboard.

Here I've used the new French Ironwork chipboard piece which I left untreated and use the new Persimmon mist.  Leaving the chipboard raw brought out a darker color in the mist.

I also used the new Leaf mist on a mini flourish chipboard piece.

On my next layout I used Calling Cards and Cottage papers from the Autumn Anthology paper collection. Here I've used another treasured family photo of my mom and her brother.
I did some masking on the background and misted with the Persimmon mist.
Here you can see when sprayed on a light background the color is much brighter.

The new chipboard piece, An Autumn Story was covered with acrylic glaze and given a light misting with the Persimmon mist.  I used a Garden Daisy chipboard which I misted with the Sky mist and cut apart to use in two different places on my layout.

The Garden Lattice Bits Chipboard was covered with an acrylic glaze.  Tucked into my flower cluster is the other piece of the Garden Daisy chipboard.

I used a piece of the Symphony border chipboard here in my flower cluster.

My final layout was created using the Frolic collection and was based off of the September sketch.
I used several papers on this layout, Amoroso, Friendship, Mercantile, Dan Le Jardin, Allegro, Secretary Calling Cards ,and Petits Moments, mostly for layering behind my photo
         
                               
            I took the Tea Medley chipboard piece and cut it in half, using it on both sides of my picture.  I primed it with gesso and embossed it with pink embossing powder.

           Tucked within my flower clusters of piece of the Floral Medley Frame with I randomly sprinkled with pink embossing powder.

 At the top of my layout I used the Jasmine Floral Pendant which I embossed with light pink embossing powder.

I hope you have enjoyed my layouts.  Don't forget that you still have time to enter our September Sketch Challenge.  You can find all of the details here.

Thanks for stopping by!
. . . Debbie

Sunday, August 16, 2015

Three Layouts Featuring The Frolic Collection

Hi eveyone!  Debbie here with you today sharing 3 layouts I created with the new Frolic paper collection.  I love the colors in this collection, perfect for your summer photos.  

My first layout highlights the Amoroso, Dans le Jardin, Friendship and Calling Cards paper.  I thought they were perfect for a somewhat masculine layout.
Lots of layering behind my photo and some fussy cutting.

I used the Collage Border and Bits of Honey chipboard, both of which I primed with some gesso and then colored with water colors.

My flower cluster on the right hand side along with some of the Bits Of Honey chipboard.

As you can see I again used some of the Bits Of Honey chipboard and the word Noted from the Arrow Words which I colored with some water color paints.

My next layout is a feminine one.  Love the pretty color combinations in the background paper, Mercantile. I also used the Friendship and Calling Cards papers. 
 Lots of subtle stamping with the Forever and Vintage stamps.

From the Arrow Words I used Love This, which I covered with gesso and applied some gelatos.   I also used the Gatsby Collage which I also covered with gesso and then added some gelatos and micro beads

Tucked beneath my cluster of flowers in the new Floral Lattice Bits chipboard.

Here I used more of the Floral Lattice Bits and added some micro beads.

My last layout I created using the August sketch and the Friendship, Allegro, Dans le Jardin and Calling Cards papers.  I added some stenciling and mists on my background to blend with my flowers. My photo is backed with a chipboard piece from the Paisley and Vine Medley and some Mini Flourish chipboard pieces are nestled among the flowers.


My title Smile is from the Smile, Funny, Giggle set which I colored with some gelatos.


Here you can see more of the Paisley & Vine Medley chipboard which I painted with gesso and misted.  I cut a few butterflies from the Dans le Jardin paper and added them to my clusters.

I hope you have enjoyed my layouts.  Don't forget that you still have time to enter our August Sketch Challenge.  You can find all of the details here.

Thanks for stopping by!
. . . Debbie

Wednesday, June 24, 2015

Girl time - by Zanka

Hey there!
Rummaging through my DT supplies from BFS, I found one more paper from Ombre dreams, which is a fanstastic collection to pick up at this time of the year, when the pictures are full of light. Well, at least usually they are-these days seem to be exceptionally cold and rainy in our region.
Nevertheles we managed to catch few rays of sunshine and sunglasses were very much needed :)
From the chipboard shelf I picked Turkish bits and fragments of Blue Fern frame. Both sets contain a lot of material, you can use pieces and they last forever. I've given them some treatment with embossing powder and paints.

 A close up:
Supplies: papers - Ombre dreams, Deja vu. Stamp - Love story 2 (Adore), Chipboards - Turkish bits, Blue Fern Frame.

For my second June project I picked totally different mood, an elegant vintage page created with a combo of Deja vu and Sanctuary. The border between the two papers is enhanced with a piece of damask chipboard.


As you can see, here I'm using not only the chipboards but also the loose bits from some sets. I primed them with gesso and coloured with watercolours, matching the colour scheme of the papers.
Supplies: papers: Sanctuary, Deja vu, stamps - Love story, chipboards - Turkish bits, Damask panel, Mini flourishes.
Thanks for stopping by!
DT Zanka.

Saturday, April 18, 2015

April Projects- by Keren Tamir


"Love This"

My first share this month for Blue Fern Studios is another beach layout.


I used the Sanctuary collection for the background and stamped it with the new textured stamps. Then I built the layout with chipboard and flowers.


I framed the photo with the Circle vine chipboard and used a couple of mini flourishes to add more swirls around the photo.


Then I added the "Love this" arrow word title.
All chipboard was painted with Antique Gold brown spray ink.


<<<<<<<<<<<<<>>>>>>>>>>>>>

"Shadow Box Frame"

My second project this month is a shadow box frame which I covered with the Correspondence paper from the Sanctuary collection.


I framed the photo in the notebook frame, which was inked with brown acrylic ink.


The frame was embellished with flowers and the Seasonal Wildflower chipboard pieces. I also inked them in brown and then glued golden micro-beads on the flowers.


Thank you for visiting the Blue Fern Studios blog.

Keren

Monday, April 13, 2015

Three off-the-page projects by Marie-Josée

Hello all,

Today, I will show you three off-the-page projects created with the beautiful Blue Fern Studios products!

Pop-up box with the Sanctuary collection

This is supposed to be a card, but to me, it looks more like an off-the-page project, since there is no place to write text. However, it can make a great wedding or anniversary souvenir, combined with a card. Thus the "Your Hearts Together" sentiment on the front panel.

For those of you who are interested to know how to create this project, here's a great tutorial I found on YouTube.

I used various papers from the Sanctuary collection to create this card: Birdsong Melody, Meadows of Time and Garden Plaza.


I cut the birds and flowers out of two different papers: The brown birds were cut out of the Birdsong Melody paper, whereas the blue bird and the flowers were cut out of the Meadows of Time paper.

On the front panel, I used a piece of the Bowed Trinkets to frame my sentiment.

I used the Mini Flourishes on the back panel to add texture and interest behind the paper flowers.


I also cut two pieces of the Lattice Fence to use on the side of my pop-up box.


Here's another view of the whole card.


Canvas with the Montage collection

Here's a small canvas (6" x 8") that I created with the Montage collection.


First, I altered my canvas with gesso, various mists and stamps.

Then, I also altered the small Circle Flourish frame with gesso and mists. I also added pearls on the circles of the frame.

Then I cut a piece of the Calling Cards paper from the Montage collection to use as a background.


I also used one of the calling card in the center of my frame.


Wall decor with various Blue Fern Studios collection

To create this piece, I used paper scraps from various Blue Fern Studios collections: Ombre Dreams, Montage, Sanctuary, and Love Story.


First, I used foam dots to assemble all the pieces of paper, to give dimension to my project. Then, using my finger, I applied gesso to the edges of the papers. Then, I sprayed various colors on the whole project: brown, white, and black.

I used the Blooming Foliage chipboard, combined with flowers. I altered it with gesso and green mists.


Then, I used the Dream Big chipboard, which I altered with black gesso.