Showing posts with label Little Birds. Show all posts

Thursday, April 10, 2014

Jackie's April Creations

I have two new projects to share today using the gorgeous Blue Fern Garden papers along with some stunning Blue Fern chipboard. Spring is in full swing here, and I couldn't resist playing along with some springy greens, flower motifs and outdoor photos. And for a change - no kid photos (gasp!).


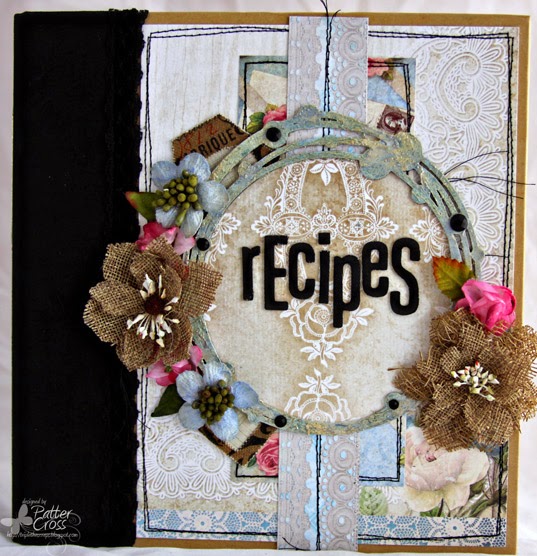
Once again, I loaded my Blue Fern paper down with media. I know I've said this before, but I'm so impressed with how this paper holds up to media. Gesso, mists, paint, ink - I threw them all at the paper.


I love the new Eastern Lantern chippies, and used this one as an elaborate hummingbird feeder. I simply painted it with graphite paint and added some script stamping; the nice thing about such an intricate piece of chipboard is that it doesn't take much.


The birds from the Little Birds set are just too sweet. To add some texture, I dabbed on some Texturez Dazzlerz, then misted overtop.


One of my favourite things about Blue Fern chipboard is all the different titles and words available. I have to admit I am lazy about titles, so having such a large selection of words ready to go is fantastic.

Blue Fern Studios Products

Blue Fern Garden Paper:
- Timeless
- In Bloom

Blue Fern Chipboard:
- Little Birds Set
- Eastern Lanterns
- The Optimist Word Set

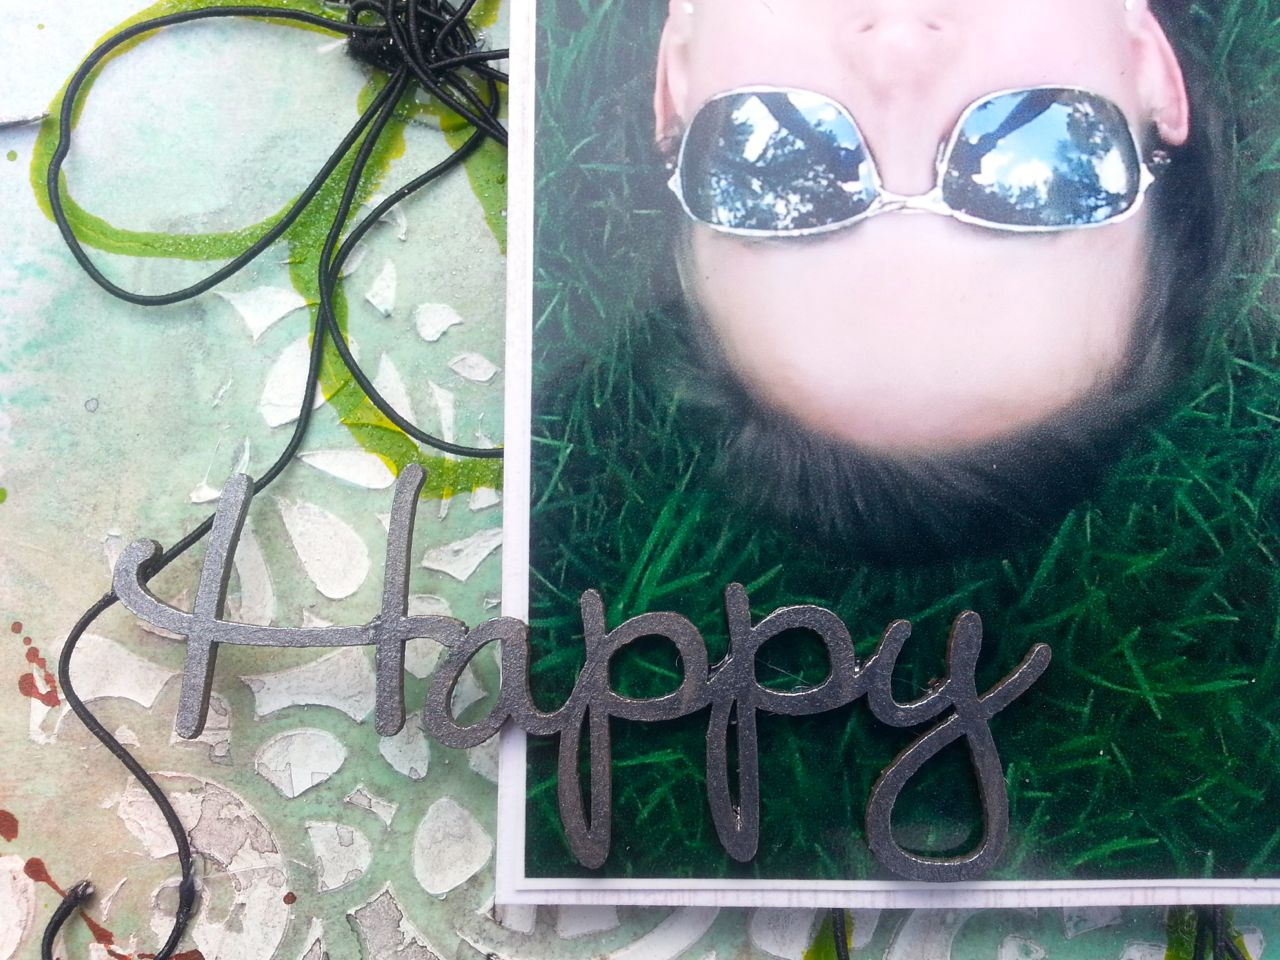
The background for my next layout is inspired by a great Irish restaurant we frequent, that has decorative holes in the plaster to reveal the brickwork underneath. The leftover bits from the Shabby Brick Panel have been sitting on my desk, waiting to be used, and they paired brilliantly with the stone viaduct in my picture (which happens to be the one from the Harry Potter movies).


I wanted to keep the bricks understated, but add some subtle texture, so I painted them with super heavy gesso, and once it dried I sponged some on for dimension.


The Manor Hinges were painted, then heat embossed in places with Distress Embossing Powder for an aged patina look.


I love the drama of these Pretty Weeds, and painted them with metallic green paint to make a simple statement in my cluster.


Blue Fern Studios Products:

Blue Fern Garden Papers: 
- In Bloom (x2)
- Timeless
- Calling Cards

Blue Fern Studios:
- Shabby Brick Panel
- All Natural Set
- Pretty Weeds
- Manor Hinges

We always love seeing what you create with Blue Fern Studios products, so please remember to share your projects with us in the Blue Fern Gallery!


Saturday, March 29, 2014

{3} Creations from Patter

Today I have three different projects for youa card, an altered binder, and a layout. All three creations use the new Blue Fern Garden papers. I hope you have had a chance to try them. They are truly wonderful! Now let's look at my creations.

The Card
For my card today, I used the Blue Fern Garden Signature paper. I wanted to create a card that left the paper 'as is' but made it come alive if that makes sense. I did use some of the Blue Fern Garden Timeless paper too for the die cut leaves on the card.
Pin It
I also used the Little Bird Set chipboard and hid the bird among the flowers. To color him, I added some distress ink, a little Sharpie for the beak, and a pearl for the eye.
Blue Fern Products Used:
Blue Fern Garden Signature
Blue Fern Garden Timeless
Little Bird Set

The Binder
I needed a new recipe binder so I thought I would alter this 3-ring binder and turn it into my new recipe binder. I used the Blue Fern Garden Parlour and Calling Cards papers along with the Beaded Strings chipboard.
Pin It
To color the chipboard, I put on a layer of gesso followed by some Shimmerz Texturez. Once that was dry, I randomly painted on some Luminarte Twinkling H2Os to match the papers.
Blue Fern Products Used:
Blue Fern Garden Parlour
Blue Fern Garden Calling Cards
Beaded Strings

Sweet
And finally, here is my 8 1/2 x 11 layout. I used the March Blue Fern Studios sketch challenge for my page. There is still time for you to play along, so I hope you will join in the fun. Click the sketch at the top of the right column for details.

I used three of the new Blue Fern Garden papersIn Bloom, Boudoir, and Calling Cards. I also used three different pieces of chipboardShabby Brick Bits, Blue Fern Bits (hearts), and the title is from the Valentine Word Set.
Pin It
To color the Shabby Brick chipboard, I randomly painted on some gesso. I wanted to leave some of it raw since I was coloring the other chipboard on the page. For the Blue Fern Bits (the hearts), I used some embossing powder and various paints to get a glossy and bumpy look. I painted the title from the Valentine Word set with acrylic paint.
Blue Fern Products Used:
Blue Fern Garden Boudoir
Blue Fern Garden Calling Cards
Blue Fern Garden In Bloom
Shabby Brick Bits
Blue Fern Bits
Valentine Word Set

Thanks for stopping by, and remember to join us in the March sketch challenge! Blessings,

Thursday, March 20, 2014

Some Blue Fern Garden Projects with Rae

Hello! It's Rae with you to share some more projects I have made using more of the Blue Fern Garden papers. They are so beautiful and I am down to scraps now, but I have had such a fun time working with this beyond gorgeous collection!

"Perfect" Layout


I'm trying to use up every part of each piece of paper, so I used this "Boudoir" piece that I cut an oval out of already for another layout, and went from there for this layout. The back has some green cardstock and the "Love Letters" paper that I fussy cut the lattice out of. 

Here's a closeup of the berry stems that I used as part of my floral cluster:

Primed with gesso, and then sprayed with some green gold mist, I then added some archival ink in black to these "berry stems", then added some Liquid Pearls in black for accents.

This is a close up of the "sweetheart dressform" that I treated with gold Ferro, then sprinkled black embossing powder over while still wet, and dried with a heat gun to get this distressed effect. 


"Follow Your Heart" Card

Another project I made using the Blue Fern Garden scraps. 

The bird is from the "little birds set." I just used black chalk ink on him. :)

The frame is from the "petite boutique frames set" that I primed with gesso, sprayed with patina mist in random spots, then used some gold embossing powder.

The scrolls under the flower are pieces I cut from the "large royal border." I painted it with dark olive paint, then added some bright green microbeads.


"Good Things Jar" Altered Project

And, lastly, here is an altered project I made using a mason jar. I've made a few of these, and I give them to friends as gifts. I saw this idea on Pinterest: keep a mason jar handy and when something good happens, write it down on a piece of paper, fold it up, and throw it in the jar. At the end of the year, take all of the pieces out and read all of the good things that have happened for that year. In the pin, the mason jar is plain, but it's much better to have an altered jar on the counter!


The jar is covered with a piece of "In Bloom" paper that I stamped and distressed. The little flag is from the bottom strip of one of the papers.


The bird cage is from the "grande cages set." I covered it with Perfect Pearls in heirloom gold, which gives it a perfect finish- not to shiny! I added pearl strips and accented the butterfly with Smooch inks.

Here's the back: 


Thanks for taking the time to look at my projects today!


Rae

Tuesday, March 18, 2014

Different Ideas by Keren Tamir


Hi Blue Fern Studio Fans.

 I have a fun and diverse post for you today. 
This month, I've created three different kinds of projects all very different from each other yet original on their own.
The first one is a layout. I know its just a layout, not so original lol, but continue scrolling down I made two more projects that you might think are more unique.

"Timeless Me"


The picture above is a picture of me when I was a kid. I think I'm probably 4 years old here. I created this layout using the green toned papers from the Blue Fern Garden collection.


I used the inside part of the Helen's Doily. It was a leftover piece from a previous layout. I also used one of the Jeweled Page baubles. Both these pieces were covered in green chalk edger ink and then stamped and edged in brown ink.


 The title Me from the Valentine word set was simply coloured in brown ink,


<<<<<<>>>>>>>

"Love & Thanks Journal"

My second project today is a journal that I created for a friend. I only altered the cover and left the inside blank for her to fill in.


The background was altered using crackle paint, ink and stamping. Once dry, I added a few of the Blue Fern Studio chipboard pieces on top.
I used the Shabby Brick bits, Two of the Veranda Cages, one little bird and the "&" sign from the Valentine Word set.


<<<<<<<<<>>>>>>>>


"Bookmarks"

For my third and final project for March I thought of a great idea on how to use some of the new Blue Fern Studio dangles to create bookmarks. I just thought they were the perfect size to fit inside a book and still have the bottom dangle through the pages.

I believe this would be a perfect gift for a friend's birthday or a teacher's end of the year gift.

I created a step by step  tutorial on how I made these bookmarks:

Step 1: Prime both dangles with Gesso on both sides. Let each side dry before applying it on the other side.


Step 2: Cover the chipboard with crackle paint. I only covered the top side. Let it dry overnight.


Step 3: Cover one of the dangles in brown and yellow chalk ink and the other with green and yellow ink. Do this on both sides. (of course you may choose any colours you like)


Step 4: Seal both sides of the chipboard using Glossy Accents, Diamond glaze or equivalent transparent gel. Let one side dry first before applying it on the other side.


Step 5: Punch a hole through the chipboard at the top of a dangle if it doesn't have one. Then insert a tassel and a fancy brad for decoration.


well I hope you enjoyed my fun and diverse post today!!
Enjoy the rest of March!!!!
Have a wonderful day!!

Keren

Wednesday, March 12, 2014

Summery kids by Maja

Hi everyone. Up here in the north of Sweden where I live it´s still winter, but the sun is back and the snow is melting. Guess thats why I got in a summery mood when I made these two layouts that I will show you today.
First up is my sons swimming in the lake last summer. They were really focused on learning!


I have used the gorgeous "Blue Fern Garden" Papers for this layout and chipboards used are Swirly Doodle, Little Bird Set and Captured words.


To colors I have used on the chipboard is Distress Inks in three different colors. I covered the word with Glossy Accent.


Next layout is a bit more "messy". A messy wild son needs a messy page, right? This photo is taken a few yers ago and I so love it!


Here I have painted the chipboard word with Distress Paint in blue and yellow and let it dry. After that I used some black gesso and before it was dry I used a babywipe to dry off some of the color.


Here with the Turkish Panel I did it the opposite way... used black gesso let it dry and went over with white gesso and dried off some of the paint with babywipes.

Thanks for stopping by =)

Thursday, February 20, 2014

Blue Fern Garden Layouts and a Card with Rae

Hello everyone! It's Rae, and today I'm going to share some projects I've made using the fabulous Blue Fern Garden paper line, and some of the amazing BFS chipboard.

I am so in love with Blue Fern Garden papers! The style is so elegant, yet so versatile.

Dream Card

 For the base of my card, I used the the Blue Fern Garden "In Bloom" paper, distressed and inked. I also used the top corner of the "Parlour" paper to capture the beautiful image of a doily, butterfly, and dream dictionary snippet. I wanted to bring out the blues and and creams of that part of the paper, so I used those colors on the "Bordeaux Layered Frame."


I used a heavy layer of gesso on the bottom layer of the frame, and I sprayed it with Tattered Angels Glimmer Mist in Patina while it was still wet. I let it dry slightly, then added Silks Acrylic Glaze in Emperor's Gold in heavy random strokes.

The top layer of the frame is randomly colored with two brown tones of distress inks and then lightly grazed with a dark brown archival ink.


For this "Small Spring Iris" piece, I primed it with gesso, then used different green and gold mists for the stems. For the flower tops, I layered green, blue, and purple embossing powders.

I Love You More Layout


This is my layout based on the February sketch. I used "Timeless" and "Parlour," papers from the Blue Fern Garden line for the background and "Boudoir" to mat the photo.


In this closeup, you see two pieces of chipboard. The leaves are are a piece from the "Natural Sprigs Set" that I painted green and sprinkled with fine glitter while wet. I also used fine glitter on the "I Love You More" piece after I painted black and sprayed with some iridescent mist. I dusted off some of the glitter when it was dry for the random look. 

I cut a small piece of the "Chicken Wire Panel" and used a metallic distress stain as a base. Then, I brushed it with an archival ink pad for the worn look. The birds are just inked with black archival ink.


I coated the "Garden Window" with Martha Stewart Crackle Specialty Finish with a thick coat using a palette knife for an uneven "stucco" finish. And like the other pieces, I lightly brushed it with black ink.

There's still plenty of time to join us for the February sketch challenge


Magical Layout


I used the following papers from the Blue Fern Garden line: "Love Letters," "Boudoir," "In Bloom" and "Signature."


On the "Blooming Foliage" piece, I primed with gesso, used a metallic green mist, then used some green pigment ink over it, then used a brown chalk ink in random spots. 


On the "Romantic Page Dangles," I painted them with green paint, then randomly used a metallic distress stain. While the paints were still wet, I sprinkled a brown embossing powder to create this weathered look.


In this picture you can see the "Country Picket Fence" that I treated with gesso and crackle paint and brown chalk ink. The "Magical" title piece is from the "Winter Titles" set. I used three different colors of embossing powder to achieve this look. 


Thanks for stopping by the blog today! 


Rae