Showing posts with label Leafy Page Accents. Show all posts

Friday, December 23, 2016

Merry Christmas by Pascale B.

Hello Sweeties,

Today I'm up on Blue Fern Studios with my three last projects. I chose to work the two layouts with photos that I've taken in the beautiful castle of Chenonceau. The castle is well known for his beautiful floral compositions that ornated every room. Every year in December, the castle celebrated Christmas with special decorations. The first one is a white and gold composition ...


As usual, I started to prime the background paper with clear gesso. The I added a design with modeling paste and a stencil. Before the paste was dry I sprinkled the design with Pearl embossing powder that I heat set.


I painted the Framington Medley with green-gold opal magic paint and the straws with a gold acrylic paint.


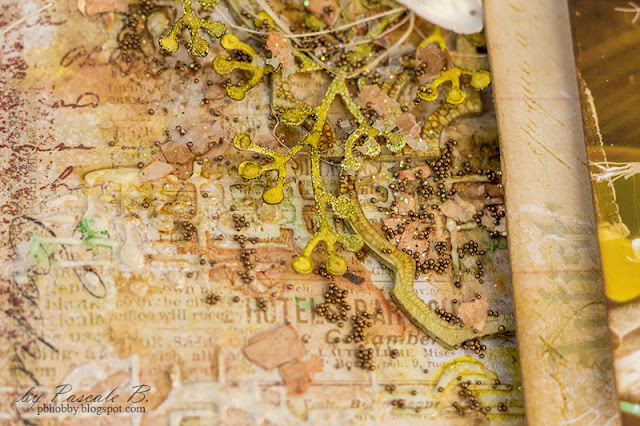
I die-cut some berry branches that I colored with different watercolors. While the watercolors were still wet, I sprinkled Lime and Buttercup embossing powder that I heat set to give some texture. 


Before gluing all the embellishments with a 3D matte gel, I added some colors to the background.


To finished the layout I added some mica flakes, glass glitter, micro beads, and glitters.


Blue Fern Studios products:

Papers - Serendipity (Fascination)
Papers - Memoires (Photographic Record)
Chipboard - Framington Medley
Flowers - Late Winter Lilies, Spring Lilies
Embossing Powder - Pearl, Lime, Buttercup
Glitter - Sunshine, Army Dust

------------------------------------

For the second project, I chose a photo I've taken in the kitchen of the castle: the composition was all about treats...


Again I primed the background with clear gesso before adding a design with the Christmas Collage stamp that I embossed with the Ginger embossing powder.


I added a second design with 3D gel and a stencil. When dry, I sprinkled some gold mica powder that I sprayed with water to make the powder run around the design. Then I colored the background with brown watercolors and sprinkled some white and brown inks.


While the background was drying, I covered the Ruth's Doily with a white crackle paste. I painted the French Word with a metallic paint. I painted the Blossom Branches with an acrylic paint too, I added some acrylic white ink and glitter to the blossoms.


While the chipboards were drying, I die-cut some leaves that I colored with watercolors. And I sprayed all the flowers with a gold mica powder. Then I glued all the embellishments with a 3D gel.


I finished the layout with some mica flakes, glass glitter, and glitter.


Blue Fern Studios products:

Papers - Vintage Christmas 2 (Holidays Cards, Jolly)
Papers - Vintage Christmas (Wonderland)
Chipboards - Ruth's Doily, Blossom Branches, French Word
Flowers - Late Winter Lilies
Stamp - Christmas collage
Embossing Powder - Ginger
Glitter - Pyrite

------------------------------------

The last project is a set of Christmas cards. I used the Vintage Christmas 1 and 2 collections.


I made the two cards the same way. First I primed the background papers with clear gesso. Then I added a design with a stamp that I embossed with the 14 Karats powder. I embossed also the edge of the background as well as the cards.


I embossed the Leafy Accent Pages with the Sand and Sea powder. I colored lightly the background with acrylic paints.


I added some flowers and some die-cut leaves that I embossed with the Antique Gold powder. 


For this one, I painted the Leafy Accent Pages with the same green watercolor I used on the background. 


With a glue gun, I added a drop of glue on each Pretty Weeds's stem that I embossed with the Poinsettia powder. 

Blue Fern Studios products:

Papers - Vintage Christmas (Greeting Cards, Deck the Halls)
Paper - Vintage Christmas 2 ('Twas the Night)
Chipboards - Leafy Page Accents, Pretty Weeds
Flowers - Memoire Blossoms, Harvest Lilies
Stamps - Christmas Collage, Ornamental Edges
Embossing Powders - 14 Karats, Antique Gold, Sand and Sea, Poinsettia.

*****************************

Time for me to say goodbye to you all and to thank Leslie and Valerie for trusting me. I have a wonderful year to work and play with their beautiful papers, chipboards and Imagine Ink.

I wish you all a Merry Christmas and a Happy New Year.

Sunday, September 4, 2016

Creating Summer Memories With Blue Fern Studios~

For September, Blue Fern Studios is hosting a Mood Board Challenge!! I just love the Beachy, Summer colors, and I hope you get a chance to drop by the blog and play along with us!


This first  layout is my just for fun, Design Team take on the Mood Board, and if you haven't ever participated in a Mood Board Challenge, I will walk you through how I used the board for inspiration, so that you can get an ideal of how you can use it for your own inspiration.

I first picked papers that had some of those gorgeous, soft Summer Colors in them. I used the Blue Fern Studios Seaside Cottage Paper Collection, I created a base layer with the Gala Paper, then distressed and inked a layer of Regalia Paper, and created base layers for my photo by using the A & B Sides of the Embark Paper, and doing some machine sewing on the edges.


Next, I picked up the texture on the Starfish in the photo, and added texture to my paper by stenciling with texture paste. I created cut outs on my 2nd layer of paper to reveal the paper underneath and then cut a Blue Fern Lace Doily Chipboard Piece in 1/2 adding them to the cutouts.


I once again took inspiration from the Starfish and painted my Doily with gesso and then inked over it to give it that speckled color look. I then heat embossed the rim of the Doily pieces with Blue Fern Imagine Ink Sunshine Embossing Powder, so perfect to pull in that sunshine yellow from the photos.


I love the burlap wrapped around the flowers, so I added a strip of that down the side of my layout then ran lace down the middle of that. I added some of my handcrafted Oh So Butterlicious Butterflies to pick up the butter yellow in the Mood Board Colors.


I then heat embossed a Blue Fern Leafy Page Accent Chipboard Piece with the Imagine Ink Sunshine Embossing Powder, and added that to the side of my photo.


I then added in flowers and foliage that picked up the colors from the photos. The lily is a Blue Fern Seaside Lily, and the daisy is from the Attic Charm Daisies flower set. I then tucked in a natural seashell like those seen in the photo in the Mood Board.


I repeated that look at the top of my photo.


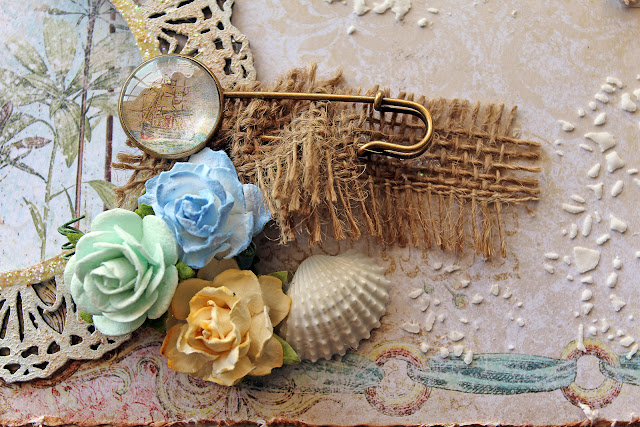
I then added some more of that burlap texture by threading some onto a metal pin and cutting the ship from the papers to add under the glass dome, and then added more flowers and another shell.

Blue Fern Studios Supply List:
Paper:
Seaside Cottage Paper Collection:
Regalia
Gala
Embark

Chipboard:
Lace Rounds
Leafy Page Accents

Flowers:
Attic Charm Daisies
Seaside Lilies

Imagine Ink:
Sunshine Embossing Powder


I am a huge romantic, and the Blue Fern Studios 
Serendipity Paper Collection, along with their gorgeous chipboard and embossing powders allowed me to capture that Shabby meets Romantic look that I love!!
Please note that I normally crop my layouts down to the edge, but since this one extended just a bit beyond the edges of the paper, I left the black background that I shoot my photos on around it, so that you could get the complete effect. 

I started with a layer of Serendipity-Reminisce Paper,  cut down a piece of  Contemplation Paper,  layered that on top and then took a second piece of Reminisce paper, and tore out a piece to put behind my photo. I then cut down a piece of Anticipation Paper, and used that to matte out my photo.


I loved the large Blue Fern Studios Looped Frame Chipboard, from the set that I had used on another layout, and thought it made the perfect, romantic piece to add to my layout.


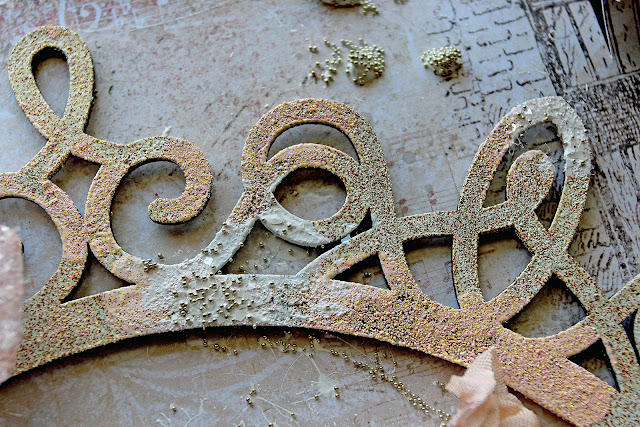
I heat embossed the whole piece with Blue Fern Imagine Ink Oatmeal Embossing Powder, and then dabbed it with a clear embossing dabber, and then heat embossed those areas with Blue Fern Petal Embossing Powder, I then randomly dabbed gesso, and sprinkled those areas with silver microbeads. 


I ran some tulle trim across the bottom in a wave pattern and then topped that with some mini roses and leaves.
I wanted to create a little drama, so I wet a q-tip and rubbed a large whole into the second layer of paper and rolled back the edges to reveal the paper pattern underneath that matches the torn paper behind my photo.


I set metal eyelets and then did some lacing with some hand dyed seam binding, created a large bow and then topped it with a button. I love how the lacing brings out the lacing on the ballet shoes in the photo~so romantic!!


I then cut strips in the corner of my layout and rolled them back, and tucked some more of the tulle trim into the corner. I splatter painted and dripped gesso randomly onto spots of my layout and topped them with more of the silver microbeads.


I added some of my handcrafted Sweet Nothings Butterflies for added dimension and texture,


then created the quote "The Future Belongs To Those Who Believe In The Beauty Of Their Dreams"  by cutting it out of the Serendipity Calling Cards Paper, cutting out each section and applying it on spots of my layout.

I hope you have enjoyed a look at my romantic heart, and that you find the time to create a little romance of your own!! Hugs ~Renea


Blue Fern Studios Supply List:

Blue Fern Serendipity Paper Collection:
Anticipation
Reminisce
Contemplation
Calling Cards
 
Chipboard:
Large Frame from the Looped Frames Set

Imagine Ink:
Petal Embossing Powder
Oatmeal Embossing Powder


For my last Blue Fern September Project, I have a Mermaid Themed Pocket Journal to share with you. 


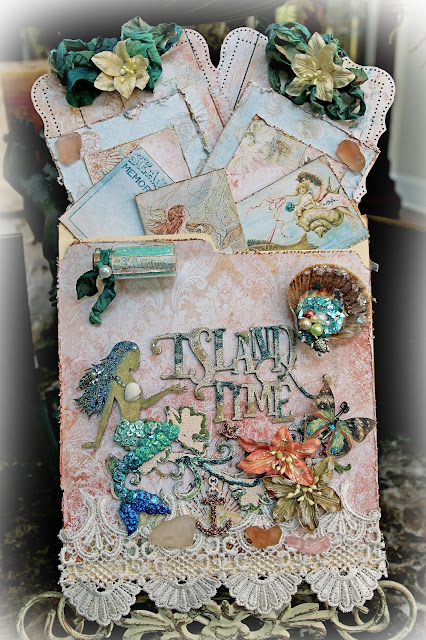
I started with a manila file folder Pocket Journal Base that I covered the front and back sides with Blue Fern Seaside Cottage Glory Paper. I ran some lace across the bottom, and then took a Blue Fern Seaside Flourish Chipboard Piece,


that I heat embossed with Blue Fern Imagine Ink Petal Embossing Powder, then accent heat embossed detail with Peacock, Sage & Sea Mist Embossing Powders, and then detailed the little anchor on the flourish with Imagine Ink Burnt Copper Glitter. The flowers are Blue Fern Harvest Lilies and Late Winter Lilies, and I added some pieces of sea glass for texture.


Next, I took a Blue Fern Seaside Mermaid, and gussied her up. I painted her body with gold paint, added a seashell and some pearls to create a top for her. 


I then took sequins of different ocean colors and glued them to her tail, coated the sequins with diamond glaze and then sprinkle that with glitter glass for a gorgeous shine that you just can not see in the photos. 


For her hair, I heat embossed in layers with Imagine Ink Peacock, Azure & Lucky Embossing Powders, 


sprinkled her hair with gold microbeads, and then added glitter glass and pearl accents. I just love how she turned out~so FABulous!!! I mounted her onto the flourish, and then 


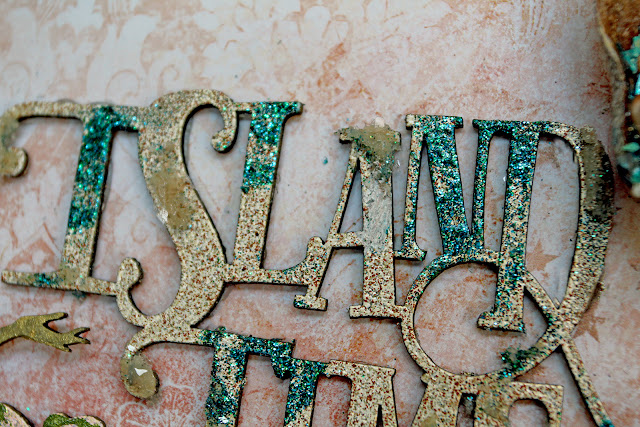
topped that piece with a Blue Fern Island Time Chipboard piece. This piece was first heat embossed with Imagine Ink Oatmeal Embossing Powder, then dabbed with clear embossing powder that was then coated with Imagine Ink Peacock Embossing Powder, heat set, and then I randomly painted places with sand paste and sprinkled that with sand glitter glass.


Here you can see the back view.


and here are all the tuck ins:
2 Extra Large Tags (Created from Blue Fern Splendor Paper and topped with hand dyed seam binding bows and Harvest Lilies)
2 Medium Pull Outs (Created with Blue Fern Glory Paper and topped with cut outs from the Blue Fern Calling Card Paper)
2 Small Pull Outs (Created from the Blue Fern Calling Card Paper)
1-Tri-fold Piece (Created from the Blue Fern Calling Card Paper)

And there you have it, a perfect place to tuck in and journal about those favorite Summer and Vacation Memories!! I hope you have enjoyed all of my September, Blue Fern projects, and that you have found some inspiration to grab some of your Blue Fern Favorites and create some Summer Memories For Yourself!! Hugs, ~Renea

Blue Fern Studios Supply List:
Seaside Cottage Paper Collection:
Seaside Cottage
Glory
Calling Cards
Splendor

Chipboard:
Island Time
Seaside Flourish
Seaside Mermaid

Flowers:
Harvest Lilies
Late Winter Lilies

Imagine Ink:
Burnt Copper Glitter
Peacock 
Embossing Powder
Oatmeal 
Embossing Powder
Azure Embossing Powder
Lucky Embossing Powder
Petal 
Embossing Powder
Sea Mist Embossing Powder


Sage Embossing Powder

Monday, July 11, 2016

A Mixture of Everything by Nicole Doiron


Hello!  This is Nicole and it's my turn to share with you some creations featuring plenty of Blue Fern Studios goodies!  This month, in wait of the brand new collection, Seaside Cottage (click HERE to see it!) that is on its way to me via post and which I will prominently feature in my August reveal, I decided to dig into my BFS stash and pick some of my all-time favorites... oldies but certainly still goodies!

Let's start with this very sunny layout featuring the beautiful Frolic collection!


 I thought that these papers were perfect for this very Summery page!  I wanted my layout to be happy and fun so I started with the title 'Frolic in the Sun' colored in an ombre effect over some stenciled yellow sunrays, all using different Imagine Ink embossing powders and glitter.


Below you see some of the pretty Attic Charm Daisies.  The yellow flower was an Attic Charm Glitter Rose from which I removed the center and replaced with a royal blue brad to go with my palette.


To go along with my sunrays, I used the smaller Looped Frame in the upper right corner of my design while using the larger one behind my photo. They were both covered with a combination of Buttercup and Honey embossing powders.


I fussy cut some of the butterflies from the patterned paper and popped them up throughout.


This sweet photo of little Jade 'frolicking in the sun', very proudly showing off her parasol, was the perfect photo for my page!


Blue Fern Studios products
Patterned Papers: Frolic (Veranda, Dans le jardin, Friendship)
Chipboard: Frolic in the Sun, Looped Frames, Leafy Page Accents
Flowers: Attic Charm Glitter Roses, Attic Charm Daisies
Imagine Ink: Embossing Powders (In the Navy, Cerulean, Bonny Blue, Buttercup, Honey), Glitter (Sunshine)


While my first layout is very bright and sunny, this one is a little darker, using the Timeless collection.


I absolutely adore this dark brown woodgrain paper and had to use it as my background.  I added some stenciling with black molding paste and some stamping designs with white ink.  I mixed 3 shades of embossing powders (ebony, auburn & mushroom) to colour the title and the Floral Lattice Bits.


 I created some elegant flower clusters using some beautiful Blue Fern Studios blooms along with more from my stash, adorned with fancy brads and badges.


The focal point of my layout is the fantastic Sweetheart Dressform - this piece is just so elegant!  I covered it with magenta embossing powder, then dabbed with a little white.


Blue Fern Studios products
Patterned paper: Timeless (Abode, Artistique, Calling Cards)
Chipboard: Sweetheart Dressform, Floral Lattice Bits, Leafy Page Accents, Contentment
Flowers: Attic Charm Daisies, Courtship Blooms
Stamp: Making Plans
Imagine Ink: Embossing Powders (Magenta, Ebony, Auburn, Mushroom)


For my last project, I created a mixed media canvas using lots of BFS chipboard, flowers and Imagine Ink mediums.


My base was created using layers upon layers of mediums.  I have to be honest, I started over this project about 3 times, not being satisfied with the result.  They say... third time's a charm.  Well, this proved to be true for me with this canvas.  After much gesso, molding paste, crackle paint, mists and inks, I added the final touches to it with some Imagine Ink embossing powder and glitter mixed in with glitter glass to create the pinkish shimmery texture.  I love the way it turned out!


I chose the title Dreams Come True as the theme for my canvas because we are all dreamers at heart, and I'm hoping that this canvas could bring a little hope and inspiration to someone somewhere someday.  I first covered this piece with Peacock embossing powder.  Such a beautiful colour!!!  And then, I dabbed some clear gesso and heated it to add some bubbly texture to it.


All the flowers used on my canvas are from Blue Fern Studios.


I fussy cut some butterflies and added die-cut scalloped squares, all from the Frolic line.  The "Dare to Dream" sentiment comes from the Paisley & Vine collection.


And last, but certainly not least, take a look at the gorgeous Victorian Fan!  I used Lime embossing powder on it as well as on the Checker Bits.


I hope I was able to inspire you with my creations today!

Blue Fern Studios products
Patterned Papers: Frolic (Adorn, Dans le jardin)
Chipboard: Victorian Fan, Dreams Come True, Leafy Page Accents, Checker Bits
Flowers: Tranquil Roses & Lilies, Attic Charm Glitter Roses, Courtship Roses
Imagine Ink: Embossing Powders (Peacock, Lime, Sea Mist, Cotton Candy), Glitter (The Pink Ladies)