Showing posts with label Jeweled Page Dangles. Show all posts

Friday, October 24, 2014

colors and pastels 3 LO by Olga

Hello !

Lately I often use yellow. Lots of yellow. In this work I use Ups and Downs Panel and arrows from it. I use combination of sweet photo of my little dude :) As title I use sentence from Optimist Word Set and some Filmstrips.

For this one I use one of my summer nature pictures .  I used here Checker bits and Jeweled page dangles as elements and Dream Big sentence from Optimist set as title.  Dangle is covered with glitter I really like this look that transparent glitter gives on works ! I used also BFS papers from Ombre dreams collection


Here I also used summer photo and soft pastel colors from Ombre dreams. I really love this collection!
One of Capture Words sentences is title of my work . one graduated circle and one of pettie butique frames fill up my composition.

Tuesday, June 17, 2014

Orchid, Lilac, and Yellow


Joyce  here today to share some projects using the Ombre Dreams paper collection, and some chipboard too.  This paper collection has a color for everyone, and for me it’s the orchid, lilac and yellow colors.
Here’s a layout using the Juliana’s Dream  paper featuring the colors of orchid and yellow. The Quatrefoil Panel chipboard was used as a stencil in the background  to add some texture, layering, to further blend the colors together, and grounding the softness of the colors with a hint of charcoal mist. 


 Close ups of the Bohemian Butterfly, and the Grande Cage:


And, here’s a little card featuring a piece of Juliana’s Dream paper and the Jeweled Page Dangle chipboard piece. I first applied gesso to the chipboard piece and was going to leave it as it was because it looked nice on the card that way too.  But, then that inner voice that whispers in my ear, “embellish, embellish, embellish” whenever I work with chipboard just kept getting louder until I succumbed and agreed that I couldn’t just leave it as  it was. It is a very small piece but the design is so exquisite and the dropped baubles required some dimension. Apply some molding paste to those focal points on chipboard to create dimension.  Here there are three values of the color yellow to add some shadow and more interest on each bauble. Try it… I think you will be pleased with the results.


Aren’t those daisies cute?  They are also elements from the Jeweled Page Dangle.  Paint them white, and follow the design of the petals with a water color pencil then add some color mist inside the watercolor pencil petal.  I would love to see more of these small daisy flowers in the Blue Fern Studios store (hint, hint, ;), they’re great little fillers.
Thanks for letting me share my projects with you.
See you on July 17th.


Tuesday, June 10, 2014

Jackie's June Creations - A Layout and A Mixed Media Gift Bag and Card

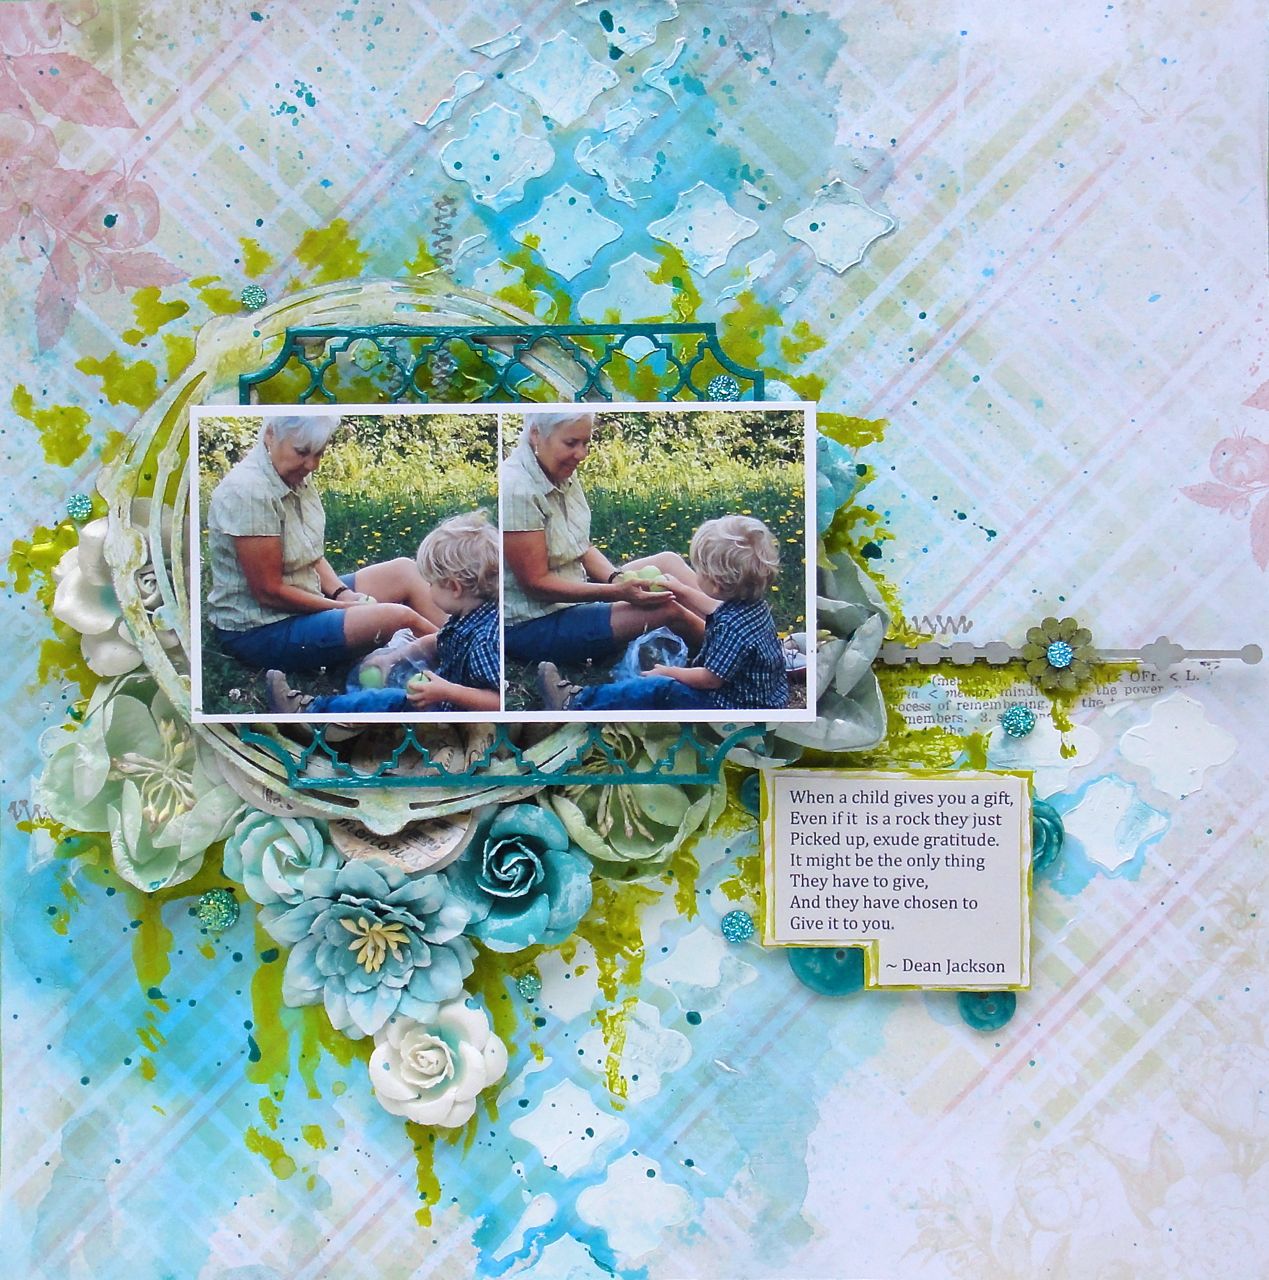
Hello Blue Fern Studios Fans! Jackie with you today to share my June Blue Fern Studios projects. I've had a blast playing with the new Ombre Dreams papers, and I have two Ombre Dreams projects to share with you today, but I'd like to start off with a very dimensional layout using Blue Fern Gardens.


I've mentioned before how much I love the thickness of these papers (and if you haven't had a chance to pick up some Ombre Dreams paper, they are printed on the same paper) because of how well they take media, and I've piled it on again here, with gesso, mists, inks and watercolour paints.


I matted my photo collage using two layers of Blue Fern chipboard, starting with one of the Beaded Strings circles. I painted it with a thick gesso (because I find super heavy gesso spreads so much easier with better coverage), then added some touches of watercolour paints, and then added a bit more gesso once those were dry to tone everything down a little. I also added some grey ink to the outside for definition.


The second layer of my photo mat is one of the Quatrefoil Garden Panels. I cut it in half lengthwise so that I could have a border both on top of and below my photos, and painted it with a shimmery acrylic paint.


To create a horizon line across my page, I used a piece of one of the Jeweled Page Dangles left over from another project. The links are coloured with chalk ink, and I used some of the shimmery watercolour paint I used on the page to colour the flower, and topped it with some bling.

Blue Fern Studios Products Used:

- Blue Fern Garden: Picnic
- Blue Fern Chipboard: Beaded Strings, Jeweled Page Dangles, Quatrefoil Garden Panels


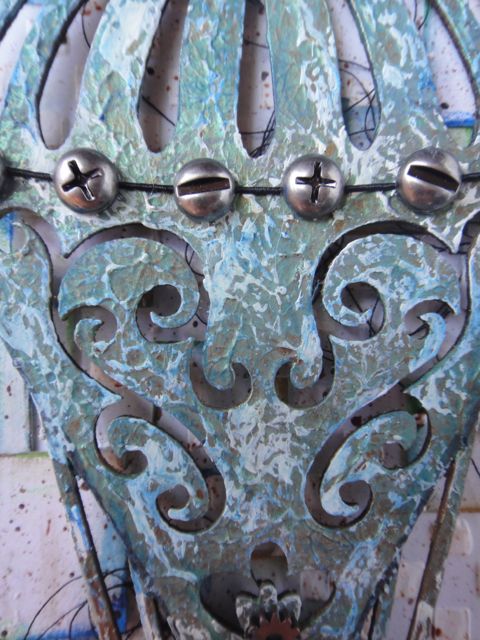
With Father's Day just around the corner, I set out to make a masculine gift bag, though in the end it turned out a little too colourful to be truly masculine, but I love it!


I combined Blue Fern Garden and Ombre Dream papers for this one; they work so well together! After I built my base layers, I added strips and squares I cut from scrap pieces and the cut-away strips at the bottom of the papers, and added random colour to the sides of all of these.


I then added stencilling, stamping and splattering to the background along with some sewing thread.


I coloured the Grand Balloon Chippy with several different colours of acrylic and watercolour paints, layering them on until I was happy with the effect then adding some gesso to help to tie the piece in with the background. 


See the wonderful texture from the acrylic paint? Some metal pieces provided nice finishing touches to the balloon.


 Blue Fern Studios Products Used:

 - Blue Fern Garden: Signature, Timeless, Parlour
- Ombre Dreams: Susan's Dream
- Blue Fern Chipboard: Grand Balloon


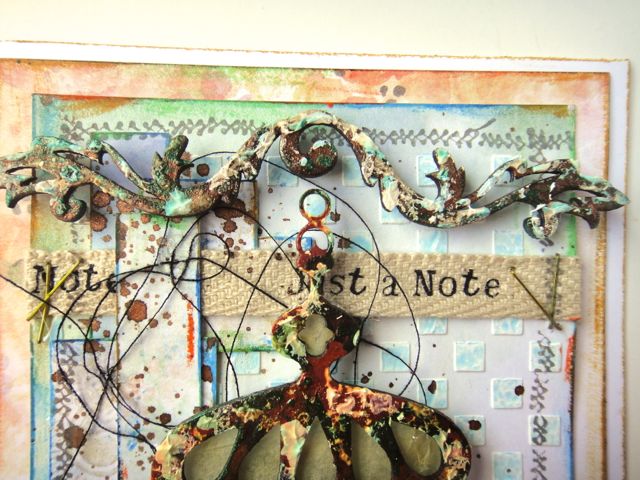
I so enjoyed making the gift bag that I decided to make a card along the same lines, this time using one of the Eastern Lanterns, and one of my favourite colours, orange.


On the Grand Balloon chippy I achieved the texture by dabbing with my finger in the wet paint; with this one I held my heat gun close to the acrylic paint to cause it to bubble and create this gorgeous effect. I then added some modelling paste and gesso to enhance the aged effect.


I treated one of the Leafy Page Accents in a similar manner, though I used a copper mist instead of the orange acrylic as my base colour (I applied clear gesso to the piece first, so that the mist would sit on top instead of seeping into the porous chipboard).


Blue Fern Studios Products Used:

- Blue Fern Garden: Parlour
- Ombre Dreams: Susan's Dream, Shannon's Dream
- Blue Fern Chipboard: Eastern Lanterns and Leafy Page Accents

Thank you for stopping in today!


Saturday, May 24, 2014

Hello all BFS Fans. Today I'm coming with 3 mixed -media projects.

First one is Little canvas in summer colors with my son on it. I use Dot Grid Panel as background to my project. Those panels from BFS are awesome You can use them to whole 12''x12'' work or cut to pieces so many ways of use a single product ! . one of Memory Frames become frame to my photo and Dream Big sign is title and filling to my composition


This work is girly and messy. I made  background using leftovers from circlce pannels I had. I glued them layered , and covered all with gesso . I recomend thick product to do that . Then i made composition using Graduated Circles and Blue Fern Bits and one of theValentine's Word Set is title.

This work was inspired by amazing photo of little girl.  I use Beaded Strings The Optimist Word Set, Heart Set and Jeweled Page Dangles to enhance delicacy of this picture.

Monday, April 21, 2014

Kelly's April Projects

Hello there, Blue Fern fans :)
Kelly here today. I have a long post...three layouts today, so I'll get right to it!!

"So Sweet"

For this one, I went back to one of my all time favorite pieces of BFS chipboard...the Floral Clock
I covered this piece with embossing ink, then sprinkled three different embossing enamels..gold, ivory, and copper for a variety of color and texture. For the clock center I added another clock embellishment and clock hands.


Tucked into the bottom of this cluster is another "older" favorite, the Ornate Medallions. This one was also given a coating of copper embossing enamel.


"Perfect Moment"

I chose to use the gorgeous Blue Fern Garden papers for this one, as the colors worked perfectly with my photos - I love when that happens!

I started with the "Boudoir" paper, and layered strips from other Garden papers.  Over the paper strips, I added  two of the Jeweled Page Dangles, which were embossed with a light pink embossing enamel. I also have used one of the Flourish Hearts, which I cut apart and tucked the heart half, and the flourish half on either side of my photos.


"I Love You So"

For this one, I fussy cut the beautiful rose and bird cage motifs from the Blue Fern Garden papers, and placed them strategically on my page.  Below I have used one of the Memory Frames, simply painted white.


I added one of the Grande Cages, which was first painted white, then given a brushing of chalk ink.


The small flower border piece below is the "cut out" from one of the Floral Hearts. Once again, I just painted it white to make it really stand out!


Blue Fern Products:
Floral Clock
Ornate Medallions
Blue Fern Garden: Boudoir
Blue Fern Garden: Calling Cards
Blue Fern Garden: Signature
Floral Hearts
Flourish Hearts
Grande Cages
Memory Frames
Jeweled Page Dangles.

I hope you've enjoyed my projects today :)
Have a wonderful week!
s
Kelly

Tuesday, March 18, 2014

Different Ideas by Keren Tamir


Hi Blue Fern Studio Fans.

 I have a fun and diverse post for you today. 
This month, I've created three different kinds of projects all very different from each other yet original on their own.
The first one is a layout. I know its just a layout, not so original lol, but continue scrolling down I made two more projects that you might think are more unique.

"Timeless Me"


The picture above is a picture of me when I was a kid. I think I'm probably 4 years old here. I created this layout using the green toned papers from the Blue Fern Garden collection.


I used the inside part of the Helen's Doily. It was a leftover piece from a previous layout. I also used one of the Jeweled Page baubles. Both these pieces were covered in green chalk edger ink and then stamped and edged in brown ink.


 The title Me from the Valentine word set was simply coloured in brown ink,


<<<<<<>>>>>>>

"Love & Thanks Journal"

My second project today is a journal that I created for a friend. I only altered the cover and left the inside blank for her to fill in.


The background was altered using crackle paint, ink and stamping. Once dry, I added a few of the Blue Fern Studio chipboard pieces on top.
I used the Shabby Brick bits, Two of the Veranda Cages, one little bird and the "&" sign from the Valentine Word set.


<<<<<<<<<>>>>>>>>


"Bookmarks"

For my third and final project for March I thought of a great idea on how to use some of the new Blue Fern Studio dangles to create bookmarks. I just thought they were the perfect size to fit inside a book and still have the bottom dangle through the pages.

I believe this would be a perfect gift for a friend's birthday or a teacher's end of the year gift.

I created a step by step  tutorial on how I made these bookmarks:

Step 1: Prime both dangles with Gesso on both sides. Let each side dry before applying it on the other side.


Step 2: Cover the chipboard with crackle paint. I only covered the top side. Let it dry overnight.


Step 3: Cover one of the dangles in brown and yellow chalk ink and the other with green and yellow ink. Do this on both sides. (of course you may choose any colours you like)


Step 4: Seal both sides of the chipboard using Glossy Accents, Diamond glaze or equivalent transparent gel. Let one side dry first before applying it on the other side.


Step 5: Punch a hole through the chipboard at the top of a dangle if it doesn't have one. Then insert a tassel and a fancy brad for decoration.


well I hope you enjoyed my fun and diverse post today!!
Enjoy the rest of March!!!!
Have a wonderful day!!

Keren