Hi everyone! Kelly here..I am thrilled to be going on my second year here at Blue Fern. I hope you are enjoying all of the inspiration from our new (and returning!) DT members this month, I know I am!
I have three projects to share today so I'll get right to it!
"Love"

This first layout, I have used a bunch of little bits of Blue Fern Chipboard. I started with one of the frames from the Ever After Frame Set. I did a little stamping, embossing with black and bronze, and then added a bit of gold shimmering acrylic ink. I also tucked a piece of the Bits Of Honey, which I cut in half and left bare, into either side of the layering beneath my photo.

On the right side of the photo, I have placed one of the Garden Daisies (Small), which was painted with the same shimmery ink, a bit of green pearl paint, and topped with just a bit of a gold texture paste. To the cluster on the left side, I added one of the cute little dandelions from the All Natural set, which was given the same treatment as the Daisies.


Chipboard used:
Good Vibes Set
Garden Daisies- Small
All Natural Set
Bits Of Honey
Ever After Frame Set
"Count Your Blessings" (8x10 Canvas)

This canvas, which I started some time ago, was finally finished when I chose the perfect bits of chipboard to finish it off! I made my flowers out of a vintage dress sewing pattern, and I added little strips cut from the Checker Bits as the stems.

The word "Blessings" comes from the Spiritually Speaking word set. This was simply given two coats of gesso so it would stand out.

Chipboard used:
Spiritually Speaking
Spiritually Speaking
Checker Bits
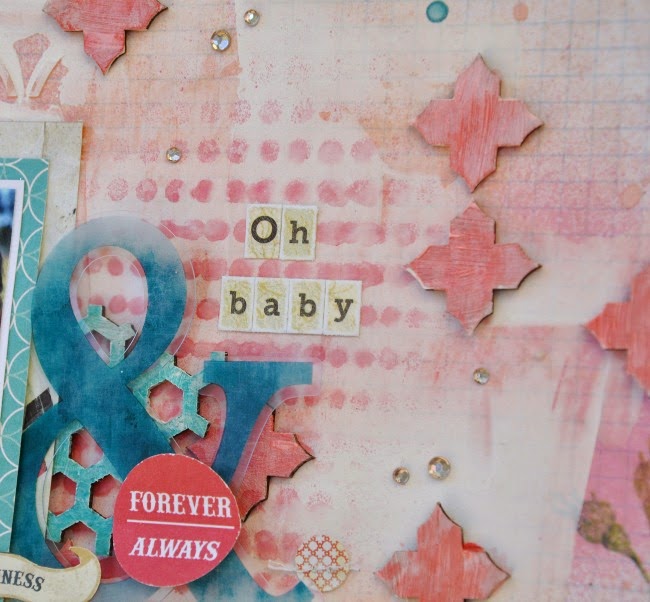
"Sweet As Honey"

Last up, a sweet, girly layout. The Graduated Circles, this one cut apart a bit, make for such a fun page design. I painted this with Distress Paint, watercolors, gelatos, and then brushed on some gold texture medium.

The title was colored with Gelatos as well, in pink and butterscotch.

Chipboard used:
The Latest Buzz
Graduated Circles
Thank you so much for taking a look today, I hope you enjoyed my projects. Have a great day!!
*Kelly*