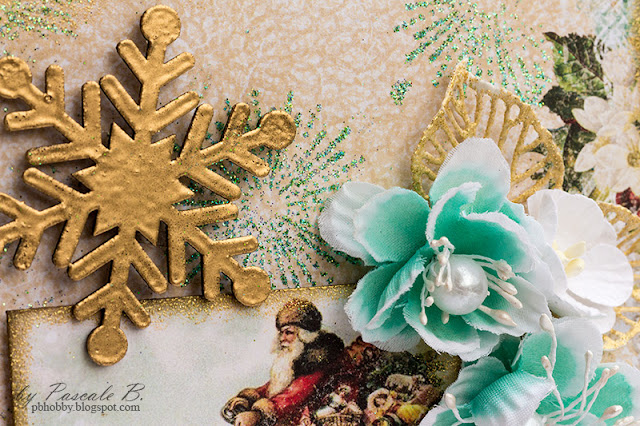
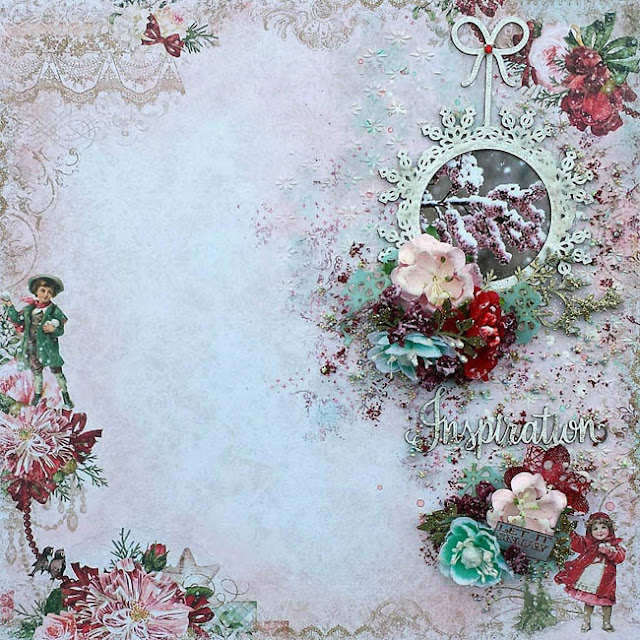
Showing posts with label Christmas Blooms. Show all posts

Tuesday, December 6, 2016

Vintage Christmas with Cathi

I can't believe a year has flown by and it is time to finish my term here at Blue Fern Studios!! I have loved working with the amazing products and my talented fellow team members.  I am so grateful for the wonderful opportunity to design here!!  For my last post here I have made two layouts and set of cards.


My first layout features the gorgeous Vintage Christmas collection Wonderland paper. I decided to do a snowy layout and just love these colors! I chose a gorgeous wintry vintage image of a family gathering pine boughs for the holidays.


Here in this first close up I have added some layers under the photo using the Vintage Christmas 2 Calling Cards cutouts. I love the Snowflake Frame which I have embossed with Imagine Ink Icicle Embossing Powder. I've added a snowflake from the Shabby Flakes collection which has been embossed with Icicle and Cotton Candy Imagine Ink Embossing Powder. 


In this photo you can see how I've used several background stamps to build up texture. I have used the Making Plans stamp, the Crackle Textures stamp and the Coarse Fabrics stamps using various distress inks. I also edged  my chipboard with Festive Berries Distress Ink to tie into the colors of the paper.


I've used some gorgeous flowers on this layout, the beautiful red Christmas Bloom and pink Soft Blossoms. For the title of my layout I used the Wonder chipboard from the Wish Wonder Dream set, and again used Icicle Imagine Ink Embossing Powder

Blue Fern Studios Supplies:

Paper:
Blue Fern Studios Vintage Christmas ~Wonderland
Blue Fern Studios Vintage Christmas 2 ~Calling Cards

Chipboard:
Shabby Flakes
Snowflake Frame


Imagine Ink Embossing Powder:
Icicle
Cotton Candy

Stamps:
Making Plans
Coarse Fabrics
Crackle Textures

Flowers:
Christmas Blooms
Soft Blooms


My next project is a set of cards using both sides of the Vintage Christmas 2 Jolly paper. I always love to use the Calling Cards page with its gorgeous cutouts and images to make a set of cards when I can.


In my first card I used the beautiful Holiday Deer chipboard piece, embossed in Antique Gold Imagine Ink Embossing Powder. The Yours and Mine at Christmas Time actually came from the branding strip at the bottom of one of the papers!  The red and aqua flowers are part of the Christmas Blooms set while the white one is from the Soft Blooms set.  To finish off the card I used some ribbon from my stash and sewed in brown around the edge of the card.


I love the image on my next card, so much fun! I have added the Christmas Cheer sentiment from the Calling Cards paper as well.  Underneath my image I have added a bit of twine from my stash. The beautiful snowflakes are from the Let it Snow set, embossed appropriately in the Snow Imagine Ink Embossing Powder! The red flower is from the Memoires Blooms and the brown lilies are from the Winter Lilies set.  Again, I have finished off the card with some brown stitching along the edges.


For my final card, I've used the other side of the Jolly paper for the background and some papers from the Calling Cards sheet again.  The flowers are both from the Christmas Blooms set.  The foliage chipboard is from the Layering Stems set and is embossed in Sage Imagine Ink Embossing Powder. I have added some ribbon and a small pine cone from my stash and stitched along the edge to finish it off.


Blue Fern Studios Supplies:

Paper:
Blue Fern Studios Vintage Christmas 2~Jolly
Blue Fern Studios Vintage Christmas 2 ~ Calling Cards

Chipboard:
Deer Ornament
Let it Snow
Layering Stems

Imagine Ink Embossing Powder:
Antique Gold
Snow
Sage

Flowers:
Memoire Blooms
Christmas Blooms
Late Winter Lilies


My final layout for Blue Fern Studios features another vintage image and the gorgeous Vintage Christmas Let it Snow paper as its base.


In this first close up you can see the beautiful Ruth's Doily peeking out from under the photo cluster, embossed in Golden Bricks Imagine Ink Embossing Powder. I have used more of the Calling Cards cutouts tucked underneath the image to build up the layers.


I have again used more of the beautiful red Christmas Blooms flower and the chocolate brown Late Winter Lilies as my flower cluster.  I have used a Mini Flourish chipboard embossed in the Pyrite Image Ink Embossing Powder as a finishing touch on the photo cluster.


The Night Before Christmas chipboard piece has been embossed in Ruby Imagine Ink Embossing Powder and you can see the background stamping I have done featuring stamps from the Forever, Essential Textures, and Texture Circles sets.  I finished off this cluster with another Late Winter Lily. 

Blue Fern Studios Supplies:

Paper:
Blue Fern Studios Vintage Christmas 2~Let it Snow
Blue Fern Studios Vintage Christmas 2~Calling Cards

Chipboard:
Ruth's Doily
Mini Flourishes
Night Before Christmas

Imagine Ink Embossing Powder:
Golden Bricks
Ruby
Pyrite

Stamps:
Forever
Essential Textures
Texture Circles

Flowers:
Christmas Blooms
 Late Winter Lilies

I have really enjoyed my time here with Blue Fern Studios and look forward to seeing what new products and new inspiration arrive next year with the amazing new 2017 team. I hope you all have a wonderful Christmas and a great 2017!!

Wednesday, November 23, 2016

Vintage Christmas by Pascale

Hello Sweeties,

Today I'm up on Blue Fern Studio with three new projects featuring the Vintage Christmas 1 & 2 collections. The first project is a mini album entirely realized with the first Vintage Christmas collection. The size of the mini album is 13 x18 cm (5" 1/4 x 7"1/4).


 I embossed the pages with different stamps as well as the edges. 


I die-cut a few doilies to add inside. I added the page titles too.


I added the first design to the cover with the Brocade Texture stamp and the Ginger powder. Then I continue with the Christmas Collage stamp set and a permanent ink.


I embossed the Dangled Flake with two layers of Black Sand embossing powder and the Winter Flakes with two layers of Ginger While the embossing powder was still hot, I stamped the Winter Flakes to add some texture.


Blue Fern Studios products:

Papers - Vintage Christmas (Wonderland, Greeting Cards, Magical, Deck the Halls,
Auld Lang Syne, Noel)
Chipboards - Dangled Flake, Winter Flakes
Stamps - Christmas Collage, Brocade Texture, Postal Texture, Texture Circle, Grungy Grid
Embossing Powder - Antique Gold, Ginger, Black Sand, Silver Bells

------------------------------------

My second project is a layout featuring the new Vintage Christmas collection. I chose an old photo of my daughter.


I cut a large strip in the Twas the Night paper and glued it on the Joly paper. Then I primed the background with clear gesso.


I added a thin layer of white gesso where I want to put my embellishments and photo. When dry, I added a design with 3D Gloss Gel and a stencil. While the gel was still wet I sprinkled some Pyrite glitter.


While the background was drying, I painted the chipboard with a metallic paint and the Soft Blossoms in red. 


I splattered some red and copper paint; Then I added a new design to the background with the Christmas Collage stamp embossed with the Ginger powder. I colored the area with different colors of watercolor.


I glued all the embellishments with a 3D gel (flowers, chipboard, lace...), and to finish, I added some star brads embossed with the Ginger powder. 


Blue Fern Studios products:

Papers - Vintage Christmas 2 (Jolly, Twas the Night, Holidays Treats)
Vintage Christmas 1 (Wonderland, Greeting Cards)
Chipboard - Tree Treats
Flowers - Christmas Blooms, Soft Blossoms
Stamp - Christmas Collage
Embossing Powder - Ginger
Glitter - Pyrite

------------------------------------

Here is my third November's project: a set of card.


I chose the Jolly paper as the base of both cards. I stamped them with one of the stamps from the Christmas Collage set. Then I embossed the image with a sticky powder in order to add Carribean glitters.


Then I embossed also the edges of both cards with the 14 Karats powder to add some extra shine.


I embossed some Winter Flakes with the Honey powder, other with the Ginger and the Antique Gold powders. 


I embossed some die-cut leaves with the 14 Karats powder too. While the embossing powder was still hot I sprinkled them with  the Carribean glitter and heat set them. 


Blue Fern Studios products:

Paper - Vintage Christmas 2 (Jolly)
Chipboards - Winter Flakes
Flowers - Christmas Blooms, Soft Blossoms
Stamp - Christmas Collage
Embossing Powders - 14 Karats, Antique Gold, Ginger, Honey
Glitter - Caribbean


Tuesday, November 22, 2016

Vintage Christmas 2 by Marilyn

Hello everyone! 
Marilyn here with you today to share two projects and a video tutorial with the new Vintage Christmas 2 collection. 

I love the combinations of turquoise, beige and red colors  in the Twas the night paper . The tree Trimming and the Holiday Cards papers made the perfect complement to my page.

The chipboard were embossed with snow and sea mist embossing powders.

I mixed the new Christmas Blooms and the Soft Blooms .

 My title is the new "Twas the night before Christmas" chipboard.

Supplies:
Christmas Vintage 2; Twas the Night, Holiday Cards, Tree Trimmings papers
Chipboard: Twas the night, Large Flake
Flowers: Christmas Blooms, Soft Blooms
Embossing Powder: Snow, Sea Mist


Here's the Video tutorial, I hope you find inspiration!!


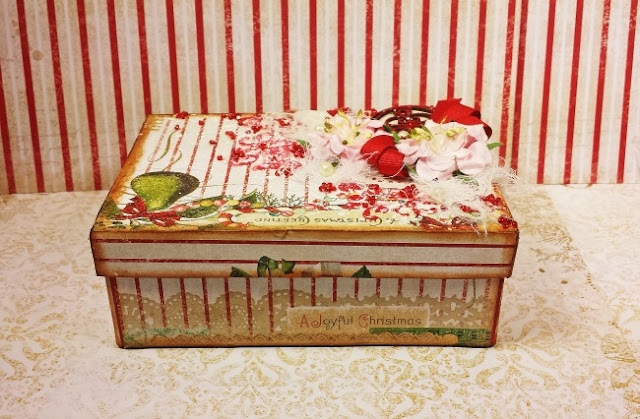
A Christmas Greeting Box
My second project is an altered Christmas box .  I played with the lines and design of the Holiday Treats paper around the box. I added one of the ornament of the Tree toys chipboard that I covered on Cranberry glitter.

Here's the back of the box, every side has a different detail.

Supplies:
Vintage Christmas 2: paper- Holiday Treats
chipboard: Tree Toys
Glitter: Cranberry
Flower: Soft Blossoms


Thanks for stopping by....Until next time!


Marilyn Rivera


Monday, November 21, 2016

November Inspiration By Debbie

Hi everyone!  Debbie here with you today to share my November projects for Blue Fern Studios.   It's cold outside today.  Over the weekend temperatures dropped a good 20+ degrees.  Cloudy grey skies only make me realize what is coming . . . winter and along with winter comes snow.  Not quite ready for that yet.  I do admit that I love looking at the falling snow, especially when it leaves a blanket on the ground as well as the bushes and trees,  With that image in my mind I created the following layout using the new Vintage Christmas Collection 2.

I used the Let It Snow paper for the background.   I did some light inking with pink ink as well as misting with a mint green mist, along with some masking, microbeads and stamping some of which included the Forever Stamp.  I wanted to add lots of texture to the background.  My picture is framed with the Dangled Flakes Chipboard which I embossed with Imagine Ink Snow Embossing Powder and added some snow texture paste along with some chunky glass glitter.

Lots of beautiful Blue Fern Flowers from the Christmas Blooms and Soft Blossoms collections along with a piece from the Layering Stems and Mystic Branch Chipboard which I embossed with Antique Gold and added some Vintage Gold Glitter.  I added some snow texture paste to all of the flowers to mimic the branches in the picture.

Love these beautiful new flowers!!! The little placard "Let It Snow" is from the Calling Cards paper.

The Title is from Serendipity Words.  I embossed with Snow, Antique Gold and Sea Mist Embossing Powders.

Blue Fern Studios Products:
Paper:  Vintage Christmas 2:  Let It Snow, Calling Cards
Chipboard:  Dangled Flake, Layering Stems, Mystic Branch, Serendipity Words 2
Embossing Powder:  Snow, Antique Gold, Sea Mist
Flowers:  Christmas Blooms, Soft Blossoms
Glitter:  Vintage Gold

My next two layouts are from the Memories Collection.
I love creating vintage layouts.  I came across the picture on Pinterest and thought it was fitting for the title.
I used the Grand Sequel paper for my background.  I added some peach ink and stamping, including the Blue Fern Grungy Grid stamp.  Lots of layers under the picture using the Calling Cards paper.

The top and bottom right hand side of the picture I used the Formal Corners Chipboard.  I embossed with some brown from my stash along with Imagine Ink Ginger and Breeze Embossing Powders.  Love the aged look to the corners. Tucked under the picture to the right I used the Mina's Border Chipboard, embossed with brown and Ginger.

Gorgeous flowers from Harvest Lilies, Memories Blooms and Tranquil Blooms!

I used the same treatment on the title as I did with the Formal Corners, a mixture of brown powder from my stash and Ginger and Breeze Imagine Ink Embossing Powders.

Blue Fern Studios Products:
Paper:  Memories Grand Sequel, Calling Cards
Chipboard:  Formal Corners, Mina's Border, A Story Worth Telling
Embossing Powder:  Ginger, Breeze
Flowers:  Harvest Lilies, Memories Blooms, Tranquil Blooms

My final layout was created for a friend and features her adorable daughter.
I used the Remember When paper for the background.  I added some light blue inking along with some random stamping.  Beneath the picture I've added a backing from the Calling Cards paper and placed the picture on the Mandala Frame Chipboard which I embossed with Mushroom Imagine Ink Embossing Powder. Lots of beautiful flowers from the Memories Blooms collection.

Here is a close up of the Mandala Frame.  I added some mircobeads and Sunshine Glitter for texture.

Tucked beneath the flowers is a Mini Flourish Chipboard embossed with Mushroom Embossing Powder.

I kept the title rather simple, inking it blue and adding some stamping.  Here you can see the vibrant flowers from the Memories Blooms.

Blue Fern Studios Products:
Paper:  Memories Remember When, Calling Cards
Chipboard:  Mandala Frame, Big Drama, Mini Flourishes
Embossing Powder:  Mushroom
Flowers:  Memories Blooms
Glitter:  Sunshine

I hope I've inspired you.
Thanks for stopping by!
. . . Debbie

Wednesday, November 16, 2016

Maja's November Layouts

A very good morning to you, Blue Fern Studios friends, welcome to the blog today!

The year is coming to an end, and we think of Christmas more and more, getting ready for the holiday, but before I totally get involved into Christmas projects, let me first share some other things ;-)

This first layout is the one you might have already seen if you visited our November challenge post:


I used the Memoirs collection, and chose a burgundy-golden-brown palette for my layout. I added some stamping on the background paper, matted the photo with postcard images cut out from the Photographic Record sheet. Then I added the largest Roman clock piece embossed with Antique Gold and Black Sand eps:


As the November challenge is all about title pieces, I used the longest title I had to make it really stand out :-) I embossed it with Ruby ep and then accented the word "story" with red glitter:


Finally, I added a couple of flowers and embellies and clock hands embossed with Mushroom:


Each Day Is A Story Worth Telling:
Papers: Memoirs: Autumn Biography, Photographic Record
Chipboard: Roman Clock Set Large, Each Day
Flowers: Attic Charm Glitter Roses, Attic Charm Daisies, Courtship Blooms
Stamps: Journey, Postal Textures
EP: Antique Gold, Black Sand, Mushroom, Ruby


My second layout also features the Memoirs collection, but this time I decided to use a light, subtle colours - yes, I think they fits boy pages too :-)


There are a few bolder black accents, like stamping on the background page and a metal tab under the photo:


Otherwise I kept the delicate tones with the title chipboard embossed with Oatmeal ep and pieces of the Marrakesh Panel that I split into several parts and embossed with the Lilac powder:


Million Dollar Smile:
Papers: Memoirs: Photographic Record, Nature's Novel, Tale of Treasures
Chipboard: Million Dollar Smile, Marrakesh Panel
Flowers: Harvest Lilies, Late Winter Lilies, Courtship Bloom
Stamps: Deja Vu, Photography
EP: Lilac, Oatmeal

Those were my Memoirs layouts, but since I just got my DT box filled with the gorgeous Vintage Christmas 2 papers, I couldn't resist making one more page using our latest release :-) And here it is:


I began by cutting the decorative edge of the Twas the Night sheet and layering it upon the Let It Snow paper.


Then I added some stamping and made the title: I cut the word "Christmas" off the Twas the Night chipboard title and placed it on the Fancy Signage piece. I embossed the latter with Oatmeal and Snow powders and for the title word I mixed the Ruby ep with some red glitter for extra sparkle :-)


I also experimented with the Large Flake piece - I mixed Snow, Sea Mist and Icicle powders to create my cutsom mint tinsel :-) I added Spiritually Speaking words, just like the title embossed with Ruby ep and red glitter:


A little flower cluster including Christmas Blooms and Spring Lilies as well an the ornate Candle Stick piece complete my layout:


Christmas:
Papers: Vintage Christmas 2: Let It Snow, Twas the Night, Holiday Treats, Holiday Cards
Chipboard: 'Twas the Night, Large Flake, Candle Stick, Spiritually Speaking, Fancy Signage
Flowers: Christmas Blooms, Spring Lilies
Stamps: Forever, Ornaments
EP: Oatmeal, 14 Karat, Snow, Ruby+ Red Glitter, Icicle+Snow+Sea Mist


And that is all for today, thank you for visiting and see you later! 
Maja Nowak