Showing posts with label Chelsea Vines. Show all posts

Wednesday, August 9, 2017

A Fairy Good Life

The second project from our August Blue Fern Fan of the Month, Mariusz Gierszewski, is this very soft and magical layout.  Mariusz has beautifully used the frame of the paper as the base for this lovely design.  The chipboard, flowers and fussy cutting create a very eye-pleasing design for this sweet infant photo.


Here is what Maruisz had to say about this layout:

Another work in which I could bring you closer shabby style. I prepared at the begining chipboards by embossing powder and cut many emablishments from other papers. After that I start to build composition of fabric flowers in the corner and more or less oposite/middle side. On the top flowers I add the gesso. On the end I add few printed chipboard pieces from collection the all corners, and to decorate layout. Balance and harmony formed an integral whole.


Blue Fern Products Used:

Paper
Garden Life Collection

Chipboard:
Circle Vine
Chelsea Vines
Circle Flourish Frame - small

Other:
Embossing Powder
Garden Life Printed Chipboard

Flowers:
Garden Florals
Happy Blooms
Spring Lilies
Spring Peony & Berries


Thanks so much, Mariusz, for sharing this beautiful layout with us!

Thursday, January 26, 2017

January projects by Vera Shelemekh

Hello Blue Fern Studios fans!
I'm really excited to present my first projects as Blue Fern Studios design team member. It's a great honor for me to join such a faboulous team! 

First a couple of words about myself.

My name is Vera Shelemekh and I come from the very heart of Russia.  I live in Moscow with my husband and 5 year old son. Scrapbooking is my hobby, my work and my life style. I can't imagine my crafty process without mixed media and fuzzy cutting. So if you come to Moscow and meet a person with scissors in dirty hands, that would be probably me :)
I create in different styles and techniques.
Visit my social media to learn more:


And now give me a chance to try and inspire you to create something really amazing with the best paper and chipboards ever!
------------------------------
My first project is the layout about russian winter full of snow and Christmas fun. We celebrate New Year first and then Orthodox Christmas on January 7th so the celebration is still alive in memory)

I used Vintage Christmas 2 Twas the night as backgroud and cut a lot of elements from Holiday Cards sheet.

The gingerbread house Chipboard is covered with white gesso, then I embossed the roof with Icicle powder and covered candy parts with Fire Engine glitter.


The title "Noel" is also embossed with Icicle powder.


Blue Fern Studios products used:

Papers:
Vintage Christmas - Wonderland
Vintage Christmas 2 - Twas the Night
Vintage Christmas 2 - Holiday Cards

Chipboards:
Gingerbread House
Noel

Embossing powder:
Icicle

Glitter:
Fire Engine
------------------------------
Now let's move to amazing Heartland collection! I've created two projects.
The first one is the layout about myself and the qween which lives deeply inside every girl) The image came up to my mind when I saw the Heartland Love Blooms paper sheet. It became the background for my layout.
My hat and skirt are made of many fuzzy cut flowers.I cut them from Heartland Sweet on You paper.

I also added some Chelsea vines covered with  green acrylic paint and lime embossing powder. 
And some hearts cut of Chunky Heart Panel and covered with antique gold powder.
 For this layout I used some stamping with Deha Vu  and Texture 1 sets. I stamped elements on the remnants of the Sweet on you paper, cut them and adhered to the layers.

Blue Fern Studios products used:

Papers:
Heartland - Love Blooms
Heartland - Sweet on You

Chipboards:
Chelsea vines
Chunky Heart Panel
Joy

Embossing powders:
Lime
Antique gold

Stamps:
Deja vu set
Texture 1 set

------------------------------
 And now the dessert. Heartland collection inspired me to create two chocolate boxes. I like to have such things at hand in case a friend drops in.
 
The boxes are made of Valentine Party and XOXO papers and decorated with flowers cut from Love Notes. I used the remnants of paper, a puncher and some glue to create paper flowers.

The birds in the middle are taken from the little birds set and covered with Fool's gold glitter.
 The boxes are quite big, appriximately 6х2,5 inch, so someone can keep quite a lot of chocolate inside))

Blue Fert Studios products used:

Papers:
Heartland - XOXO
Heartland - Valentine Party
Heartland - Love Notes

Chipboards:
Little Birds set

Glitter:
Fool's Gold

Hope you enjoyed! Have a good crafty day and see you in February ;)


Friday, September 23, 2016

September inspiration by Pascale

Hello Sweeties,

Today I'm up on Blue Fern Studios blog with three new projects. The first one featured the Tranquility collection: it was perfect for this photo of Marilyn Monroe.


I started to cover the Hushed paper with a thin coat of clear gesso; Then I added a design with a stencil and two pastes: black heavy gesso and platinum crackle paste.


When dry, I added more texture with the Arcadia Texture stamp and the Magenta embossing powder.


I just painted the Chelsea Vines with black gesso.


I embossed the Corner Flourishes with Pearl embossing powder.


Then I glued all the embellishments (flowers, chipboard and lace) with a 3D gel. 


Blue Fern Studios products:

Papers - Tranquility (Hushed, Calling Cards) ;
Chipboards - Chelsea Vines, Corner Flourishes ;
Stamp - Arcadia Texture ;
Imagine Ink - Embossing Powders (Pearl, Magenta) ;
Flowers - Courtship Roses, Tranquil Lillies and Roses, Seaside Lillies.

------------------------------------

The second layout feature the Timeless collection which is perfect for this photo I've taken in the park of the castle of Chaumont-sur-Loire (Loire Valley, France). It's a sculpture from Giuseppe Penone: “Trattenere 8 anni di crescita (Continuerà a crescere tranne che in quel punto), 2004-2012”.)


As usual, I primed the Abode paper I chose as background with clear gesso. Then I added a design with a stencil and platinum crackle paste. I sprinkled Foll's Gold and Pyrite glitters while the paste was still wet.


I splattered watered gesso and let dry. Then I continued some splattering with gold and rust mica powders mixed with water and gel medium as well as gold paint.


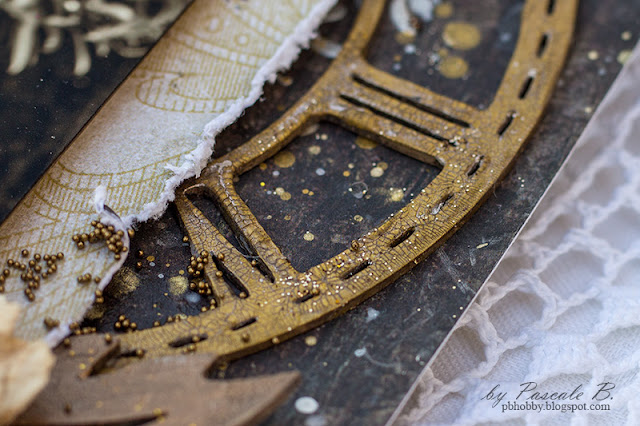
In the meantime, I painted the Roman Clock with a gold acrylic paint. When dry, I added a coat of clear crackle paste and let dry naturally. I added some rust mica powder to darken the crackle as well as some pale silver mica powder to lighten the clock face.


First I embossed the Stillness title with the mushroom embossing powder. While the powder was still hot I sprinkled some pearl embossing powder as well.


I primed the Arching Leaves with white gesso, then I painted it with a rust mica powder. Then I added a coated of clear crackle paste.


When all the embellishments were glued, I added some micro beads.

Blue Fern Studios products:

Papers: Timeless (Abode, Main Street)
Chipboards - Roman Clock Set - Small ; Arching Leaves ; Peaceful, Stillness, Contentment
Imagine Ink - Embossing Powders (Musrooms, Pearl) ;
Imagine Ink - Glitters (Foll's Gold, Pyrite).

------------------------------------

I chose to work with the Tranquility collection again for my third layout.


I primed the background with clear gesso. Then I added a design with a stencil and clear crackle paste: I covered randomly the stencil with two chalk inks before applying the crackle paste through it.


While the crackle paste was still wet I sprinkled some Pyrite and Blue Ice glitters.


I sprayed all the chipboards with two inks: a brown and a teal and dried them. Then I added the same chalk inks I used previously with the stencil, sprayed some water.


I kept the Floral Garden Bits like this and I covered the Layering Stems with Glossy Accent.


I die-cut some leaves in the Jubilation paper and I colored the flowers lightly with a beige watercolor.


Blue Fern Studios products:

Papers - Tranquility (Blissful, Jubilation) ;
Chipboards - Floral Lattice Bits, Layering Stems ;
Imagine Inks - Glitters (Pyrite, Blue Ice).

Saturday, July 23, 2016

July's inspiration by Pascale

Hello Sweeties,

Today I'm up on Blue Fern Studios blog with three new projects. The first two features the Timeless collection.

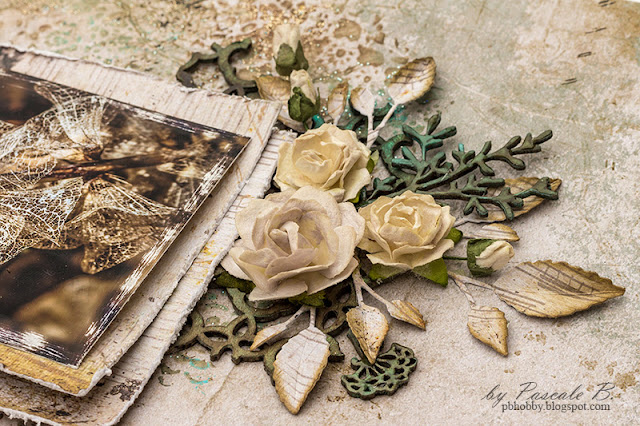
I take th photo of the Astrance in the garden of the castle of Chaumont-sur-Loire (Loire Valley, France)


First I primed the Song paper from the Timeless collection with clear gesso. Then I added a design with a stencil and 3D Gloss Gel.


When dry, I added some color in green and burgundy to match the photo. I splattered a mix of Merlot glitter, gel medium and water as well as white gesso. I added also a design with the Postal stamp and the Ginger embossing powder.


I primed the Wild Flourish Bundle with white gesso before coloring it with watercolor. I sprinkled the leaves with Verdant and Lime embossing powders to add some texture.


I primed the Persian Ornement with clear gesso and covered it with a clear crackle paste. When dry, I used two mica powders to color it.


To finish, I added some random stamping with the Halftone stamp.

Blue Fern Studios products:

Papers - Timeless (Song, Freedom) ;
Chipboards - Wild Flourish Bundle, Persian Ornament ;
Stamps - Journey, Haftone ;
Imagine Ink - Embossing Powders (Verdant, Lime, Ginger) ;
Imagine Ink - Glitter (Merlot).

------------------------------

I also use the Timeless collection for the second layout but as you can see the result is really different. I take this photo during an street event we have recently near the place I live. This clown is called Lullaby and the show was so entertaining.


I cut in the Freedom and Main Street papers from the Timeless collection some squares that I glued on the background with a soft gel. When dry I covered everything with clear gesso.


Then I added a design with a stencil and a white crackle paste. I let dry naturally before coloring the background in various shades of brown and green.


I primed all the chipboards with clear gesso The title Glee was just paint in green. The Chelsea Vines were painted in brown, then sprinkled with two shades of green embossing powder.


I covered the Mod Squares with the Rust Effect Paste and splattered them with the same green watercolor I used on the background and the title.


Before gluing all the elements, I stamped randomly the background with the Making Plans stamp.


Blue Fern Studios products:

Papers - Timeless (Couture, Freedom, Main Street) ;
Chipboards - Mod Square, Chelsea Vines, Serendipity Words 2 ;
Flowers - Tranquil Blooms ;
Stamp - Making Plans ;
Imagine Ink - Embossing Powders (Fern, Grassy Knot).

------------------------------

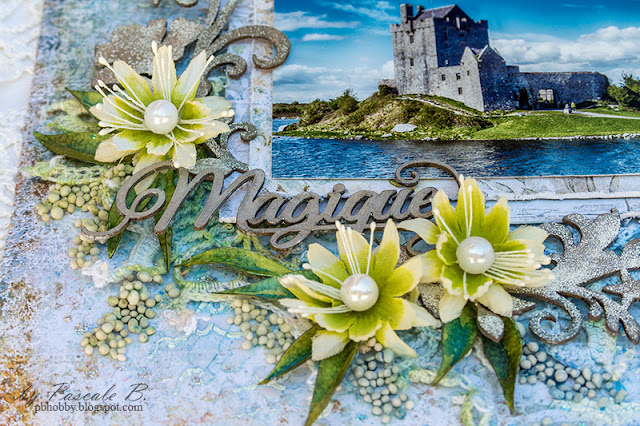
Here is my third project:  I chose a photo of the Duncaire Castle situated on the shore of Galway Bay (Kinvara, co. Galway, Ireland) and the new collection Seaside Cottage was just the perfect choice.


I started to prime the background with clear gesso before adding a design with a stencil and 3D gloss gel. When dry, I added a second design with another stencil and white crackle paste.


I primed the chipboards with clear gesso. I painted the title Magique from the French Adjectives 2 set with a silver watercolor as well as the Seaside Flourish. While the watercolor was still wet I sprinkled some Icicle embossing powder.


I colored the background with different shades of blue and green. Then I mixed some Silver Prism glitters with water and gel medium and splattered the mix on the background to remind the reflections in the water. I repeated the process with the Blue Ice glitters. 


After having glued all the embellishments, I added some stones to remind the ones in the photo.


Blue Fern Studios products:

Papers - Seaside Cottage (Calling Cards, Whitewash)
Chipboards - Seaside Flourish, French Adjectives 2
Flowers - Tranquil Blooms
Imagine Ink - Glitters (Silver Prism, Blue Ice)
Imagine Ink - Embossing Powder (Icicle)