Showing posts with label Boston Lattice. Show all posts

Wednesday, August 5, 2015

Winner, Winner - and some amazing featured layouts!

Hello everyone!  It's time to announce the winner of our July Sketch Challenge, and to feature some amazing layouts.  We love to show off how you use Blue Fern products.

We will begin with this month's winner, selected by a random draw.........and the winner is entry #7,  created by Alison Bevis of Australia.

Congratulations Alison!  As the winner, you will receive a package of Blue Fern Studios chipboard.  Please send me an e-mail, within the next 7 days, to {valerie(at)bluefernstudios(dot)com} to claim your prize.

Here is the lovely layout Alison created for our July Sketch Challenge using paper from the Sanctuary Collection.  She also used several chipboard pieces - Smile, as her title, Seaside Frame, Checker Bits, and Circle Links.


We are always pleased to feature a few layouts from those that were submitted for the challenge.  You all spend so much time creating layouts for us, and we want you to know how much we look forward to seeing you use our patterned paper, chipboard and stamps!  Of all the amazing projects, here is a selection of 5 layouts that we would like to feature this month.


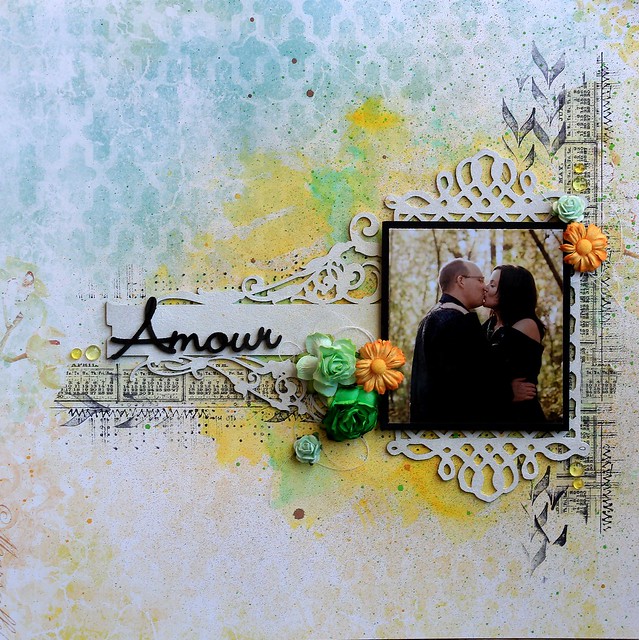
The first feature this month was created by Taru Jehkonen of Finland.  Aren't theses colors beautiful?  We love how Taru began with a sheet of paper from the Ombré Dreams collection, and created this stunning background.  The frame is from the Splattered Circles set, and the title is one from the Laughter, Happy, Smile set of words.  


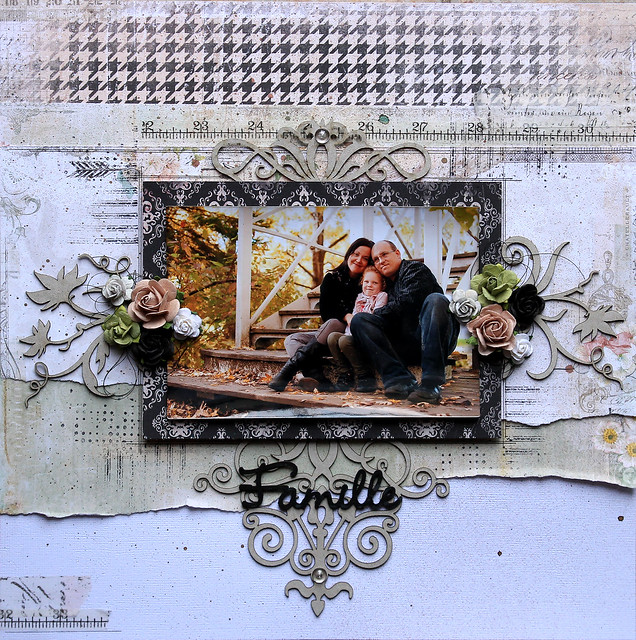
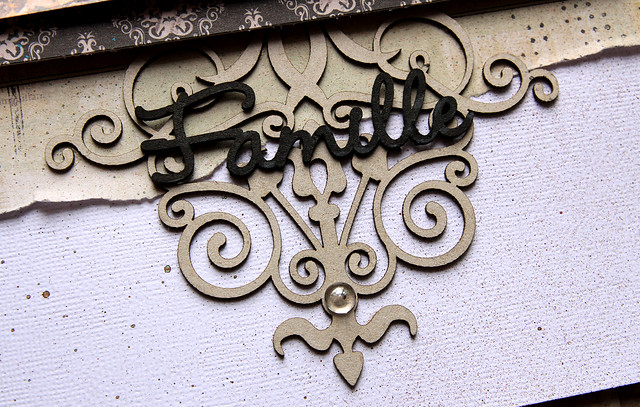
Marie-Eve of Canada also used paper from Ombré Dreams for her sketch layout, which features some amazing touches of gold!  She used a circular frame on her layout (Graduated Circles), Shabby Brick Bits, and the title is from our French Words chipboard set. 


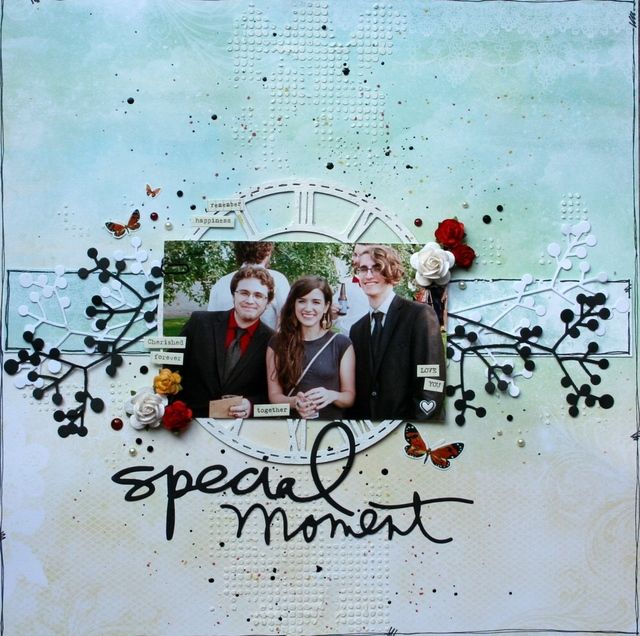
We immediately fell in love with this one from Rae Moses of the US.  The Boston Lattice chipboard piece is the perfect back-drop for this sweet photo.  The paper is from the Dejá Vu collection.  We love the addition of the scalloped border. 


 The next feature this month also has a scalloped border and striking black accents.  This stunning layout was created by Connie Hall of Canada using paper from the Montage collection.  The Heaven Sent chipboard title, from the Spiritually Speaking set,  couldn't be more perfect with such a sweet photo.


And last, but not certainly not least, is this layout from Joanne of Canada, who has used another sheet from our Ombré Dreams collection.  The simplicity of this one is what caught our eye.  It really lets the photo shine!


That wraps up our July Sketch Challenge.  Thank you to ALL who participated.  
We sure hope you will be back creating with us this month.  You can see the August sketch challenge by clicking on the link on our sidebar.  Have a great month!

Sunday, April 19, 2015

April Projects by Angelica Franssen

Hello all! Today I'm here to share my April project with you. I made three layouts using the gorgeous new collection Deja Vu. The papers are designed beautifully and the colors are so sweet! I really love the soft tones of the purple, yellows, and green.

My first layout is based on April's sketch. I used the Friperies paper as  my background and used Tresors as my accents layers. The title "memories" is from the Petites Cartes papers.

For the chipboard pieces  I used Boston Lattice and Mesh Bits. I first painted with gesso and sprinkled lightly some cleat UTEE. Heated until the UTEE is melted then sprayed with mist.
 I also used on of the new pieces that coordinate with the Deja Vu Collection. This one here is a piece from the Deja Vu Dangle set.

For this page I used the La Plume paper as my background. Then tearing and layering on top I used the Un Voyage A Paris paper. I took a piece of the Luminaires paper to run down my page.

I used gesso and  paint on the Chelsea Vines. Then sprinkles some colored glitter glass on the tip of the leaves.
 For the title I used the word Delight from the Delight Set.
 This lovely lamp post is also new to coordinate with the Deja Vu Collection. This one is called Luminaires. It comes in a set of two and I used the larger on a previous layout I made.

The soft green color in the papers is one of my favorite shades of green. I used the Atelier paper as my background then layered  Tresors. I fussy cut some images from the Friperies and Petites Cartes papers.

This is another piece from the Deja Vu Dangle Set. I painted with gesso, misted, and lightly dabbed some distress glitter to finish the piece.
 Here I used the Small Roman Clock. I used the same dressing as above.
Thank you for taking the time! I hope I've inspire you to get the Deja Vu collection. It's one that you should have in your stash! :)

Sunday, March 1, 2015

March Sketch Challenge

Really? Could it be March already?  Well, that's what the calendar says so that means our sketch designer, Michele Singh, has a brand new sketch for you! 


 I love the beautiful chipboard frame (Keepsake Frame) on this month's sketch, but as you will see below, you don't HAVE to use a frame on your layout.  Our Creative Team interpreted the sketch in several different ways.  

Keren Tamir used a frame from our Ever After Frame Set


Zaneta Glowa used layers of beautiful Love Story paper under her photo, instead of using a frame. 


Yuko Tanaka rotated the sketch and used our Boston Lattice chipboard piece behind her photos.


Melinda Thompson used paper from the Sanctuary collection for her layout and she also chose to layer paper under her photo.


 The 4-piece Memory Frames Set is very popular and is what Karita Vainio used for her sketch layout.


We have many chipboard pieces that can used as a frame.  Kim Price framed her photo with the Roman Clock and added some Blue Fern flourishes. 


Marie-Josee Hamel's background paper is from Ombre Dreams.
Instead of a frame, she let patterned paper in a contrasting color, frame her photo.  

Blue Fern title

Mini Ring Things chipboard set


What's next? 
One lucky winner, selected by a random draw, will receive a prize package of Blue Fern Studios chipboard!

In addition, we will also select 3 (or more) layouts to feature.
We have just a few simple rules to follow if you would like to participate in our sketch challenge:

1.) Feel free to interpret the sketch as you please by means of taking it as-is or 
flipping/turning/mirroring it to suit your needs! 

2). Please note that you can do whatever type of project you please - a layout, card, 
  canvas, altered item- whatever suits your mood and style! 
We would love to see the different ways our sketch can be used.

3.) You must use at least one piece of Blue Fern Studios chipboard OR use Blue Fern Studios paper on your project. Please note that you do not need to use the pieces featured in the sketch
- use whatever suits your fancy! You can find the store nearest you HERE.
 {Do not use any other brand of chipboard on your project please!}

4.) Upload your project using the Inlinkz tool below by midnight EST on March 31, 2015

We look forward to seeing how you use our sketch and Blue Fern products!

Thursday, February 19, 2015

Love Story with Angelica

Hello friends! I'm happy to be here today to share three layouts I created using the beautiful new collection, Love Story. This is collection is so pretty and versatile. Some of the papers have vibrant bold colors and others are more subtle. Good for those shabby pages!

My first layout is based on the February Sketch. I used the lightest paper, The Grand Ball, for the base of my page and the Calling Card paper. I did some masking and used the little stars on the Forever Stamp for some texture.

I painted the Boston Lattice, Love, and Heart Set with heavy gesso. For the negative part of the heart I stamped with the Texture Stamp 1 when the gesso was still wet. It left a nice impression of the honeycombs. Once all the pieces were dry I did some misting for some color.

 
For my second page I want to use a whole different color combo from the sketch page. The reds and greens in the True Harmony paper is gorgeous.  I also used the Twenty One paper for layering. I painted the Brick Panel chippy with gesso and stucco paste. Then rubbed some ink on the raised texture.

 For the Cherish chippy I just painted it red and added glitter so it can pop from the page.


Finally, for my third page I've been waiting for the perfect time to use the Brown Eyed Girl Chippy.
The colors that I had in mind worked just right with the Sweet Song, Concerto, and Calling Card papers. I cut a bit off the end of the Beaded Strings chippy.


Thank you for visiting! I hope that I've inspired you!
 
♥♥♥ Angelica~

Friday, February 13, 2015

Two layouts with the Love Story collection by Marie-Josée

Hello all!

I am happy to be back today to share two layouts made with the latest Blue Fern Studios paper collection, Love Story, as well as my sketch layout. Here they are!

"Famille" layout

For this layout, I used white cardstock as a base. Then, I tore the Grand Ball paper from the Love Story collection in two and used each side on my layout. I also added a piece of the Concerto paper at the top.

Here's a little trick: on this layout, I used two different chipboard that I cut in half.

Here's the Britannia Flourish (above and under my picture):


The title, Famille, is from the French Words set: 


And here is the Wild Flourish Bundle (on the left and right sides of my picture):


"Love Story" layout

Here's my second layout with the Love Story collection. I used the Twenty One paper for my background. As you can see, I used the "Love Story" words from the strip of paper we always cut and toss to create my title.


To frame my picture, I used a piece of the Lace Rounds set. Under it is the Symphony border. Both were altered with black spray ink


I cut a small piece of the Symphony border to put on the left side of my layout.


Sketch layout

And finally, here's the layout I created for the sketch challenge back at the beginning of February.

I used a paper from the Ombre Dreams collection to create my background, the Ginger's Dream paper.
 

Then, under my picture, I added the Boston Lattice chipboard. I altered it with gesso.


Then, on the left, I used the Fancy Signage chipboard, also altered with gesso, and on top, the word Amour from the French Words set.


Saturday, December 20, 2014

Sanctuary Projects with Rae

Hello all. It's Rae, sharing my last projects for BFS! It's been an exciting year for me, and I feel so honored to to have been a part of this team! I made all of these projects with the Sanctuary paper collection.


"Remember" Layout


This is my layout that I made for the December Sketch Challenge. You still have time to play along!

I am absolutely obsessed with cemetery statues. I took these pics a few months ago at a huge cemetery here in Denver, and I knew they would be perfect for the Sanctuary papers!

Here's a closeup of two pieces of chipboard that I layered (the ornate frame and a piece of the small Roman clock set). On the ornate frame, I used embossing powders and chalk ink to get that effect. I pressed my black archival ink pad on the clock piece, and used some gold paint.

Untitled Layout

I love all the rich colors in Sanctuary collection and how they are paired with such soft complimentary colors, so I wanted to play with all of them for this layout.


Here's a close up of the small spring iris piece. I treated it with a heavy layer of gesso, then randomly sprinkled clear embossing powder over it, and dried it with a heat gun. Once dry, I used some acrylic glaze paints and water to get this effect.

You can also see the Boston lattice- nothing fancy there- just a coat of gesso!

I used some of the Bohemian flowers from that set under the flower cluster, along with a key from the vintage key set. I used a platinum embossing powder and once it was hot, I pour small amounts of black embossing powder over it, so it only slightly melded on to the platinum.

I used the same technique on the manor hinges.


"Smile" Card

For this card, I used the Bordeaux Layered Frame. I traced the bottom piece on to the Conservatory paper, then adhered it to the chipboard, and filed the edges for a clean look.


 In this close up, you can see the top layer of the frame- I used several colors of embossing powders, layering them to achieve this effect.

I did the same thing with the "Smile" title. 


I hope you enjoyed taking a peek at my projects today, and this past year!

Congrats to the new Blue Fern Studios design team- it's going to be an amazing year!


Rae