Happy 4th Of July!!! I hope this Independence Day finds those of you who celebrate, enjoying time with your family and friends, and enjoying so many of the freedoms that we as American's have.
Today, I am celebrating my freedom to create in three different styles. First up is a Shabby Chic layout that I created using the Blue Fern Studios Courtship Lane Paper Collection.
I started with a layer of Blue Fern Studios Courtship Lane~Main Street Paper, and then layered on another layer of Courtship Lane Bourbon Avenue Paper, that I did some stenciling with texture paste, corner rolling and distressing on. I then added a layer of lace and then took more of the paper collection and created a matte for my photo.
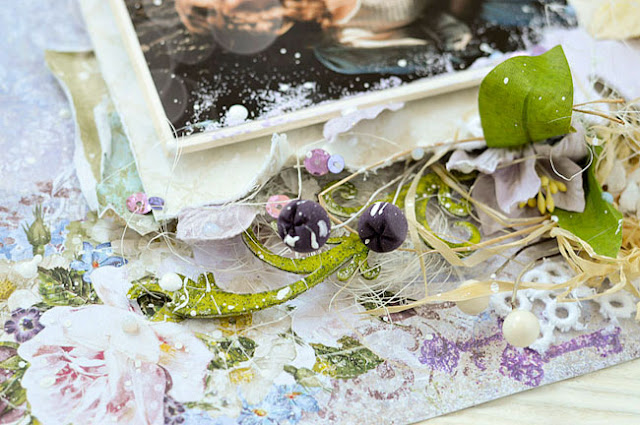
At the corner of my photo, I took a Blue Fern Studios Courtship Violin Chipboard Piece, and crackle painted the violin portion of the piece, letting it air dry to get a deep crackle finish, and then I rubbed different layers of purple and lavender ink over the top to bring out the textures.
I then colored the greenery part of the piece with markers, and then used an embossing ink dabber to randomly add in, and coated it with some Imagine Ink Sage Embossing Powder to get a raised two tone surface.
I then added some mulberry flowers, a daisy from the Blue Fern Attic Charm Flower Collection, some burlap string bows and a sweet metal heart.
Next, I took some Blue Fern Garden Lattice Bits, coated them in embossing ink, and then coated them with Imagine Ink Mystic Purple Embossing Powder, heat set the powder, and added on some pearl accents, and placed the bits randomly around the edges of my layout.
I added some more mulberry flowers to the top lattice piece along with some a matching burlap string bow. To top my piece off, I added in some of my handcrafted Dragonflies for dimension.
Here with this side shot, you can see all the dimension and texture that those amazing Blue Fern Products can help you create!!
Blue Fern Studio Supply List:
Paper:
Courtship Lane~Main Street
Courtship Lane~Bourbon Street
Chipboard:
Courtship Violin
Garden Lattice Bits
Imagine Ink:
Mystic Purple Embossing Powder
Sage Embossing Powder
For my second project this month, I wanted to create something with a bit more of a grunge feel to it. I love playing with color and inks, and sometimes like to challenge myself to create without using flowers or the more feminine embellishments that most work that I see contains. It challenges me to step outside the box and to be more creative, and I love that the Blue Fern products allow me to still create something amazing and visually stimulating without having to grab a package of flowers, or any fluff.

I started with a layer of Blue Fern Tranquility~Calm Paper, and then layered on a second layer of Blue Fern Tranquility~Patience Paper, tearing the right side, and heavily inking that edge, then layered on a 3rd layer of Blue Fern Tranquility Serenity Paper, that I distressed and inked the edges on, and then tore and heavily inked the right side edge, layering it over the 2nd layer, so that the 2nd layer so that it peeked out, then layered in some film strip transparencies. I then used texture paste and a stencil to create the raised texture on the paper, spraying it with 3 different layers of spray stain to capture the colors I used in the layout.
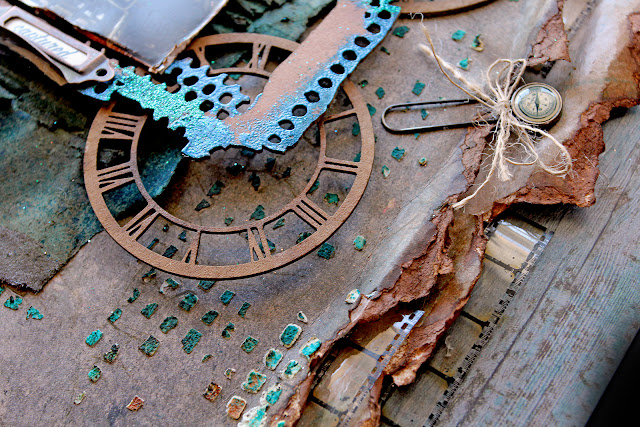
I created a background layer by taking corrugated cardboard and spraying it with 3 different layers of spray stain, and then inking the edges. I grabbed a Blue Fern Grunge Frame,
and first stained it with a brown color, then used a clear embossing ink dabber randomly, added coated it with Imagine Ink Seven Seas Embossing Powder, and heat set it, then randomly dabbed with the clear ink again, coated it with Imagine Ink Peackock Embossing Powder, heat set it and then inked back over the whole piece. I then distressed and inked the edges of my photo and added it on.
The clock pieces are Blue Fern Small Roman Clocks that I stained and layered in.
Here you can see all the dimension of all the layering in that I did with the gorgeous Blue Fern papers and embellishments.
The "Story" piece o my layout is a chipboard piece from the Blue Fern~Story, Fairytale, Magic Set. For this piece I inked it in 2 different colors, randomly dabbed it with an embossing ink dabber and then coated it with Imagine Ink Copper Embossing Powder, and heat set it~YUM!!
For the finishing touches I rolled some of the paper scraps and tied them with burlap string bows, added some More of the film strips, a paper button and some metal accents. I just love those blues and browns in the Tranquility line, so bold and so perfectly grungy!!
Blue Fern Studios Supply List:
Paper:
Tranquility~Patience
Tranquility~Calm
Tranquility~Serenity
Chipboard:
Small Roman Clocks
Grunge Frame
Story, Fairytale, Magic Set
Imagine Ink:
Seven Seas Embossing Powder
Peacock Embossing Powder
Copper Embossing Powder
For my final project this month, I decided to do a Mini Album with a Magical Fairy Theme using the Blue Fern Studios Attic Charm Paper Collection:
I used a gate fold album that was perfect for using the Blue Fern Royal Gate Chipboard to create a piece where the gate actually opens. The cover was layered with Blue Fern Attic Charm~Haberdashery Paper.
A Side View.
I did a crackle finish on the gate and then heat embossed it with Imagine Ink Pearl Embossing Powder, and then over inked it with a gold color.
The edges of the album are coated in a pink Glitter Glass. The "Magic" piece is from the Blue Fern Story, Fairytale, Magic Chipboard Set. I heat embossed the piece with a mixture of Imagine Ink Honey & Buttercup Embossing Powders, and then went over the edges with some green ink to highlight it.
I added flower and feather details. The Daisy, and small green flower are from the Blue Fern Attic Charm Daisies and Courtship Blooms Flower Collections.
When you open the right side of the gate. you are greeted with a Blue Fern Attic Charm Calling Card.
When you open up the whole album, it folds out to a large sectional that is layered with Blue Fern Attic Charm~Curio Paper, lace and a large Blue Fern Gazebo Chipboard Piece that I painted white. The edges are done out in Imagine Ink Blue Ice Glitter.
Page 1 and 2 are covered in Blue Fern Attic Charm~Spring Posy Paper, with pockets created from Attic Charm~Foyer Paper, along with 3 pull outs and a booklet piece created from the Attic Charm~Calling Cards Paper. Details include: lace and a sweet bunny from the Blue Fern Chipboard All Natural Set that I painted white.
Pages 3 and 4 feature Attic Charm~Foyer Paper, and a Blue Fern Attic Stairs Chipboard Piece that I heat embossed with Imagine Ink Oatmeal Embossing Powder.
Pages 5 & 6 feature Attic Charm~Generation Paper, and have to heart doily accents.
Pages 6 & 7 are covered in Attic Charm~Generation Paper, and lace.
Pages 8 & 9 are covered in Attic Charm~Attire Paper, and the page 9 features a Blue Fern Lace Round Chipboard Piece that was heat embossed with Imagine Ink Sage Embossing Powder.
Pages 10 & 11 feature Attic Charm~Calling Card Paper, with Calling Card Cut Outs for accents, along with a garden fairy die cut and a wildflower from the Blue Fern All Natural Chipboard Set that I colored the stem with a marker and then inked the flower head on.
The last set of pages gives you this fold out appearance that matches the the very 1st fold out section using Attic Charm~Curio Paper.
The back of the album is covered in Attic Charm~Spring Posy Paper with the edges finished out in glitter glass.
I hope that you have enjoyed all of my projects this 4th of July, and that you find the time to to grab some of those YUMMY Blue Fern products for yourself, and celebrate your freedom to create!! Hugs ~Renea
Blue Fern Studios Product List:
Paper:
Attic Charm Papers~
Attic Charm
Haberdashery
Curio
Spring Posy
Foyer
Generation
Calling Cards
Attire
Chipboard:
Gazebo
Royal Gate
Magic (from Story, Fairytale, Magic Set)
Bunny (from All Natural Set)
Attic Stairs
Lace Round
Wildflower (from All Natural Set)
Flowers:
Attic Charm Daisies
Courtship Blooms
Imagine Ink:
Embossing Powders:
Breeze
Pearl
Sage
Honey
Buttercup
Oatmeal
Imagine Ink:
Blue Ice Glitter


