Showing posts with label Berry Stems. Show all posts

Monday, November 16, 2015

Goodbye fall, welcome winter !


It becomes serious now, winter is coming up .
Well, in Switzerland it does...
A lot of snow coming this way.
With this in mind I remembered this lovely picture I wanted to scrap for some time.
The Vintage Winter collection can be used for non related Christmas themes, 
 as you see on my winter scene layout.

My idea was to keep the page simple in the colors of the picture.
I added gesso and misted the page over the wet gesso.
Stenciled snowflakes here and there .


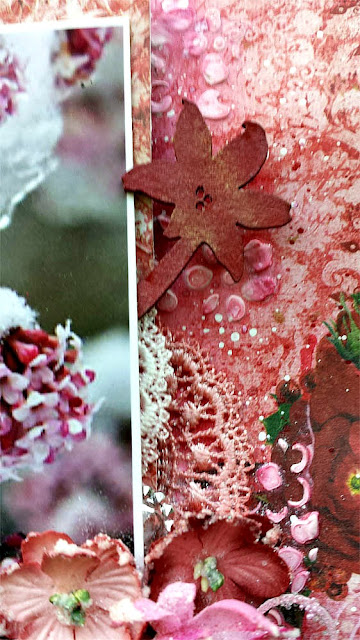
The Berry Stems did get two coats of gesso, just dabbed on.


For the beautiful snowflake dangle I first gesso the chipboard .
In the wet gesso I sprengled some good old fairydust .
I did the same on the bird.


The title stamp FRAGILE comes from Blue fern too.
It is on of the stamps from the Postal textured stamp set


Thanks for visiting the blog
x Wilma x


Vintage Christmas With Debbie

Hi everyone!  Debbie here with you today sharing 3 layouts I created with the new Vintage Christmas paper collection!  This is such a beautiful paper collection.    

My first layout features the Deck The Halls paper.  Beautiful hues of reds and pinks! I layered underneath my photo with the Noel paper.

I used 4 different chipboard pieces here, Blooming Curls, Royal Border, Classic Ornament and Twinkle from the Winter Titles.  I misted the Royal Border and Classic Ornament with the Imagine Ink Cotton Candy Mist and added some micro beads.  I painted my title dark red and added some of the Petal Embossing Powder.

 When using the Blooming Curls chipboard, I cut it apart and used it in three different places on my layout.  I also cut the Classic Ornament piece in half and used in on the top and bottom of my photo.

Another piece from the Blooming Curls shown here.

My next layout features Auld Lang Syne, Noel and Wonderland papers.  I primed my background with some clear gesso and did some random masking.  Then I added some Imagine Ink Cotton Candy Mist.

Love this old photo of my grandfather !  I cut apart the Holiday Frame chipboard and added a piece to the bottom of the photo that I misted with the Imagine Ink Winter Mint and Jingle Bells mist and then added some micro beads.

Tucked beneath the pink rose is another piece from the Holiday Frame chipboard.

Here I used a piece from the Damask Panel, misted with Imagine Ink Winter Mint and Jingle Bells.

Love the details in the Winter Sleigh chipboard.  I covered it with gesso and then added some Pyrite Glitter.

My final layout was created using the  November sketch.
I used the Auld Lang Syne, Noel and Wonderland papers.  After adding some masking to the background, I misted with the Persimmon and Jingle Bells Imagine Ink Mists
 
My title Magical is from the Winter Titles.  I painted it white and then randomly sprinkled it with Pyrite Glitter.

Pieces of the Berry Stems chipboard are placed with my flower clusters.  I pained the stems brown and added  Phoenix Glitter.

On each side of my photo I used The Holiday Vine Chipboard which I painted brown and added Phoenix, Pyrtie and Fern Glitter.

                       
I hope you have enjoyed my layouts.  Don't forget that you still have time to enter our November Sketch Challenge.  You can find all of the details here.

Thanks for stopping by!
. . . Debbie

Monday, September 21, 2015

Autumn Anthology with Bente.

Hi, it's Bente here with a couple of layouts to share using the latest gorgeous 
paper collection Autumn Anthology. 
It is simply a mixture of stunning designs and some of my most favourite colours.

Here is my first page with the collection:


Did you know that Blue Fern Studios now even carry mists? There will be new mists with each collection and I used two of the new colours here; Imagine Inks Leaf and Sky.


I painted the chipboard title-words a neutral beige colour and decorated with some micro beads.
I used  the stunning  Jackie's Window to ground my design and this one is also painted with a mix of acrylic paint and some green mist. After it dried I went over the edges with a small chalk ink pad.


As you can see I  used some of the new stamps on my page. 
I used all three designs from the Essential Textures set. 
I cut out the banner that you can see under the chipboard from one of the calling cards.
The title is made of a couple of words from the  Chunky Words set.


To make my flower cluster complete I added a few small chipboard twigs called Berry Stems. 
I love the brown colour they were painted and the delicate look of them. 


Ok, now for my second page for today:


 Another beautiful sheet from the Autumn Anthology collection
I actually fussy cut a part of one paper and added it on top of this blue one, (in case you go looking for a paper that looks like this :-D)


I used the Royal Heart Frame to surround the photo on top of the layers of paper and calling cards.


After I painted the heart frame a suitable colour I heat-embossed it with gold using one of the same textured stamps as above. I think the look is really neat!! 


I added a few bits and pieces from the inside of larger chipboard pieces. 
I find these are good to hold on to as they can be really useful.


 As you see from the shot here I have added quite a lot of media to my layered papers. 
I added different beads as well as glitter gel, paint, gesso, and ink. 
There is a certain shimmer to the page that does not come through in the pictures.

Finally a little reminder that there's still ample time to join in our sketch challenge for September.
Below is a picture of the sketch and a page I made as an example.


You can read ALL bout the challenge HERE.

Thanks for looking!

Friday, September 4, 2015

Two New Scrapbooking Layouts Featuring Frolic and Paisley & Vine by Kim Price

Hello again everyone! I'm back up on the blog today to share a couple of new projects created using the brand new collections, Frolic and Paisley & Vine. I'm such a fan of Blue Fern Studios products and these two new collections do not disappoint - they are simply stunning.


My first layout today showcases the beauty of Frolic - a gorgeously feminine collection. I've used Frolic Allegro patterned paper as my base, adding layers of fussy cut flowers and paper ribbons taken from Amoroso.


In between my paper layers I've arranged Aloha Flourish chipboard having painted it up in coordinating colors of carmine, mustard and green, then added my Always and Forever sentiment on top.


My second project for today features papers from both Frolic and Paisley & Vine.

I've used Paisley & Vine Bohemian patterned paper, adding a light coat of paint to soften the design and a few splashes of mist around the edges for effect.

When my background had dried I added layers of cut out designs from Paisley & Vine Vineland patterned paper along with a floral design taken from Frolic Veranda. The frame in the center of my design can be found on Paisley & Vine Playing Cards patterned paper.


I've then added the two floral chipboard pieces Paisley & Vine Flowers adorning the left of my design, giving them a watercolor look in coordinating shades of blue and green. I've gone ahead and tucked a piece from Berry Stems behind one of the paper layers, and used a title from Wish, Wonder, Dream.

Sadly this is my final post for Blue Fern Studios as I am currently on a year long trip away from home with my husband and I am unable to keep up with my scrapbooking commitments. I absolutely love Blue Fern products and know they will continue to go from strength to strength.

Thank you for allowing me the privilege of being a part of this amazing team.


-Kim Price


Wednesday, March 4, 2015

Two New Layouts by Kim Price

Hello everyone, it's Kim here today and I have a couple of new projects to share featuring some of my favourite Blue Fern Studios products.


My first project is a dimensional layout created for a frame to be hung on the wall. I've used patterned papers from Montage - this collection truly takes my breath away every time I create with it - and some stunning chipboard pieces to showcase this photograph of a friend's daughters.


I've used the largest clockface piece from the Large Roman Clock Set which really set the scene for the rest of the layout. I simply gave this piece a coat of gesso then added some color with an off white shade of acrylic paint and added some watercolor in a shade to coordinate with Montage. The final touch was to add some chalk to give it a real vintage feel.


Adding the chipboard clockface to my custom made background I then went ahead and cut out some of the designs from my Montage patterned papers layering them up with some dimensional dots along with a few of the pieces from the Cogs & Gears set and lots of flowers. The two large butterfly images are photographs from my personal collection. Because this piece is intended to be hung on the wall I have chosen not to give it a title but to instead let the project speak for itself.


For my second project today I've created layout featuring the Sanctuary collection. The soft muted colors in Sanctuary remind me so much of time spent with nature and I've used a favorite snapshot of the girls taken when we were on a bushwalk in Australia and came across an unexpected waterfall.


I started out with a torn and tattered sheet of Meadows Of Time patterned paper, layering it over the dark side of Bountiful patterned paper and adding the fussy cut birds image from Birdsong Melody.


I've then give the largest piece from Mesh Bits, two Berry Stems and the "joy" sentiment from the Good Vibes pack a coat of gesso allowing them to thoroughly dry. A touch of watercolor really takes chipboard to a whole new level and I'm really loving how the Berry Stems have turned out using this method.


To help the "joy" sentiment stand out from the rest of my layout I've highlighted each letter using a fine black Sharpie, added some sweet little flower blooms and a scattering of sequins to finish off.


Thanks for calling in today, I hope you have enjoyed my projects for March and I look forward to calling in again next month.


Saturday, August 9, 2014

A layout, a mini album and a tag trio...

Welcome back to another beautiful day at Blue Fern Studios. Today I will share with you a layout, a mini and a trio of tags.
For all 3 projects,  I used Blue Fern Studios Ombre Dreams paper. I did some masking with molding paste and some inking on the background of my layout.


To color the Wild Field Stem, once again, I heat embossed it using a few different colors from Lindys Stamp Gang. I heat embossed it twice to get 2 different colors on the flower part and let some of it bleed into the stem.


For the Majestic Frame, I heat embossed it and added a couple of jewels, then just kissed the edges with some soft charcoal ink.


For the cover of the mini, I used a couple of the Berry Stems and the Memories frame from the Memory Frame Set.


I painted the frame and the Berry Stems with white gesso, then heat embossed it using Lindys Stamp Gang embossing powder.


The Circle Motif was heat embossed straight onto raw chipboard. I gave it  double coat for texture.


 For the tags, I used the Framed Trinkets set which contains all 3 pieces. I used cut out pieces from the Bits Of Honey set.


I coated the chipboard with white gesso and heat embossed them with Lindy's embossing powder.


Once the tags were complete, I gave them an overall spray with Lindys Starburst spray for extra color and shimmer.

I hope you enjoyed my latest creations. Until next time, grab some BFS chipboard. There are new designs being added to the collection all of the time. Enjoy...
Lisa
xoxo