Showing posts with label Number Grid- Large. Show all posts

Wednesday, April 8, 2015

April Projects by Melinda Thompson


Hi everyone :)

I have two new projects to share with you today using lots of gorgeous Blue Fern Studios products.
For my 1st layout I have chosen to use some Ombre Dreams papers...so so gorgeous! I have used Charlotte's Dream as the background paper with the Calling Cards as my layers.

"Baby Blues"


I have used the Roman Clock Set - Small and teamed it up with the gorgeous Tattered Butterlies and the word Baby from the Baby Words Set.


I have used lots of mists and inks to blend and tone my chipboard peices in to the colours of my photo and papers.


Products Used:
Paper: Omber Dreams - Charlotte's Dreams & Calling Cards
Chipboard: Roman Clock Set - Small, Tattered Butterflies, Baby


My 2nd project I decided to start with a plain white sheet of cardstock as I wanted to use the Number Grid - Large to be the focus of my layout.

"Smile"


Paper layers behind the photo are from the Sanctuary Collection.  I love that saying that is found on one of the Calling Cards.


I love these peices of chipboard from the Picture Perfect Collection..they are perfect for a fun layout.  I have again used many mists and inks with water to push the colour around on the chipboard.


Products Used:
Paper: Sanctuary Collection
Chipboard: Number Grid - Large, Smile, Picture Perfect, Negatives from the Jumbo Rings Panel


Hope you enjoyed my projects...
See you next month and happy scrapping!
Melinda :)

Wednesday, June 25, 2014

June colours with Jelissa

Hello friends! Thank you for dropping by :)
Today I'm in to share three projects I created for Blue Fern Studios, featuring the new paper collection Ombre Dreams and some fantastic chipboard pieces.

"Count the Ways"


The first is a layout I made of my big boy, with papers from Ombre Dreams collection.  The title came from one of the most popular love poems around - Sonnet 43 by Elizabeth Browning but I used it here to describe my love for my sweet and wonderful child.

Some close ups:


A frame from the Memory Frame set which I misted green. 


Counting the ways with the number grid chipboard panel, which I covered with black EP.


A piece of Layering Stem. Gosh, I love these! Just perfect for tucking into any little corner of my floral cluster.


A piece from Fall Foliage, also misted with green and gesso brushed on randomly. 

Blue Fern products used:

Ginger's Dream
Shannon's Dream
Number Grid - Large
Memory Frame Set
Layering Stems
Fall Foliage


"Follow Your Bliss"

My second project is a simple little card. In fact, I made a card instead of my usual LO because I wanted to use the chipboards as the main features. I layered sheets from the Ombre Dreams collection and layered water colours in pastel tones, careful not to hide the lovely details the papers have.

Some close-ups:


The Twilight Garden Frame. What a lovely piece! I used gold paint on the lamp and added a layer of crackle. For the rest of the frame, I coloured with gelatos.


I used "Follow your Bliss" word as my card sentiment, which I covered with some bronze embossing powder.

Blue Fern products used:

Leslie's Dream
Twilight Garden Frame
Follow Your Bliss

"Blue Skies"

My third project is a layout I created for this month's sketch challenge. If you havn't seen it, do take a look because Michelle has come up with another fabulous sketch. And to win a pack of gorgeous Blue Fern products, just create a project based on the sketch and link it up. It's that easy!

Here is the sketch again:


And my take on it:


I used "Susan's Dream" for my background. It has the most calming tones of blues and greens, with a tinge of orange which I have used to highlight certain elements of the page. I like to use a lot of mediums and thinner papers tend to warp with so much fluid sitting on it. But the BFS papers are so much heavier (and sturdier), my LO remained pretty much the same shape even when I was adding quite a fair bit of water to bleed the colours. If you love playing with mediums like me, you'll find the quality of BFS papers just perfect. 


A cut-out phrase from "Dream Cards". There are several elements that you can fussy cut out from this page and layer them on your project. I also used a gear and bird chipboards. 


Another phrase from "Dream Cards" layered on top of the Mini Ring Things chippie.


The Treasured floral frame chippie. Love the delicate vines and flowers on this piece!

Blue Fern products used:

Susan's Dream
Treasure Floral Frame
Mini Ring Things
Widget Works
Descano Gardens (bird)
Layering Stems

And here's a start to finish video I put together to show you how I did the background, as well as the various techniques I used to alter the chipboards. Sit back and enjoy the show, and do remember to play along with our sketch challenge this month!


That's all for today. Do check back at our blog again for more inspiration from the rest of the fabulous Blue Fern girls!

love,
Jelissa


Thursday, March 27, 2014

March Projects w/Erin Blegen

Hello :)

Erin Blegen here today to share my March projects with you. I always enjoy varying my projects each month, so today I have for you a layout, a card, and a tag...a little bit of something for everyone.

Let's get started :)

"Always"
The large panels available from Blue Fern Studios like this "Number Grid" one are so great for working with 12" x 12" layouts. I like to cut mine up and make them suit my design. 


I painted the panel white before randomly dabbing it with embossing ink, sprinkling with Stampendous "Shabby Pink Embossing Enamel", and setting with a heat gun. I love the pretty pink and textured bits splattered throughout the chipboard to mimic my background.

Blue Fern Studios Products Used:
Number Grid

"Different" Card

As like anyone who has ever used chipboard before, sometimes the raw look just suits the project best. Here I've used a few various pieces and have simply dabbed them randomly with a Prima white chalk edger pad before adding them to my project. Combined with some of the more subtle Blue Fern Studios papers, I created a neutral, monochromatic look which I love.


Blue Fern Studios Products Used:
Blue Fern Garden "Love Letters"
Blue Fern Garden "Calling Cards"
Checker Bits
Film Strips
Eclectic Hearts

"Love" Tag
 Sometimes downsizing a chipboard piece can give you exactly what you need for a particular project. Here I've taken the middle out of the "Helen's Doily" to beautifully accent this tag. Primed with gesso, covered with a Prima "Shabby Tote" chalk edger pad, and adorned with pearls :) The Blue Fern Garden "Picnic" paper was whitewashed with gesso to make it a little bit more subtle in order to achieve the look I was going for.


Blue Fern Studios Products Used:
Blue Fern Garden "Picnic"
Blue Fern Garden "Calling Cards"
Helen's Doily

That's it for me! I hope you enjoyed :)

Don't forget about our March Sketch Challenge- still plenty of time to play along!

Thursday, February 13, 2014

Two layouts with Blue Fern panels by Marie-Josée

Hello all,

Today, I will show you two layouts I created with the Blue Fern panels. I love the panels: they are great if you want to add texture and interest to your backgrounds. Here are two differents ways to use them.

Be sure to come back here on February 16th too; I'll be featuring a tutorial to show how to create your own mixed media background, again with a Blue Fern panel.

Without further ado, here are my layouts.

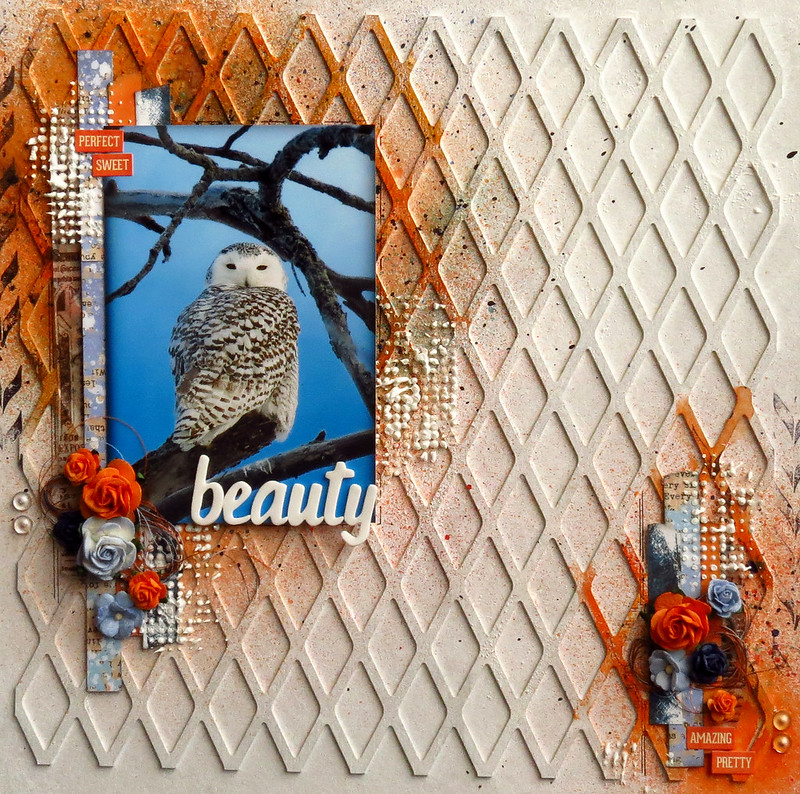
"Beauty" layout
 

Do you love birds and snowy owls? I do, and I am particularly lucky to have two hanging around very close to my house this year. I go see them almost every day and I take lots of pictures! :) Here's one that was taken at the beginning of February.

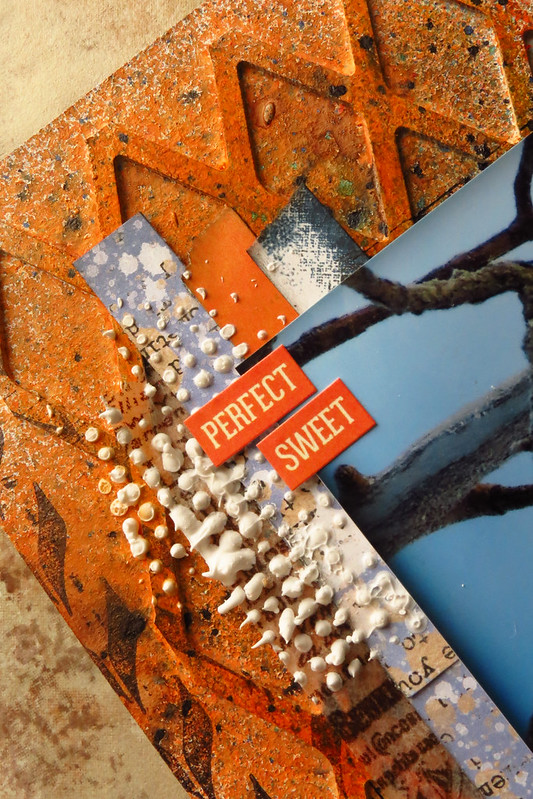
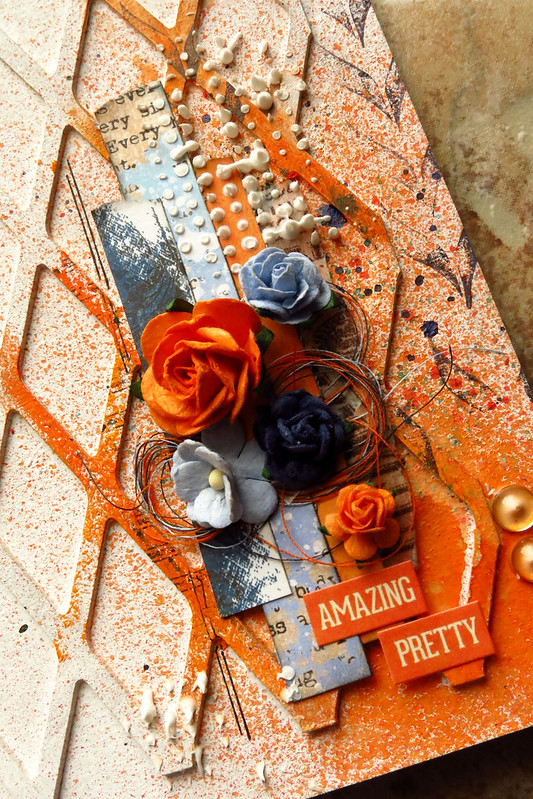
I used the Harlequin panel to create the background of this layout. I glued it to a 12 x 12 piece of chipboard and covered the whole thing with gesso.

First, I sprayed various mists in the opposite corners.


Then, I altered some parts of the chipboard with two different colors of Gelatos.


I also added a bit of texture with a stencil and modelling paste.


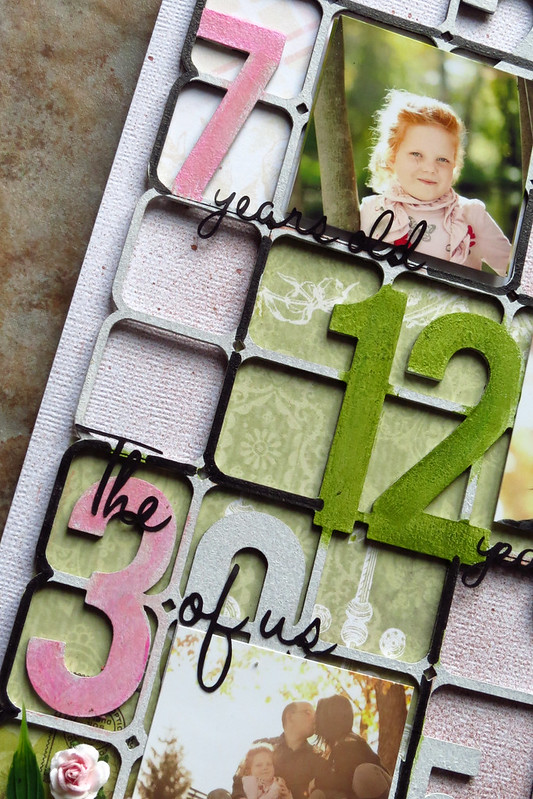
"Family" layout


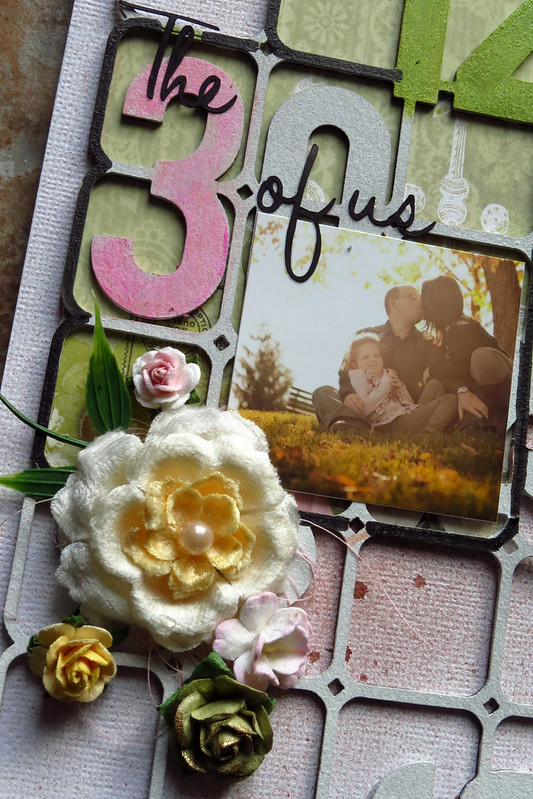
For this layout, I used the brand-new Number Grid panel, which was released in December. I used the big one, but there is also a smaller version.

First of all, I primed my panel with gesso and let it dry.


I chose a few significant numbers in the grid and colored them with Silks Acrylic Glazes to make them stand out. I then put the relevant pictures beside those numbers. I also used my Silhouette to cut some words and create phrases with my numbers.


Then, I used pieces of the new Blue Fern Garden papers here and there under the grid.


I also added various embellishments and words here and there.