Saturday, March 9, 2019

Two Kirigami Gift Boxes - Vicky Alberto

I am back to share a cute project idea - 6 x6 inch kirigami gift boxes. These are great for any time of year. I had fun playing with the Blue Fern's Heartland and Homespun collections, plus their gorgeous flowers, lace, adhesive shapes (that coordinate with the paper collections)... and of course chipboard (the clock is from the love story accents).


Here is a close-up of the first box...
The only thing used from my "stash" is a paper doily.


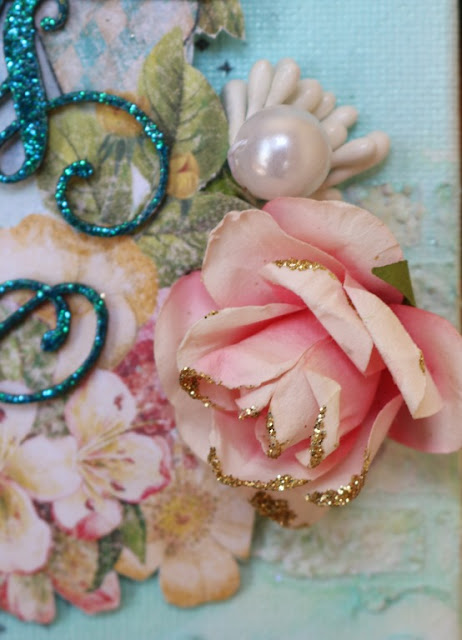
Here is a close-up of the second box...
On the clock chipboard (from the love story accents), I simply dabbed ink to leave expose raw chipboard showing. Sometimes less is more on some projects and a simple technique is perfect to suit the design style.


 Thanks for taking the time to view my projects today and you can find a kirigami gift box tutorial on my blog at:


Wednesday, March 6, 2019

Cards with the Homespun Collection

Greetings!Today I am here to share two cards I made with the Homespun Collection.
I have to admit I am not a big card maker but I really enjoyed making these two. Let me show you the first card.
If you know me then you know that I love layers! The more the better. With this card I used a variety of elements to give it depth. I used a pretty polka dot paper for my base and began to build from there. I used a piece of burlap, some additional papers from the collection (I fussy cut a large floral element for the left side), I tore some paper from an old Thesaurus I had and bits of different lace from Blue Fern.  
 I stamped a fern onto a scrap piece of paper to use as a center focal point and embellished around it. I used Fern Leaves and heat embossed them with Ginger embossing powder, both from Blue Fern. The gorgeous little buds are also from Blue Fern but one of their older lines sadly you can't get them anymore. 
A little close-up.
Gorgeous lace from Blue Fern Studios.
My second card is completely different.

Again layering up with fussy cut papers and this time I used a piece of printed chipboard to frame the house I cut from one of the papers. 
I used some Lush Leaves embossed with Ginger embossing powder for this card. These adorable little red blooms are also from an older line.
I was thinking of a welcome home card when I made this so I cut out the house element from one of the papers and framed it with a printed chipboard frame.
I cut the title for the card from one of the tabs of paper along the bottom of the page.


Products Used

Papers
Tea Time
Homemade
Picturesque
Homegrown
Homestead

Printed Chipboard


Lace

Unknown

Chipboard

Fern Leaves
Lush Leaves

Seedlings

Flaming

Embossing Powder

Ginger

Blooms

Unknown Blue Fern

Thank-you for joining me today and I look forward to seeing you again soon!

All the best! :)


Tuesday, March 5, 2019

Authentic Canvas

Hi everyone!  Today I have a mixed media canvas to share with you using the Happy Accident 2 collection.

I started off by stamping randomly on the canvas with the Grungy Grid and Forever stamps.  Next I added some flourishes with paint and a stencil, and then added some copper wax.  I created layers using the 
 Balmoral, Chase, Grubby and Faux papers from Happy Accident 2, along with some Happy Accident 2 ephemera.  

To the right I used the Blooms & Butterfly chipboard piece, which I cut in half.  I embossed it with Blue Fern Chile Powder Embossing Powder and dabbed on some blue paint and copper wax.  I tucked in a couple of flowers from Harvest Lilies and  Happy Floral. I covered the chipboard piece at the bottom with copper wax and stamped over it with the Grungy Grid stamp. 

Here I used the other half of the Blooms & Butterfly chipboard, along with some other Blue Fern Chipboard that I embossed with Chile Powder Embossing Powder, then dabbed with blue paint, added copper wax and some stamping.

The title is from the Arrow Words 2 set.  To finish off the canvas, I applied some mini art stones along with some Paprika and Evening Sky Seedlings.  

Blue Fern Studios Products Used:

Paper:  Happy Accident 2
Balmoral, Grubby, Chase & Faux
Ephemera

Chipboard:
Blooms & Butterfly, Arrow Words 2

Embossing Powder:  Chile Powder

Flowers:  Harvest Lilies, Happy Floral

Seedlings:  Paprika, Evening Sky

Stamps:  Forever, Grungy Grid

I hope I've inspired you.
Thanks for stopping by!
. . . Debbie


Monday, March 4, 2019

Loaded envelope with Homespun papers

Hello, DT Henriƫtte here today sharing my first ever loaded envelope.
I used one of my favorite Blue Fern Studios paper collections "Homespun".


This was my first loaded envelope, so before I started I watched some video tutorials and just began by making the envelope from white cardstock.
I made three pockets and decorated them with "homespun" papers, chipboard shapes, calling cards,
 lace and flowers. I also made a  tassel out of white cotton twine and attached it to the side.


To fill the envelope I made a lot of "stuffers".


A loaded envelope wouldn't be complete without a wand.
I made these two wands.


I also decorated a little notebook with the homespun chipboard shapes.
This is such a sweet image with the cross stitching.


There's one big tag and two little tags in the envelope.


A few decorated little clothespins and two paperclips.


and of course a card.


I loved making all the stuffers for the envelop with this beautiful paper collection.


I hope you like it to.
Thanks so much for stopping by.

Hugs, Henriƫtte.


Here is a list of the products I used:

Patterned Paper:
Homespun collection
Homespun calling cards


Chipboard:
Homespun Printed Chipboard shapes


Flowers:
Blue fern studios flowers


Lace:
Lace 3 Ivory Venice lace
Lace 4
white ribbons
twine


Sunday, March 3, 2019

Layered Layout - Places to Go

Hello everyone, it's Aida here from @aidaville and I hope you're having a good start to this month of March !

I'm sharing a layout of my older daughter who faced lots of challenges getting to where is is today. A musician, committed animal activist, a full scholarship Graduate and currently a Teaching Assistant at the University while she completes her Masters in Political Science. The title "I've got places to go and people to see" perfectly sums up the full life she worked hard to carve out.

The Blue Fern Studios products used are :
Patterned Papers : 
Heartland - XOXO | Remnants - Westfield | Happy Accidents 2 - Tonic
Lace no. 5
Wanderlust Printed Chipboard
Chipboard - Widgets
Flowers : Happy Blossoms | Garden Blooms
Embossing Powder : Silver Bells
Others : 8 x 10" flat backed canvas.

I love the Wanderlust Printed Chipboard as it has some thickness to it for creating layers and edging the chipboards with contrasting acrylic paint, some Distress inking gives it depth. As you can see the photo was adhered inside the oval frame for prominence and the other chipboard pieces were added around it

Creating is so much easier, and fun when chipboard pieces have sentiments which can be used as titles like this one above !

Here is a closer look at the layers.

Very often lace is soft and may require a thin layer of transparent Gesso, stiffening them to make for easier handling. The Lace no.5 was trimmed into smaller manageable pieces, then inserted in between the flowers and chipboard and glued securely.
Silver Bells Embossing powder gave the chipboard Widgets interesting texture and the pieces were given a light daub of grey acrylic paint on the edges for more dimension.

Floral embellishments really do complete a layout and it looks so pretty ! For a shabby feel, I gently coated the blooms with thinned down white gesso.

I hope this layered layout has given you interesting ideas and shown how to create with Blue Fern Studios. Thank you for coming by,  have a happy, create-ful Sunday !


Friday, March 1, 2019

Gift box with Attic charm

Hello everyone,
Today i wanted to share a gift box made with gorgeous 
"Attic charm" collection
I have used layers of fussy cut elements,chipboard ,die cut leaves
and flower made from the pattern paper itself to decorate the box.
For the flower center i have used Seedlings.


Products used:

Paper
 Attic charm - Mercantile , Sachet , Haberdashery

Chipboard
Moldings

Embossing powder
Glistening sand 

Seedlings
Platinum

Thank you for stopping by.
Happy crafting,

Tuesday, February 26, 2019

Spread Your Wings and Fly-Canvas by Pam Ellis

Hello everyone and welcome back to the Blue Fern Blog.
Today I would like to share with you a canvas I made for my granddaughter Emily. 

 I used a 7 by 9 canvas. First I primed the entire piece with Gesso to save me from any misting mistakes. Then I added a little bit of brick wall stenciling with molding paste. I added some lace along the top and bottom (both from Blue Fern) then attached a piece of chipboard border Mina's Border also from Blue Fern.  I then went to work with my mists.
 
 I used blooms from the Attic Charm Collection.
I used the chipboard piece Spread Your Wings and Fly as my focal point. I used Peacock, Honey, Raspberry, and it's a Girl embossing powders to decorate the piece.
 
I covered the Mina's Border chipboard piece with mists.

 Masking work and some stamping using the Forever Stamp from Blue Fern. Aren't the lace pieces gorgeous!
 
Finally my last little bloom cluster. Again Attic Charm bloom with a small white flower also from Blue Fern that I don't have a name for.


Products Used

Patterned Papers
Smarty

Chipboard
And Fly
Mina's Border

Lace
Blue Fern lace

Embossing Powder
Peacock
Raspberry
It's A Girl
Honey

Flowers
Attic Charm Collection
white-unknown Blue Fern