Hello my friends!
I am so happy to be back to you with my new project and also VIDEO tutorial.
Today's work will present new collection 'Paisley & Vine'.
Those are beautiful papers with lots of flowers, flourishes with red, yellow and brownish colours.
Here is my page called 'Free spirit'
When I saw this stunning collection for the first time, I knew that my page will be full of flowers and cute die cuts. This paper collection is full of stunning designs which could be cut out and turned into lovely page embellishments.
I added few embossed chipboards and title from 'Playing cards' 12x12 paper from 'Paisley & Vine'
I hope you enjoyed this basic, simple project. If you wish to see in steps how I made this page please feel free to watch my video tutorial.
I hope you will find some inspiration and motivation to create some great makes!
Hugs, Marta xx
Monday, July 27, 2015
Sunday, July 26, 2015
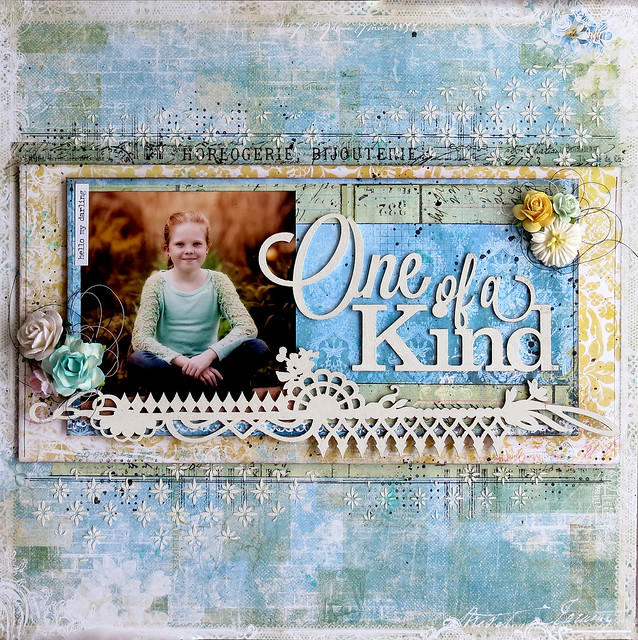
"One of a Kind" layout by Marie-Josée
Hello all,
Today, I will show you a layout I created with Blue Fern Studios newest paper collection, Frolic. It is a beautiful collection, and the paper is as thick as usual. I am sure you will fall in love with this wonderful collection! I used three different papers: Veranda, Secretary and Friendship!
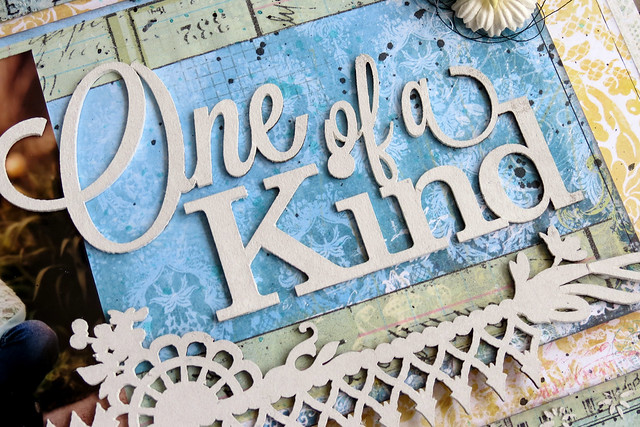
On this layout, I used the One of a Kind chipboard as my title. Since it was a little bit to big to fot where I wanted to put it, I cut it. Here's what it looked like in one piece, before I cut it:
I altered it with white gesso. And here's what it looks like once cut in two:
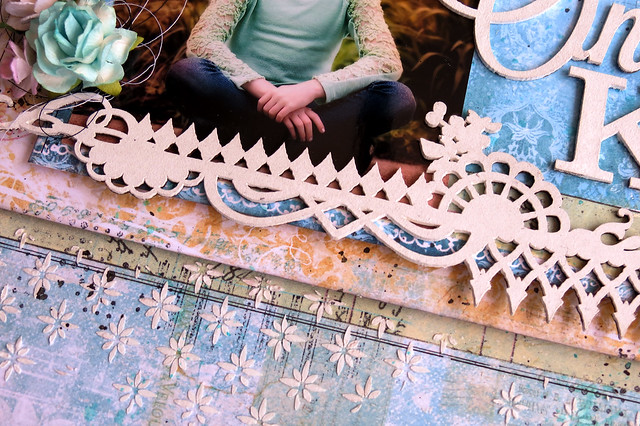
Finally, I added the Déjà Vu Border Chippie, also altered with gesso:
Friday, July 24, 2015
Mixed media layouts by Zanka
Today I have two projects to show for you, created with BFS Ombre Dreams. This collection has a delicate mixed media feel and whether you just leave it there or add more -like I did here- to enhance this effect, I'm sure you will be delighted with the result!
'Everyday Moments'
The chipboards are primed with clear gesso and painted with different colours of paints. In the background I used the same primer, adding watercolours randomly and finishing it off with the stencil.
Chipboards used:Organic coins, Everyday Moments, Layering Stems
Stamps:Forever, Halftone
' A Beautiful Life'
In this layout I used the same techniques, but different colours. The focus point is enhanced with a layered composition of chipboards, which makes the photo really pop out.
Chipboards used: Spring Branch, Deja Vu border, Grid pieces.
Stamps: Vintage Edges
These are my last 2 layouts in July and for a while I will not be sharing new works here...I have to temporarily step down from my DT tasks due to personal reasons but I hope to see you again in a few months.
Lots of love!
Zaneta aka Zanka
Thursday, July 23, 2015
Frolic and more with Sandi ~
"Fun in the Sun"
Hello, Blue Fern Studios fans!
Sandi here with you today sharing a mix of new products along with some olders ones as well. I hope the month of July is going well for you. Mine is super busy, busy, busy! I hope August will be a little more "normal" and I'll have some leisure time for creating!
Anyway, I have created a layout for you using the A side of the Friendship paper from the brand new Frolic collection. I usually try to steer away from the A sides at least for a while but this blue was calling my name .. which is kind of unusual for me. But I knew that it would be a great background for this photo of the grandkids taken on the Fourth of July weekend, a holiday here in the USA. My photo mat layers are the Adorn papers.
As par for the course, I did some background work with gesso, a stencil, super heavy gesso and mists. Just a light touch as the papers are so pretty.
This is the new Frolic Mesh chipboard piece! Gosh, I adore this one! It is for sure going to be a favorite. I inked it and then did sme random embossing in dark copper.
I was excited to get these sweet Paisley and Vine Flowers chipboard piece in my design team kit! They are adorable ! Sweet and dainty. They were merely gesso-ed and inked. They picked a few random bits of embossing powder from my kraft mat and that created some fun texture
My title piece Fun in the Sun was painted, misted and the embossed all over for a shiny look.
Blue Fern Studio products used:
Paper:
Frolic Friendship
Frolic Adorn
Chipboard:
Frolic in the Sun
Frolic Mesh
Paisley and Vine Flowers
***
"Cute Stuff"
Next, I decided to play up some of the greens from the Paisley and Vine collection for this photo of my granddaughter. The photo is rather poor quality but she needed it scrapped, so there you go!
I did some photo editing and tried to have a little fun in the process.
I've layered a sheet of Whimsy paper over Bohemian and then used torn strips of Bohemain (both sides) along with Splendor. Playing cards made for a perfect photo mat and subtitle.
Have you seen the new Novelty trim pieces? That red piece in the center is one of them. Mine is painted and then misted in shades of red-orange. I also adore the Deja Vu Atelier Chippie! It made for a beautiful vertical piece to ground my layout. Gesso gave it some tooth and then I used paints and mists. The Cute Stuff title from the Good Vibes set is an oldie that I still enjoy using. I've simply inked it in brown.
The Halftone stamp was used to further frame the photo by adding texture and depth all around the photo area.
Here are a couple of close-ups:
Swooning over the Atelier piece and stamps!
Just another little close-up.
Blue Fern Studios products used:
Paper:
Paisley and Vine Splendor
Paisley and Vine Whimsy
Paisley and Vine Bohemian
Paisley and Vine Playing Cards
Chipboard:
Novelty Trims
Déjà Vu Atelier Chippie
Good Vibes
Stamps:
Halftone
***
"Enjoy the Journey"
You might have already seen this one! It was made for last month's Sketch challenge but I never got a chance to share it. I've used a combination of Ombre Dreams papers, Shannon's Dream and Julianna's Dream. Using a stencil, super heavy gesso and mist, I created a really fun background. A little brighter than I originally had in mind but I love the final result. All my chipboard was treated with gesso, chalk inks and microbeads and are listed below.
Close-ups:
Love the layering stems.
Microbead fun!
Blue Fern Studios products used:
Paper:
Ombre Dreams Shannon's Dream paper
Ombre Dreams Julianna's Dream paper
Chipboard:
Layering Stems
Enjoy the Journey title
Jeweled Page Baubles
Flutter Page Singles
Well, that's it from me this month.
Hopefully next month will be a bit quieter around our house and I can get back to
creating a little more leisurely. There are lots of new goodies on my desk.
Thanks for coming by!
Wednesday, July 22, 2015
My First DT Projects and Video Tutorial by Marilyn
Hi everyone! Marilyn here excited to share with you my first design team creations and video tutorial for Blue Fern Studios
 |
| A little about me: My name is Marilyn Rivera and I'm from Puerto Rico but I'm living in North Carolina with my lovely family now. I have two wonderful teenagers and a very supportive husband. I'm a Fashion Designer although the last 18 months I'm a SAHM. I've been scrapbooking for 8 years and nowadays is become more than a hobby, I've been giving the opportunity to travel and give workshops. I love to share my knowledge and techniques in my classes and in my video tutorials. In my work you will see some techniques that I use for my dressmaking combined with paints, mediums, lace, pearls and lot of textures! I'm so happy to be part of the Blue Fern Studios Creative Team and I hope my work and video tutorial inspired you. You can see my work in my blog HERE and my videos tutorial in my YouTube channel HERE. |
"MEMORIES"
 |
| I placed the 'Butterflies Friends' chipboard around my photo and cut out these butterflies from the Dans Le Jardin paper from the Frolic collection. |
 |
| My title is the 'Memories' word chipboard that I painted in different tones, don't miss the video tutorial. |
 |
| I added glass beads and pearl in the rings of the chipboard to create dimension. |
 |
| Supplies: Frolic Collection: Dans Le Jardin, Mercantile, Amoroso Blue Fern Chipboards: Ring panel, Butterflies Friends, Memories word Here is the video tutorial, I hope it inspired you...Enjoy it! |
"A Special Day"
 |
| I placed the beautiful clocks around my photo and between my flower cluster. |
 |
| I painted with gelatos the "Blooming Foliage", then I covered the leaves with gel medium and green micro beads. |
 |
| Supplies: Frolic Collection: Mercantile paper Blue Fern chipboard: Blooming Foliage, Roman Clock Set, "Special" word I hope you find inspiration in my first blog post. Have a great day! Marilyn Rivera |
Tuesday, July 21, 2015
Bente's July inspiration.
Hi, I hope all of you in the northern hemisphere are enjoying a lovely Summer,
and that the Winter is not too bad on the rest of you :-)
Today I have some layouts to share with you that are absolutely 'fresh from the press' so to speak.
I was in the UK last week celebrating my eldest daughters graduation from university and
when I got back I had to finish my projects rapidly!!
-But with such awesome products to play with it's not a problem:-)
My first page is based upon a pink paper from the Montage collection.
On top is a paper from the Deja Vu collection. As yo can see the collections mix very well.
-Especially when you add a litttle mixed media here and there. :-)
I 'framed' the whole page with the largest sized Graduated Squares, painted white then inked around.
I 'framed' the whole page with the largest sized Graduated Squares, painted white then inked around.
The gorgeous piece of chipboardbelow the picture is one of the recent shapes and called
Rock Wall Bits. I painted it beige , stapmed on it and addedsome pink glitter. The part of the Grunge Frames chipboard piece above the photo was given the same treatment. I just love to add glitter to my pages at the moment :-)
Rock Wall Bits. I painted it beige , stapmed on it and addedsome pink glitter. The part of the Grunge Frames chipboard piece above the photo was given the same treatment. I just love to add glitter to my pages at the moment :-)
The cute small dots scattered all over my page are the insides of then alpha stickers that I used.
I used the Montage collection for my second project. I love all the lovely yellow papers in that collection:-)
And here are some close ups of the details.
I used one of the Memory Frames as my title and hid it partially behind my photo.
The arrows are from the Directions set and simply painted black.
Making banner-pieces or mats behind the photos are such great ways to use up those left over pieces from your favourite patterned papers.
And finally here is my page for the current sketch challenge that you can find HERE.
The chipboards I used are:
Laughter, Happy, Smile and Floral Clock.
Laughter, Happy, Smile and Floral Clock.
And a closer peek at some of the details:
That's all from me for today!!
Have a good week!
Monday, July 20, 2015
A Little Bit of Chipboard
Sometimes it takes just a little bit of chipboard to bring your project together. Today we thought we would share some projects by members of our Creative Team showcasing the inspiring ways they have used chipboard for things other than layouts.
Chipboard is awesome to use on a canvas, as you will see from the examples below. It is easily attached with glue, and adds just the right amount of dimension and interest.
Thanks for stopping by today. We hope you have enjoyed this look at how many ways Blue Fern chipboard can be used on ALL your projects!
Chipboard is awesome to use on a canvas, as you will see from the examples below. It is easily attached with glue, and adds just the right amount of dimension and interest.
On this close-up of Yuko's canvas, you can see how she has so beautifully used chipboard that adds dimension, but blends in so well with her background.
This is an example of how Marie-Josee has used our Wonderland Tree as the focal point for her canvas.
The chipboard piece Elena has added to her background was the perfect starting point for her artsy canvas. From there, she built her layers on top of it..
Jelissa's canvas comes together with a chipboard title (and don't you love that frosty chipboard border she has under the title?).
Keren has used a chipboard clock to represent time on this art journaling page.
Sometimes a little dimension is all you need. Kim has tucked in some painted chipboard pieces on her altered clock.
Subscribe to:
Posts (Atom)


