Saturday, September 13, 2014

Three projects with the new Montage collection!

Hello folks!

I hope you had a great summer and that you had lots of fun! I traveled for five weeks with my family in Western Canada and Alaska and we had a great time. When I came back, the new Montage collection was waiting for me at home. I was thrilled to find all this new paper to play with, along with new pieces of chipboard.

Here are the three projects I created with this brand new collection.
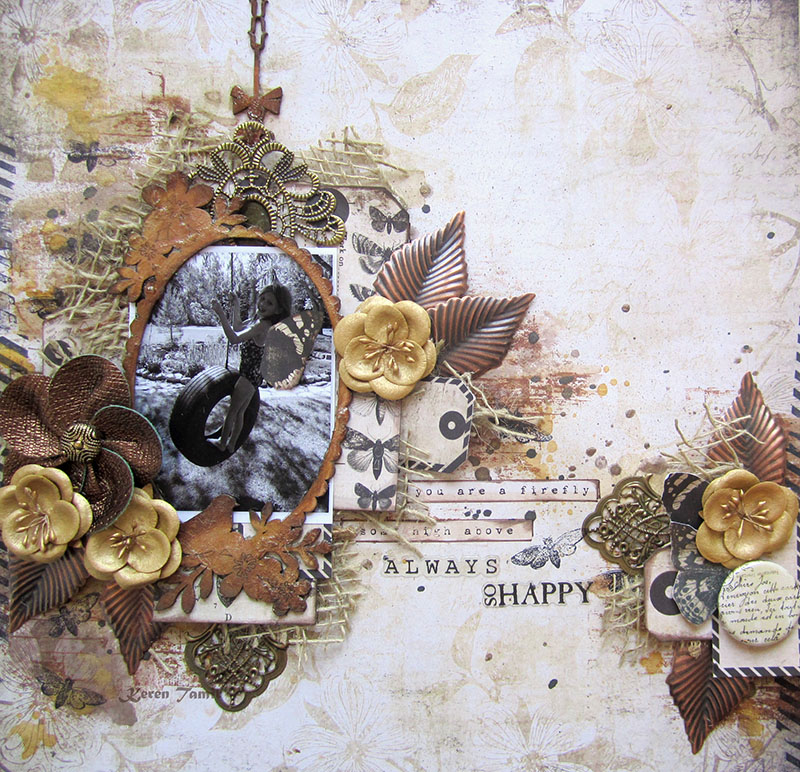
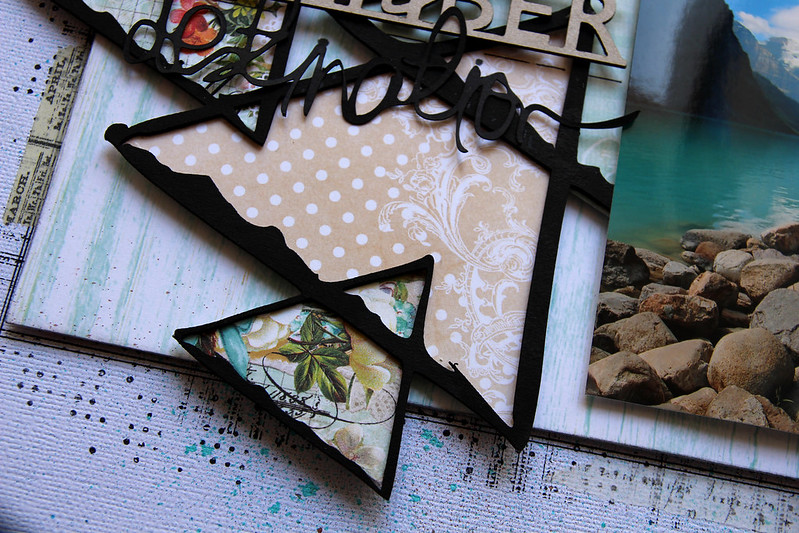
"Always Remember" 

For this layout, I used a picture of my daughter taken at beautiful Lake Louise in Banff National Park, Canada.

I used the brand new Triangle Eclipse chipboard, which I altered with black gesso.


I also used two different papers from the Montage collection, Now & Then and Fairyland. I used various pieces of both sides of the Now & Then paper behind the Triangle Eclipse chipboard. I used the Fairyland paper as a background for my chipboard and picture.


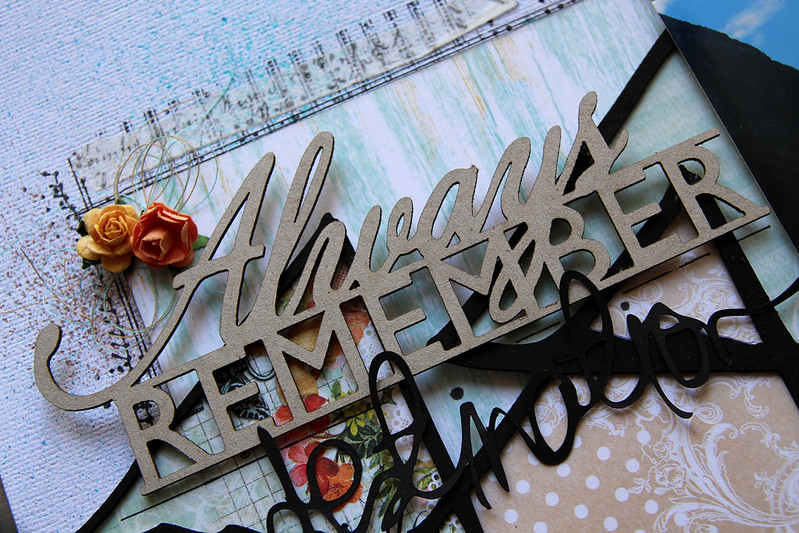
For my title, I used the Always Remember chipboard and the word Destination that I cut with my Silhouette.
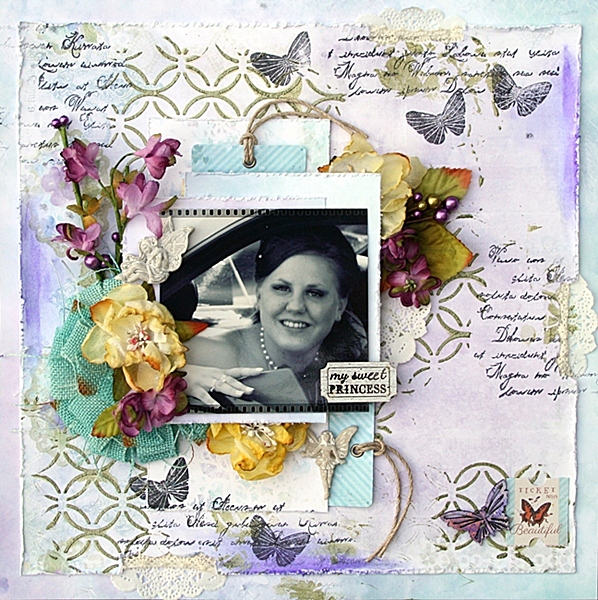
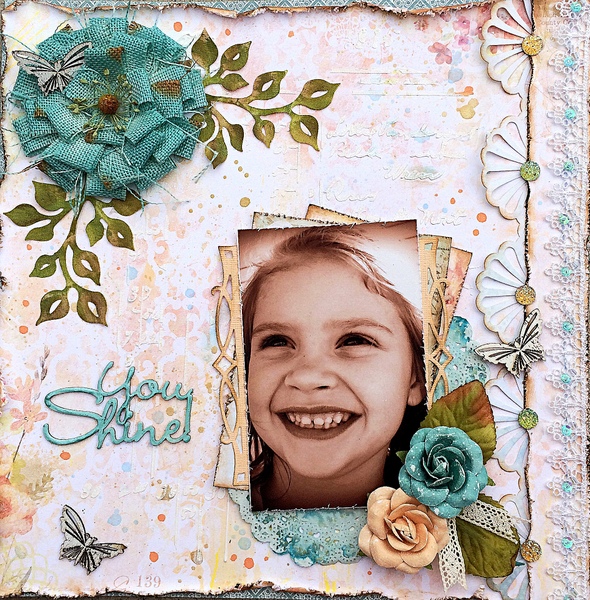


"Adore"

For this layout, I used the Society paper as a background. I love it, because it doesn't need many embellishments. A bit of washi tape, modelling paste and mists and voilĂ ! :)


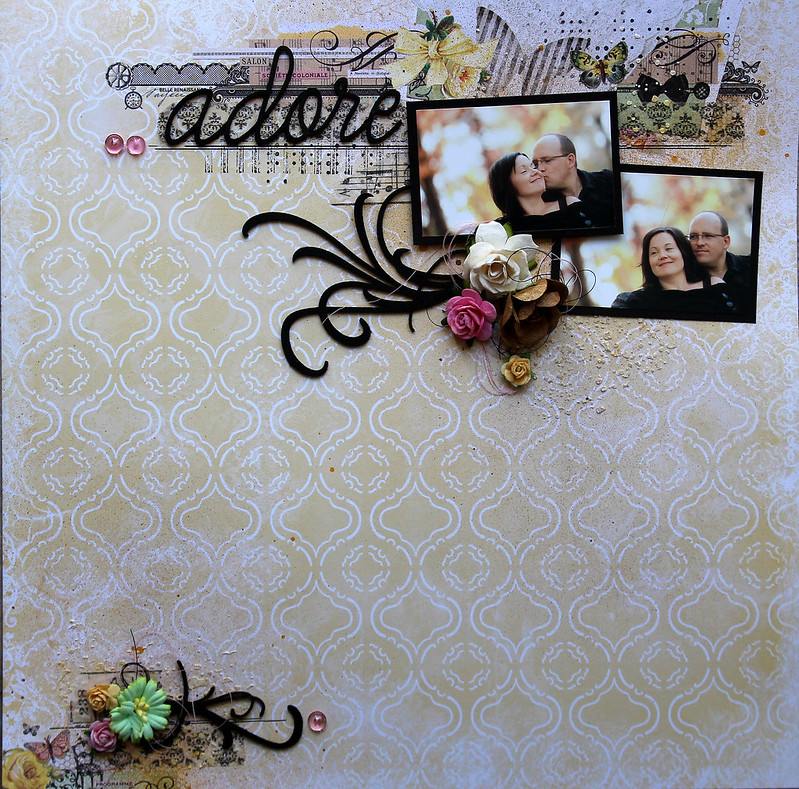
For my title, I used a piece of the Adore, Love, Cherish chipboard set. I also used pieces of the Mini Flourishes chipboard set. All were altered with black gesso.
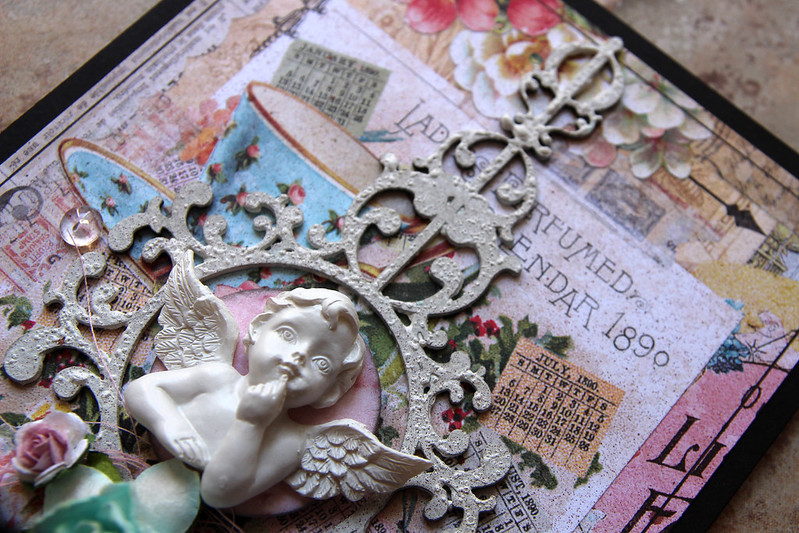
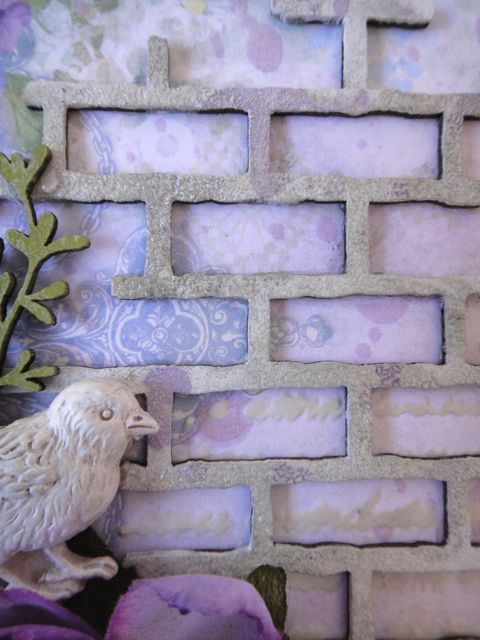


Angel canvas

For this canvas, I used the beautiful Mercantile paper for my background.


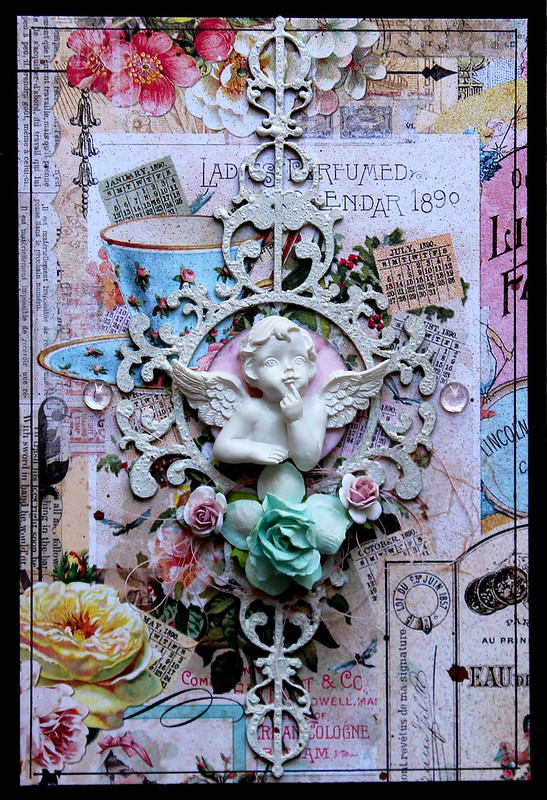
The chipboard I used is the Ornate frame. I altered it with gesso. I used my heat gun to dry the gesso to create texture. I also added a bit of brown mist.


Friday, September 12, 2014

New Montage collection with Maja

Hi, Maja here today to share two projects made with the gorgeous new Montage paper collection. I hava a layout and a tag that I made. Let´s start with the layout.

When I first saw this paper collection I knew what I would do with just this piece of paper when I got it in my hands. Love tha lamp that is in the paper and the BFS chipboard  "evening lamp post" works so well with it. So that was my plan and this is how it turned out. My color splashes are made with Distress Stains. For my chipboard pieces I used black and white gesso.


Blue Fern products used:
Paper: Montage - Bouquet & Invitation
Chipboard: Evening Lam Post, Bohemian Flowers & Roman Clock Set Small


Next is my tag. I love the romatic vintage feel of the Montage collection and that what I wanted to create in this tag.  


Blue Fern products used:
Paper: Montage - Bouquet, Fairyland & Society
Chipboard: Tattered Butterflies


Thanks for stopping by =) 

Thursday, September 11, 2014

Designer Inspiration: This One's for the Ladies...

Good morning and welcome to another installment of our designer inspiration feature! This time, it's all about projects inspired by some extra special ladies. 

We hope you enjoy...

Keren Tamir

Leila Cardoso

Lisa Gregory

Lisa Griffith

Maja Stokk

Rae Moses

Thanks for stopping by for your daily dose of inspiration!

Wednesday, September 10, 2014

Jackie's September Projects - A Layout and An Upcycled Box

Hello there Blue Fern Studios fans! I have two new projects to share with you today - one shabby layout and an upcycled project.

For my first project, I wanted to create a bit of whimsy for this photo of my youngest wearing a crown of daisies (vey begrudgingly!). Blue Fern Studios papers are so thick that they are gorgeous for tearing and distressing.


I began by tearing a diagonal strip out of the In Bloom sheet, then tore additional pieces off and layered them between the Love Letters and In Bloom papers, along with some lace. I also distressed and inked the edges, tucking in some lace and pieces of Bohemian Flowers chippies painted white.


I tucked additional Bohemian Flowers into the flower cluster - the stark white helps them to stand out against the busy mixed media background.


I cut the word Dream and the layers for my photo from the Calling Cards paper.


I love using the Mini Ring Things chippies for dimension in my background. Here I've coated them in a light brown chalk ink and then stamped them with a darker ink.


A little close-up of all the layers of media, chipboard, paper and embellies.


Blue Fern Studios Products

Blue Fern Garden papers:
- Love Letters
- Timeless
- In Bloom
- Calling Cards
- Parlour

Blue Fern Studios Chipboard:
- Bohemian Flowers
- Mini Ring Things

Are you a crafty hoarder? I am, which is how my second project came about. I have problems throwing out alterable items that might be able to be repurposed as something else, even if I have no idea what that might be. Such was the case with this little blue plastic box. Originally it housed a science experiment from the kids. Since it was a one-time-use experiment, the little box was destined for the recycling box. But I loved the size and the way it closed so snugly, so I salvaged it and tucked it away in a corner of my scraproom. This month I've given it new life - to store my resin pieces - with some gorgeous Blue Fern Studios products.


The Joyce's Dream paper from the Ombre Dreams collection is full of beautiful, subtle details. I added a little modelling paste through a script stencil and tinted it slightly with grey chalk ink, then added some splatters of purple to the background before adding my chipboard and other elements.


For the top of the container I used some of the Shabby Brick Bits coated with paint, embossing powder and chalk ink for a textured appearance.


To round out the cluster of embellishments I tucked in one of the Layering Stems coloured with chalk ink and then touched with gesso for a weathered appearance. I love these pieces of chipboard for tucking in here and there!


I finished the front of the box with one of the Spring Trinkets, coloured with various chalk inks and weathered with gesso.


Blue Fern Studios Products

Paper:

- Ombre Dreams: Joyce's Dream

Chipboard:

- Shabby Brick Bits
- Spring Trinkets
- Layering Stems

Thank you so much for joining me today! Remember, there is still plenty of time to play along with our September Sketch Challenge for your chance to win some gorgeous Blue Fern Studios products!

Sunday, September 7, 2014

September projects with Camilla

Hi all!

September is here and I have some new Blue Fern Studios projects to share. First a layout where I have used some of the newer chipboard pieces together with a paper from the Blue Fern Garden collection. The chipboards are the Ornate Frame, the Chunky Words and the Roman Clock Set.


The chipboards are painted in white gesso and then sprayed on with Color Bloom.


The tag looks like this. I have used papers from the Blue Fern Garden collection. The chipboards are the Roman Clock Set and the Leafy Bough.


I cut the clock into two pieces and left them raw.


The leafy bough is painted in white and then sprayed on with Color Bloom.


Thank you for stopping by! Make sure to check in later to see more inspiration from the Blue Fern Studios team!

Friday, September 5, 2014

August Sketch Challenge WINNER & Top 3 Features!

This day is always a fun one as we get to announce the lucky winner of the previous month's sketch challenge prize, as well as the Top 3 projects we've chosen to feature!

Let's start off by announcing the WINNER of the August Sketch Challenge prize pack!!


Congrats to Elena Morgun!!
Please contact me {erin@bluefernstudios.com} within 7 days to claim your prize!

Now...on to our Top 3 Features :)

Dawn Edwards


Debbie Lewis


Bec Genet

Congrats, girls!  Thanks to everyone who participated in our sketch challenge last month!

Wednesday, September 3, 2014

Everythings Coming Up Roses...By Lisa Gregory

 I hope you have all had a peek from Blue Fern Studios new paper line, Montage. Well, it is beautiful and  must have collection for your paper stash. For todays post, each project was done with each of Blue Fern Studios paper Collections. This first layout was done with Blue Fern Garden using the Timeless sheet. I opted to take the pink color in the layout and use Lindys Stamp Gang sprays to color the paper. It was also inspired by this months beautiful Sketch. Click on the sketch below to join the challenge!!


Here is my take on the sketch.


The piece of chipboard I used is from the  Roman Clock Set - Large.  I used one of the smaller pieces and cut it out in  semicircle for the corner.


 I used one of the the larger circles from the Roman Clock Set - Large.  to frame the photo. Both pieces of chipboard were textured with gesso, then sprayed with Lindys Starburst sprays. .

  
I used the Mixed Chains to dangle underneath the flower bud. I cut one to get 2 pieces.


This next layout was created using Montage. I layered  Bouquet and Mercantile over  piece of corrugated cardboard.


I heat embossed Lindys embossing powder on the Quatrefoil Panel. 


 I used the Collage Frame to frame the photo.I primed it with white gesso, then heat embossed it using Lindys Embossing powder.


The tag was created using Ombre Dreams Juliannas Dream. I did some spraying and masking on the tag before adding my embellishments.


I cut the smallest piece from the Roman Clock Set. I used the pieces in opposite corners.


I created  the quote in Photoshop, printed it out, then cut it up for the tag.I topped the tag with Seam binding that I colored with Lindys spray.


I hope you were inspired by my projects today.  Until next month, Visit the Blue Fern Studios Blog for daily inspiration! Step by steps and videos from our eduction team will keep your creativity flowing!!
xoxo
Lisa